· Katria Melrose · DIY & Home Improvement · 16 min read
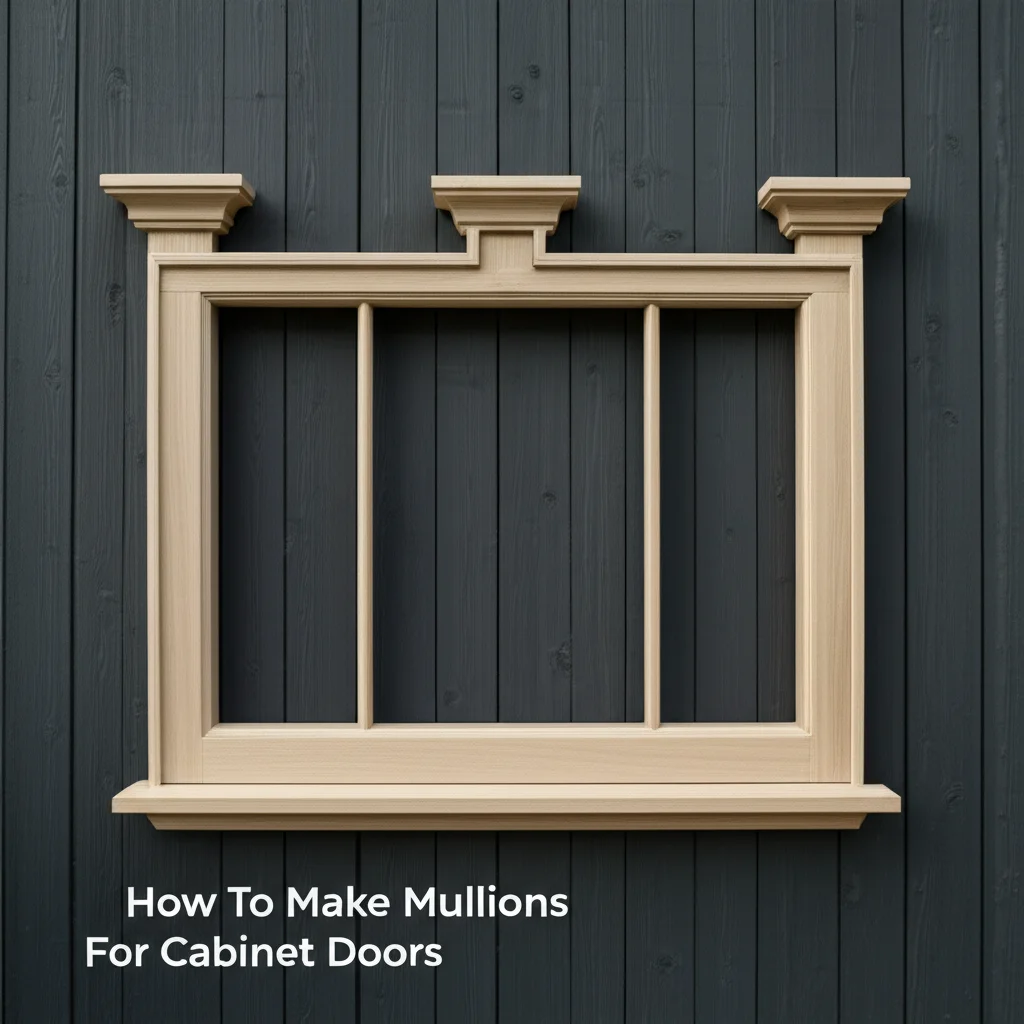
How To Make Mullions For Cabinet Doors
Crafting Custom Cabinet Mullions: A DIY Guide
Have you ever gazed at elegant cabinet doors, admiring their intricate glass panes and wondered how they achieved that classic, refined look? The secret often lies with mullions. Learning how to make mullions for cabinet doors can transform ordinary cabinetry into a striking focal point in your home. This guide will help you create beautiful, custom details for your kitchen or living space. We will cover everything from design planning and tool selection to precise cutting, assembly, and finishing techniques. Get ready to add architectural charm and a touch of sophistication to your cabinet doors with this rewarding woodworking project.
Takeaway
- Mullions add significant aesthetic value and character to cabinet doors.
- Careful planning, precise measurements, and specialized tools are essential.
- You can choose between true divided light or applied mullion styles.
- Accurate joinery and proper assembly ensure a professional finish.
- Finishing and installation complete the transformation of your cabinet doors.
Making mullions for cabinet doors involves precision woodworking. You cut thin wood strips, create specific joinery, and then assemble them into a grid. This grid fits either within an open cabinet door frame or applies directly to a glass panel. The process enhances cabinet aesthetics significantly.
Understanding Cabinet Mullions and Their Aesthetic Appeal
Mullions are decorative strips of wood. They divide a larger glass pane into smaller, individual sections. Historically, they separated multiple small glass pieces, creating a “true divided light” window. For cabinet doors, mullions offer a classic or contemporary design element. They break up the visual expanse of a single glass panel. This creates depth and character for your cabinetry.
The aesthetic benefits of adding cabinet mullions are numerous. Mullions can elevate the style of simple cabinet doors. They offer an architectural detail often found in custom-built homes. Mullions define the glass area, making cabinets look more sophisticated. They allow you to showcase items inside while still adding visual interest. This technique transforms standard kitchen cabinets or display cases into pieces of fine furniture.
There are two primary types of mullions: true divided light and applied. True divided light mullions are structural. They hold individual panes of glass within each small opening. This method requires precise joinery and more complex construction. Applied mullions are simpler. They attach directly to a single sheet of glass. This creates the appearance of individual panes without the structural complexity. For DIY enthusiasts, applied mullions are often a more manageable starting point. Both methods provide a beautiful result.
Choosing to make mullions gives you full control over design. You select the wood species, the profile of the mullion, and the grid pattern. This customization ensures your cabinet doors perfectly match your home’s decor. It is a rewarding project for anyone wanting to personalize their living space. The finished look often surprises people with its elegance.
Essential Tools and Materials for Mullion Making
To make mullions for cabinet doors, having the right tools is key. Precision is very important in woodworking, especially with small pieces. A router is your most important tool for creating the specific profiles and joinery needed for mullions. You will also need specialized router bits designed for this purpose.
For cutting and shaping wood stock, a table saw is incredibly useful. It allows you to rip down wood to the exact width needed for your mullions. A miter saw provides accurate crosscuts for the length of your pieces. Both ensure your cuts are straight and precise. This accuracy is vital for tight-fitting joints.
Here is a list of essential tools you will need:
- Router and Router Table: These create the decorative profiles and joinery. A router table provides stability and control for small pieces.
- Mullion Router Bits: These specialized bits cut the unique profiles for mullions. Some sets include cope and stick bits for true divided light joinery.
- Table Saw: For ripping wood strips to consistent widths.
- Miter Saw: For precise crosscuts on mullion lengths.
- Measuring Tools: A good quality tape measure, combination square, and marking gauge are critical.
- Clamps: Various sizes of clamps for holding pieces during gluing and assembly.
- Wood Glue: High-quality wood glue for strong joints.
- Safety Gear: Safety glasses, hearing protection, and dust mask are a must.
For materials, you will need suitable wood stock. Choose a wood species that matches your existing cabinet doors. Common choices include maple, oak, cherry, or poplar. Ensure the wood is straight and free of defects. The thickness and width of your wood stock depend on your desired mullion profile. It is always wise to buy a bit extra. This allows for mistakes or practice cuts. You will also need sandpaper for finishing. If you plan to finish the mullions with paint or stain, have those materials ready too. Having all materials on hand before starting saves time.
Planning and Design for Your Custom Mullion Doors
Careful planning is crucial when you make mullions for cabinet doors. This step ensures your finished product looks professional and fits perfectly. Start by deciding on the type of mullion: true divided light or applied. True divided light mullions require an open frame cabinet door. This means the door has a perimeter frame but no center panel. If your existing doors have a center panel, you might need to modify them. You could also build new doors or opt for applied mullions. For building new cabinet doors, consider guides like how to build a pantry cabinet with doors for foundational door construction or how to make shaker cabinet doors from old flat fronts for converting existing flat doors.
Next, measure your cabinet door openings precisely. If you are fitting mullions into an existing door frame, measure the inside dimensions of that frame. If you are applying them to glass, measure the glass panel itself. This provides the overall dimensions for your mullion grid. Decide on your grid pattern. Common patterns include simple crosses, rectangles, or intricate geometric designs. Draw a detailed diagram of your chosen pattern. This drawing should include all dimensions for each individual mullion piece.
Consider the width and thickness of your mullion strips. Thicker strips create a more robust look. Thinner strips appear more delicate. The profile of your mullions also matters. Router bits offer various profiles like ogee, cove, or simple chamfers. Choose a profile that complements your cabinet style. Selecting the right wood species is also important. It should match or complement your existing cabinets. Poplar is a good choice if you plan to paint. Oak or cherry work well for staining.
Create a cut list based on your design. This list specifies the length and quantity of each mullion piece. Remember to account for the width of your router bit when calculating lengths for true divided light joinery. A practice piece or two is a good idea. This helps you confirm your measurements and router setups. Thorough planning prevents costly mistakes later in the process.
Step-by-Step Guide to Cutting Mullion Joinery
Cutting the joinery is the most precise step when you make mullions for cabinet doors. This process depends on whether you are making true divided light or applied mullions. For true divided light, you will use specialized router bits. These bits create “cope and stick” joints or similar interlocking profiles. This allows the horizontal (rails) and vertical (stiles) mullion pieces to fit together snugly.
Start by ripping your wood stock to the exact width determined in your planning stage. This needs to be consistent for all pieces. Next, set up your router table with the correct mullion bit. For cope and stick joinery, you typically use a two-part bit set. One part cuts the “stick” profile along the long edge of all your mullion pieces. The other part cuts the “cope” profile on the ends of your rail pieces. This cope cut matches the stick profile, creating a tight joint. Precision in setting the bit height and fence position is critical. Even a small error can result in gaps.
Cut the “stick” profile along both long edges of all your horizontal and vertical mullion pieces first. Make sure your router table fence supports the wood well. Use push blocks for safety and control. Next, switch to the “cope” part of the bit (or adjust if it’s a multi-function bit). Cut the “cope” profile on the ends of your horizontal rail pieces. These cuts must be perfectly square to the piece’s length. A miter gauge or a sled on your router table helps ensure square cuts.
For applied mullions, the process is simpler. You cut the decorative profile along all four edges of each mullion piece. You then cut these profiled strips to length. The joinery for applied mullions is usually a simple butt joint or mitered joint at the intersections. You will attach these directly to the glass. This method does not require interlocking cope and stick joints. No matter which method you choose, practice cuts on scrap wood are highly recommended. This helps you dial in your router settings. Remember to always prioritize safety when operating power tools. Mullions can also be considered a form of trim, similar to how one might put trim on cabinet doors for decorative purposes.
Assembling and Securing Your Mullion Grid
Once you have all your mullion pieces cut, it is time to assemble the grid. This step requires careful handling and patience to ensure a strong, professional result. For true divided light mullions, begin by dry-fitting all the pieces. This means assembling the grid without glue. Check that all the cope and stick joints fit tightly. Ensure the overall dimensions of your assembled grid match the inside dimensions of your cabinet door frame. If the fit is too loose, you may need to recut some pieces or adjust your process for the next one. If you have existing doors with glass that you’re modifying, knowing how to remove glass from cabinet doors might be helpful before you start assembly.
After a successful dry fit, apply wood glue to the cope and stick joints. Use a small brush or an applicator to spread the glue thinly and evenly on both mating surfaces. Avoid using too much glue, as excess squeeze-out can be difficult to clean. Assemble the grid, making sure all pieces are properly seated. Use clamps to hold the assembly together while the glue dries. Frame clamps or bar clamps are ideal for this. Apply gentle pressure to ensure the joints are tight but do not overtighten, which can warp the wood. Use cauls (scrap wood pads) under the clamp jaws to distribute pressure evenly and prevent denting the mullions.
For applied mullions, the assembly process is different. You will typically glue and sometimes pin nail the mullion pieces directly to the glass panel. First, clean the glass thoroughly. Use a strong adhesive specifically designed for bonding wood to glass. Apply a thin bead of adhesive to the back of the mullion strips. Carefully place each strip onto the glass, following your design pattern. Use spacers to ensure consistent spacing between the mullion pieces. Small brad nails can provide initial holding power while the glue dries. Be extremely careful not to crack the glass when using nails.
Allow the glue to cure completely according to the manufacturer’s instructions. Once dry, remove the clamps. Scrape or sand away any dried excess glue. This step is important for a smooth finish. The assembled grid should be rigid and square. A well-assembled mullion grid is the foundation for a beautiful cabinet door.
Finishing Touches and Door Installation
The final steps involve finishing your newly crafted mullions and re-installing your cabinet doors. This is where your hard work truly shines. Begin by thoroughly sanding the mullion grid. Start with a medium-grit sandpaper (around 120-150 grit) to remove any imperfections, glue squeeze-out, or tool marks. Then, move to a finer grit (220 grit or higher) for a smooth finish. Sanding with the grain produces the best results. A clean, smooth surface is essential for proper paint or stain absorption.
Once sanded, prepare the mullions for finishing. If painting, prime the wood first. A good primer ensures even paint adhesion and hides wood grain. Apply paint in thin, even coats, allowing each coat to dry completely before applying the next. For staining, apply your chosen wood stain evenly. Wipe off excess stain according to the product instructions. This prevents a blotchy appearance. After staining, apply a protective topcoat like polyurethane or lacquer. This protects the wood and enhances its durability.
For true divided light mullions, you now need to install the glass panes into each individual opening. Cut glass to the exact dimensions of each opening. Secure the glass using small glass stops or glazier points. A thin bead of clear silicone caulk can also help hold the glass and prevent rattling. For applied mullions, your glass is already in place. Simply ensure it is clean before the next step.
Finally, integrate the finished mullion grid into your cabinet door. If using true divided light, the grid will be secured within the door frame. You might use small brad nails or screws from the back, hidden behind where the hinges go. For applied mullions, the finished grid, complete with glass, can be installed into the door frame using trim or retaining clips. Ensure a snug fit. Once the door is complete, re-install it on your cabinet. If you need a refresher, check out guides like how to hang cabinet doors with exposed hinges for installation tips. After installation, check that the door closes properly and aligns well. If you notice any issues, such as a gap between cabinet doors, adjust the hinges as needed. Your new cabinet doors with custom mullions are now ready to impress!
Tips for Success and Common Challenges
Making mullions for cabinet doors can be a rewarding project, but it comes with its own set of challenges. Knowing these ahead of time helps ensure success. Precision is the most critical element in mullion making. Even small errors in cutting can lead to gaps or misaligned joints. Always measure twice and cut once. Use sharp blades and bits. Dull tools lead to tear-out and inaccurate cuts. Take your time with each step, especially the router work.
One common challenge is achieving perfectly square cuts. When cutting the ends of your mullion rails, use a miter gauge or crosscut sled on your table saw or miter saw. This ensures the ends are exactly 90 degrees to the edges. Any deviation will create gaps in your joints. Another issue can be inconsistent router bit setup. Before cutting your actual mullion pieces, always run test pieces through your router. Adjust the bit height and fence position until the profile is perfect and the joints fit snugly.
Dealing with wood movement is another consideration. Wood expands and contracts with changes in humidity. Choose stable wood species. Allow your wood to acclimate to your shop’s environment before cutting. This minimizes warping or twisting after assembly. For true divided light mullions, ensure the glass is installed in a way that allows for slight expansion and contraction. Do not glue the glass directly to the wood; use stops or points.
Safety must always be a top priority. When working with routers and saws, wear appropriate personal protective equipment. Use push sticks and push blocks to keep your hands away from blades and bits. Keep your work area clean and free of clutter. If a cut feels unsafe or awkward, stop and re-evaluate. It’s better to take a break than risk injury.
Consider starting with applied mullions if you are new to this type of woodworking. They are less complex than true divided light mullions. This allows you to gain confidence with the tools and techniques. You can always progress to more intricate designs later. Remember, mistakes happen. Have extra material on hand for re-cuts. Learning from errors is part of the DIY process. With patience and attention to detail, you can overcome these challenges and create beautiful, custom cabinet doors.
FAQ Section
Q1: What is the main difference between true divided light and applied mullions? True divided light mullions are structural. They separate and hold individual small panes of glass within a single door frame. Applied mullions are decorative. They attach directly to the surface of a single, large glass pane. Applied mullions give the appearance of divided light without the complex structural work.
Q2: Can I add mullions to existing cabinet doors? Yes, you can. If your existing doors have a flat, recessed panel, you can replace this panel with glass and then add true divided light mullions. Alternatively, you can add applied mullions directly to an existing glass-paneled door. This is often an easier modification.
Q3: What kind of wood is best for making mullions? The best wood for mullions usually matches your existing cabinet doors. Common choices include maple, oak, cherry, or poplar. Poplar is good if you plan to paint. Hardwoods offer better durability and hold detail well. Ensure the wood is straight-grained and free of knots.
Q4: Do I need special router bits for mullions? Yes, you generally need specialized router bits. For true divided light mullions, you will need a mullion router bit set, often a cope and stick style. These bits create the specific profiles and joinery needed for the interlocking pieces. For applied mullions, you might use a decorative profile bit.
Q5: How do I calculate the spacing for my mullion grid? First, measure the exact inside dimensions of your door’s glass opening. Subtract the total width of all your vertical mullion pieces. Divide the remaining space by the number of desired glass panes (this gives you the space between mullions). Repeat this process for horizontal spacing. Drawing a detailed diagram helps immensely.
Q6: What if my mullions don’t fit perfectly into the door frame? If your true divided light mullion grid is slightly too large, you can carefully trim the outer edges with a table saw. If it’s too small, you may need to add thin shims or recut pieces. Precision is key during measurement and cutting to minimize these issues.
Conclusion
Transforming your cabinet doors with custom mullions is a project that adds significant value and beauty to your home. We explored the process from initial design to final installation. You learned about selecting the right tools, like the essential router and specialized bits. We discussed the critical steps of precise measurement and cutting the intricate joinery. Remember, whether you choose true divided light or the simpler applied mullions, attention to detail makes all the difference.
Assembling and securing your mullion grid properly ensures longevity and a professional appearance. Finishing touches, including sanding, painting, or staining, bring your vision to life. Finally, re-installing your newly enhanced doors completes the transformation. Taking on the challenge of how to make mullions for cabinet doors allows you to personalize your space like never before. I encourage you to embrace this rewarding woodworking journey. Your custom cabinets will surely become a beautiful focal point in your home.
- Cabinetry
- Woodworking
- DIY Projects

Katria Melrose
Cleaning Specialist
With over 12 years of experience in commercial cleaning and a certification in workplace ergonomics, I’ve developed a deep understanding of what makes a workspace truly productive. At HEG, I specialize in helping people transform their home offices into clean, efficient, and comfortable environments. Through smart cleaning routines and strategic organization solutions, I empower readers to create spaces that support focus, comfort, and success—one well-organized desk at a time.