· Todd Martin · DIY Home Projects · 14 min read
How To Build Sauna Benches

Building Sauna Benches: A Comprehensive DIY Guide
Imagine stepping into your own sauna, a haven of relaxation in your home. The key to true comfort and safety in this space often lies in the benches. Building sauna benches yourself offers a rewarding project. It ensures they fit your space perfectly and meet your specific needs. I am here to guide you through the entire process, from planning your design to selecting the right materials and assembling the final structure.
This article provides clear, actionable steps on how to build sauna benches. You will learn about choosing the best wood, gathering essential tools, and constructing strong, safe, and beautiful seating. We will cover various bench configurations and important safety tips. Get ready to create the perfect seating for your personal wellness retreat.
Takeaway:
- Plan your design: Measure your sauna space accurately and consider bench height and width.
- Select the right wood: Choose heat-resistant, low-resin woods like Western Red Cedar or Aspen.
- Gather essential tools: Ensure you have basic woodworking tools for cutting, drilling, and finishing.
- Build sturdy frames: Construct strong support frames for your benches.
- Attach slats correctly: Fasten bench slats with hidden fasteners for comfort and safety.
- Finish safely: Sand all surfaces smooth and avoid chemical treatments.
To build sauna benches, you need to select appropriate heat-resistant wood like cedar or aspen, design for proper air circulation and comfort, and use a step-by-step construction process to create sturdy frames and smooth seating surfaces, ensuring safety and durability for long-term use.
Planning Your Perfect Sauna Benches
Planning is the first crucial step before you build sauna benches. A well-thought-out plan ensures your benches fit your sauna space and serve your comfort needs. I always recommend sketching out your ideas first. Consider the dimensions of your sauna room. This helps you determine the length and width of your benches.
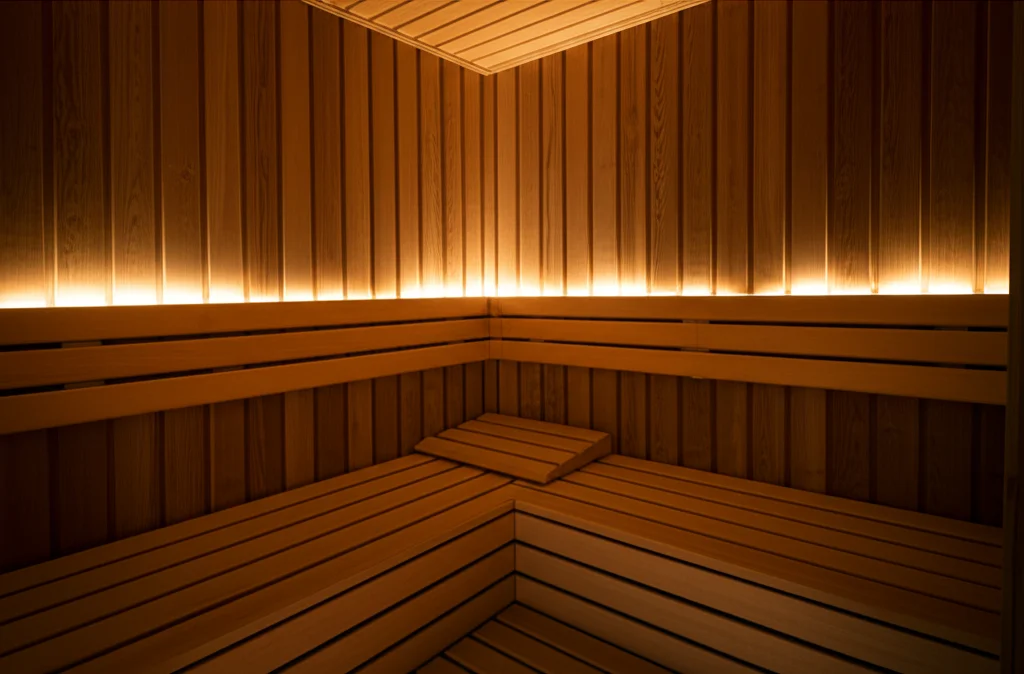
Most saunas feature two levels of benches. The lower bench is cooler, and the upper bench is hotter. Standard upper benches are usually 36 inches deep. Lower benches often measure around 18-24 inches deep. The height difference between benches should allow comfortable seating and foot placement. Typically, the upper bench sits 42-46 inches from the floor, and the lower bench 18-22 inches below the upper one. Think about how many people will use the sauna at once. This impacts the required bench space. You can easily build different types of benches, similar to how you might build a bench seat against a wall in another room of your home.
Consider the layout. Will your benches run along one wall, or wrap around multiple walls? Corner benches can maximize seating. Some designs include pull-out lower benches or movable footrests. Proper air circulation around and under the benches is vital for safety and comfort. Do not make benches too tight against walls or floors. This can trap moisture and impede airflow. Your design should allow for easy cleaning. I find that simple, open designs are often best for sauna environments. Take your time during this planning phase. It will save you effort later in the construction process.
Choosing the Right Wood for Sauna Benches
Selecting the correct wood is paramount when you decide to build sauna benches. The wood must withstand high temperatures and humidity without warping or splintering. It should also be comfortable for sitting, meaning it stays cool to the touch and does not release harmful odors. Not all woods are suitable for a sauna environment.
The best choices are typically softwoods with low resin content. Western Red Cedar is a top recommendation. It is naturally resistant to decay and insects. Cedar also smells pleasant when heated and does not splinter easily. Another excellent option is Aspen. Aspen is light-colored, virtually knot-free, and has no odor. It is also very smooth to the touch, which makes it comfortable for bare skin. Other good options include Basswood and Hemlock. These woods are stable in heat and resist cracking. When I choose wood for a sauna, I always check for these qualities.
Avoid woods that splinter easily, like pine or spruce, especially if they are heavily knotted. Knots can become very hot. Also, do not use pressure-treated lumber. The chemicals in it can release toxic fumes when heated. Always choose clear, kiln-dried lumber. This reduces the risk of warping and ensures stability. You want boards that are straight and free of large defects. The right wood makes your sauna benches safe, durable, and enjoyable. Just like building a strong deck bench seat, choosing the correct weather-resistant materials is key for longevity.
Essential Tools and Materials for Bench Construction
Having the right tools and materials is critical when you build sauna benches. Preparing everything in advance makes the construction process smooth and efficient. You do not want to stop in the middle of a cut to find a missing tool. I always lay out all my items before I start a project. This helps me stay organized.
Here is a list of essential tools you will need:
- Measuring tape: For accurate measurements of all wood pieces.
- Pencil: For marking cuts and drilling spots.
- Circular saw or miter saw: For making straight and precise cuts. A miter saw is excellent for repetitive cuts.
- Drill/driver: For pre-drilling holes and driving screws.
- Orbital sander or sandpaper: For smoothing all surfaces to prevent splinters.
- Level: To ensure your benches are perfectly horizontal.
- Framing square: For checking 90-degree angles.
For materials, you will need:
- Chosen sauna wood: As discussed, Western Red Cedar or Aspen is ideal. Calculate the total linear footage based on your design.
- Stainless steel screws: Use stainless steel specifically. Other metals can rust or corrode in the sauna’s heat and humidity. They can also get very hot and burn skin. Look for screws designed for outdoor use or deck construction.
- Wood glue (optional): A waterproof, heat-resistant wood glue can add strength to joints, but screws are the primary fasteners. Ensure it is non-toxic when heated.
- Safety gear: Always wear safety glasses when cutting and drilling. Gloves protect your hands. A dust mask is good for sanding.
Gathering these items ensures you are fully prepared. You can start construction without delays. This systematic approach helps you build sauna benches that are sturdy and safe. Building outdoor furniture, such as an outdoor couch, also requires careful material selection to withstand elements.
Step-by-Step Guide to Building Sauna Benches: Framing
Building the frame is the foundational step when you build sauna benches. A strong frame ensures the stability and safety of your seating. I always focus on precise cuts and secure connections at this stage. Mistakes here can compromise the entire structure.
Begin by cutting all your frame pieces according to your design plan. You will need vertical support legs and horizontal support beams. For standard sauna benches, the frame pieces are usually 2x4s or 2x6s, depending on the desired strength and size. Use your measuring tape and pencil to mark each cut. A miter saw makes these cuts quick and accurate. Make sure all cuts are square. This ensures joints fit together tightly.
Next, assemble the frame sections. For a simple rectangular bench, you will create two end frames and connect them with long horizontal beams. Use stainless steel screws to join the pieces. Pre-drill pilot holes for every screw. This prevents wood splitting, especially with denser woods. Use at least two screws per joint for strength. When building, remember that stability is key, similar to constructing a bench seat for a kitchen table where wobbling is unacceptable.
Ensure the frame is level and square as you assemble it. Use a level to check horizontal surfaces. Use a framing square to verify right angles. You can add diagonal braces in corners for extra stability, especially for longer benches. Once the frames are built, position them in your sauna. Secure them to the wall studs if your design includes wall-mounted supports. This creates an incredibly strong and secure bench system. A well-built frame sets the stage for durable and reliable sauna benches.
Step-by-Step Guide to Building Sauna Benches: Decking and Finishing
Once your frames are sturdy, the next phase is decking and finishing. This is where your sauna benches take their comfortable and aesthetic form. I find this part very satisfying as the benches start to look complete. Careful attention here ensures a smooth, splinter-free surface.
Start by cutting the bench slats. These are the pieces of wood that form the top seating surface. They are typically 1x4s or 1x6s. Cut them to the exact length of your bench frame. For comfort and air circulation, space the slats about 3/8 to 1/2 inch apart. This gap allows for heat and moisture to circulate freely, preventing mildew buildup and making the benches cooler to the touch. You can use a spacer block to ensure consistent gaps between each slat.
Attach the slats to the frame using stainless steel screws. For a cleaner look and to prevent screws from heating up and burning skin, consider using “hidden” fasteners or attaching the slats from underneath the frame. If you must screw from the top, countersink the screw heads slightly below the surface. This creates a smoother finish. Some people prefer to attach slats with dowels or specialized clips for a completely fastener-free top surface. This part of the build is similar to putting a top on a piece of furniture like when you build a side table, where the surface needs to be flat and presentable.
After all slats are attached, it is time for finishing. Sand all surfaces thoroughly. This includes the top, sides, and edges of the slats and any exposed frame parts. Use a medium-grit sandpaper first, then move to a finer grit (120-220 grit) for a very smooth finish. Pay special attention to edges and corners, rounding them slightly to prevent sharp points. Never use varnishes, stains, or sealants on sauna wood. These products can release fumes when heated and are not designed for sauna conditions. The wood should remain natural. This natural finish ensures safety and enhances the beauty of your DIY sauna benches.
Sauna Bench Safety and Maintenance
Safety and proper maintenance are paramount after you build sauna benches. A sauna is a hot and humid environment. Ensuring your benches remain safe and hygienic is vital for a pleasant and healthy experience. I always prioritize these aspects once the construction is complete.
First, check for stability. Gently push and pull on your new benches. They should not wobble or creak. If they do, reinforce any loose joints or connections. Ensure all screws are tight and recessed. Any exposed metal can become extremely hot and cause burns. Verify that there are no sharp edges or splinters left from the sanding process. Run your hand over every surface. This ensures comfort and prevents injuries when someone uses the sauna. Proper installation means the benches are securely in place.
For maintenance, regular cleaning is essential. The high heat and moisture can promote mold or mildew if not properly ventilated and cleaned. After each sauna session, open the sauna door and vents to allow it to air dry completely. This prevents moisture buildup. Wipe down the benches with a clean cloth. For a deeper clean, mix warm water with a mild, non-toxic soap or a specialized sauna cleaner. Avoid harsh chemicals, as they can damage the wood or release fumes when heated. Lightly scrub the benches, then rinse with clean water and let them air dry thoroughly. Just like you might perform regular cleaning and maintenance for log furniture, sauna benches require similar care to preserve their natural beauty and function.
Over time, wood can darken from sweat and oils. A light sanding (100-120 grit) once a year can refresh the surface. This removes any discoloration and keeps the wood smooth. Always remove all dust after sanding. By following these safety and maintenance tips, your homemade sauna benches will remain a comfortable, safe, and beautiful feature of your home sauna for many years.
Advanced Sauna Bench Designs and Customizations
After mastering how to build basic sauna benches, you might consider advanced designs. Customizations can greatly enhance the functionality and comfort of your sauna. I enjoy exploring these options to make a sauna truly unique and efficient.
One popular advanced design is the multi-level bench system. This typically involves an upper bench and a lower bench, but some larger saunas can accommodate a third, even higher “hot seat.” This arrangement allows users to choose their preferred heat level. You can also integrate pull-out benches. These are lower benches that slide in and out from under the main upper bench. This saves space when not in use. It also provides extra seating when needed. Building pull-out components requires precise measurements and smooth-gliding hardware.
Consider adding backrests for extra comfort. A fixed backrest or a removable one can make long sauna sessions more enjoyable. Backrests are typically made from thinner slats, spaced for air circulation, and angled slightly for ergonomic support. Some designs include movable footrests or small, portable step stools. These are useful for accessing higher benches or for children. Integrating storage underneath the benches is another practical customization. This could be a simple open shelf or a more enclosed cabinet. Ensure any storage does not impede air flow or safety within the sauna.
For a unique touch, you can shape the bench ends. Rounded corners or decorative cuts add visual appeal. Some people even integrate LED lighting strips under the benches for ambient light. Always use sauna-specific lighting that withstands heat and humidity. These advanced techniques allow you to build sauna benches that are not only functional but also a true design statement. Remember to maintain the principles of proper wood selection and safe construction.
Frequently Asked Questions
Q: What is the best wood for sauna benches? A: The best wood for sauna benches is Western Red Cedar due to its heat resistance, low resin content, and pleasant aroma. Aspen is another excellent choice; it is odorless and splinter-free. Avoid woods with high resin content like pine, as they can get very hot and release sticky sap.
Q: How high should sauna benches be? A: Sauna benches are typically arranged in two levels. The upper bench is usually 42-46 inches from the floor. The lower bench sits about 18-22 inches below the upper bench. This allows comfortable seating and proper foot placement.
Q: Can I use screws for sauna benches? A: Yes, you can use screws for sauna benches. However, you must use stainless steel screws. Other metals like galvanized or coated screws can corrode in the sauna’s humidity and heat. They can also get dangerously hot, causing burns. Countersink the screws for a smooth surface.
Q: How often should I clean sauna benches? A: You should clean sauna benches regularly, ideally after every few uses or at least once a month. Wipe them down with a damp cloth after each session to remove sweat and moisture. For a deeper clean, use a mild, non-toxic sauna cleaner with water.
Q: What safety precautions should I take when building sauna benches? A: Always wear safety glasses when cutting and drilling. Ensure all wood surfaces are thoroughly sanded to prevent splinters. Use only stainless steel fasteners, as other metals can overheat. Never apply chemical treatments, varnishes, or stains to the wood, as they can release harmful fumes when heated.
Conclusion
Building sauna benches yourself is a rewarding project. It allows you to create a personalized and safe space for relaxation. You have learned about careful planning, selecting the ideal wood, and gathering the right tools. We covered the precise steps for framing and finishing your benches. I have also shared essential safety and maintenance tips.
By following this guide, you can ensure your sauna benches are durable, comfortable, and beautiful. Remember, the key is attention to detail and choosing the right materials. Your new sauna benches will provide many years of comfortable heat therapy. Get started on your DIY sauna project today. Transform your home into a personal wellness retreat.


