· Todd Martin · DIY Home Projects · 21 min read
How To Build A Murphy Bed With Desk
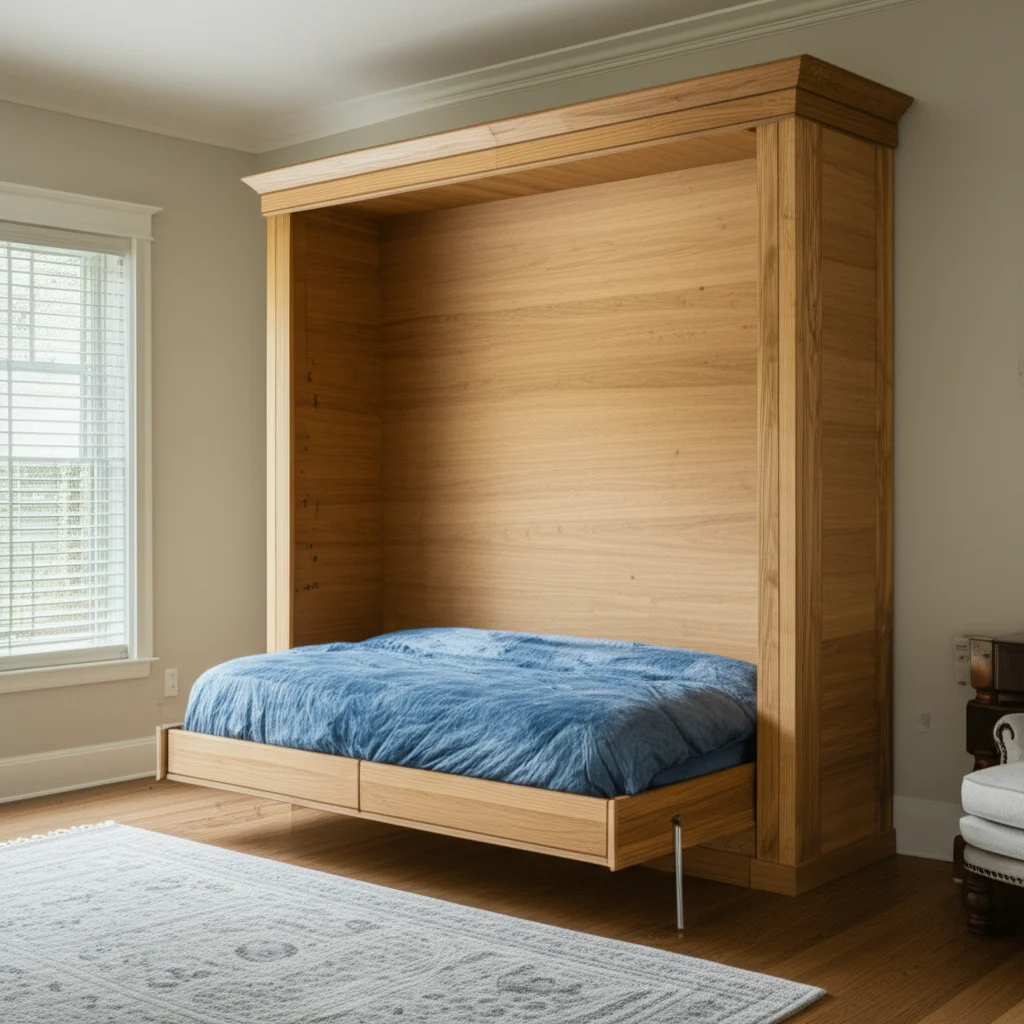
Build a Murphy Bed with Desk: Your Ultimate DIY Guide
Do you dream of having a dedicated home office, but lack the space? Many of us face this common dilemma. My own small apartment made me realize the need for smart furniture. A Murphy bed with a desk offers a brilliant solution. It transforms a bedroom into a functional workspace by day and a comfortable sleeping area by night.
Building your own Murphy bed with a desk might seem like a big project. However, with careful planning and clear steps, it is completely achievable for a dedicated DIYer. This guide will walk you through the entire process. We will cover everything from initial design to the final touches. Get ready to reclaim your space and enjoy the benefits of this versatile furniture piece.
Takeaway
Building a custom Murphy bed with a desk allows you to maximize limited living space. Here are the key takeaways:
- Dual Functionality: Enjoy a comfortable bed and a productive workspace in one compact unit.
- Space Optimization: Free up floor space in small rooms or studio apartments.
- Custom Design: Tailor the materials, finishes, and desk features to fit your style.
- Cost Savings: DIY construction can be more affordable than buying a pre-made unit.
- Enhanced Home Value: Add a unique, high-value feature to your property.
To build a Murphy bed with a desk, you construct a sturdy cabinet frame, integrate a foldable bed platform and a stable desk surface, and install a reliable lift mechanism. This DIY project maximizes small spaces by offering both sleeping and working areas in one convertible unit. Proper planning, precise measurements, and careful assembly are key to success.
Why Build a Murphy Bed with Desk? Space-Saving Solutions
Living in smaller homes or apartments often means creative thinking about space. A Murphy bed with a desk is a prime example of this creativity. It is more than just a bed that folds into a wall. It is a smart piece of furniture that serves two crucial purposes. I found it incredibly useful for my own home office needs.
This design offers huge benefits. By day, you have a fully functional desk for work or study. When the workday ends, the desk neatly tucks away as you lower the bed. This instantly changes the room’s function. It means your bedroom can also be your office, your craft room, or even a guest room. This level of versatility is hard to beat.
Maximize Your Limited Space
The main reason people build a Murphy bed with a desk is to save space. Traditional beds take up a lot of floor area. This can make a small room feel cramped. When you fold up a Murphy bed, that floor space becomes available. You can use it for yoga, exercise, or just moving around more freely. This makes a huge difference in smaller living areas. It creates a feeling of openness.
A desk integrated into the unit adds even more efficiency. Imagine having all your office supplies and computer ready to go. Then, with a simple movement, it disappears for the evening. This eliminates the need for a separate desk area. It keeps your living space uncluttered and organized. This dual-purpose design is perfect for studio apartments or multi-functional rooms.
Benefits Beyond Space
Beyond saving space, there are other advantages to building a Murphy bed with a desk. First, it offers incredible versatility. A spare room can serve as an office during the week. On weekends, it can become a comfortable guest room. This adaptability is highly valuable in modern living. It allows your home to adapt to different needs.
Second, a DIY Murphy bed with a desk allows for full customization. You choose the materials, colors, and finishes. You can match it perfectly to your existing decor. Want extra shelves or lighting? You can add those too. This personal touch ensures the unit fits your exact needs and style. It also provides a sense of accomplishment.
Finally, it can add value to your home. A well-built, custom piece of furniture like this is a desirable feature. Potential buyers appreciate intelligent space solutions. It shows off your home’s functionality. Building it yourself also means significant cost savings compared to buying a pre-made unit.
Planning Your Murphy Bed with Desk Project
Every successful DIY project begins with thorough planning. Building a Murphy bed with a desk is no different. I always spend extra time on this phase. Good planning ensures a smooth build and avoids costly mistakes. You need to consider design, measurements, and materials.
This stage sets the foundation for your entire project. It allows you to visualize the finished product. It also helps you gather all necessary supplies before you start. Taking the time to plan carefully will save you time and frustration later. This step is truly important for a positive building experience.
Design and Layout Considerations
Start by thinking about your room and how you will use the unit. Do you prefer a vertical or horizontal bed? Vertical models take up less wall width. Horizontal models work better under lower ceilings. How will the desk integrate? Some designs have a desk that folds down with the bed. Others have a desk that slides out or stays stationary at the bottom. Consider how the desk will look when the bed is both up and down.
Think about the size of the mattress you want to use. This will dictate the overall dimensions of your unit. A twin or full-size bed is usually easier to manage for a DIY project. Consider the clearance needed when the bed is lowered. Make sure there is enough space in front of the unit. Also, think about how the desk functions with the bed down.
Taking Precise Measurements
Accurate measurements are critical for this project. Measure your ceiling height and wall width carefully. These dimensions will determine the maximum size of your cabinet. Measure your chosen mattress length, width, and thickness. The bed platform must fit the mattress snugly. The desk also needs to be a comfortable working height when extended.
I recommend drawing a detailed plan or sketch. Label all dimensions on your drawing. Double-check every measurement before you cut any wood. A small error in measurement can cause big problems later. Consider the depth needed for the mattress and bedding when the bed is folded up. Account for the thickness of all your wood panels.
Selecting Materials and Tools
Choosing the right materials ensures durability and a professional finish. Plywood is a popular choice for the cabinet and bed frame. It is strong and stable. MDF (medium-density fiberboard) is also an option, especially for painted finishes. Select high-quality wood that is free of warps or defects.
You will also need specific hardware for the Murphy bed mechanism. This includes a spring or piston lift system. These kits come with instructions and are crucial for safe operation. You will need strong hinges for the desk. Other hardware includes screws, wood glue, and perhaps drawer slides if you add storage.
For tools, you will need:
- Circular saw or table saw for cutting large sheets of wood.
- Drill for pilot holes and driving screws.
- Router for edge finishing (optional but nice).
- Measuring tape, square, and level.
- Clamps to hold pieces while glue dries.
- Safety glasses and hearing protection.
Gather all your materials and tools before starting construction. This preparation will make the building process much smoother.
Building the Cabinet Frame for Your Wall Bed
The cabinet frame forms the core structure of your Murphy bed. It needs to be strong and square. This part of the build is essentially creating a large, sturdy box. I always focus on precision here. A well-built frame ensures the bed operates correctly and safely.
The frame must support the weight of the bed and mattress. It also needs to be securely anchored to your wall. This section will guide you through cutting your wood and assembling the main components. Follow these steps carefully for a solid foundation.
Cutting and Preparing Your Wood Panels
Begin by cutting all your plywood or MDF panels according to your measured plans. You will need panels for the two side walls, the top, and the bottom of the cabinet. You may also need a back panel, depending on your design. Use a circular saw with a straight edge guide or a table saw for clean, accurate cuts. Precision is key here. Even a small deviation can cause issues when assembling.
Label each piece as you cut it. This helps with organization during assembly. Sand any rough edges to prevent splinters and prepare for finishing. If you plan to paint or stain, this is a good time to do some initial sanding. Ensure all panels are perfectly square. Use a large carpenter’s square to check corners.
For more detailed instructions on creating cabinet structures, you can refer to resources like how to build a simple wall cabinet box. These guides provide foundational knowledge that applies to larger cabinet builds.
Assembling the Main Cabinet Box
Now, it is time to assemble the cabinet frame. Start by attaching the side panels to the bottom panel. Use strong wood glue and screws for a secure connection. Pilot holes are essential to prevent wood splitting. Countersink the screw heads for a flush finish. Ensure the corners are perfectly square before the glue sets. Clamps are very helpful here to hold pieces in place.
Next, attach the top panel to the side panels. Again, use glue and screws. You are creating a large, open-front box. This box will house the bed mechanism and the bed platform. Make sure the unit is plumb and level as you assemble it. This ensures the bed will open and close smoothly.
Consider adding internal bracing or blocking if your design requires it. These provide additional points for attaching the bed mechanism or other features. You might also want to include a toe kick at the bottom. This elevates the unit slightly and gives it a more finished look. For tips on creating a sturdy base, articles like how to build toe kick for wall cabinets can offer helpful insights.
Reinforcement and Wall Mounting Preparation
A Murphy bed unit must be securely anchored to the wall. This is a critical safety step. Identify the wall studs in your chosen location. The top and sides of your cabinet frame will need to be screwed directly into these studs. Mark these locations on your cabinet pieces before assembly or before mounting.
Add extra blocking or a thick cleat along the top and sides of the cabinet interior. This provides a strong attachment point for screws going into the wall studs. Use long, heavy-duty construction screws for mounting. Do not rely solely on drywall anchors. The unit experiences significant forces during operation.
Once assembled, position the cabinet against the wall. Use a level to ensure it is perfectly plumb and square. This is crucial for the mechanism to work correctly. Secure the unit to the wall studs. The strength of this mounting is paramount for the safety and longevity of your Murphy bed. Building sturdy wall units shares many principles with constructing wall cabinets for living rooms, offering insights into secure installation techniques. You can find more information on general wall cabinet construction here: how to build wall cabinets for living room.
Constructing the Bed Platform and Desk Integration
With the main cabinet frame complete, the next step is building the bed platform and integrating the desk. This is where your Murphy bed truly takes shape. The bed platform must be strong enough to hold a mattress and person. The desk needs to be sturdy and fold away seamlessly. I found this part very satisfying as the unit started looking like furniture.
This section requires careful attention to detail. The way the desk attaches and operates is key to the “desk” part of the Murphy bed with desk. Ensure all components are aligned for smooth movement.
Building the Bed Platform
The bed platform is essentially a box frame that holds your mattress. It will attach to the Murphy bed lift mechanism. Cut pieces of plywood or solid wood to create the frame. The frame should be slightly larger than your mattress dimensions. This allows the mattress to fit inside without being too tight. You will need side rails, head and foot rails, and a central support beam.
Assemble these pieces using wood glue and screws. Ensure all joints are strong and square. You can add a plywood sheet on top of this frame. This provides a solid base for the mattress. Cut air holes in the plywood mattress support for ventilation. This helps keep your mattress fresh. For beds with storage, the construction of a platform can be similar. You can explore how to build various bed platforms, including options with storage, at how to build a twin platform bed with storage underneath.
Reinforce the corners of the bed platform for added strength. This platform will be lifted and lowered frequently. It needs to withstand repeated use. Make sure the total thickness of the platform and mattress fits within the depth of your cabinet when folded up.
Integrating the Fold-Down Desk
The desk is the unique feature of this project. It needs to fold out of the way when the bed is lowered. A common design has the desk panel attached to the bed platform’s foot end. When the bed is folded up, the desk surface faces outwards. When the bed is lowered, the desk swings neatly under the bed platform, staying level. This design ensures that items on the desk do not fall off.
Cut a piece of plywood or solid wood for your desk surface. The size will depend on your needs. Ensure it is wide enough for a computer and comfortable work. Attach the desk panel to the foot of the bed platform using strong, heavy-duty hinges. These hinges must allow the desk to rotate smoothly as the bed moves. You might need specialized hinges that allow the desk to remain horizontal throughout the bed’s motion.
Consider how the back of the desk will look when it’s exposed. Sometimes, the back of a desk can look unfinished. If this is a concern, you might want to consider design elements or materials that ensure a clean appearance from all angles. For ideas on improving the aesthetics of exposed desk backs, see how to cover up the back of a desk.
Weight Distribution and Balance
Proper weight distribution is crucial for the desk to stay level. The desk mechanism often relies on counterweights or a carefully balanced pivot point. Ensure the hinges and attachment points are robust. Test the movement before final installation. The desk should not sag or tilt excessively.
Some designs use a small support leg that automatically extends when the desk is in use. This provides extra stability for the desk surface. When the bed is lowered, the desk will be hidden underneath. Make sure there is enough clearance for the desk and any items on it when the bed is in the down position. This ensures a smooth transition between bed and desk modes.
Installing the Murphy Bed Mechanism and Desk Hardware
Installing the lift mechanism is a critical step. This hardware allows the bed to fold up and down effortlessly. It is also a key safety component. Most mechanisms use either springs or pistons. I always follow the manufacturer’s instructions very carefully at this stage. Mistakes here can affect both function and safety.
This section also covers the specific hardware for the desk. Proper installation ensures both parts of the unit work smoothly together. Take your time with these steps. Precision is essential for a safe and functional Murphy bed with desk.
Attaching the Murphy Bed Lift System
Your Murphy bed kit will come with a detailed instruction manual. Read it thoroughly before you begin. The lift mechanism typically mounts to the inside of your main cabinet frame and to the bed platform. The exact placement varies by kit. Follow the measurements and hole patterns provided by the manufacturer.
- Piston Systems: These use gas pistons to assist in lifting and lowering the bed. They offer a very smooth and controlled motion. Mount the piston brackets to the designated points on the cabinet and bed frame.
- Spring Systems: These use heavy-duty springs to counterbalance the weight of the bed. They are often more visible but are very reliable. Attach the spring assemblies to the cabinet and bed frame according to instructions.
Ensure all bolts and screws are tightened securely. Do not overtighten, but make sure there is no wobbling. The mechanism is under significant tension, especially with the springs or pistons installed. Double-check all connections. This is about both convenience and safety.
Installing Desk Hinges and Supports
The desk portion requires special hinges. These hinges allow the desk to pivot and remain level as the bed is lowered and raised. They are often called “leveling desk hinges” or “pivot hinges.” They mount to the front of the bed platform (what becomes the bottom when the bed is up) and to the top edge of the desk panel.
When the bed is stored vertically, the desk surface forms the front face of the unit. When the bed is pulled down, the desk surface rotates underneath. It should remain horizontal throughout this movement. Test the hinge action before screwing everything in permanently. Make sure the desk clears the floor and the main cabinet as it moves.
Some desk designs may also incorporate small, fold-out legs or supports. These provide extra stability when the desk is in use. Install these according to your design. Ensure they fold away neatly when the bed is stored. The goal is a desk that is sturdy when in use but disappears when not needed.
Testing and Adjusting the Mechanism
After installing the bed mechanism and desk hardware, it is time for testing. Carefully raise and lower the bed multiple times. Observe its movement. Does it operate smoothly? Is there any sticking or binding? The bed should lift with relative ease. It should lower in a controlled manner, without dropping too quickly.
If using a spring system, you might need to adjust the number of springs to match your bed and mattress weight. Piston systems are usually fixed for a specific weight range. Refer to your kit’s instructions for any adjustments. The desk should remain perfectly level as the bed goes up and down. If it tilts, check the hinge alignment and installation.
Ensure all safety locks or latches work correctly. Many Murphy beds have a latch to keep the bed securely in the upright position. Test this feature thoroughly. This ensures the bed will not accidentally fall down. Proper installation of the mechanism is crucial for both convenience and user safety.
Finishing Touches and Customization for Your Convertible Bed
With the core structure and mechanisms in place, it is time for the finishing touches. This is where your Murphy bed with desk goes from a functional piece to a beautiful part of your home. This stage allows you to add your personal style. I always enjoy this part of a project the most. It is when the vision truly comes to life.
Finishing enhances the look and durability of your new furniture. Customization adds functionality and makes the unit truly unique. Pay attention to the details here. They make a big difference in the final appearance and usability of your convertible bed.
Sanding, Painting, or Staining
Before applying any finish, thoroughly sand all wood surfaces. Start with a coarser grit sandpaper (e.g., 100-120 grit) to smooth out any imperfections. Then, move to a finer grit (e.g., 180-220 grit) for a silky-smooth finish. Proper sanding is key for paint or stain adhesion. Wipe away all dust before proceeding.
Now, choose your finish.
- Paint: Apply a primer first, especially if using MDF. Then, apply two or more thin coats of your chosen paint color. Lightly sand between coats for a professional look. This gives a modern, seamless appearance.
- Stain: If using plywood or solid wood, stain can highlight the natural wood grain. Apply wood conditioner first for even stain absorption. Then, apply your chosen wood stain. Finish with several coats of a clear protective topcoat (polyurethane, lacquer). This offers durability and a classic look.
Allow ample drying time between coats. Follow the manufacturer’s instructions for drying and curing times. A good finish protects the wood and makes your unit look polished.
Adding Shelves, Lighting, and Power Outlets
Customization is what makes your DIY Murphy bed with desk truly special. Consider adding built-in shelves or cubbies around the bed. These provide storage for books, decor, or office supplies. They can be fixed shelves or adjustable ones. For ideas on integrating shelving, looking at how to build a pantry cabinet with doors can provide insights into creating integrated storage solutions. These principles translate well to any custom cabinetry.
Think about lighting. LED strip lights can be installed inside the cabinet. They provide ambient light when the bed is open or closed. Small task lights can also be added above the desk area. This enhances the functionality of your workspace. Ensure all wiring is hidden and safe.
Adding power outlets and USB ports to the desk area is a smart move. This makes it easy to plug in your laptop, phone, or other devices. You can install recessed power strips or simple outlets within the desk or cabinet. If you want to avoid drilling, there are solutions for mounting power strips without screws, which can be useful for keeping your desk clean and adaptable. You can find guidance on how to mount power strip to desk without screws. This attention to detail improves usability.
Decorating Your Convertible Bed Unit
Once finished, decorate your Murphy bed with desk to match your home’s aesthetic. Add decorative hardware, like cabinet pulls or handles. These small details can make a big impact. Consider adding molding or trim around the edges of the cabinet for a more built-in look.
Choose bedding that complements the room. When the bed is folded up, the interior of the cabinet might be visible. You can line it with fabric or paint it a contrasting color. Add personal touches like framed photos, plants, or decorative objects to the shelves. Make it feel like a cohesive part of your living space.
The goal is to make the unit look integrated and intentional. It should not just look like a functional piece. It should enhance your room’s design. A well-finished and decorated Murphy bed with desk becomes a focal point. It truly transforms a multi-functional space.
Frequently Asked Questions (FAQ)
Building a Murphy bed with a desk often brings up many questions. I remember having plenty of them myself when I started. Here are some common queries people have about this project.
Can a beginner build a Murphy bed with a desk?
Building a Murphy bed with a desk is a challenging but achievable DIY project for a dedicated beginner. It requires basic woodworking skills, accurate measurements, and patience. Following detailed plans and watching tutorials can greatly help. Starting with a simpler design or smaller bed size might be wise for your first attempt.
What materials are best for a DIY Murphy bed with desk?
High-quality plywood (like Baltic birch or cabinet-grade plywood) is excellent for durability and stability. MDF (medium-density fiberboard) is also a good option, especially if you plan to paint the unit, as it offers a smooth finish. Ensure you use a reliable Murphy bed lift mechanism kit for safe operation.
How much does it cost to build a Murphy bed with a desk?
The cost varies widely based on materials, bed size, and the lift mechanism chosen. Expect to spend anywhere from $500 to $1,500 or more for materials and hardware. This is significantly less than purchasing a pre-made unit, which can cost $2,000 to $5,000 or even higher.
What type of mattress works best with a Murphy bed?
A standard innerspring or memory foam mattress generally works well. Avoid overly thick or heavy mattresses, as they might exceed the lift mechanism’s weight capacity. The mattress should also be flexible enough to conform to the mechanism’s movement. Check your kit’s specifications for maximum mattress thickness and weight.
Is a DIY Murphy bed with a desk safe?
Yes, if built correctly and anchored securely to wall studs, a DIY Murphy bed with a desk is safe. The key is using a high-quality lift mechanism, strong materials, and precise assembly. Proper installation of safety latches and adherence to the mechanism’s instructions are vital for safe operation.
How long does it take to build a Murphy bed with a desk?
The construction time can range from a few weekends to several weeks. This depends on your skill level, the complexity of your design, and the amount of time you can dedicate. Planning, cutting, assembly, and finishing all require significant time. Do not rush the process; precision yields better results.
Conclusion
Building your own Murphy bed with a desk is a rewarding project. It transforms your living space, making it more functional and versatile. You have learned about the benefits, from maximizing small spaces to personalizing your home. We covered the crucial steps, from careful planning and precise measurements to constructing the cabinet and installing the specialized hardware. My own experience showed me that with patience and attention to detail, you can create a beautiful and highly useful piece of furniture.
Remember, the key to success lies in thorough preparation and following each step carefully. Your new wall bed with desk will serve as both a comfortable sleeping area and a productive workspace. This smart furniture solution truly optimizes your home. Get started on your DIY journey today. Create a functional and stylish space that perfectly suits your needs. You will love the added space and efficiency.
- Murphy bed DIY
- space-saving furniture
- wall bed with desk
- home office solutions
- convertible furniture

Todd Martin
Senior Writer
With over 15 years of experience in home renovation and design, I started HEG to share what I’ve learned with homeowners who want to create spaces that are both beautiful and functional. I’ve always believed in a hands-on approach, and over the years, I’ve picked up practical solutions that actually work. Through HEG, I aim to make home improvement more approachable, sharing real tips that help you create a home you truly love.