· Todd Martin · DIY & Woodworking · 20 min read
How To Build Farmhouse Table
Crafting Your Own Farmhouse Table
Have you ever dreamed of a grand, sturdy table that gathers your family for meals and memories? A farmhouse table brings warmth and character to any home. It offers a perfect blend of rustic charm and functional design. Building your own allows for complete customization, making it truly unique.
This guide provides a step-by-step approach to help you construct a beautiful farmhouse table. We cover everything from design choices to the final finish. You will learn about selecting the right wood, gathering tools, and mastering essential woodworking techniques. Get ready to create a piece that will serve your family for years.
Takeaway
Building a farmhouse table requires careful planning and execution. Key steps include:
- Choosing the right wood type for durability and aesthetics.
- Gathering all necessary tools and safety gear.
- Developing precise plans and dimensions.
- Mastering woodworking joints for strength.
- Applying proper finishing techniques for lasting beauty.
Building a farmhouse table involves cutting and joining wood pieces. You make a sturdy top from planks. You then assemble a strong base and legs. Finally, you apply a protective finish. This creates a durable, beautiful piece of furniture.
Why Build a Farmhouse Table for Your Home?
A farmhouse table is more than just a piece of furniture; it is a focal point. It draws people together, fostering connection and conversation. Its large, welcoming surface invites family meals, craft sessions, and game nights. This style fits many interior designs, from traditional to modern.
Choosing to build your own table offers significant advantages. You control the dimensions, ensuring it fits your space perfectly. You can select specific wood species and finishes to match your existing decor. This level of personalization is impossible with store-bought items. Many people find satisfaction in creating something with their own hands. The finished table holds special meaning. It becomes a family heirloom, built with love and effort.
Building your own table often saves money. High-quality farmhouse tables can cost a lot in stores. You can source materials yourself and save on labor costs. This makes a custom, high-quality table more accessible. It also provides a valuable learning experience. You gain new skills in woodworking and problem-solving. This project builds confidence for future DIY endeavors.
Think about the impact a handmade table has on your home’s atmosphere. It adds a touch of authenticity and history. The imperfections of handmade work add to its character. A farmhouse table invites a relaxed, comfortable feeling. It creates a space where everyone feels welcome.
Essential Tools and Materials for Your Farmhouse Table
Starting a woodworking project requires the right tools and materials. Having everything ready saves time and frustration. For building a farmhouse table, you will need a mix of power tools and hand tools. Safety equipment is also a must. You should always protect yourself when working with wood.
Power Tools
- Miter Saw: This tool makes accurate crosscuts for table legs and aprons. It ensures square cuts for strong joints.
- Table Saw: Essential for ripping long boards to width for the tabletop. It creates straight edges for laminating.
- Planer (Optional but Recommended): A planer helps flatten and smooth rough lumber. It ensures uniform thickness for the tabletop boards. If you do not have one, buy pre-milled lumber.
- Orbital Sander: Speeds up sanding and creates a smooth surface. You will use this tool a lot.
Hand Tools and Supplies
- Tape Measure: For precise measurements. Accuracy is critical in woodworking.
- Pencils: To mark cuts and joinery.
- Square: Ensures all your cuts and assemblies are square.
- Clamps: Many clamps are needed for gluing up the tabletop and assembling the base. Bar clamps or pipe clamps work well.
- Drill: For pilot holes and driving screws. Choose a drill with good torque.
- Router (Optional): A router can add decorative edges to the tabletop. It can also create dadoes or rabbets for joinery.
- Wood Glue: High-quality wood glue is essential for strong joints.
- Screws/Bolts: For attaching the tabletop to the base and reinforcing joints.
- Wood Filler: To fill any small gaps or imperfections before finishing.
- Sandpaper: Various grits, from coarse (80-100) to fine (220+).
- Safety Glasses and Hearing Protection: Always protect your eyes and ears.
- Dust Mask: Protects your lungs from wood dust.
Choosing Your Wood
The wood you choose impacts the table’s look and durability. Common choices for a farmhouse table include:
- Pine: Affordable and easy to work with. It takes stains well for a rustic look. Pine is softer, so it may show dents over time.
- Douglas Fir: Similar to pine in workability and cost. It is slightly harder and has a pronounced grain.
- Oak: A very strong and durable wood. It has a beautiful, distinct grain pattern. Oak costs more but lasts a lifetime.
- Maple: Hard, dense, and has a fine grain. It creates a smooth, durable surface. Maple is also more expensive.
- Reclaimed Wood: Offers immediate character and history. It can be challenging to work with due to old fasteners or unevenness.
Consider the table’s purpose and your budget when selecting wood. Harder woods stand up better to daily wear and tear. Pine and fir are excellent choices for a first project due to their cost and ease of use. If you are interested in working with different wood types for other projects, consider how you might build a live edge table or even build a coffee table with storage. These projects use different wood and design elements.
Designing Your Perfect Farmhouse Table
Before you cut any wood, you need a clear plan. Design determines the table’s size, shape, and overall style. Consider where the table will sit and how many people it needs to seat regularly. A well-thought-out design prevents costly mistakes. It ensures your table fits your space and needs.
Determining Dimensions
Standard dining table height is around 30 inches. For width, 36 to 40 inches provides enough space for plates and serving dishes. Length depends on how many people you want to seat:
- 4-6 people: 60-72 inches long
- 6-8 people: 72-84 inches long
- 8-10 people: 84-100 inches long
- More than 10: 100+ inches long
Measure your dining area carefully. Leave at least 3 feet of clear space around the table for chairs and movement. Consider if you want the table to have leaves for expansion. This allows for flexibility for larger gatherings. Learning how to build an extendable table or build a dining room table with leaves can be a great addition.
Sketching and Blueprints
Draw a detailed sketch of your table. Include all dimensions for the tabletop, legs, and aprons. A simple drawing helps visualize the final product. For more precision, create a cut list. This list includes every piece of wood needed, with its exact dimensions. This makes cutting more efficient and reduces waste.
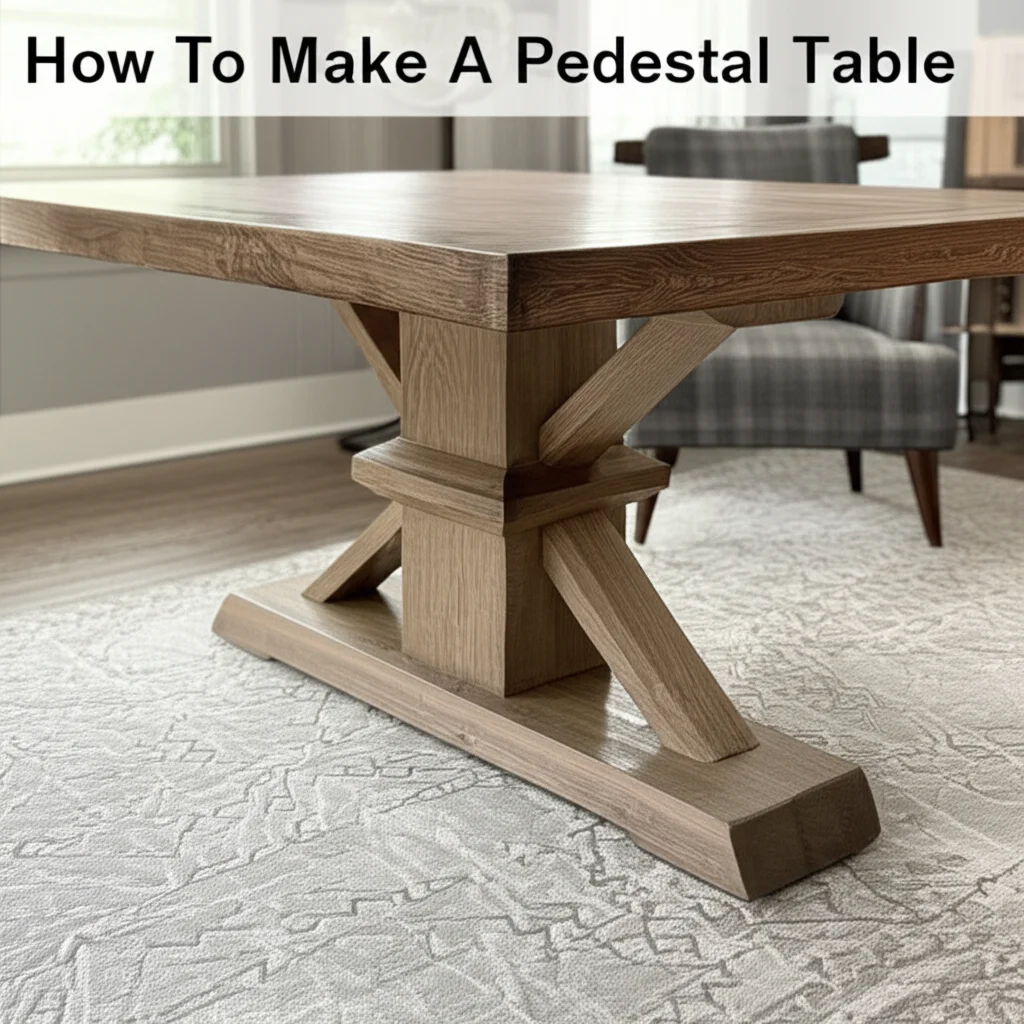
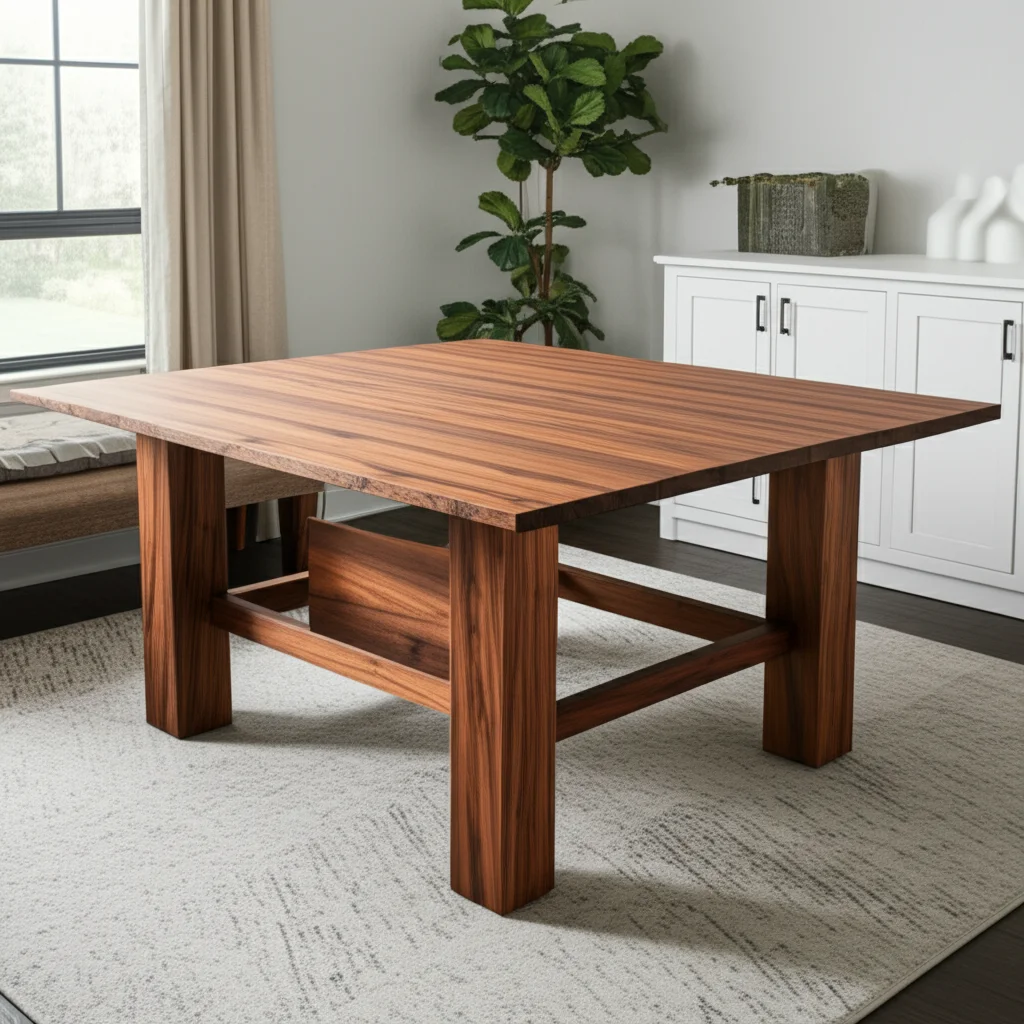
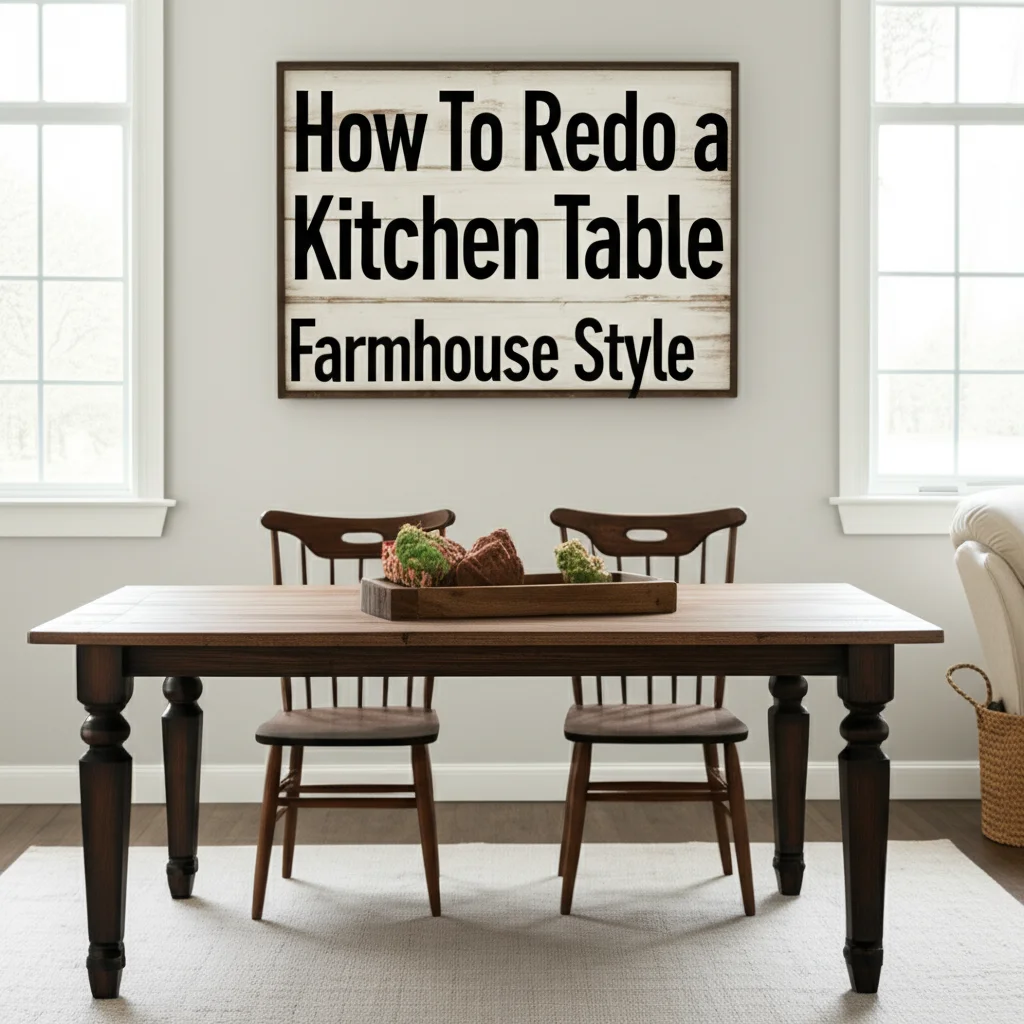
Consider the style of legs and base. Common farmhouse leg styles include:
- Tapered Legs: Simple and classic, tapering from top to bottom.
- Turned Legs: More decorative, requiring specific tools or pre-made components.
- Square Legs: Easiest to make, offering a rustic, blocky look.
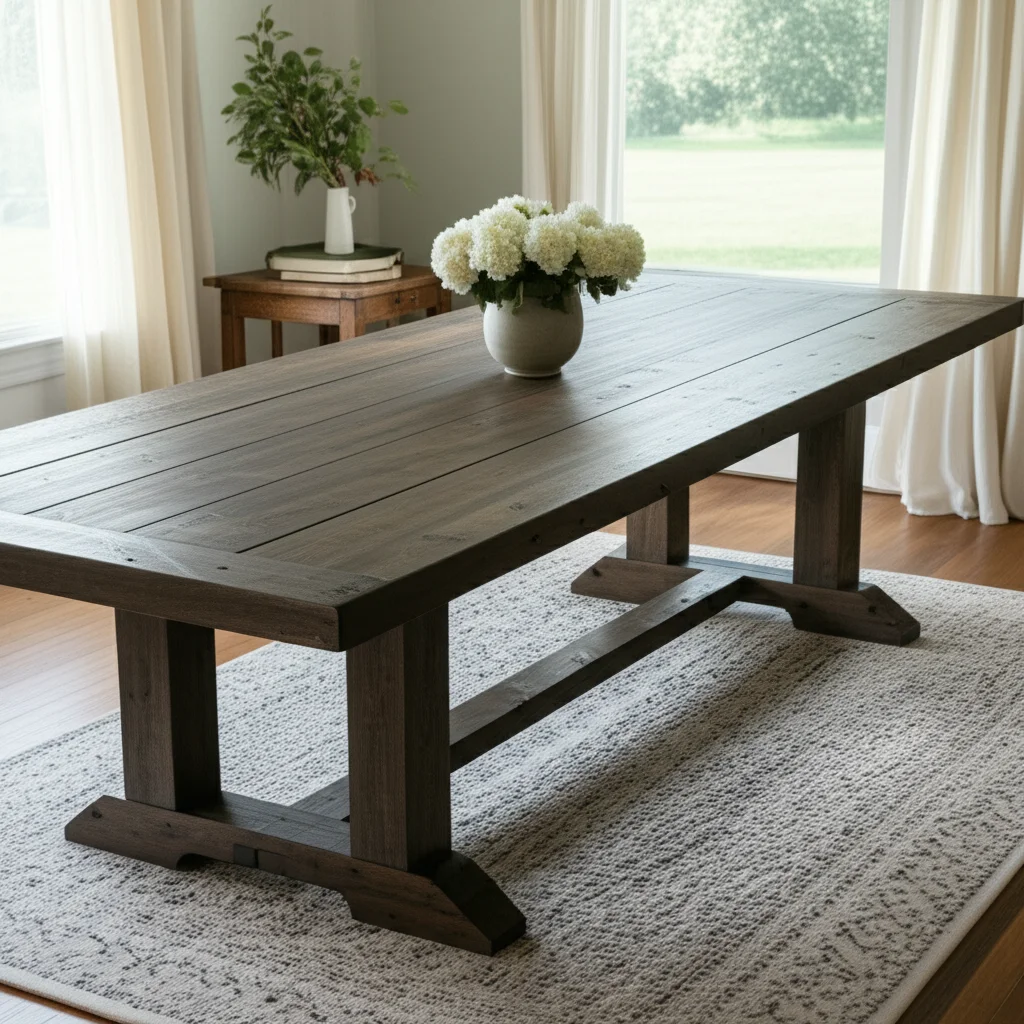
- Trestle Base: Features two A-frames or pedestals connected by a stretcher. This style eliminates corner legs, allowing more seating.
The apron is the frame that connects the legs and supports the tabletop. Its depth impacts the clearance for chairs. Typically, aprons are 3-5 inches deep. Ensure there is enough space under the apron for a person’s lap when seated.
Think about the tabletop construction. Will it be a single slab or multiple glued-up planks? For most DIY farmhouse tables, glued-up planks are the practical choice. This method uses standard lumber and is achievable with common tools. Consider the board width for the tabletop. Wider boards often create a more traditional farmhouse look.
Building the Tabletop: Steps and Techniques
The tabletop is the most visible part of your farmhouse table. Its construction demands accuracy and care. A strong, flat tabletop ensures the table is functional and beautiful. This process involves milling lumber, gluing planks together, and careful sanding.
Preparing Your Lumber
Start with your chosen wood planks. If you bought rough lumber, you need to mill it flat and square. Use a jointer to create one flat face and one square edge. Then use a planer to achieve the desired thickness. Aim for a consistent thickness across all boards for a seamless top. If you do not have these tools, buy pre-milled, flat lumber.
Once planks are milled, cut them to the correct length for your tabletop. Add a few extra inches to the length for trimming later. This allows you to cut perfectly square ends after gluing. Arrange the planks on a flat surface to find the best layout. Look at the grain patterns and colors. Try to create a visually appealing flow. Alternate the end grain direction of the planks. This helps prevent warping later on.
Gluing Up the Tabletop
This is a critical step for strength and stability.
- Apply Glue: Spread a thin, even layer of waterproof wood glue along the edges of the planks. Do not use too much, as it can cause a messy squeeze-out. A glue roller or brush helps.
- Clamp Together: Place the glued edges together. Use plenty of clamps along the length of the tabletop. Alternate clamps above and below the planks if possible. This helps keep the top flat. Apply firm pressure to squeeze out excess glue. You want a thin, consistent glue line.
- Check for Flatness: Use a straightedge across the top. Adjust clamps to ensure the surface remains flat during drying. Some woodworkers use cauls (straight pieces of wood clamped across the top) to help maintain flatness.
- Curing Time: Let the glue dry completely. Follow the glue manufacturer’s instructions. This usually takes 24 hours. Remove clamps only after full cure.
Sanding the Tabletop
After the glue dries, scrape off any dried glue squeeze-out. Then, begin sanding the tabletop. Start with a coarse grit sandpaper (80 or 100 grit). This removes any milling marks or slight height differences between boards. Gradually move to finer grits (120, 150, 180, 220). Each progressive grit removes scratches from the previous one. Sand until the surface is smooth to the touch. This prepares the wood for finishing. Proper sanding is key to a beautiful finish.
Constructing the Table Base and Legs
The base provides stability and support for your heavy tabletop. A well-built base ensures your farmhouse table stands strong for years. This section details how to create the frame and attach the legs. Accuracy in cuts and joints is crucial here.
Cutting and Assembling Aprons
The apron is the frame directly under the tabletop. It connects the legs and provides rigidity. Cut four pieces for the apron: two long side aprons and two shorter end aprons. The length of the aprons depends on your desired table length and width, accounting for the leg thickness. For example, if your table is 72 inches long and legs are 3.5 inches square, your side aprons will be 72 inches minus (2 * 3.5 inches), or 65 inches.
Join the apron pieces together using strong woodworking joints. The most common joint for aprons is the mortise and tenon joint. This joint is very strong and provides excellent stability. If mortise and tenon joints are too advanced, you can use:
- Pocket Hole Joinery: Use a pocket hole jig to drill angled holes. Drive screws through these holes to join the pieces. This method is fast and strong.
- Dowel Joints: Use wooden dowels inserted into drilled holes to align and reinforce butt joints.
- Reinforced Butt Joints: Simply glue and screw the apron pieces together, then reinforce with corner blocks.
Assemble the apron frame on a flat surface. Use wood glue at each joint. Clamp the frame square while the glue dries. Ensure the frame forms a perfect rectangle.
Preparing and Attaching Legs
Cut your table legs to the desired height (typically 29.25 inches if using a 0.75-inch thick tabletop to reach 30 inches total). Ensure all four legs are exactly the same length. Uneven legs will make the table wobble. Sand the legs to a smooth finish before attaching them.
Attach the legs to the assembled apron frame.
- Mortise and Tenon: If you used mortise and tenon for the aprons, the legs will also have tenons that fit into mortises on the apron. This creates a very strong joint.
- Pocket Holes: Drill pocket holes into the apron where it meets the legs. Screw the apron into the legs.
- Lag Bolts/Hardware: You can use specialized table leg brackets or simple lag bolts to secure the legs. Drill pilot holes to prevent splitting.
Ensure the legs are perfectly square to the apron. Use a square to check angles from all sides. Clamp the legs firmly while glue dries. Allow the glue to cure fully before moving the base. A sturdy base makes all the difference. For other table building projects, like learning how to build a side table or build an outdoor dining table, similar leg attachment methods apply.
Assembly and Finishing Your Farmhouse Table
With the tabletop and base built, it is time to bring them together. The final assembly needs care to ensure a seamless fit. Then, applying the right finish protects the wood and enhances its beauty. This stage transforms your project into a lasting piece of furniture.
Attaching the Tabletop to the Base
The tabletop needs to be securely attached to the base. Wood expands and contracts with changes in humidity. You must use a method that allows for this natural movement. Do not simply screw the top directly to the apron. This can lead to cracking or warping of the tabletop.
Here are common methods for attaching the tabletop:
- Tabletop Fasteners (Z-clips or Figure-8 Fasteners): These metal clips fit into slots routed into the apron. One end screws into the tabletop, allowing the top to expand and contract. This is a very common and effective method.
- Pocket Hole Screws with Elongated Holes: If using pocket holes, drill one hole normally and the other slightly elongated. This allows for movement.
- Wooden Blocks with Screws: Screw small wooden blocks to the inside of the apron. Drill an oversized pilot hole through the block. Then, drive a screw through the block into the tabletop. This allows the screw to slide slightly.
Place the tabletop upside down on a clean, padded surface. Position the base centered on the tabletop. Mark the attachment points. Attach the base using your chosen method. Ensure the base is perfectly aligned before tightening all fasteners.
Final Sanding and Preparation
Even after assembly, one final round of sanding is beneficial. Lightly sand the entire table, focusing on any glue spots or rough areas. Use a finer grit (e.g., 220 grit) to achieve a smooth surface. This opens the wood grain for better stain absorption. After sanding, use a shop vacuum or tack cloth to remove all dust. Dust can ruin a perfect finish.
Applying Finish
The finish protects the wood from moisture, spills, and wear. It also enhances the wood’s natural beauty.
- Stain (Optional): If you want to change the wood color, apply a wood stain. Test the stain on a scrap piece of the same wood first. Apply stain evenly with a brush or cloth. Wipe off excess after a few minutes, following product instructions. Let the stain dry completely.
- Sealant/Topcoat: This is the protective layer. Common choices include:
- Polyurethane: Very durable and water-resistant. Available in oil-based (more amber tone, harder) or water-based (clearer, faster drying). Apply multiple thin coats. Sand lightly between coats with fine-grit sandpaper (e.g., 320-400 grit) to ensure good adhesion.
- Varnish: Similar to polyurethane, often used for outdoor furniture.
- Oil Finish (e.g., Tung Oil, Linseed Oil): Penetrates the wood, providing a natural look. Less protective than polyurethane but easy to repair. Requires more frequent reapplication.
- Wax: Offers a soft sheen and some protection. Best over an oil finish or for very light use.
Apply the finish in a dust-free area. Follow the manufacturer’s instructions for application, drying times, and recoating. Multiple thin coats are better than one thick coat. A proper finish makes your table both beautiful and durable.
Care and Maintenance for Your Farmhouse Table
Your newly built farmhouse table is a significant investment of time and effort. Proper care and maintenance will ensure it lasts for generations. A well-maintained table continues to look beautiful and function perfectly. Protecting your table from daily wear and tear is simple but important.
Daily Cleaning
For everyday cleaning, a damp cloth is usually enough. Wipe down the table after each meal to remove crumbs and spills. Avoid harsh chemical cleaners, especially those with ammonia or silicone. These can damage the finish over time. For tougher spots, use a mild dish soap solution. Always dry the table immediately after cleaning. Do not let water sit on the surface, as it can cause water rings or damage the finish.
If you used a wax finish, you might need to reapply it periodically. For polyurethane or varnish finishes, gentle cleaning is sufficient. Regularly cleaning your wood furniture ensures its longevity. You can learn more about how to clean a wood table and how to generally clean dining table surfaces.
Protecting the Surface
Prevention is better than cure when it comes to table damage.
- Coasters and Trivets: Always use coasters under drinks to prevent water rings. Use trivets or hot pads under hot dishes to protect against heat damage.
- Placemats: Placemats protect the surface from scratches and spills during meals.
- Avoid Direct Sunlight: Prolonged exposure to direct sunlight can fade wood and finishes. Consider positioning your table away from direct sun or using curtains.
- Humidity Control: Wood expands and contracts with changes in humidity. Keep your home’s humidity level stable, especially in extreme climates. A humidifier or dehumidifier can help. This prevents cracks or warping.
- Felt Pads: Place felt pads under any decorative items on the table. This prevents scratches when moving them.
Dealing with Spills and Damage
Accidents happen. Act quickly when spills occur. Blot liquids immediately with a soft cloth. Do not rub, as this can spread the stain. For stubborn marks, research specific solutions based on your table’s finish. For example, for water rings on an oil finish, you might gently rub with a soft cloth and a little mineral oil.
Minor scratches can often be repaired. For shallow scratches, rubbing with a walnut or using a furniture repair crayon might work. Deeper scratches might require sanding and reapplication of finish to the affected area. Always test repair methods on an inconspicuous spot first. For specific wood types, like oak, special cleaning considerations may apply. Learn how to clean oak table surfaces.
Regular maintenance and quick attention to spills keep your farmhouse table looking its best. This ensures it remains a cherished part of your home for many years.
Advanced Techniques and Personalization
Building a basic farmhouse table is a great start. Once you master the fundamentals, you can explore advanced techniques. These methods add character, functionality, and a professional touch to your table. Personalizing your table makes it truly unique. It transforms a piece of furniture into a work of art.
Incorporating Unique Features
Consider adding features that enhance the table’s utility or design.
- Breadboard Ends: These are solid pieces of wood attached perpendicular to the main tabletop planks at each end. They help prevent warping and provide a finished look. They must be attached in a way that allows for wood movement. This usually involves mortise and tenon joints with elongated tenons or specialized fasteners.
- Drawer or Storage: Integrating a shallow drawer into the apron can be very useful. This provides a place for placemats, napkins, or small items. This requires careful planning for drawer slides and box construction.
- Distressing: To enhance the rustic look, you can distress the wood. This involves lightly hammering, scraping, or sanding specific areas to simulate age and wear. Do this before applying the finish.
- Apron Details: Instead of a plain apron, you can add a simple cove or bead detail with a router. This adds a subtle decorative touch.
- Hidden Leaf Storage: For tables with leaves, you might design a system to store the leaves discreetly within the table structure itself.
These additions require more planning and skill. However, they significantly elevate the table’s design and function.
Custom Finishes and Patinas
Beyond standard stains and sealants, explore different finishing options to achieve a specific aesthetic.
- Milk Paint or Chalk Paint: These paints provide a matte, often distressed look. You can paint the base a contrasting color, leaving the top stained. This creates a two-tone farmhouse style.
- Liming Wax: This product creates a pale, whitewashed effect, often used to highlight wood grain.
- Bleaching: For a very light, natural wood tone, you can bleach the wood before staining or sealing. This neutralizes natural wood colors.
- Rubio Monocoat or Osmo Polyx-Oil: These are hardwax oils that offer a durable, natural-looking finish. They penetrate the wood and are often easier to repair than polyurethane.
- Vinegar and Steel Wool Solution: This homemade concoction creates a gray, weathered look when applied to certain woods like oak or pine. Always test on scrap wood first.
Experiment with different techniques on scrap wood. This helps you understand how the wood reacts to various finishes. The right finish can completely transform the table’s appearance. It can make it look ancient, modern, or somewhere in between.
Personalizing your farmhouse table allows your creativity to shine. You create a piece that tells a story. This story is unique to your home and your efforts.
Safety First: Protecting Yourself While Building
Woodworking is a rewarding hobby, but it carries risks. Protecting yourself must be your top priority. Accidents can happen quickly. Understanding and implementing safety measures prevents injury. Always think before you cut or drill.
Personal Protective Equipment (PPE)
Never start a woodworking project without wearing appropriate PPE.
- Safety Glasses: Wood chips, dust, and splinters can cause serious eye injuries. Always wear safety glasses or a face shield when operating power tools.
- Hearing Protection: Saws, planers, and routers create loud noise. Prolonged exposure can lead to permanent hearing damage. Use earplugs or earmuffs.
- Dust Mask/Respirator: Fine wood dust can cause respiratory problems. Wear a dust mask or respirator to protect your lungs, especially when sanding or cutting dusty woods.
- Gloves: Consider wearing gloves to protect hands from splinters or sharp edges when handling rough lumber. Remove them when operating rotating machinery.
- Appropriate Clothing: Avoid loose clothing that can get caught in machinery. Tie back long hair. Do not wear dangling jewelry.
Tool Safety
Learn how to use each tool correctly before you operate it. Read the manufacturer’s manual.
- Miter Saw/Table Saw:
- Keep hands clear of the blade path.
- Use push sticks or push blocks when cutting small pieces or when your hands are close to the blade.
- Ensure guards are in place and functioning.
- Never force a cut.
- Stand to the side of the blade when making rip cuts on a table saw. This avoids kickback.
- Drill: Secure your workpiece before drilling. Use clamps.
- Clamps: Ensure clamps are tight and stable before gluing or assembly.
- Sharp Blades: Keep your saw blades and router bits sharp. Dull tools require more force. This increases the risk of kickback or slips.
- Unplug Tools: Always unplug tools when changing blades, bits, or making adjustments. This prevents accidental starts.
- Clean Workspace: Keep your workspace clean and free of clutter. This reduces tripping hazards and allows for clear movement.
- Proper Lighting: Work in a well-lit area. This improves visibility and reduces eye strain.
Fire Safety
Wood dust is flammable. Keep your shop clean. Do not let dust accumulate. Have a fire extinguisher readily available. Dispose of oily rags properly. Oily rags can spontaneously combust. Store them in a metal container filled with water or spread them out to dry before disposal.
By following these safety guidelines, you can enjoy building your farmhouse table without risk of injury. A safe woodworker is a happy woodworker.
Frequently Asked Questions (FAQ)
What type of wood is best for a farmhouse table?
Pine or Douglas fir are popular choices due to their affordability and ease of workability. They take stain well for a rustic look. For greater durability
- farmhouse table
- DIY furniture
- woodworking project
- rustic dining
- custom table
- home decor
- build table
- wooden table

Todd Martin
Senior Writer
With over 15 years of experience in home renovation and design, I started HEG to share what I’ve learned with homeowners who want to create spaces that are both beautiful and functional. I’ve always believed in a hands-on approach, and over the years, I’ve picked up practical solutions that actually work. Through HEG, I aim to make home improvement more approachable, sharing real tips that help you create a home you truly love.