· Todd Martin · DIY · 19 min read
How To Build An Outdoor Dining Table

Building Your Own Outdoor Dining Table: A Comprehensive Guide
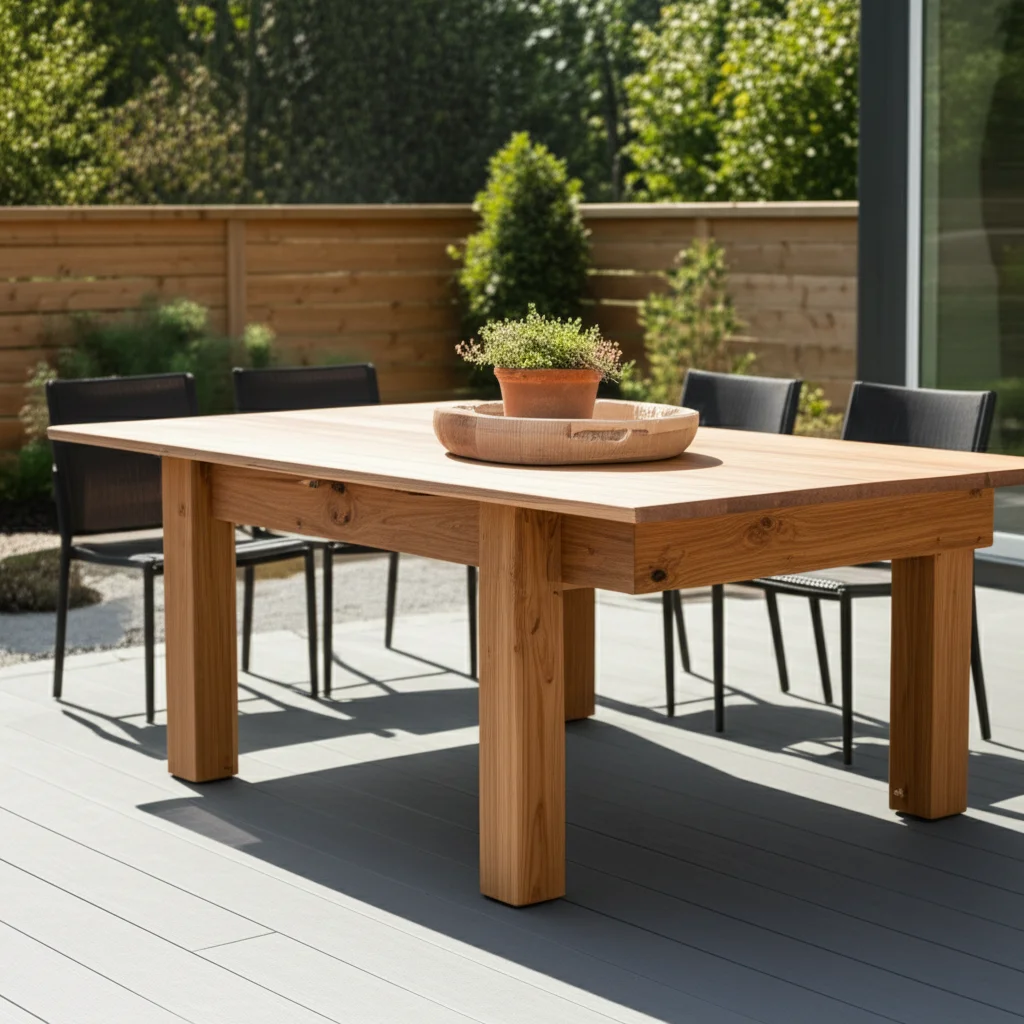
Imagine beautiful sunny days and warm evenings spent with family and friends. Delicious food and laughter fill your backyard. All of this can happen around an outdoor dining table that you built yourself. Building an outdoor dining table is a rewarding project. It adds a personal touch to your outdoor space. You create a durable piece of furniture perfect for entertaining. This guide will walk you through every step. We cover planning, material selection, construction, and finishing. You will soon enjoy meals at your custom-made outdoor dining table.
Takeaway:
- Design a durable outdoor dining table specific to your needs.
- Choose weather-resistant materials for lasting quality.
- Follow simple construction steps to build your custom piece.
- Apply proper finishes to protect your table from outdoor elements.
- Maintain your table for years of outdoor enjoyment and use.
Building an outdoor dining table involves selecting weather-resistant wood, precise cutting, careful assembly of the frame and tabletop, and applying a suitable protective finish. This DIY project provides a custom, durable, and functional centerpiece for your outdoor living area, enhancing your home’s entertainment space.
Planning Your Outdoor Dining Table Project
Careful planning is the first step to building any successful outdoor dining table. This stage ensures your table meets your needs and fits your space. It helps you avoid mistakes during construction. We will discuss design ideas, dimensions, and where your table will sit.
Design and Dimensions
First, think about the shape and size of your outdoor dining table. Do you prefer a rectangular, square, or round design? Consider how many people you typically host. A standard dining table allows about 24 inches of width per person. Measure your available outdoor space carefully. Ensure there is enough room for chairs and walking around the table. Drawing a simple sketch helps visualize the final product. You can also look at existing outdoor dining table designs for inspiration.
Next, decide on the table’s height. Most dining tables are about 29 to 30 inches tall. This height works well with standard outdoor dining chairs. Consider adding features like an umbrella hole if your outdoor space lacks natural shade. Think about the style you want. Do you prefer a rustic look, a modern design, or something in between? Your design choices impact material selection and construction complexity. A simple, sturdy design is often best for your first outdoor dining table project. For more details on spacing, you might find tips on how to measure rug for dining table helpful, as rug size often dictates dining area footprint.
Choosing the Right Location
The table’s location influences its design and material needs. Will it sit on a patio, deck, or in the yard? A flat, stable surface is essential for safety and comfort. Consider sun exposure throughout the day. Direct, intense sunlight might require more UV protection for your table finish. Areas with heavy rain or strong winds also demand extra durability.
Think about proximity to your house or outdoor kitchen. Easy access makes serving food and drinks simple. Ensure there is enough clearance around the table for chairs to be pulled out. Also, consider any existing outdoor decor. Your new outdoor dining table should complement its surroundings. A well-chosen spot ensures your table becomes a central part of your outdoor living space.
Selecting Durable Materials for Outdoor Use
Choosing the right materials is crucial for building an outdoor dining table that lasts. Outdoor furniture faces harsh elements like sun, rain, and temperature changes. Selecting weather-resistant materials prevents warping, rotting, and damage. This section covers wood types and fasteners.
Wood Choices
Wood is a popular choice for outdoor dining tables due to its natural beauty and workability. However, not all wood types are suitable for outdoor exposure.
- Cedar: This wood is naturally resistant to rot, decay, and insect attacks. It has a beautiful reddish-brown color that weathers to a soft gray if left unfinished. Cedar is lightweight and easy to work with. It is a good choice for many DIY outdoor projects.
- Redwood: Similar to cedar, redwood offers excellent natural resistance to decay and insects. It is also very stable, meaning it resists warping and cracking. Redwood has a deep, rich color. It is a premium choice for outdoor furniture.
- Teak: Teak is often considered the gold standard for outdoor furniture. It is incredibly durable, highly resistant to moisture, decay, and insects. Teak’s high oil content makes it naturally waterproof. It weathers to an attractive silvery-gray patina over time. Teak is more expensive but offers exceptional longevity.
- Pressure-Treated Pine: This wood is treated with chemicals to resist rot and insects. It is a cost-effective option for outdoor use. Pressure-treated pine is readily available. However, it can be prone to warping or cracking as it dries. You should allow it to dry thoroughly before finishing.
When choosing wood, consider its sustainability and local availability. Always inspect boards for straightness and defects before buying. For specific guidance on protecting different wood types, you might find information on how to protect acacia wood dining table relevant, as many principles apply broadly. Also, learning how to seal an outdoor wood table is important for all wood types.
Fasteners and Adhesives
The fasteners you use are as important as the wood itself. Standard steel screws or nails will rust when exposed to moisture. Rust stains the wood and weakens the joints over time.
- Stainless Steel Screws: These are the best choice for outdoor furniture. Stainless steel resists rust and corrosion. They provide strong, lasting connections. Look for screws specifically designed for outdoor use.
- Galvanized Screws/Nails: Galvanized fasteners have a zinc coating that offers some rust resistance. They are a more affordable alternative to stainless steel but may not last as long in very wet conditions. Hot-dipped galvanized is better than electro-galvanized.
- Weatherproof Wood Glue: Use a strong, waterproof wood glue in addition to screws or bolts. This significantly strengthens the joints and helps prevent movement. Look for glues labeled “exterior” or “waterproof.” They are designed to withstand moisture and temperature changes.
Ensure all hardware, such as hinges or braces, is also rust-resistant. Choosing the right fasteners and adhesives ensures your outdoor dining table remains sturdy for many years.
Essential Tools and Safety First
Building an outdoor dining table requires a few essential tools. Having the right tools makes the job easier and more precise. More importantly, always prioritize safety when working with power tools. This section outlines the tools you will need and critical safety practices.
Power Tools and Hand Tools
You will need a combination of power and hand tools for this project.
- Miter Saw or Circular Saw: These saws are crucial for making accurate cuts. A miter saw is excellent for precise crosscuts and angles. A circular saw works well for cutting longer boards and breaking down larger pieces of lumber.
- Drill/Driver: An electric drill or impact driver is essential for drilling pilot holes and driving screws. Choose a cordless model for convenience. Ensure you have a variety of drill bits and driver bits.
- Sander (Orbital or Belt): Sanding is key for a smooth finish and proper adhesion of sealants. An orbital sander is versatile for general sanding. A belt sander can remove more material quickly for initial shaping.
- Tape Measure: Accuracy is vital. A good quality tape measure ensures all your cuts are precise.
- Speed Square or Combination Square: These tools help you mark straight lines and check for square corners.
- Clamps: Various sizes of clamps will hold pieces securely during assembly and gluing. Bar clamps or pipe clamps are useful for larger assemblies.
- Wood Chisels and Mallet: You might need these for minor adjustments or cleaning out joints.
- Carpenter’s Pencil: For marking cut lines and measurements clearly on wood.
Having these tools ready before you begin saves time and frustration. A well-organized workspace also contributes to efficiency.
Personal Protective Equipment
Safety should always be your top concern when undertaking any DIY project, especially one involving power tools.
- Safety Glasses or Goggles: Always wear eye protection. Sawdust, wood chips, and flying debris can cause serious eye injuries. This is non-negotiable for any cutting or drilling.
- Hearing Protection: Power tools like saws and sanders produce loud noise. Extended exposure can damage your hearing. Use earplugs or earmuffs to protect your ears.
- Dust Mask or Respirator: Wood dust can irritate your respiratory system. Especially when sanding, wear a dust mask to avoid inhaling fine particles. If working with treated lumber, a more protective respirator is advisable.
- Work Gloves: Gloves protect your hands from splinters, cuts, and abrasions. Choose gloves that allow for good dexterity.
- Appropriate Clothing: Wear clothing that fits well and does not have loose parts that could get caught in machinery. Avoid dangling drawstrings or jewelry.
- Clear Workspace: Keep your work area tidy and free of clutter. Ensure good lighting. Never work when tired or under the influence of substances.
Following these safety guidelines protects you from injury. It ensures your outdoor dining table project is a safe and enjoyable experience.
Step-by-Step Construction: Building the Frame
Building the frame is the foundational step for your outdoor dining table. A sturdy frame ensures your table is stable and lasts for years. This section guides you through cutting your lumber and assembling the table’s legs and aprons. Precision at this stage is key for a successful outcome.
Cutting the Lumber
Before you begin cutting, double-check all your measurements against your design plan. Mark your cut lines clearly on each piece of lumber. Use a speed square to ensure all marks are perfectly straight and square. When cutting with a miter saw or circular saw, take your time. Ensure the blade is sharp for clean cuts. Support longer boards properly to prevent them from shifting.
Cut the pieces for the table legs first. These must be identical in length for a level table. Next, cut the apron pieces. These form the rectangular or square frame connecting the legs. You will typically need two long aprons and two shorter aprons. Label each piece as you cut it. This helps keep everything organized during assembly. Small differences in length can cause wobbles, so measure twice and cut once. Always cut slowly and carefully. This ensures accuracy and safety.
Assembling the Legs and Aprons
With all pieces cut, you can start assembling the frame of your outdoor dining table. We will use a combination of waterproof wood glue and stainless steel screws for strong, lasting joints.
- Prepare the Joints: Apply a thin, even layer of waterproof wood glue to the ends of the apron pieces where they will connect to the legs. This glue adds significant strength.
- Attach Aprons to Legs: Position the first apron piece between two legs. Ensure the top edges are flush. Use clamps to hold the pieces firmly in place. Drill pilot holes through the legs into the apron ends. Pilot holes prevent the wood from splitting when you drive screws.
- Drive Screws: Drive two to three stainless steel screws through each joint. Make sure they are long enough to penetrate well into the apron piece. Repeat this process for all four apron pieces to create a rectangular frame.
- Check for Squareness: After assembling the basic frame, use your speed square or a large carpenter’s square to check that all corners are truly 90 degrees. If the frame is not square, gently adjust it before the glue dries completely. You can also measure diagonal distances across the frame; they should be equal.
- Add Support: Depending on your design and table size, you might need to add stretcher bars between the legs for extra stability. These are typically placed lower down, parallel to the aprons. Glue and screw these in place too.
Allow the glue to cure completely before moving the frame. This gives the joints maximum strength. A strong frame is the backbone of your outdoor dining table, ensuring it withstands years of use and weather. For building concepts, you might explore articles like how to build a dining room table with leaves or how to build a live edge table for general table construction principles, even if the specific application differs.
Crafting the Tabletop and Final Assembly
The tabletop is the most visible part of your outdoor dining table. Crafting it well enhances both its appearance and functionality. This section covers preparing and attaching the tabletop boards. It also details the important step of sanding for a smooth finish. A well-made tabletop defines the look of your entire project.
Attaching the Tabletop Boards
Once your table frame is sturdy and square, you can begin on the tabletop.
- Select Boards: Choose your tabletop boards. Look for straight, flat pieces with minimal knots or defects. Lay them out on the assembled frame to visualize the top. Arrange them in a way that looks best, considering grain patterns and colors.
- Cut to Length: Cut the tabletop boards to the exact desired length. This length should match or slightly overhang your table frame. A slight overhang often looks more finished and provides a comfortable edge.
- Prepare for Assembly: If you are joining multiple boards to form the tabletop, you can use biscuits, dowels, or pocket holes for alignment and strength. Apply waterproof wood glue along the edges of the boards before clamping them together. Use pipe clamps or large bar clamps to hold them tightly while the glue dries. Wipe away any excess glue.
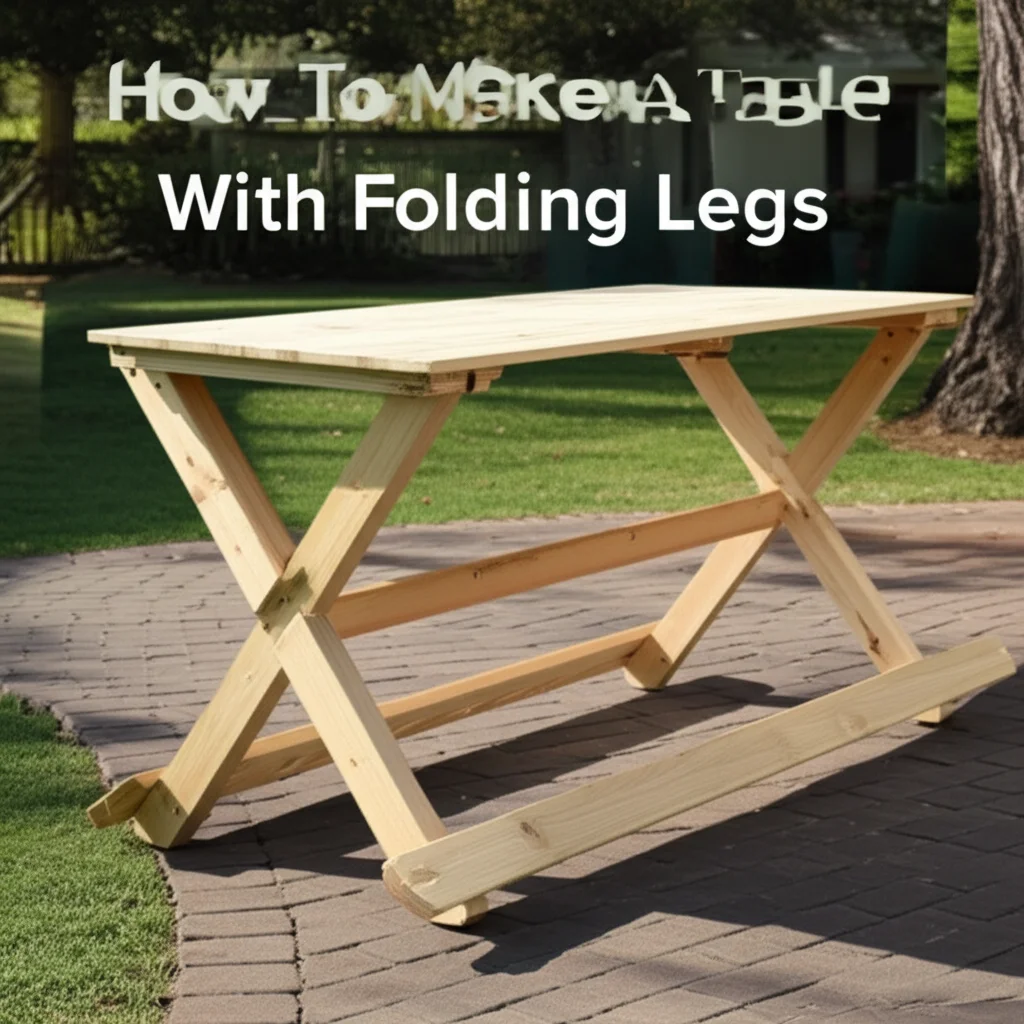
- Attach to Frame: Once the tabletop is a single, solid piece (or individual pieces, if your design dictates), attach it to the frame. Position the tabletop precisely on top of the apron frame. Ensure even overhangs on all sides if desired. You can attach the top using screws driven up through the apron from underneath into the tabletop. This hides the fasteners. Alternatively, you can use Z-clips or figure-eight fasteners, which allow for natural wood movement due to humidity changes. This method prevents warping.
Ensure the tabletop is securely fastened. It needs to withstand pressure from dining and daily use. Secure attachment makes the table safe and stable. For specific ideas on creating tabletops, see how to make an outdoor table top.
Sanding and Smoothing
Sanding is a critical step for a smooth, professional-looking outdoor dining table. It prepares the wood for finishing. Proper sanding ensures your chosen finish adheres well and looks great.
- Start with Coarse Grit: Begin sanding with a coarser grit sandpaper, like 80-grit or 100-grit. This removes any mill marks, glue squeeze-out, or minor imperfections. Sand with the grain of the wood. Using an orbital sander makes this process faster and more even.
- Progress to Finer Grits: Gradually move to finer grits. Go from 120-grit, then 150-grit, and finally 180-grit or 220-grit. Each successive grit removes the scratches left by the previous, coarser grit. The final grit creates a smooth surface. Do not skip grits, as this leaves visible scratches.
- Edge and Corner Sanding: Pay special attention to all edges and corners. Lightly round them over slightly for a softer feel and to prevent splinters. This also makes the table more comfortable to use.
- Dust Removal: After each sanding stage, use a vacuum cleaner and a tack cloth to remove all dust. Dust left on the surface can interfere with the finish. It can create a bumpy or uneven appearance.
Thorough sanding gives your outdoor dining table a professional look. It also makes the table pleasant to touch and use. Take your time during this step. It greatly impacts the final result.
Protecting Your Outdoor Dining Table with Finish
Protecting your outdoor dining table with the right finish is essential for its longevity. The finish shields the wood from moisture, UV rays, and general wear. Without proper protection, your beautiful outdoor table will quickly degrade. This section discusses various finishing options and how to waterproof your table for lasting durability.
Stains and Sealants
Choosing the correct stain and sealant is vital for an outdoor dining table. These products enhance the wood’s natural beauty while providing a protective barrier.
- Exterior Stains: Stains add color to the wood and help protect it from UV damage. They come in transparent, semi-transparent, and solid opacities. Transparent stains show the most wood grain. Solid stains offer the most UV protection and color coverage. Choose a stain specifically labeled for outdoor use. Apply stain evenly with a brush or rag, wiping off excess according to product instructions.
- Exterior Sealants/Topcoats: After staining (or directly on natural wood), apply a clear sealant. These sealants create a durable, protective layer.
- Spar Urethane: This is a popular choice for outdoor wood. It is flexible, allowing for wood expansion and contraction. It offers excellent water and UV resistance. Apply multiple thin coats, allowing proper drying time between each.
- Exterior Oil Finish: Oil finishes penetrate the wood, nourishing it from within. They provide a more natural look and feel. They are easy to reapply as needed. They require more frequent maintenance but are less prone to cracking or peeling than film-forming finishes.
- Marine Varnish: If you want the absolute best protection, consider marine varnish. It is designed for boats, offering superior water and UV resistance. It is very durable but can be more challenging to apply.
Always read the product instructions for application, drying times, and recoat intervals. Proper application ensures maximum protection. Learning how to seal an outdoor wood table will directly apply here.
Waterproofing for Longevity
Beyond stains and sealants, additional steps can help waterproof your outdoor dining table. This significantly extends its lifespan, especially in rainy or humid climates.
- Water-Repellent Preservatives: Before staining or sealing, some wood types can benefit from a water-repellent wood preservative. These products penetrate the wood, offering an extra layer of moisture protection. They are especially useful for less naturally resistant woods like pressure-treated pine.
- Edge Sealing: The end grain of wood absorbs moisture much more readily than the long grain. Apply extra coats of your chosen sealant to the ends of the legs and tabletop boards. Consider using a specific end-grain sealant for superior protection.
- Caulking Joints: For critical joints or gaps where water might pool, you can use an exterior-grade, paintable caulk. This creates a watertight seal. Ensure the caulk is compatible with your chosen wood finish.
- Regular Reapplication: No finish lasts forever, especially outdoors. Inspect your outdoor dining table annually for signs of wear, such as fading, cracking, or water absorption. Reapply a fresh coat of sealant or oil as needed. This proactive approach prevents major damage and maintains the table’s appearance.
Taking these steps to waterproof your outdoor dining table ensures it remains a beautiful and functional part of your outdoor living space for many years. Proper protection against water is critical. For broader understanding, refer to how to waterproof a table for outdoor use.
Maintenance and Care for Your Custom Outdoor Table
Building your outdoor dining table is a significant achievement. Proper maintenance ensures it remains beautiful and functional for many years. Outdoor elements can be harsh. Regular cleaning and protective measures extend your table’s life. This section provides tips for ongoing care and preparing your table for different seasons.
Regular Cleaning Routines
Keeping your outdoor dining table clean is simple. Regular cleaning prevents dirt and grime from building up.
- Wipe Down Daily: After each use, quickly wipe the tabletop with a damp cloth. This removes food spills, dust, and leaves. Prompt cleaning prevents stains from setting.
- Weekly Wash: For a more thorough clean, mix a small amount of mild dish soap with water. Use a soft brush or sponge to gently scrub the table surface. Rinse thoroughly with clean water. Ensure no soap residue remains, as it can attract more dirt. Avoid harsh chemicals or abrasive cleaners. These can damage the wood finish.
- Address Mold and Mildew: In humid environments, mold or mildew can appear. Prepare a solution of one part white vinegar to one part water. Spray it on affected areas. Let it sit for 15-20 minutes, then scrub gently and rinse. For stubborn spots, a very diluted bleach solution (1 part bleach to 10 parts water) can be used, but always test on an inconspicuous area first. Rinse thoroughly after using bleach.
- Remove Stains Promptly: If you notice a stain, address it immediately. Food stains, bird droppings, or sap can etch into the finish if left too long. Use a gentle cleaner suitable for outdoor wood.
Regular cleaning not only keeps your table looking good but also prevents damage. For general tips on keeping outdoor furniture clean, consider resources like how to clean outdoor wood furniture or how to clean outdoor furniture.
Winterizing Your Table
Preparing your outdoor dining table for colder months or extended periods of non-use is crucial. This protects it from harsh winter weather.
- Thorough Cleaning: Before winter, give your table a deep clean. Remove all dirt, grime, and any mold or mildew. A clean table is less likely to harbor moisture and develop problems over winter.
- Inspect and Re-seal: Inspect the finish for any worn spots or damage. If necessary, reapply a fresh coat of sealant or oil. This ensures the table has maximum protection against moisture and freezing temperatures. Pay extra attention to end grains and joints.
- Cover the Table: A breathable, waterproof outdoor furniture cover is an excellent investment. It protects the table from snow, ice, and prolonged dampness. Ensure the cover fits well and allows for some air circulation to prevent condensation. Avoid plastic tarps that trap moisture.
- Store Indoors (If Possible): If you have space, storing your outdoor dining table in a garage, shed, or basement during winter is the best option. This completely removes it from the elements. Ensure the storage area is dry and has good airflow.
- Elevate from Ground: If storing outdoors, lift the table slightly off the ground using blocks or furniture risers. This prevents moisture from wicking up into the legs from damp ground.
Proper winterization ensures your outdoor dining table survives the cold months. It will be ready to use when spring arrives. These steps safeguard your investment and effort.
FAQ Section
Q: How long does it typically take to build an outdoor dining table? A: The time frame for building an outdoor dining table varies. It depends on your skill level and the complexity of the design. A simple design might take a weekend or two of focused work. More complex tables or those requiring advanced joinery could take longer, potentially several weeks. This estimate includes cutting, assembly, and finishing time.
Q: What is the best wood for an outdoor dining table? A: The best wood for an outdoor dining table is typically teak due to its natural durability and resistance to rot, insects, and moisture. Other excellent choices include redwood and cedar, which also offer good natural resistance. Pressure-treated pine is a more budget-friendly option, but it requires thorough drying and proper sealing.
Q: Can I use an indoor dining table outdoors? A: Using an indoor dining table outdoors is not recommended unless specifically treated for outdoor conditions. Indoor tables lack the necessary weather-resistant finishes and wood types. They will quickly warp, rot, or crack when exposed to moisture, sun, and temperature fluctuations. It is
- outdoor dining table
- DIY furniture
- woodworking projects
- patio table


