· Todd Martin · DIY · 12 min read
How To Make A Table With Folding Legs

Build Your Own Table with Folding Legs: A DIY Guide
Making your own table with folding legs offers great benefits. This project gives you a custom, portable, and space-saving piece of furniture. You can use it for various activities, from crafts to extra dining space. This guide provides clear instructions to help you create your own sturdy folding table. We cover everything from choosing materials to the final assembly.
Takeaway
- Customization: Build a table that perfectly fits your needs and space.
- Portability: Easily move and store your table for different uses.
- Cost-Effective: Save money compared to buying a pre-made folding table.
- Skill Building: Learn new woodworking techniques through this project.
Making a table with folding legs involves selecting a sturdy tabletop, choosing appropriate folding leg hardware, and securely attaching the legs. You will need basic woodworking tools and materials. This project creates a versatile, space-saving furniture piece for any home or activity.
Why Make a Table with Folding Legs? Benefits and Uses
Making a table with folding legs offers many advantages for any home. You gain extreme versatility when furniture can adapt to your space. This type of table serves many purposes efficiently. I find it perfect for small living areas where every square foot counts.
A folding table saves significant space. You can easily store it away when not in use. This keeps your room clear and open. Think about sudden guests or a large family gathering. This table can quickly provide extra dining or serving space. When the event ends, fold it up and store it in a closet or under a bed.
The portability of a folding table is another key benefit. You can move it between rooms with ease. It is also great for outdoor activities like picnics or tailgating. If you have a hobby, this table provides a dedicated workspace. After you finish, fold it up and clear the area. This flexibility makes daily life much simpler.
Building your own table also allows for complete customization. You choose the size, materials, and finish. This means your table will perfectly match your existing decor. You can make it as small as a side table or as large as a full dining table. This project lets you create a unique piece tailored to your specific needs.
Essential Tools and Materials You Will Need
Before you start building your folding table, gather all necessary tools and materials. Having everything ready saves time and ensures a smooth process. You will need standard woodworking tools and specific hardware for the folding mechanism. I always make a checklist before I begin.
For tools, a circular saw or miter saw is crucial for cutting wood accurately. A drill is essential for pre-drilling holes and securing screws. You will also need measuring tape, a pencil, and a carpenter’s square for precise measurements. Sandpaper or an orbital sander helps smooth rough edges. Safety glasses and gloves are a must for protection during the build.
The primary material is wood for the tabletop and possibly a support frame. Plywood, MDF, or solid wood planks work well. Plywood is often a good choice for its stability and affordability. The thickness depends on the table’s intended use and size. Thicker wood makes a sturdier table.
The most important hardware consists of the folding leg mechanisms. These come in various styles, including traditional folding table legs or collapsible brackets. Choose mechanisms that match your table’s size and weight requirements. You will also need wood screws for attaching the legs and any support frames. Wood glue provides extra strength for joints.
Optional materials include wood stain, paint, or varnish for finishing the tabletop. This adds protection and improves the table’s appearance. Consider adding felt pads or rubber feet to the bottom of the legs. These protect your floors and prevent the table from sliding. Having all these items ready ensures a successful DIY project.
Designing Your Folding Table: Size and Style
Designing your folding table is an important first step. It determines the table’s functionality and aesthetic appeal. Think about how you will use the table most often. This helps you decide on the right dimensions and style. I always sketch out my ideas first.
Consider the table’s size. For a small craft table, a compact top works best. If you need an extra dining surface, a larger rectangular top is more practical. Measure the space where the table will be used and stored. This ensures your table fits comfortably. Remember to account for the thickness of the tabletop material.
Next, choose your tabletop material. Plywood is a popular choice due to its strength and cost-effectiveness. You can also use solid wood planks for a more rustic look or laminate for easy cleaning. The material affects both the weight and the durability of the table. Think about what kind of finish you want to apply later.
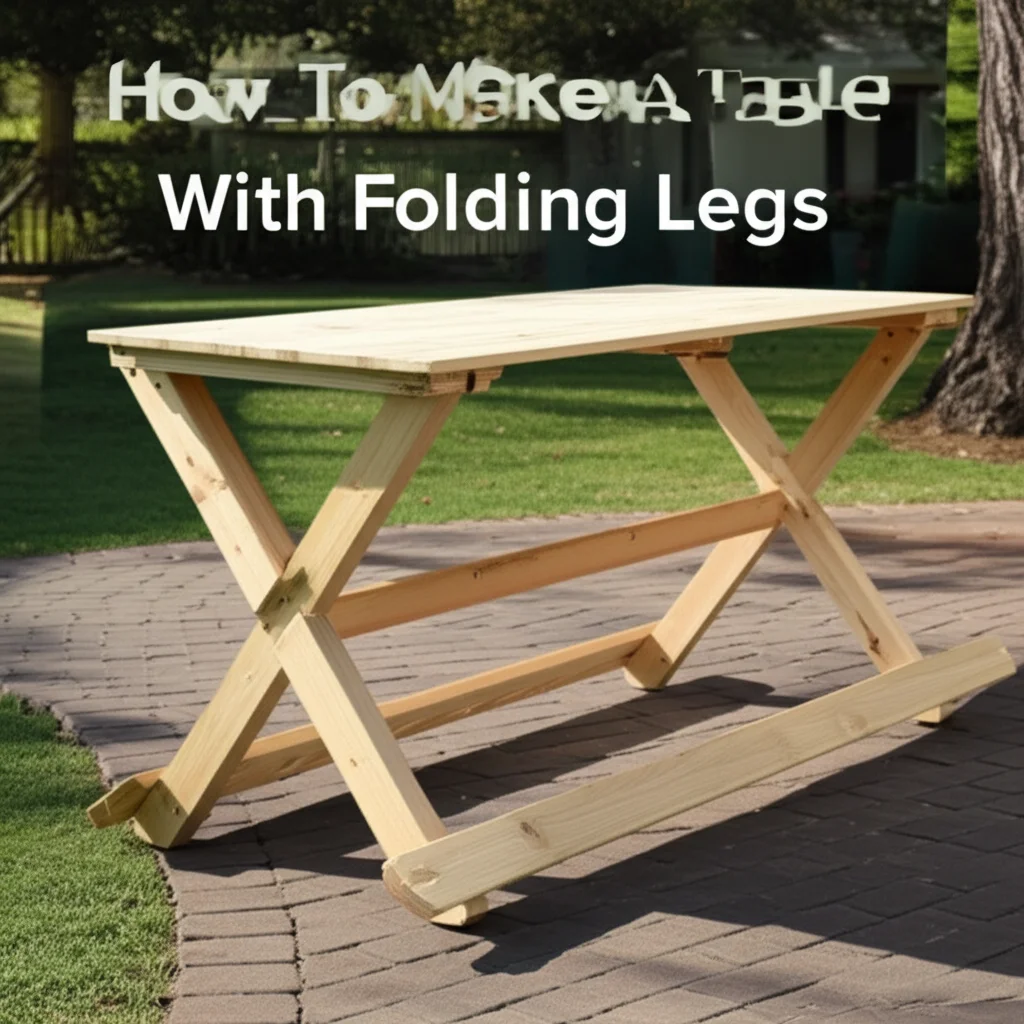
The style of the table also includes the folding leg type. There are basic metal folding legs that provide maximum stability. You can also find more decorative options that might require a sub-frame for attachment. Some mechanisms allow the legs to fold flat against the tabletop, making storage very compact. Consider how the legs will look when unfolded and how they will store.
Think about the overall aesthetic. Do you want a modern, minimalist table? Or something more traditional? The choice of wood, finish, and leg style impacts the final look. You can make a folding table look nice with careful design choices. A well-designed table is both functional and visually pleasing.
Preparing the Tabletop for Assembly
Preparing the tabletop is a critical step in making your folding table. This stage ensures a smooth, stable, and attractive surface. Proper preparation affects the table’s durability and final appearance. I always take my time with this part of the project.
First, cut your chosen tabletop material to the desired dimensions. Use a circular saw or miter saw for straight, clean cuts. Measure twice and cut once to avoid mistakes. If you are using multiple planks for a solid wood top, you will need to join them together. Use wood glue and clamps to create a strong bond between the planks.
After cutting, sand all surfaces and edges thoroughly. Start with a coarser grit sandpaper, like 80 or 100-grit, to smooth out any imperfections or saw marks. Gradually move to finer grits, such as 150 or 220-grit. This creates a very smooth surface. Smooth edges are important for safety and aesthetics.
Once sanded, clean the tabletop to remove all dust and debris. Use a damp cloth or tack cloth. This step is crucial before applying any finish. Dust can get trapped in the finish, ruining the smooth appearance. A clean surface allows the finish to adhere properly.
Now, apply your chosen finish. This could be wood stain, paint, or varnish. Stain enhances the natural wood grain. Paint offers a custom color. Varnish provides a durable protective layer. Apply thin, even coats according to the product instructions. Allow each coat to dry completely before applying the next. Sand lightly between coats for a smoother finish. Proper finishing protects the wood and makes the table easy to clean a wood table later.
Attaching Folding Legs: Step-by-Step Installation
Attaching the folding legs is the core of this project. Proper installation ensures your table is stable and functions correctly. Take your time and follow these steps carefully. This part requires precision and attention to detail.
First, decide on the exact placement of the legs. The legs should be positioned close enough to the edges to provide stability. However, they should also be set back enough to prevent tipping when weight is applied to the edges. Mark the exact spots where the leg brackets will attach. I typically measure from the corners to ensure symmetry.
Next, attach any necessary support frames or rails to the underside of the tabletop. Some folding leg mechanisms require a solid frame for secure mounting. These frames add structural integrity to the tabletop itself. Use wood glue and screws to firmly attach these supports. Ensure the screws do not go through the tabletop surface. You can learn more about how to attach a table top to base for general table construction principles.
Now, position the folding leg brackets onto the marked spots. Use a drill to pre-drill pilot holes for the screws. This prevents the wood from splitting. Make sure your drill bit is slightly smaller than the screw’s diameter. Then, secure the brackets using the appropriate wood screws. Tighten them firmly, but avoid overtightening, which can strip the wood.
Test the folding mechanism after attaching each leg. Ensure they fold smoothly and lock securely into place when extended. Check for any wobbling or instability. If the table wobbles, re-check all screw connections. Adjust the leg placement if needed to improve balance. A well-attached set of legs makes your table functional and safe.
Finishing Touches and Maintenance Tips
Adding the finishing touches makes your folding table complete. These steps improve its appearance and protect it for long-term use. Proper maintenance ensures your table stays in excellent condition. This is where your table truly becomes a unique piece.
After attaching the legs, inspect the entire table for any rough spots or unfinished areas. You might want to do a final light sanding on any edges that will be handled frequently. Wipe down the table again to remove any lingering dust or fingerprints. A clean surface is essential for a good final look.
Apply a final protective finish to the tabletop if you haven’t already. A clear coat of polyurethane or a durable lacquer provides excellent protection against spills and scratches. This step is especially important for tables used frequently or in areas prone to moisture. Follow the product’s instructions for application and drying times. This step also helps to make a foldable table look nice by giving it a polished appearance.
Consider adding protective pads to the bottom of the table legs. Felt pads prevent scratches on delicate floors like hardwood. Rubber feet offer better grip and prevent the table from sliding, especially on smooth surfaces. These small additions significantly extend the life of your floors and the table.
For maintenance, clean your folding table regularly. Use a soft, damp cloth for general cleaning. Avoid harsh chemicals, which can damage the finish. For deeper cleaning, use a mild wood cleaner designed for finished surfaces. If your table gets wet, wipe it dry immediately to prevent water damage. Store the table in a dry place when not in use. This protects it from extreme temperatures and humidity.
Ensuring Stability and Durability for Your Folding Table
Creating a stable and durable folding table is crucial for its longevity and safe use. While folding tables inherently have moving parts, you can build them to be very sturdy. Focus on strong connections and quality materials. I always double-check these aspects.
The choice of folding leg hardware plays a big role in stability. Look for heavy-duty mechanisms made from strong metal. Cheaper, flimsy hardware will lead to a wobbly table over time. Ensure the locking mechanism engages firmly when the legs are extended. This prevents accidental collapse during use.
Proper attachment of the legs to the tabletop is paramount. Use screws that are long enough to penetrate deep into the wood without going through the top. Pre-drilling pilot holes prevents wood splitting and ensures a tight fit. If your tabletop is thin, consider adding a support frame or cleat underneath where the legs attach. This distributes the stress over a larger area. For general advice on table stability, you can also look at tips for stabilize a table with hairpin legs, as the principles of reinforcement are similar.
Reinforce joints with wood glue during assembly. Even if you are using screws, glue adds significant strength to the connections. Apply glue to mating surfaces before screwing them together. Clamp the parts while the glue dries for the strongest bond. This applies to any support frames or cross-braces you add.
Periodically inspect your folding table for loose screws or worn parts. Tighten any loose screws promptly. If any hardware seems damaged, replace it before using the table. Proper storage also extends durability. Store the table in a dry, stable environment to prevent warping or damage from humidity changes. Building a table from durable materials, such as those used to make a picnic table out of pallets, can also inform your material choices for a sturdy build.
FAQ Section
What type of wood is best for a folding table?
Plywood is a popular choice for folding tables due to its stability and cost-effectiveness. Solid wood like pine, oak, or maple also works well, offering durability and a beautiful finish. The best choice depends on your budget, desired look, and the table’s intended use. Each wood type has unique characteristics.
How do I prevent my folding table from wobbling?
Ensure you use high-quality folding leg hardware with a strong locking mechanism. Securely attach the legs to the tabletop with appropriately sized screws, pre-drilling pilot holes. Adding a sub-frame or extra bracing under the tabletop can significantly increase stability. Always check and tighten all screws regularly.
Can I use a folding table outdoors?
Yes, you can use a folding table outdoors, but consider the materials and finish. If building for outdoor use, select weather-resistant wood or apply a marine-grade varnish. This protects the wood from moisture and UV rays. Store the table indoors when not in use to prolong its life.
What kind of folding leg hardware should I buy?
Many types of folding leg hardware exist. Look for heavy-duty metal brackets that lock firmly when extended. Some common options include traditional folding leg brackets, gate leg hinges, or scissor-style mechanisms. Choose hardware appropriate for the table’s size and weight capacity.
How much weight can a DIY folding table hold?
The weight capacity depends on the materials used, the thickness of the tabletop, and the strength of the folding leg hardware and its attachment. A well-built table with sturdy plywood and robust metal folding legs can typically hold a significant amount of weight, often 50-100 pounds or more.
Conclusion
Making a table with folding legs is a rewarding project. You gain a versatile, portable, and space-saving piece of furniture. We covered every step, from planning your design to the final finishing touches. You now have the knowledge to create a table that perfectly fits your needs.
Remember, careful planning and attention to detail ensure a successful outcome. Choosing the right materials and robust folding leg hardware contributes to the table’s stability and durability. This project not only gives you a functional item but also builds your DIY skills. Get started on your own custom folding table today.
- DIY furniture
- portable table
- collapsible table


