· Davia Murnell · Appliance Maintenance · 20 min read
How To Replace Light Bulb In Amana Microwave
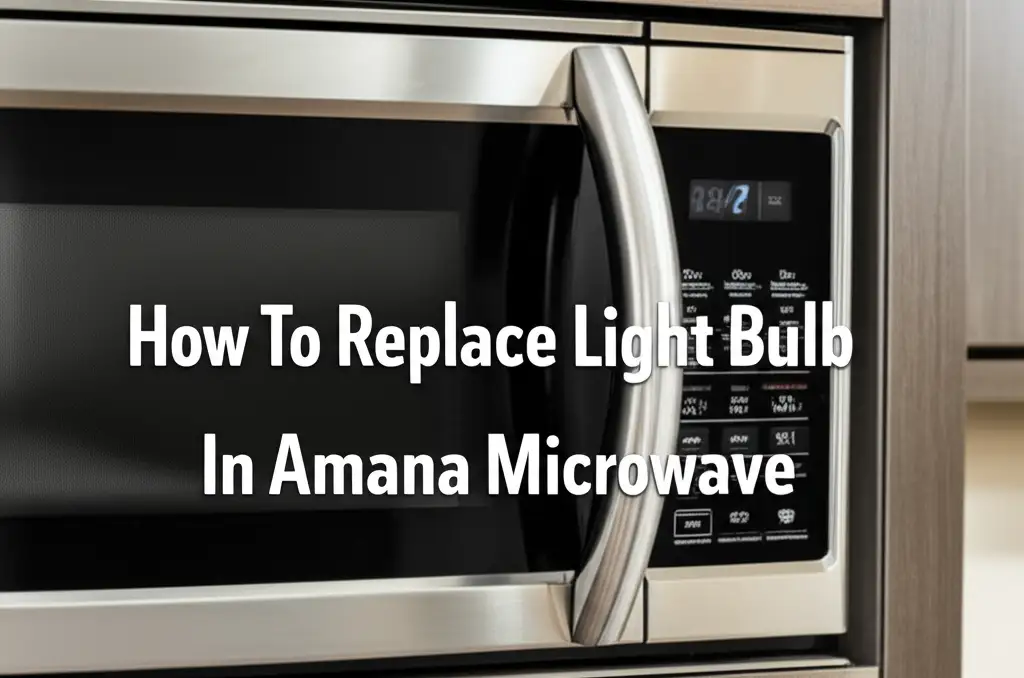
How to Replace Your Amana Microwave Light Bulb Safely
Is your Amana microwave dark inside? A burnt-out light bulb makes it tough to see your food cooking. It also means you cannot see how clean the microwave interior truly is. Replacing a light bulb in your Amana microwave is a common task. You can do this yourself with basic tools. This guide will help you bring light back to your kitchen appliance.
I know how frustrating it is when small appliance parts stop working. A dark microwave feels less efficient. It makes simple tasks like checking on popcorn feel complicated. This article provides clear instructions. We will cover safety, tools, and the exact steps. You will learn how to replace the light bulb in your Amana microwave. We will look at different Amana models. This includes over-the-range and countertop units. By the end, you will feel confident to complete this easy repair.
Takeaway:
- Always unplug your Amana microwave before starting any repair.
- Identify your microwave model type (over-the-range, countertop) to locate the bulb correctly.
- Use the correct replacement bulb specified for your Amana microwave.
- Follow specific steps to access and replace the bulb, varying by model.
- Test the new bulb before fully reassembling the microwave.
To replace the light bulb in your Amana microwave, first unplug the unit for safety. Next, locate the bulb access panel, which varies by model (often behind the grille for over-the-range, or a small cover on countertop units). Remove any screws, unclip the old bulb, insert the new one, and then reassemble the microwave.
Understanding Your Amana Microwave’s Lighting System
Amana microwaves use different lighting systems. The type of system depends on the microwave’s model. Over-the-range (OTR) models usually have two types of bulbs. These are a cavity light and a cooktop light. The cavity light illuminates the inside of the microwave. The cooktop light shines down onto your stove. Countertop models typically only have an interior cavity light. Knowing your model helps you locate the correct bulb.
The location of the light bulb varies. For OTR models, the cavity bulb is often inside the microwave compartment. It sits behind a clear cover. The cooktop light is usually under the microwave. It is behind a separate cover or grille. Countertop models might have the bulb accessible from the side or back. Some models require removing the outer casing. Always check your specific Amana microwave’s manual first. This ensures you find the exact location and access method.
It is important to use the correct bulb type. Microwaves often use specific wattage bulbs. They might be incandescent, halogen, or even LED. Using the wrong bulb can cause issues. It might not fit, or it could damage the electrical system. Amana parts websites or your microwave’s manual specify the correct bulb. Having the right bulb ready makes the replacement smooth.
Many modern microwaves use similar bulb access methods. If you have changed a light bulb in other appliances, this might feel familiar. For example, replacing a bulb in a Whirlpool microwave hood combination often involves similar steps due to shared design elements. Remember, safety is always your first concern when working with electrical appliances.
Essential Safety Precautions Before You Start
Working with any electrical appliance requires careful attention to safety. A microwave oven uses high voltage components. These components can store an electrical charge even after unplugging. It is important to follow strict safety rules. This protects you from electrical shock. Never skip these steps.
First and most importantly, always unplug your Amana microwave. Find the wall outlet where your microwave is plugged in. Pull the plug completely out of the socket. Do not just turn off the microwave with the power button. The appliance must be completely disconnected from the power source. This removes any risk of electric shock while you work.
Next, you might need to discharge any residual electricity. For older or more complex microwaves, this step is vital. This typically involves opening the microwave door for a few minutes. This helps dissipate any stored charge in the capacitor. While this is less critical for simple light bulb replacements, it is a good habit. You want to ensure no surprises.
Wear appropriate personal protective equipment (PPE). Gloves can protect your hands from sharp edges or grease. Safety glasses protect your eyes from dust or falling debris. These items are simple but effective. They add an extra layer of protection during the repair process.
Finally, work in a well-lit area. Good lighting helps you see small parts. It also prevents accidents. Clear the area around the microwave. Make sure you have enough space to move freely. Keeping your workspace tidy also reduces the chance of tripping or dropping tools. Following these safety precautions ensures a safe repair for your Amana microwave.
Gathering the Right Tools and Replacement Parts
Having the correct tools makes any repair job easier. For your Amana microwave light bulb replacement, you won’t need many specialized items. Gather everything before you begin. This saves you time and prevents interruptions during the process. Being prepared helps ensure a smooth repair.
You will likely need a few basic hand tools. A Phillips head screwdriver is almost always necessary. Some Amana models might also use a flathead screwdriver. Inspect your microwave for visible screws. See what type of head they have. Small nut drivers might also be useful for certain panel fasteners.
The most important “part” is the new light bulb itself. Do not guess the bulb type. Check your Amana microwave’s owner’s manual. The manual will list the exact bulb specifications. This includes wattage, voltage, and bulb type (e.g., T-8, G-8, 125V 20W). If you don’t have the manual, look for a part number on the old bulb. You can also search online using your Amana microwave’s full model number. Using the correct replacement bulb is crucial for proper function and safety.
It is helpful to have a small container or magnetic tray. Use it to hold screws and small parts. This prevents them from getting lost. Losing a tiny screw can prolong your repair. A flashlight can also be useful. It helps illuminate dark spaces inside the microwave, especially if your kitchen lighting is not perfect.
Consider having a soft cloth or paper towels nearby. You might need to clean the bulb socket or surrounding areas. A clean working area is always better. These simple tools and preparations ensure you are ready. You can then efficiently replace the light bulb in your Amana microwave.
Step-by-Step Guide: Replacing the Interior Cavity Light Bulb (Countertop Models)
Replacing the interior light bulb in an Amana countertop microwave is generally straightforward. This type of microwave usually offers easier access to the bulb. There is no need to remove the entire unit from a cabinet. I will guide you through each step.
Unplug the Microwave: First, and most importantly, disconnect the microwave from power. Pull the power cord from the wall outlet. Do not proceed until the microwave is completely unplugged. This prevents electrical shock.
Locate the Bulb Access: For most Amana countertop models, the interior light bulb is located on the side or rear of the microwave’s outer casing. Sometimes, it is accessible from the top or back. Look for a small panel or cover. This panel usually has one or two screws holding it in place. The panel might be plastic or metal.
Remove the Access Panel: Use your Phillips head screwdriver to remove the screws. Gently set the screws aside in your container. Carefully remove the access panel. It might be a tight fit. Do not force it. The panel protects the bulb and wiring.
Remove the Old Bulb: Once the panel is off, you will see the light bulb. It is typically a screw-in type or a push-in wedge bulb.
- Screw-in bulb: Turn the bulb counter-clockwise to unscrew it. It works just like a regular household light bulb.
- Push-in wedge bulb: Gently pull the bulb straight out from its socket. Some bulbs might have a clip. Gently push the clip to release the bulb.
Insert the New Bulb: Handle the new bulb carefully. Avoid touching the glass part with bare hands. Finger oils can shorten the bulb’s life.
- Screw-in bulb: Screw the new bulb into the socket clockwise until snug. Do not overtighten.
- Push-in wedge bulb: Align the new bulb with the socket. Push it firmly but gently into place. Ensure it sits securely.
Replace the Access Panel: Once the new bulb is in, replace the access panel. Make sure it aligns correctly. Insert and tighten the screws. Do not overtighten the screws. This could strip the threads.
Test the Microwave: Plug the microwave back into the wall outlet. Open the microwave door. The interior light should now come on. Close the door and try starting a short cycle (e.g., 30 seconds of water) to ensure everything works properly. If the light does not turn on, recheck the bulb and connection. If you encounter issues, you might want to look at articles on why a microwave light is not working for general troubleshooting. This completes the process for countertop models.
Step-by-Step Guide: Replacing the Interior Cavity Light Bulb (Over-the-Range Models)
Replacing the interior cavity light bulb in an Amana over-the-range (OTR) microwave can be a bit more involved. This is because OTR models are often mounted above a stove. Access to certain parts might require moving a grille or control panel. I will walk you through the process for these models. This process is very similar to changing an over-the-range microwave light bulb for other brands.
Unplug the Microwave: Always start by unplugging your Amana OTR microwave. This is crucial for your safety. Locate the power outlet. It is often in the cabinet above the microwave. Pull the plug out completely.
Locate the Bulb Access Panel: For many Amana OTR models, the interior cavity bulb is accessed from the top front of the microwave. You will typically need to remove the vent grille. This grille is usually located above the microwave door. It covers the fan and light bulb area.
Remove the Vent Grille: Look for screws holding the vent grille in place. These screws are often on the top front edge of the microwave. They might also be on the side panels. Remove these screws. Gently pull the vent grille forward and then lift it away. Some grilles might have clips instead of screws. Unclip these carefully.
Find the Bulb Housing: Once the grille is removed, you should see the fan assembly and the light bulb housing. The cavity light bulb is usually behind a clear plastic or glass cover. This cover protects the bulb from steam and food splatters.
Remove the Bulb Cover: The bulb cover usually has a small tab, a screw, or a clip. Gently unclip it, unscrew it, or slide it out. Be careful not to break the cover. Set it aside.
Remove the Old Bulb: With the cover off, you can access the bulb.
- Screw-in bulb: Turn the bulb counter-clockwise to unscrew it.
- Push-in wedge bulb: Pull the bulb straight out from its socket. Some models might have a retaining clip. Release the clip first.
- Halogen or specialty bulbs: These might require a gentle push and twist, or a specific pull. Consult your manual if unsure.
Insert the New Bulb: Take your new Amana microwave light bulb. Hold it with a clean cloth or glove. This prevents skin oils from getting on the glass. Insert the new bulb into the socket.
- Screw-in: Screw it in clockwise until it is snug.
- Push-in: Push it firmly into the socket. Make sure it sits securely.
Replace the Bulb Cover and Vent Grille: Put the bulb cover back in place. Ensure it is secure. Then, reattach the vent grille. Align the grille correctly. Reinsert and tighten all screws. Make sure the grille is firmly in place.
Test the Microwave: Plug the microwave back into its power outlet. Open the microwave door. The interior light should now illuminate. Close the door and test by running a short cycle. This confirms the new bulb works. If the light does not turn on, check the bulb and connections again. This general process applies to many over-the-range models, including those similar to Whirlpool microwave hood combinations.
Step-by-Step Guide: Replacing the Cooktop/Exterior Light Bulb (Over-the-Range Models)
Many Amana over-the-range microwaves include a light that shines down onto your stove. This is called the cooktop light or exterior light. Replacing this bulb is often simpler than the interior bulb. It is designed for easier access. I will show you how to replace this light.
Unplug the Microwave: As always, safety first. Unplug your Amana microwave from the wall outlet. The cooktop light is powered by the microwave’s electrical system. So, you must cut power to the unit.
Locate the Cooktop Light Cover: The cooktop lights are on the underside of the microwave. Look directly below the microwave. You will see one or two clear or frosted light covers. These covers protect the bulbs. They often have a screw, a tab, or a simple clip holding them in place.
Remove the Light Cover:
- For screw-held covers: Use a Phillips or flathead screwdriver to remove the screw(s). Gently slide or swing the cover down.
- For clip or tab-held covers: Look for a small notch or tab. Use a flathead screwdriver or your fingernail to gently pry it down or unclip it. Some covers pivot open. Be careful not to force anything.
Remove the Old Bulb: Once the cover is off, the bulb is visible. Cooktop lights are typically screw-in type bulbs. They often look like small, appliance-specific bulbs.
- Turn the old bulb counter-clockwise to unscrew it from its socket. If it’s hot, wait for it to cool, or use a cloth to handle it.
Insert the New Bulb: Take your new, correct replacement bulb. Ensure it matches the specifications in your Amana microwave’s manual.
- Carefully screw the new bulb into the socket clockwise. Tighten it gently until it is snug. Do not overtighten, as this can crack the bulb or strip the socket.
Replace the Light Cover: Once the new bulb is securely in place, reattach the light cover. Make sure it is properly aligned. Reinsert any screws or secure any clips or tabs. Ensure the cover is firmly closed and protected.
Test the Light: Plug the Amana microwave back into the electrical outlet. Turn on the cooktop light. This is usually done with a dedicated “Light” button on the microwave’s control panel. The new bulb should illuminate the stove area. If the light does not come on, recheck the bulb’s connection. Ensure it is fully screwed in. This simple fix brings light back to your cooking area.
Troubleshooting Common Amana Microwave Light Issues Beyond Bulb Replacement
Sometimes, replacing the light bulb does not fix the problem. The light might still not work, or it might behave strangely. This indicates a deeper issue. It is important to know when to troubleshoot further. I will outline some common problems. This helps you determine your next steps.
One common issue is a faulty socket. The socket holds the light bulb. If the socket is damaged, corroded, or has loose wiring, the new bulb will not light up. Inspect the socket carefully. Look for signs of burning, rust, or bent metal contacts. If the contacts are just bent, you might gently try to bend them back. If the socket looks severely damaged, it needs replacement. This is a more complex repair. It often requires professional help.
Another possibility is a wiring problem. The wires connecting the light socket to the microwave’s power supply could be loose or damaged. This can happen over time. Rodents might also chew wires in some cases. Checking wiring requires opening up more of the microwave. This can be dangerous due to high voltage components. I highly recommend calling a qualified technician for wiring issues. Do not attempt this unless you are highly skilled in appliance repair.
The door switch assembly can also cause light problems. Microwaves have safety interlock switches. These switches prevent the microwave from operating with the door open. They also control the light. If a door switch is faulty, the microwave might not realize the door is open. This means the light might not turn on. If your microwave light also stays on constantly, or if it won’t turn off, this could be a door switch issue. Check out guides on why a microwave light stays on or why a microwave light won’t turn off for more insights. Replacing a door switch is a more advanced repair.
Finally, the microwave’s control board or transformer could be failing. These are the “brains” of the microwave. A problem here can affect various functions, including the light. Issues with the control board are usually complex. They require diagnostic testing. This repair should be left to a professional. If you have tried replacing the bulb and checked the socket, and the light still does not work, it is time to consider professional assistance. Do not risk personal injury attempting complex electrical repairs.
Maintaining Your Amana Microwave for Longevity
Regular maintenance helps your Amana microwave last longer. It also keeps it working efficiently. Light bulb replacement is one part of this maintenance. But there are other simple steps you can take. These steps ensure your microwave serves you well for years.
First, keep the interior clean. Food splatters can build up. This affects the light’s brightness. It also creates odors. Wipe down the interior regularly with a damp cloth and mild detergent. Do not use harsh chemicals. They can damage the interior finish. A clean microwave helps the light function better. It also prevents food particles from blocking the bulb’s light.
Inspect the door seals regularly. The door seal keeps microwave energy contained. It also prevents steam and moisture from escaping. Over time, seals can crack or become brittle. Damaged seals can lead to energy leakage. This can also affect the internal environment, potentially impacting the bulb’s lifespan. If you see damage, consider replacing the door seal. This is generally a simple part to replace.
Check and clean the grease filters (for over-the-range models). OTR microwaves have filters that trap cooking grease. These filters are usually located on the underside of the microwave. If they become clogged, they reduce airflow. This can cause the microwave to overheat. Overheating can stress electrical components, including light bulbs. Remove and wash the filters regularly. Refer to your Amana manual for cleaning instructions. This is a crucial step for maintaining proper ventilation. For KitchenAid microwaves, replacing the grease filter is also a good practice, and the procedure is similar for Amana.
Ensure proper ventilation around the microwave. Whether it’s a countertop or OTR model, proper airflow is important. Do not block the vents on the microwave. This allows heat to dissipate correctly. Poor ventilation can shorten the life of components. This includes your light bulb. Make sure nothing is obstructing the air vents. Taking these simple steps keeps your Amana microwave in top condition. This also minimizes future repair needs.
When to Call a Professional for Amana Microwave Repair
While replacing a light bulb is a DIY task, some microwave problems need expert attention. It is important to know your limits. Attempting complex repairs can be dangerous. It can also cause more damage to your Amana microwave. Recognizing when to call a professional saves you time and ensures safety.
Call a professional if you suspect electrical issues beyond the bulb. If your new bulb does not light up and the socket looks fine, there might be a problem with the wiring or control board. These components carry high voltage. Working with them without proper training and tools is extremely risky. An appliance technician has the right equipment. They can diagnose these issues safely.
If your Amana microwave is making strange noises, sparking, or emitting unusual odors, stop using it immediately. Unplug the microwave. These symptoms indicate serious internal problems. They could be related to the magnetron, transformer, or waveguide. These are core components of a microwave. They pose significant health hazards if tampered with. A professional must handle these repairs.
Consider the age and value of your microwave. If your Amana microwave is very old, complex repairs might not be cost-effective. The cost of parts and labor could be close to buying a new microwave. A technician can give you an honest assessment. They can help you decide if repair or replacement is the better option.
Finally, if you feel uncomfortable or unsure at any point, call for help. Your safety is paramount. Do not try to force parts or guess about wiring. A qualified appliance repair technician specializes in microwave repair. They can fix your Amana microwave safely and efficiently. Investing in professional help ensures your appliance operates correctly. It also gives you peace of mind.
Frequently Asked Questions (FAQs)
What type of light bulb does my Amana microwave use?
Amana microwaves use various bulb types. This depends on the specific model. Common types include incandescent, halogen, or LED bulbs. They also come in different wattages and base types. Always check your Amana microwave’s owner’s manual for the exact specifications. You can also look for a part number on the old bulb.
Can I use a regular household light bulb in my Amana microwave?
No, you should not use a regular household light bulb. Microwave ovens require specific appliance bulbs. These bulbs are designed to withstand heat and vibration. They also have a specific voltage and wattage. Using the wrong bulb can cause damage. It can also create a fire hazard. Always use the manufacturer-recommended replacement bulb.
Why is my Amana microwave light still not working after replacing the bulb?
If your Amana microwave light still does not work after replacing the bulb, several issues could be present. The socket itself might be faulty or corroded. There could be a loose or damaged wire. A defective door interlock switch can also prevent the light from turning on. For these issues, professional diagnosis is recommended.
How often should I replace the light bulb in my Amana microwave?
The lifespan of a microwave light bulb varies. It depends on how often you use your microwave. It also depends on the bulb type. Typically, a microwave light bulb can last for several years. Replace it when it burns out. You might also replace it if it flickers or becomes dim.
Where can I buy a replacement light bulb for my Amana microwave?
You can buy replacement light bulbs for your Amana microwave from several places. Appliance parts stores often carry them. Online retailers like Amazon or appliance parts websites are also good options. Make sure you have your microwave’s full model number. This ensures you buy the correct bulb.
Is it safe to use my Amana microwave if the light bulb is burnt out?
Yes, it is generally safe to use your Amana microwave with a burnt-out light bulb. The light bulb is for illumination only. It does not affect the microwave’s cooking function. However, it is less convenient to see your food. Replacing the bulb is recommended for better visibility.
Conclusion
Bringing light back to your kitchen with a working Amana microwave is a simple yet satisfying repair. We have walked through the entire process. You now know the vital safety steps. You understand what tools you need. You also have clear, step-by-step instructions for both countertop and over-the-range Amana models. You can confidently replace the interior cavity light bulb or the exterior cooktop light bulb.
Remember, safety is always your top priority. Always unplug your microwave before starting any work. Use the correct replacement bulb type for your specific Amana microwave model. If you encounter issues beyond a simple bulb replacement, it is wise to consult a professional. Knowing when to call an expert keeps you safe and prevents further damage to your appliance.
This DIY task empowers you to handle minor appliance repairs. It saves you money. It also extends the life of your Amana microwave. Keep your microwave clean and well-maintained. This simple care ensures it continues to serve your family effectively. Do not let a dark microwave dim your cooking experience. Take action today and replace the light bulb in your Amana microwave. You can do this!

Davia Murnell
Room Cleaning Expert
Before joining HEG, I spent over a decade running my own window cleaning business, where I perfected streak-free techniques and learned the ins and outs of specialty glass care. Now, I bring that expertise to a broader mission—helping homeowners maintain sparkling windows and beautiful outdoor spaces. From skylights and sliding doors to patio glass and outdoor furniture, I believe every surface deserves attention and care. I share practical tips and proven methods that make even the toughest cleaning jobs feel manageable. Whether you're battling pollen on the porch or smudges on high windows, I’m here to help you see your home in a whole new light—literally.