· Todd Martin · Furniture Renovation · 16 min read
How To Paint Chairs Black

Painting Chairs Black: A Complete Guide
Giving your chairs a fresh coat of paint can dramatically change their look. I find painting chairs black offers a sleek, modern update for any room. Black chairs provide a bold statement or a subtle accent. This guide will help you achieve a professional, durable finish. I will cover everything from choosing the right paint to proper preparation and application techniques. You will learn how to paint chairs black effectively.
Takeaway
- Choose the Right Paint: Select a paint type (like latex or chalk) that suits your chair material.
- Prepare Meticulously: Clean, sand, and repair your chairs thoroughly before painting.
- Prime for Success: Apply a suitable primer to ensure paint adhesion and a smooth finish.
- Apply Thin Coats: Use multiple thin layers of black paint for even coverage and fewer drips.
- Seal for Durability: Protect your painted chairs with a topcoat to ensure long-lasting beauty.
Painting chairs black involves several key steps. First, clean and sand the chairs well. Next, apply a primer for good paint adhesion. Then, paint with multiple thin coats of black paint. Finally, seal the chairs with a protective topcoat. This process ensures a durable and attractive finish.
Why Choose Black for Your Chairs?
Choosing black paint for your chairs offers many benefits. Black is a classic color. It fits well with almost any home decor style. You can use it in a modern setting or a traditional room. Black chairs add a touch of elegance and sophistication. They also hide imperfections more easily than lighter colors.
Black furniture creates a strong visual anchor in a space. It can make other colors pop. Imagine a bright throw pillow on a black chair. The black helps the pillow stand out. Black chairs also offer versatility. You can pair them with various table finishes, from natural wood to glass. I often suggest black chairs to clients who want a timeless look. Black chairs can adapt as your style changes. They remain stylish for years. For ideas on how to use black in your home, consider exploring how to decorate black furniture. This offers tips on creating a cohesive look.
Furthermore, black paint is very practical. It tends to show dirt and scuffs less than white or very light colors. This makes black chairs a good choice for dining areas or homes with children and pets. They require less frequent cleaning for minor marks. This durability makes them a smart choice. I love how a simple coat of black paint can completely transform an old chair. It gives it a new life and purpose in your home. The aesthetic impact is often surprising.
Black also provides a strong contrast. If your walls are light, black chairs stand out beautifully. If your walls are dark, black chairs can blend in for a moody, cozy feel. This makes black a powerful design tool. Think about the overall feel you want for your room. Black chairs can help you achieve that vision. They are a reliable choice for furniture makeovers.
Gathering Your Essential Painting Supplies
Before you start painting chairs black, collect all necessary tools and materials. Having everything ready saves time and ensures a smooth process. You will need more than just paint. Proper supplies make the job easier and improve the final look. I always create a checklist to avoid forgetting anything important.
First, select your paint. For chairs, latex, chalk, or oil-based paints work well. Each has different properties. Latex paint is water-based, cleans up easily, and dries fast. Chalk paint offers a matte, distressed look without much prep. Oil-based paint is durable and provides a smooth finish but requires mineral spirits for cleanup. Consider the material of your chairs and the look you want. For example, learning how to paint furniture with latex paint can provide a good overview of this common paint type. It gives a durable finish.
Next, you need a primer. Primer helps the paint stick to the chair surface. It also ensures an even color, especially when painting a dark color over a light one. Choose a primer that works with your selected paint type. Look for a stain-blocking primer if your chairs have old stains. This will stop them from showing through your new black paint.
Don’t forget brushes and rollers. High-quality synthetic brushes work best with latex paint. Natural bristle brushes are good for oil-based paint. Small foam rollers can give a smooth finish on flat areas. Angled brushes are useful for details and corners. For spray painting, you will need a spray gun or aerosol cans of black paint.
Other essential supplies include:
- Sandpaper: Various grits (80-grit, 120-grit, 220-grit) for sanding.
- Cleaner: TSP (trisodium phosphate) or a good degreaser for cleaning.
- Rags: For wiping and cleaning.
- Painter’s tape: To protect areas you don’t want to paint.
- Drop cloths or plastic sheeting: To protect your floor and surrounding items.
- Safety gear: Gloves, safety glasses, and a respirator mask for ventilation.
- Screwdriver/Wrench: For disassembling chairs if needed.
Having these items ready before you start means you will not stop mid-project. This helps maintain momentum and quality. Good tools are an investment in your project’s success.
Preparing Your Chairs for a Smooth Finish
Proper preparation is the most important step when you paint chairs black. Skipping prep steps leads to poor adhesion and a less durable finish. A well-prepared surface ensures your black paint looks professional. It also helps the paint last much longer. I cannot stress enough how much this step impacts the final result.
Start by cleaning your chairs thoroughly. Use a good degreaser or TSP mixed with water. Wipe down every surface to remove dirt, grease, and grime. Pay attention to crevices and joints. Any residue left on the chair will prevent the paint from sticking properly. After cleaning, rinse the chairs with clean water. Let them dry completely before moving on. This drying time is crucial. For specific cleaning tips on various chair materials, like how to clean metal chairs or even how to clean wicker chairs, ensure your surface is pristine.
Next, it is time for sanding. Sanding helps the primer and paint adhere better. Start with a medium-grit sandpaper, like 80 or 120-grit, to remove old finish or rough spots. If your chairs have a glossy finish, scuff sanding creates a surface for the new paint to grip. For previously painted chairs, sand until the surface is dull. After the initial sanding, switch to a finer-grit sandpaper, around 220-grit. This smooths out any sanding marks and prepares the surface for a flawless finish. Always sand in the direction of the wood grain if your chairs are wood. Wipe away all sanding dust with a tack cloth or a damp cloth after each sanding step.
Inspect your chairs for any repairs. Fill cracks or holes with wood filler. Let the filler dry completely, then sand it smooth. Tighten any loose joints. Disassemble chairs if possible. This allows you to paint all surfaces evenly. It also helps avoid missed spots. Remove any hardware, like seat cushions or decorative elements, that you do not want to paint. Use painter’s tape to mask off areas that should not get paint. This includes any upholstery edges or metal accents. This careful taping ensures sharp, clean lines. Taking your time with preparation will save you headaches later. It ensures your chairs will look fantastic once painted black.
Priming for Durability and Adhesion
Priming is a crucial step when you paint chairs black. Many people want to skip it, but I strongly advise against it. Primer creates a bonding layer between the chair surface and the black paint. It ensures better adhesion, especially on tricky surfaces like laminate, plastic, or very glossy wood. Primer also helps create a uniform surface. This means your black paint will look more consistent and vibrant. Without primer, your paint may chip or peel easily.
Different chair materials require different primers. For wood chairs, a general-purpose wood primer works well. If the wood has knots or stains, use a stain-blocking primer. This prevents tannins or stains from bleeding through your black paint. For metal chairs, choose a rust-inhibiting metal primer. This protects against corrosion and ensures the paint sticks firmly. For plastic or laminate chairs, a bonding primer is essential. These surfaces are slick, and a specialized primer helps the paint grip. Considering the material is vital. For instance, painting plastic outdoor chairs would definitely benefit from a specific primer for plastic surfaces.
Apply primer in a thin, even coat. You can use a brush, roller, or spray primer. If using a brush, apply it in smooth, consistent strokes. Avoid thick puddles. If spray priming, hold the can or gun about 8-12 inches from the surface. Use sweeping motions. One thin coat is usually enough. You do not need to cover the chair completely. The goal is even coverage, not full opacity.
Let the primer dry completely according to the manufacturer’s instructions. Drying times vary, but typically it takes a few hours. Some primers need 24 hours to fully cure. Check the label. Once dry, lightly sand the primed surface with 220-grit sandpaper. This creates a very smooth base for your black paint. Wipe away any dust with a tack cloth. This step improves the final finish dramatically. Proper priming makes all the difference in the longevity and appearance of your painted chairs.
Applying Black Paint to Your Chairs
Now comes the exciting part: applying the black paint. This is where your chairs truly transform. Applying black paint requires patience and thin coats. Rushing this step often leads to drips and an uneven finish. I always prefer multiple thin coats over one thick one.
You have a choice between brush painting and spray painting. Brush painting gives you more control. It works well for intricate details or small chairs. Use a good quality brush for a smooth finish. Dip only the tip of the brush into the paint. Apply thin, even strokes in the direction of the wood grain. This avoids brush marks. If you see drips, quickly smooth them out with your brush. Allow each coat to dry fully before applying the next. This prevents streaks and ensures even coverage.
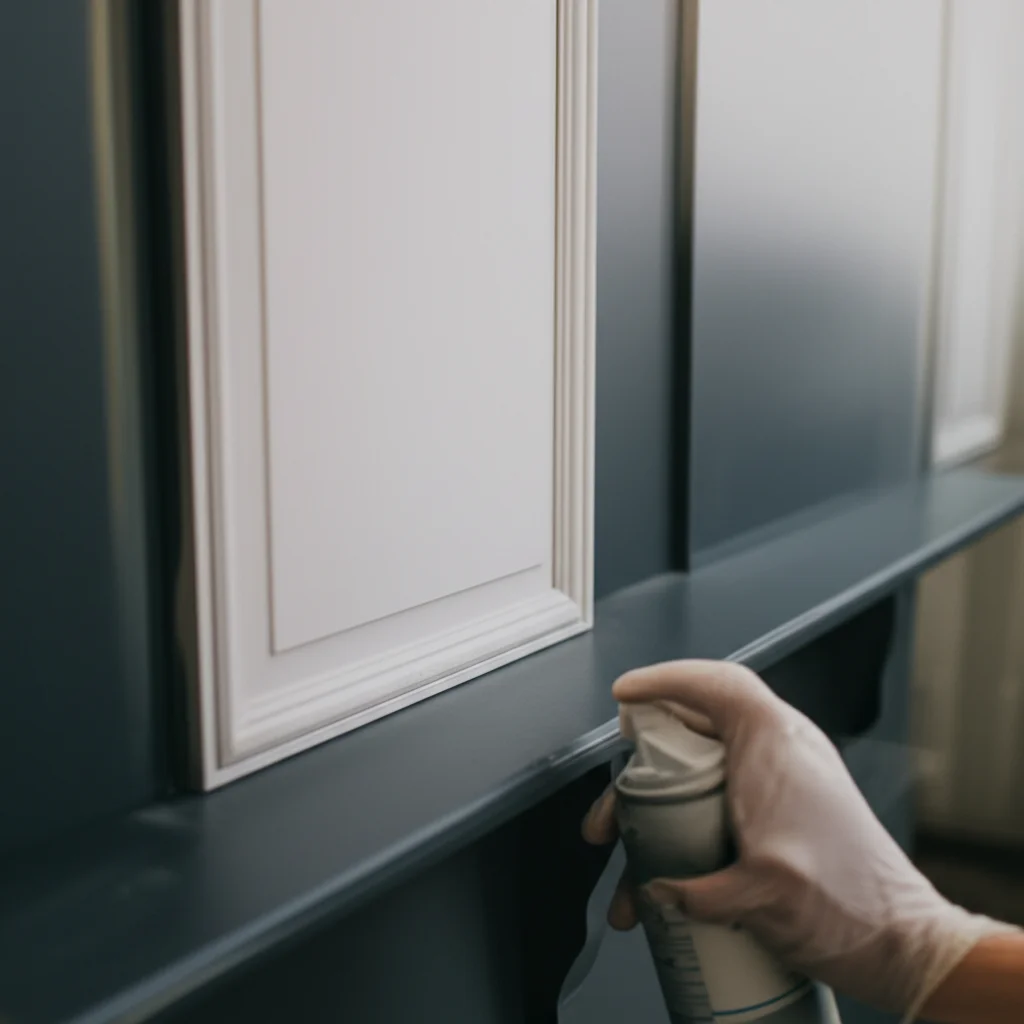
Spray painting is faster, especially for multiple chairs or chairs with many spindles. It provides a very smooth, factory-like finish. If using aerosol cans, shake them well before and during use. Hold the can about 8-12 inches from the chair. Use continuous, sweeping motions. Overlap each pass slightly. Do not stop spraying while aiming at the chair. This creates drips. It is better to go slightly past the edge of the chair before stopping. For larger projects, you might consider using a paint sprayer. This gives excellent results. This technique is similar to how you might paint a kitchen table black or any other large furniture item.
Apply at least two to three thin coats of black paint. Black paint sometimes needs extra coats to achieve full, rich coverage. Let each coat dry completely. This can take several hours depending on humidity and paint type. Sand lightly with 220-grit sandpaper between coats if needed. This smooths any imperfections and helps the next coat adhere. Always wipe off sanding dust before applying the next coat. Painting in a well-ventilated area is very important. Fresh air helps the paint dry and keeps you safe from fumes. Remember, patience with drying times will result in a much better outcome.
Sealing and Curing for Long-Lasting Beauty
Once your black paint is dry, the final step is sealing and curing. This step protects your hard work. It also ensures your black chairs remain beautiful for years. Skipping a topcoat can lead to scratches, chips, and a dull finish. I always recommend a protective layer. It is the best way to make your painted furniture durable.
There are several options for topcoats. Polyurethane is a popular choice for durability. It comes in water-based and oil-based formulas. Water-based polyurethane dries clear and quickly. It resists yellowing. Oil-based polyurethane is more durable but can add a slight amber tint. This might not be noticeable on black paint. Apply polyurethane in thin, even coats using a brush or foam applicator. Ensure good ventilation.
Another option is a clear wax. Wax provides a soft, satin finish. It is often used with chalk paint. Apply wax with a soft cloth. Buff it after it dries to achieve a subtle sheen. Wax offers good protection against light wear. However, it may need reapplication over time, especially in high-traffic areas. For specific guidance on broader furniture items, learning how to paint a kitchen table also covers crucial sealing steps that apply to chairs. The principles are very similar.
Sprays are also available for topcoats. Clear acrylic sealers in spray cans offer an easy application method. They dry quickly. This is a good choice for intricate chair designs. Like paint, apply the topcoat in thin, even layers. Multiple thin coats are better than one thick coat. Each layer builds up protection without creating drips or a cloudy appearance.
Allow the topcoat to cure fully. This curing process is different from just being dry to the touch. Curing means the finish hardens completely. This can take days or even weeks, depending on the product and humidity. Refer to the product’s instructions for specific curing times. During the curing period, handle the chairs gently. Avoid placing heavy items on them. Do not expose them to excessive moisture. Once cured, your black chairs will be ready for regular use. They will withstand daily wear and tear much better. This final protective layer is key to a lasting finish.
Troubleshooting Common Painting Challenges
Even with careful preparation, you might encounter issues when you paint chairs black. Knowing how to fix these problems saves your project. I have seen many common issues. Most have simple solutions. Do not get discouraged if something does not look perfect at first.
One common problem is drips or runs. This happens when too much paint is applied in one area. If the paint is still wet, gently smooth out the drip with a brush. If it is dry, you will need to sand it. Use fine-grit sandpaper (220-grit) to carefully sand down the dried drip. Then, wipe off the dust and apply another thin coat of paint. Remember, thin coats are key to avoid drips. Applying less paint per coat is always better.
Uneven coverage or streaks can also occur. This often happens if the paint is too thin or if you did not apply enough coats. It can also result from an uneven primer coat. To fix this, ensure your paint is well-mixed. Apply additional thin coats. Use consistent brush strokes or spray patterns. Lightly sand between coats if needed. A smooth, even primer base helps prevent streaking in the final black coat.
Paint chipping or peeling is a frustrating problem. This usually indicates poor adhesion. It means the chair was not cleaned or sanded properly. The primer might not have been suitable, or it did not dry fully. To fix this, you must go back to the beginning. Scrape off any loose paint. Re-clean and re-sand the affected area. Then, re-prime and repaint. It is more work, but it ensures a lasting finish. Prevent this by spending extra time on initial preparation.
Rough texture after painting can happen due to dust particles or improper sanding. Ensure your painting area is as dust-free as possible. Clean the chairs thoroughly after sanding. Use a tack cloth right before painting. If you notice a rough spot after painting, lightly sand it with very fine sandpaper (320-grit or higher). Then, apply another thin coat of paint. This removes the texture.
Bubbles in the paint can appear if you shake the paint can too vigorously or apply paint too quickly. Air gets trapped. To fix it, you can sometimes pop the bubbles with a brush if the paint is wet. If dry, sand them down and repaint. Applying paint in a controlled, steady manner helps. Avoid painting in direct sunlight or very high temperatures. This can cause the paint to dry too fast on the surface. Understanding these issues helps you correct them quickly. It helps you achieve a professional finish when you paint chairs black.
Frequently Asked Questions (FAQ)
1. How long does it typically take to paint chairs black? Painting chairs black usually takes about 2-3 days from start to finish. This includes cleaning, sanding, priming, and applying multiple coats of paint and sealer. Each step needs proper drying time. Rushing the process can lead to a less durable finish. Planning for drying time is essential.
2. What type of paint is best for painting chairs black? For chairs, latex paint is a good all-around choice. It is durable and easy to clean up. Chalk paint offers a matte, distressed look and requires less prep. Oil-based paint provides a very hard, smooth finish. The best type depends on the chair material and your desired look.
3. Do I need to sand chairs before painting them black? Yes, sanding chairs before painting them black is very important. Sanding creates a rough surface for the primer and paint to stick to. It also smooths out imperfections. Even if your chairs are already painted, scuff sanding improves paint adhesion significantly.
4. How do I prevent drips when painting chairs? To prevent drips, apply paint in thin, even coats. Avoid overloading your brush or spray nozzle. Keep your movements consistent. If using a spray can, maintain a steady distance from the chair. Multiple thin coats are always better than one thick coat.
5. How do I maintain black painted chairs? To maintain black painted chairs, clean them regularly with a soft, damp cloth. Avoid harsh chemicals or abrasive cleaners. Use furniture polish designed for painted surfaces if desired. Reapply a clear topcoat every few years, especially if the chairs see heavy use, to keep them looking fresh.
6. Can I paint black chairs a lighter color later? Yes, you can paint black chairs a lighter color later. The process is similar to painting them black. You will need to clean, sand, and then apply a good quality, stain-blocking primer. This primer is important to cover the dark black and prevent it from showing through the new lighter color. Then you can apply your new lighter paint color.
Conclusion
Painting chairs black is a rewarding project. It offers a dramatic update to any piece of furniture. You can transform old, worn chairs into stylish, modern accents for your home. We have covered every step, from selecting the right materials to applying the final protective coat. Remember, proper preparation is the foundation for a lasting finish. Patience during drying times also ensures a smooth, professional result.
By following these guidelines, you can achieve beautiful, durable black chairs. Whether you choose a sleek, glossy finish or a charming matte look, your newly painted chairs will enhance your space. Do not be afraid to start your own chair transformation project. You now have the knowledge to paint chairs black confidently. Give your chairs a fresh, bold new life today. Start your painting project and enjoy the stylish change.
- painting chairs
- black furniture paint
- DIY chair makeover
- furniture restoration
- home decor

Todd Martin
Senior Writer
With over 15 years of experience in home renovation and design, I started HEG to share what I’ve learned with homeowners who want to create spaces that are both beautiful and functional. I’ve always believed in a hands-on approach, and over the years, I’ve picked up practical solutions that actually work. Through HEG, I aim to make home improvement more approachable, sharing real tips that help you create a home you truly love.