· Todd Martin · DIY & Home Improvement · 19 min read
How To Spray Paint Laminate Furniture
Transform Your Space: Spray Paint Laminate Furniture
Do you have old laminate furniture that looks dull and needs new life? Perhaps a bookshelf or a dresser has seen better days. You can give it a fresh, modern look without spending a lot of money. The answer often lies in a simple yet powerful tool: spray paint. With the right steps, you can successfully spray paint laminate furniture and achieve a smooth, durable finish that mimics a professional job.
I have transformed many pieces of furniture over the years. Laminate can be tricky, but it is not impossible. This guide will walk you through every step. We will cover choosing the right materials, preparing the surface, applying paint, and sealing the final coat. You will learn how to avoid common mistakes and get a great result. Get ready to update your home with beautiful, refreshed furniture.
Takeaway
- Clean and scuff-sand laminate surfaces well before painting.
- Use a high-quality bonding or shellac-based primer for strong paint adhesion.
- Apply multiple light coats of spray paint, allowing full drying between layers.
- Protect your finished furniture with a clear topcoat for added durability.
To spray paint laminate furniture, first, clean and lightly sand the surface. Then, apply a high-quality bonding primer to ensure paint adhesion. Follow with several thin, even coats of durable spray paint. Finish the process by applying a clear protective topcoat for lasting results.
Why Spray Paint Laminate Furniture? Benefits and Considerations
Spray painting laminate furniture offers a quick and affordable way to update your home decor. Laminate furniture often comes at a lower cost, making it a popular choice for many homes. Over time, its surface can show wear, scratches, or outdated colors. Instead of buying new pieces, you can easily change the look of your existing furniture with a few cans of spray paint. This method saves you money and reduces waste. It is a smart choice for budget-conscious DIY enthusiasts.
One major benefit of spray paint is its ability to create a smooth, streak-free finish. Unlike brushes, spray cans produce a fine mist of paint. This mist covers surfaces evenly, hiding brush marks that often appear with liquid paint. This is especially good for flat, large surfaces found on laminate items like tabletops or cabinet doors. The wide range of colors and finishes available in spray paint also gives you many design options. You can choose matte, satin, gloss, or even metallic looks. This means your old furniture can match any new style you choose.
However, painting laminate has its challenges. Laminate is a non-porous material. This means paint does not stick to it easily. Proper preparation is critical for success. Without the right primer and sanding, your paint may chip or peel off quickly. You must also work in a well-ventilated area because spray paint fumes can be strong. Protecting your surroundings from overspray is also important. Despite these points, many people find the quick transformation and professional finish worth the effort. My own experiences show that careful preparation makes all the difference. It turns a challenging surface into a successful DIY project.
Essential Materials and Tools for a Successful Spray Paint Project
Before you begin to spray paint laminate furniture, gathering all the right materials is important. Having everything ready makes the process smoother and helps you achieve a professional-looking finish. Using the correct tools and supplies is key to success when working with laminate, which needs good adhesion.
Here is a list of what you will need:
- Degreaser or All-Purpose Cleaner: This removes grime and dirt.
- Fine-Grit Sandpaper (220-400 grit): This scuffs the laminate surface. It helps the primer stick.
- Tack Cloth or Microfiber Cloths: These remove dust after sanding.
- Painter’s Tape: This protects areas you do not want to paint.
- Drop Cloths or Plastic Sheeting: These protect your work area from overspray.
- Respirator Mask: This protects your lungs from paint fumes.
- Safety Glasses: These protect your eyes from paint particles.
- Gloves: These protect your hands from paint and chemicals.
- Shellac-Based or Bonding Spray Primer: This is the most critical item for adhesion. It creates a sticky base for the paint.
- Spray Paint (All-in-One Paint + Primer, or Furniture Spray Paint): Choose a durable formula.
- Clear Protective Topcoat (Spray Polycrylic or Clear Enamel): This adds durability and seals the paint.
Choosing the Right Spray Paint and Primer
Selecting the right primer is perhaps the most important decision for this project. Laminate is very smooth. Regular paint will not stick to it well without a special primer. I recommend a shellac-based primer or a dedicated bonding primer in spray form. Brands like Zinsser B-I-N Shellac-Base Primer or Rust-Oleum Primer are excellent choices. They create a strong bond even on slick surfaces like laminate. These primers block stains and prevent bleed-through. This helps the topcoat look even and vibrant.
For the spray paint, look for products designed for furniture or multi-surface use. Some brands offer “paint + primer” formulas. While convenient, always use a dedicated bonding primer first for laminate. This extra step prevents peeling or chipping later. Consider the finish you want (matte, satin, semi-gloss). Satin or semi-gloss finishes tend to be more durable and easier to clean. Using an effective cleaner for spray nozzles will also ensure a consistent spray pattern throughout your project, preventing clogs. How To Clean Spray Nozzle
Finally, a clear topcoat is essential for durability. It protects the paint from scratches, wear, and moisture. Spray polycrylic or clear enamel topcoats work well over spray paint. Make sure the topcoat is compatible with your chosen spray paint. Read the labels carefully for curing times and application instructions. Proper material selection lays the groundwork for a successful and long-lasting furniture transformation.
Preparing Laminate Furniture for Spray Painting
Proper preparation is the most important step when you spray paint laminate furniture. If you skip or rush this stage, your paint job will not last. The paint may peel, chip, or scratch off easily. Laminate surfaces are slick. They do not give paint much to stick to. We need to create a surface that paint can grab onto. This ensures a durable, beautiful finish.
Follow these steps carefully for the best results:
- Disassemble the Furniture (If Possible): Remove all drawers, doors, and hardware like knobs and pulls. This makes it easier to clean, sand, and paint every surface evenly. Keep all hardware in a labeled bag so you can put it back together correctly.
- Clean the Surface Thoroughly: Laminate furniture collects dirt, grease, and grime over time. Use an all-purpose cleaner or a degreaser solution. Spray the cleaner on the surface and wipe it down with a clean cloth. Pay close attention to areas that get a lot of use, like table tops or drawer fronts. This step removes anything that could prevent the primer from sticking well. Make sure the surface is completely dry before moving on. For guidance on cleaning similar surfaces, you can refer to tips on How To Clean Laminate Cabinets.
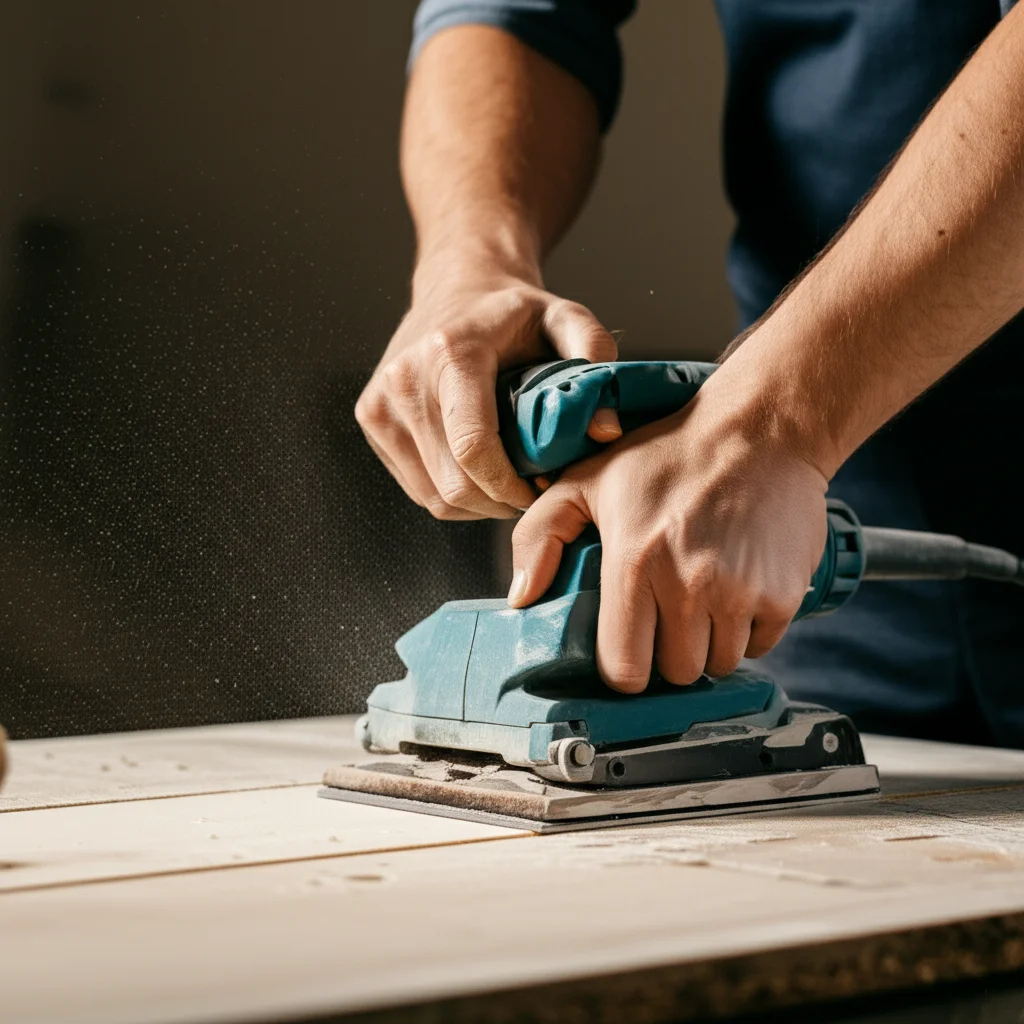
- Lightly Scuff-Sand the Laminate: This step is vital for adhesion. You are not trying to remove the laminate. You are just creating tiny scratches. These scratches give the primer something to grip. Use fine-grit sandpaper, like 220-grit or 320-grit. Lightly sand all surfaces you plan to paint. Apply gentle, even pressure. You will notice the surface becoming dull, not shiny. Do not sand too hard, or you might damage the laminate layer. For comprehensive advice on painting laminate surfaces, consider reading our guide on How To Paint a Laminate Table, which offers similar preparation steps.
- Remove Sanding Dust: After sanding, there will be a fine layer of dust on your furniture. Use a vacuum cleaner with a brush attachment to remove most of it. Then, use a tack cloth or a damp microfiber cloth to wipe down all surfaces. Make sure there is no dust left. Dust can create a rough finish or prevent good adhesion. Let the surface dry completely if you used a damp cloth.
- Repair Any Damage: Inspect the laminate for any chips, dents, or peeling areas. If you find any, fill them with wood filler or a two-part epoxy filler. Smooth the filler with a putty knife. Once dry, sand the repaired areas smooth with fine-grit sandpaper. This creates a uniform surface for painting. Learn more about fixing damages on How To Repair Chipped Laminate Furniture.
- Mask Off Areas: Use painter’s tape to cover any parts you do not want to paint. This includes drawer interiors, the backs of shelves, or hardware attachment points. Press the tape down firmly to prevent any paint from seeping underneath. Lay down drop cloths or plastic sheeting on your floor and surrounding areas. This protects them from overspray. Work in a well-ventilated area, preferably outdoors or in an open garage.
Taking your time with these preparation steps will ensure a smooth, long-lasting finish for your spray-painted laminate furniture. It sets the stage for a successful transformation.
Priming Laminate: The Foundation for Strong Paint Adhesion
Once your laminate furniture is clean, sanded, and masked, the next critical step is priming. This step is not optional when you spray paint laminate furniture. Laminate surfaces are notoriously smooth and non-porous. This means most paints will not stick to them directly or will peel off easily over time. Primer acts as a bridge. It creates a rough, sticky surface that the topcoat can grip onto firmly. Without proper priming, even the best spray paint will likely fail.
I cannot stress enough the importance of using the right primer. For laminate, you need a high-adhesion primer. Shellac-based primers are excellent because they stick to almost any surface, including slick laminate. They also dry quickly and block stains. Another good option is a dedicated bonding primer, specifically formulated for difficult-to-paint surfaces like plastics, metals, and laminate. These primers create a strong mechanical bond with the surface. They provide a stable base for your chosen topcoat. I always use one of these types for laminate projects.
When applying the primer, shake the can well for at least one minute after the mixing ball rattles. This ensures the primer is well-mixed. Hold the can about 8-12 inches away from the furniture surface. Use smooth, even, sweeping motions. Start spraying off the piece and move across, releasing the button at the end of each pass. Overlap each pass slightly to ensure full coverage. The goal is to apply several thin coats, not one thick coat. A thick coat can lead to drips or uneven drying. It can also hurt adhesion.
Apply one thin, even coat over the entire surface. Do not worry about achieving full opacity with the first coat. You just need a light, even layer. Let this first coat dry completely according to the manufacturer’s instructions. This usually takes about 30 minutes to an hour for spray primers. Once dry, apply a second thin coat. Two thin coats are much better than one thick coat. They provide better adhesion and a smoother final surface. Some slick laminate pieces might even benefit from a third thin coat. Always follow the specific drying times on your primer can. Drying times can vary based on temperature and humidity. Ensuring each coat is fully dry before applying the next prevents problems later. This solid primer base is the secret to a long-lasting, beautiful finish on your laminate furniture.
Spray Painting Laminate Furniture: Technique and Tips
Now that your laminate furniture is properly primed, it is time for the exciting part: applying the spray paint. This stage requires patience and good technique to get a smooth, even finish. Remember, the key is multiple thin coats, not one thick coat. Trying to get full coverage in one go will lead to drips, runs, and an uneven surface. I always tell people to think of it like building layers, one by one.
Optimal Painting Environment
First, choose the right environment. Work in a well-ventilated area. Outdoors on a calm, dry day is ideal. If indoors, open windows and doors. Use fans to move air. Avoid painting in direct sunlight or extreme humidity. High humidity can cause paint to dry too slowly or create a bumpy texture. Very hot conditions can make paint dry too fast, leading to an uneven finish. The ideal temperature is usually between 60-85°F (15-30°C) with low humidity. Make sure your work area is free of dust and debris. Dust can settle on wet paint and ruin your smooth finish.
Mastering Spray Painting Technique
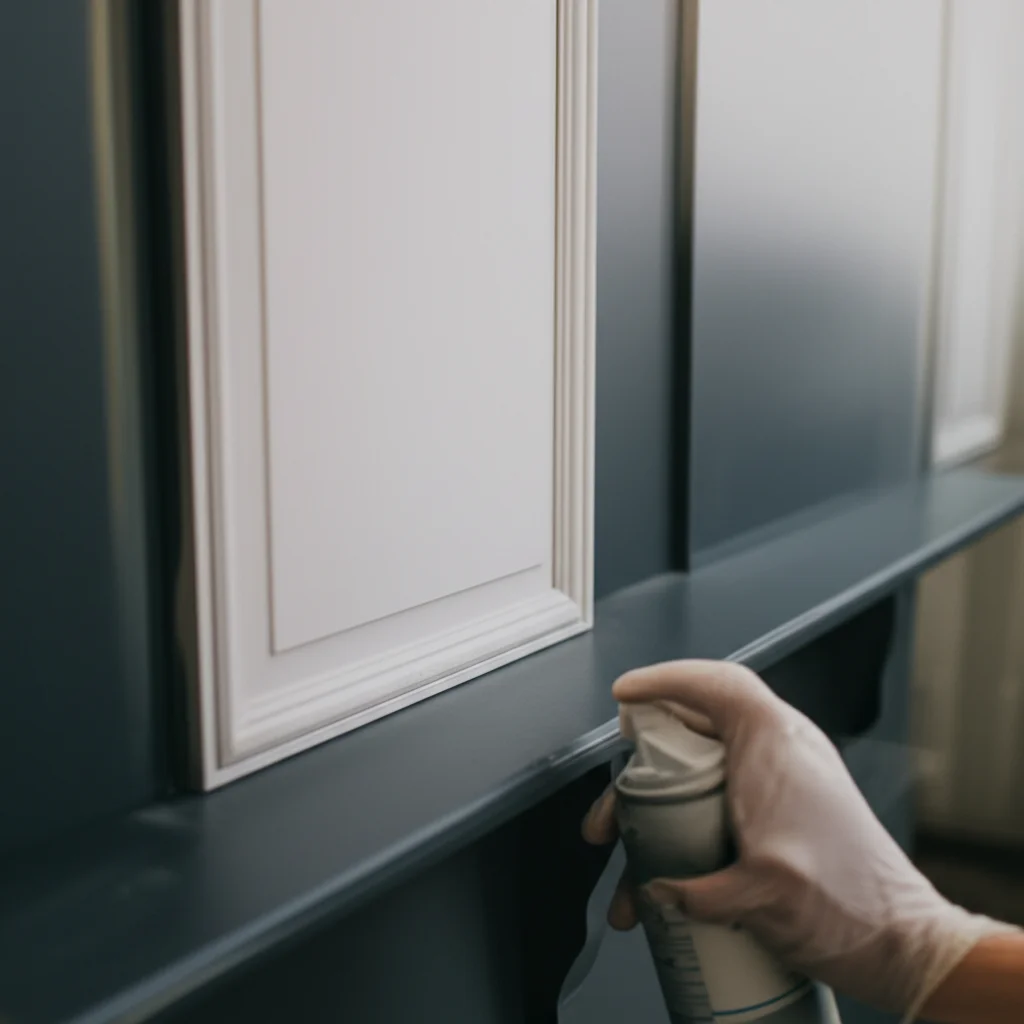
Shake your spray paint can vigorously for at least one minute after the mixing ball begins to rattle. Continue shaking periodically during use. This keeps the paint properly mixed. Hold the can about 8 to 12 inches away from the surface of your furniture. This distance helps create an even spray pattern and prevents paint from building up too much.
Begin spraying by pressing the nozzle button and moving the can across the furniture. Use a steady, sweeping motion. Start spraying just off the edge of the piece and stop spraying after you have passed the other edge. This avoids heavy paint spots at the start and end of your stroke. Overlap each stroke by about 50%. This ensures even coverage without creating lines. Keep the can moving at all times while spraying. Never stop with the nozzle pressed down, or you will create a puddle. For tips on general spray paint techniques, our guide on How To Spray Paint Outdoor Metal Furniture shares similar application methods.
Apply one thin coat over the entire surface. You will likely still see the primer or original color underneath. This is perfectly normal. Do not try to cover it fully with the first coat. Let this coat dry to the touch according to the paint manufacturer’s instructions. This usually takes 15-30 minutes. Once dry, apply a second thin coat using the same sweeping motions. Repeat this process until you achieve the desired color and opacity. Most laminate projects require 2-4 thin coats for full coverage.
Patience is key during drying times. Applying a new coat before the previous one is sufficiently dry can cause bubbling, wrinkling, or runs. If you notice any small drips or imperfections, let the paint dry completely. Then, you can gently sand the area smooth with 400-grit sandpaper and reapply a thin coat. If you get overspray on unintended areas, learn How To Clean Spray Paint to fix it. Taking your time with each thin coat will lead to a beautiful, professional-looking finish that you will be proud to display.
Sealing and Curing Your Newly Painted Laminate Furniture
After successfully spray painting laminate furniture, the final step is to protect your hard work with a clear topcoat. This step is just as important as priming. A clear topcoat adds a layer of protection against scratches, chips, moisture, and general wear and tear. Without it, your beautiful new paint job might not last long, especially on furniture that gets regular use, like a desk or a dresser.
Choosing the right topcoat is important. For spray-painted laminate, a spray polycrylic or clear spray enamel works very well. Polycrylic is water-based. It is known for its durability and does not yellow over time, making it great for light-colored paints. Clear spray enamel is often solvent-based. It provides a very hard and durable finish. Always check that your chosen topcoat is compatible with your spray paint. Read the product labels for compatibility and specific application instructions. My experience shows that compatible products create the strongest bond and best finish.
Just like with the primer and paint, apply the clear topcoat in multiple thin coats. Shake the can well. Hold it 8-12 inches from the surface. Use steady, sweeping motions. Apply the first thin coat evenly over all painted surfaces. Do not try to get full coverage or a thick layer in one pass. A thin coat will dry more evenly and prevent drips. Let this first coat dry completely to the touch. This usually takes about 30 minutes to an hour, depending on the product and conditions.
Once the first coat is dry, apply a second thin coat. Many projects benefit from 2-3 coats of a clear topcoat for maximum durability. For high-use surfaces, like a tabletop, I often apply a third coat. Always follow the manufacturer’s recommended drying times between coats. Trying to rush this process can trap solvents underneath, leading to a cloudy finish or less durable protection.
The final, often overlooked, step is curing. Paint may feel dry to the touch in hours, but it takes much longer to fully cure and harden. Curing means the paint and topcoat have reached their maximum hardness and durability. For spray paint and clear coats, this can take anywhere from a few days to several weeks, depending on the product, temperature, and humidity. During the curing period, handle the furniture gently. Avoid placing heavy objects, food, or drinks on it. Do not clean it with harsh chemicals. Letting the furniture fully cure ensures the finish is as tough and long-lasting as possible. Your patience here pays off with a durable and beautiful piece of furniture that stands the test of time.
Troubleshooting Common Spray Painting Issues
Even with careful preparation, you might encounter some common issues when you spray paint laminate furniture. Knowing how to fix these problems can save your project and give you confidence. I have faced many of these issues myself, and fixing them is often simpler than it seems.
Here are some common problems and their solutions:
Drips or Runs
Problem: Paint forms drips or runs down the surface. Cause: Applying paint too thickly, holding the can too close, or moving the can too slowly. Solution: If the paint is still wet, you can sometimes carefully wipe the drip with a clean, lint-free cloth or a foam brush. If the paint has dried, let it cure for a day or two. Then, use fine-grit sandpaper (400-grit or higher) to gently sand down the dried drip until it is smooth. Wipe away dust with a tack cloth. Reapply a very thin coat of paint to that area, blending it with the surrounding finish. Remember to apply future coats in light, even passes, keeping the can moving steadily.
Rough or Bumpy Finish
Problem: The painted surface feels rough, like sandpaper. Cause: Dust or debris settling on wet paint, painting in high humidity, or holding the can too far away causing the paint to dry before it reaches the surface (dry spray). Solution: If the paint is dry, lightly sand the rough areas with very fine-grit sandpaper (400-600 grit). This will smooth the surface. Wipe clean with a tack cloth. Then, apply another thin coat of paint. To prevent this, ensure your work area is clean and dust-free. Work in an area with good ventilation but without strong drafts that could blow dust. Avoid painting on very humid days. Hold the can at the recommended 8-12 inches.
Peeling or Chipping Paint
Problem: The paint is not sticking and is peeling or chipping off, especially at edges. Cause: Poor surface preparation, specifically inadequate cleaning or sanding, or using the wrong type of primer. Laminate needs specific primers for adhesion. Solution: This is a tougher fix. You usually need to go back to square one for the affected areas. Scrape or sand off all loose paint. Re-clean the area thoroughly. Re-sand the laminate surface well to create a good scuff. Reapply a high-quality bonding or shellac-based primer. Then, reapply your spray paint in thin coats. This problem highlights why preparation and the right primer are so important. For more on fixing damages, see How To Repair Chipped Laminate Furniture.
Uneven Coverage or Streaks
Problem: The color looks patchy, or you can see lines where the spray passes overlapped incorrectly. Cause: Inconsistent spray technique, not overlapping passes enough, or moving the can too fast or too slow in certain areas. Solution: Let the paint dry completely. Apply another thin, even coat of spray paint. Focus on maintaining consistent speed and overlapping your passes by about 50%. Make sure the can is shaken well and held at a steady distance. Sometimes, simply applying another careful, thin coat will even out the appearance.
Troubleshooting takes patience. Most issues can be corrected with a bit of sanding and reapplication. Do not get discouraged. Every project is a learning experience. With these tips, you can achieve a flawless finish on your spray-painted laminate furniture.
Frequently Asked Questions About Spray Painting Laminate Furniture
Can you spray paint laminate furniture without sanding?
While some primers claim “no sanding required,” I always recommend a light scuff-sanding. Laminate is very smooth. A quick pass with 220-400 grit sandpaper creates tiny scratches. These scratches help the primer bond better to the surface. This small step greatly improves paint adhesion and reduces the chance of peeling or chipping later. It provides a more durable finish.
What is the best primer for laminate furniture?
The best primers for laminate furniture are shellac-based primers or dedicated bonding primers in spray form. Brands like Zinsser B-I-N Shellac-Base Primer or Rust-Oleum Bonding Primer are highly effective. These primers are designed to stick to slick, non-porous surfaces like laminate, ensuring your spray paint has a strong foundation.
How long does spray paint take to cure on laminate?
Spray paint often feels dry to the touch in minutes or hours, but full curing takes much longer. On laminate, complete curing can take anywhere from 7 to 30 days, depending on the specific paint, humidity, and temperature. During this time, handle the furniture gently. Avoid heavy use or placing objects on the surface to allow the paint to harden fully.
Can you use regular spray paint on laminate?
You can use regular spray paint on laminate furniture, but you must use the right primer first. Without a specialized bonding or shellac-based primer, regular spray paint will not stick well to the slick laminate surface. It will likely peel or chip. The primer creates the necessary adhesion for any topcoat, including regular spray paint.
How do you prevent drips when spray painting?
To prevent drips, apply spray paint in multiple thin, even coats. Hold the can 8-12 inches away from the surface. Keep the can moving steadily across the furniture in a sweeping motion. Start and stop your spray off the piece itself. Avoid oversaturating any one area. Allow each thin coat to dry to the touch before applying the next.
Is spray painting laminate furniture durable?
Yes, spray-painted laminate furniture can be very durable if you follow all steps correctly. Proper surface preparation, using a high-quality bonding primer, applying multiple thin coats of durable spray paint, and finishing with a clear protective topcoat are all essential. These steps create a robust finish that can withstand everyday use.
Conclusion
Giving your old laminate furniture a fresh look with spray paint is a rewarding DIY project. I have found it incredibly satisfying to transform outdated pieces into something new and exciting. You
- spray paint
- laminate furniture
- furniture makeover
- DIY painting
- home decor
- furniture restoration
- painting tips

Todd Martin
Senior Writer
With over 15 years of experience in home renovation and design, I started HEG to share what I’ve learned with homeowners who want to create spaces that are both beautiful and functional. I’ve always believed in a hands-on approach, and over the years, I’ve picked up practical solutions that actually work. Through HEG, I aim to make home improvement more approachable, sharing real tips that help you create a home you truly love.