· Todd Martin · Furniture Renovation · 18 min read
How To Paint Pottery Barn Furniture
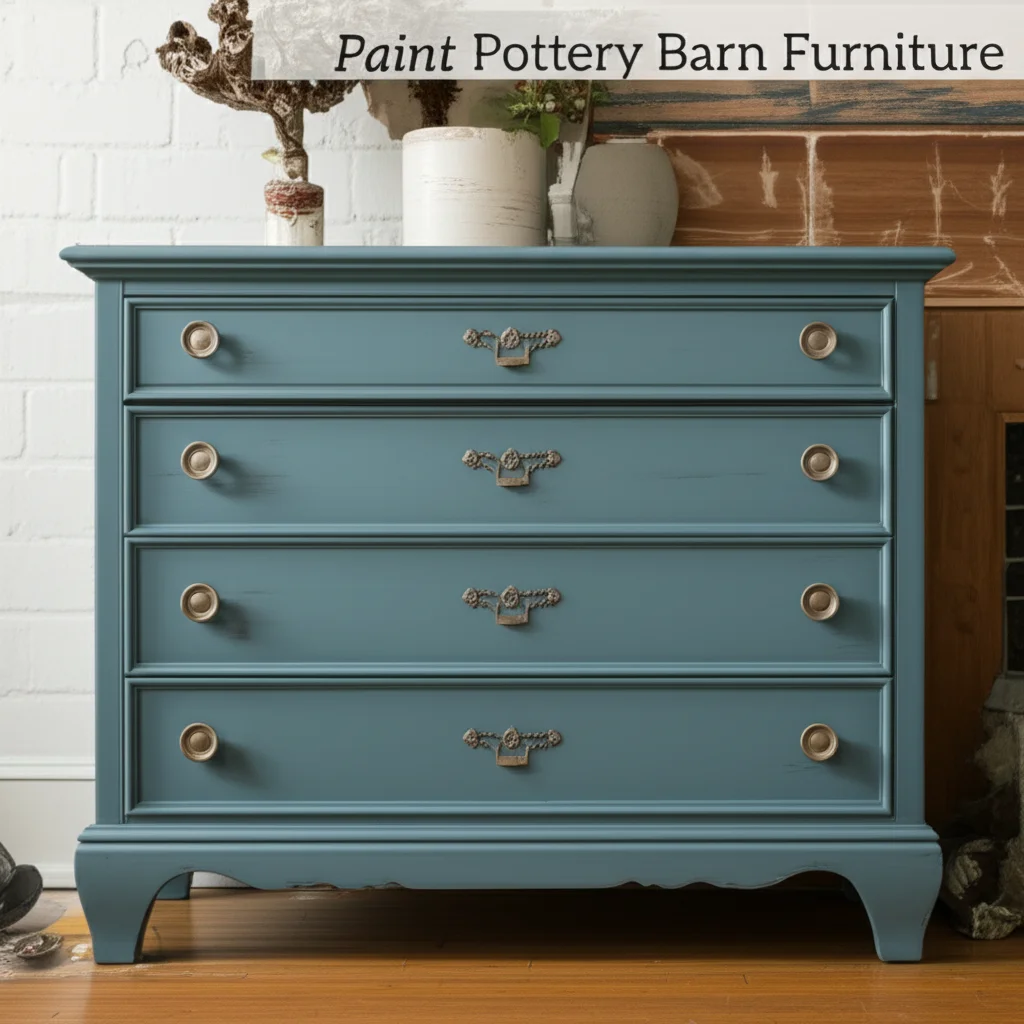
Give Your Home a Fresh Look: How To Paint Pottery Barn Furniture
Have you looked at your Pottery Barn furniture and thought, “It needs a change?” Perhaps the style feels dated, or the color no longer fits your home decor. Painting your beloved pieces offers a fantastic way to refresh your space without buying new items. I have personally updated several pieces, and the results are always satisfying. This project allows you to personalize high-quality furniture, giving it a second life.
This guide helps you understand exactly how to paint Pottery Barn furniture. We will cover why these pieces are great candidates for painting and what tools you need. You will learn the important steps for proper preparation and selecting the right paint. I will also share techniques for a smooth finish and how to protect your newly painted furniture. Get ready to transform your home with a fresh look!
Takeaway
- Pottery Barn furniture is good for painting due to its solid construction.
- Gather all necessary tools and materials before you start.
- Clean, sand, and prime furniture for the best paint adhesion.
- Choose a durable paint and primer specific for furniture projects.
- Apply multiple thin coats for a smooth, even finish.
- Seal your painted furniture to protect the new surface.
Painting Pottery Barn furniture requires careful preparation, the right materials, and proper application techniques. First, clean and sand the surface thoroughly. Next, apply a high-quality primer. Then, use durable furniture paint in thin coats. Finally, seal the piece with a protective topcoat for a lasting, beautiful finish.
Why Paint Pottery Barn Furniture? Understanding its Value
Pottery Barn furniture often features strong construction and quality materials. Many pieces are solid wood, offering a sturdy base for painting projects. This high build quality makes them excellent candidates for a refresh. Painting is a budget-friendly option compared to buying new furniture. It also lets you customize a piece to match your current home style.
You get a chance to save money and show your creativity. I often find that older, solid pieces hold up better to paint than new, cheaper furniture. Their inherent quality means they can handle the refinishing process well. This makes your effort worthwhile. You invest time in a piece that will continue to serve you for years.
Painting lets you update a classic style or change a color that no longer works. Perhaps your decor has shifted, or you want a bolder statement piece. A new paint color instantly changes the item’s feel. It is a simple way to make an older item feel current. This process preserves the value of a good piece of furniture.
The furniture often has good bones and detailed craftsmanship. These details look great with a fresh coat of paint. You can highlight carvings or specific shapes with a new color. Painting offers a fresh canvas for your design ideas. It extends the life of a well-made item.
This choice supports sustainability, too. You keep a usable item out of a landfill. Giving furniture a new life reduces waste. It is a responsible way to decorate your home. I feel good knowing I have repurposed something instead of just buying more.
Essential Tools and Materials for Your Pottery Barn Project
Having the right tools ready makes any painting project easier. This is especially true when you paint furniture. Gathering everything before you begin saves time and prevents interruptions. You will need items for cleaning, sanding, painting, and protecting your work. Using quality tools also helps you get a better finish.
Here is a list of the must-have supplies:
- Cleaning Supplies:
- Mild detergent or degreaser
- Clean cloths or sponges
- Bucket of water
- Preparation Tools:
- Screwdriver (for removing hardware)
- Drop cloths or old sheets (to protect your work area)
- Painter’s tape (for masking off areas)
- Wood filler (for dents or holes)
- Putty knife
- Sanding blocks or an orbital sander
- Sandpaper in various grits (e.g., 100, 150, 220 grit)
- Painting Supplies:
- High-quality primer (e.g., shellac-based or bonding primer)
- Your chosen paint (e.g., latex, mineral, or chalk paint)
- Paintbrushes (angled brush for corners, flat brush for surfaces)
- Small foam rollers (for smooth, even coverage on flat areas)
- Paint trays
- Stir sticks
- Protection and Finishing:
- Clear topcoat (e.g., water-based polyurethane or furniture wax)
- Clean, lint-free cloths (for applying wax)
- Safety Gear:
- Nitrile gloves (to protect hands from paint and chemicals)
- Dust mask or respirator (for sanding and painting in less ventilated areas)
- Safety glasses
Choosing good brushes and rollers prevents brush marks and streaks. Investing in a quality primer helps the paint stick well to the furniture. These choices directly affect your final result. I always make sure my tools are clean and in good condition. This prevents problems like stray hairs in the paint or uneven coverage.
Preparing Your Pottery Barn Piece for a Flawless Finish
Proper preparation is the most important step when you paint furniture. Skipping steps here leads to a poor, peeling finish later. Pottery Barn furniture often has a durable factory finish. This finish needs specific attention to ensure new paint sticks. I always spend extra time on prep, knowing it pays off.
Step-by-Step Preparation
Clean the Furniture Thoroughly:
- Start by wiping down the entire piece with a mild detergent or a dedicated degreaser. Furniture collects dirt, grease, and grime over time. These substances prevent paint from adhering properly.
- Use a clean cloth or sponge and warm water. Make sure to get into all crevices and corners.
- Rinse the piece with clean water and a fresh cloth. Allow it to dry completely. Any moisture left behind can affect paint adhesion. This step ensures a clean canvas for your work. For more details on cleaning your furniture before painting, you can check out this guide: how to clean furniture before painting.
Remove Hardware:
- Take off all knobs, pulls, hinges, and any other removable hardware. This protects them from paint and allows for a cleaner finish.
- Store the hardware in a labeled bag or container. This helps you keep track of small parts. You can easily reattach them later.
- If any hardware is difficult to remove, use painter’s tape to cover it neatly.
Repair Imperfections:
- Look closely for dents, scratches, or small holes. These flaws will show through paint.
- Use wood filler to patch any damaged areas. Apply it with a putty knife, pressing it firmly into the imperfection.
- Allow the wood filler to dry fully according to the product instructions. Drying times vary.
Sanding for Adhesion:
- Sanding creates a surface that paint can grip onto. Pottery Barn furniture usually has a smooth, sometimes shiny, factory finish. This finish needs scuffing.
- Start with a medium-grit sandpaper (100-150 grit) to rough up the existing finish. You do not need to remove all the old finish, just dull the shine. Sand in the direction of the wood grain.
- Follow up with a finer-grit sandpaper (180-220 grit) for a smoother surface. This helps eliminate sanding marks.
- If your furniture has a very thick, stubborn varnish or paint, you might need to use a chemical stripper first. However, light sanding often works for most Pottery Barn pieces.
- After sanding, wipe down the furniture with a tack cloth or a damp cloth to remove all dust. Dust is a paint’s enemy, causing bumps and poor adhesion.
Prime the Surface:
- Priming is critical for Pottery Barn furniture. It ensures good paint adhesion and prevents bleed-through from tannins in the wood. It also creates a uniform base for your chosen color.
- Use a high-quality bonding primer or a shellac-based primer. These types are excellent at sticking to tricky surfaces and blocking stains.
- Apply one to two thin coats of primer. Allow each coat to dry completely before applying the next. Follow the manufacturer’s drying times.
- Lightly sand with 220-grit sandpaper after the first primer coat if needed, then wipe clean. This creates an extra smooth surface for your paint. For furniture that already has paint, preparing it might involve specific steps for proper adhesion; learn more here: how to paint over painted furniture.
This thorough prep work ensures your paint sticks well and looks smooth. It prevents future peeling or chipping. I always tell people that good prep means a good outcome.
Choosing the Right Paint and Primer for Durability and Style
Selecting the correct paint and primer is as important as proper preparation. Your choices affect both the look and durability of your painted Pottery Barn furniture. Not all paints are equal for furniture. I have tried many types, and some perform much better than others.
Primer Selection
- Bonding Primer: This type of primer is designed to stick to difficult surfaces like slick factory finishes. It creates a strong bond between the furniture and your paint. Look for a water-based bonding primer for easy cleanup.
- Shellac-Based Primer: A shellac-based primer is excellent for blocking stains and odors. It also adheres very well to smooth surfaces. It dries fast but requires mineral spirits for cleanup. It is a good choice if your furniture has any dark wood that might bleed through lighter paint colors.
Always use a primer specifically designed for furniture or cabinetry. These primers offer better adhesion and durability than standard wall primers. Do not skip primer, especially on smooth Pottery Barn finishes.
Paint Type Selection
Once primed, your furniture is ready for color. Several paint types work well for furniture. Each offers different benefits and finishes:
Latex Paint (Acrylic Latex):
- Pros: Water-based, easy cleanup, low odor, widely available. It is durable, especially higher-quality versions with built-in primers or increased durability.
- Cons: Can show brush marks if not applied carefully. May require a longer cure time before becoming fully hard.
- Best for: General furniture painting, especially if you want a smooth, modern look. Choose a semi-gloss or satin finish for durability. Learn more about painting furniture with latex paint here: how to paint furniture with latex paint.
Mineral Paint:
- Pros: Often self-leveling, low VOCs, and has a built-in topcoat. It provides a durable, matte to satin finish. Very easy to use.
- Cons: Can be more expensive than latex.
- Best for: A smooth, modern, and highly durable finish with minimal effort. This is one of my favorite options for busy pieces.
Chalk Paint:
- Pros: Requires minimal prep (often no sanding or priming). Creates a matte, velvety finish. Easy to distress for a vintage look.
- Cons: Needs a topcoat (wax or poly) for durability. Can chip if not sealed properly.
- Best for: Achieving a distressed, farmhouse, or shabby chic look. If you consider chalk paint, understanding how to clean chalk paint furniture is helpful for long-term care: how to clean chalk paint furniture.
Milk Paint (True Milk Paint or All-in-One Milk Paint):
- True Milk Paint: Comes in powder form, needs mixing. Creates a very durable, flat finish. Can naturally chip or “flake” for an authentic antique look.
- All-in-One Milk Paint (e.g., Fusion Mineral Paint): Similar to mineral paint, offers good adhesion and durability without a separate topcoat. Learn about using this type of paint here: how to use fusion paint on furniture.
- Best for: True milk paint for an authentic chippy look, or all-in-one versions for durability and ease.
Consider the level of traffic the furniture receives. A dining table needs a more durable paint and topcoat than a decorative side table. Always choose paint made for furniture or cabinets. These paints are formulated for daily use and wear.
Applying Paint Like a Pro: Techniques for a Smooth Finish
Once you have prepared your Pottery Barn furniture and chosen your paint, it is time to apply the color. Proper application techniques lead to a beautiful, smooth finish without drips or brush marks. Patience is your best tool here. I always work in thin layers, which is key to a professional look.
Painting Techniques
Start with the Right Environment:
- Paint in a clean, well-ventilated area. Avoid dusty spaces.
- Ensure the temperature is moderate, not too hot or too cold. Extreme temperatures can affect paint drying and adhesion.
- Lay down drop cloths to protect your floors or work surfaces.
Mix Your Paint Well:
- Stir your paint thoroughly before and during use. This ensures even color and consistency. Do not shake cans unless instructed, as this creates bubbles.
Apply Thin Coats:
- This is the golden rule of furniture painting. Multiple thin coats are always better than one thick coat. Thick coats drip, sag, and take longer to dry. They also lead to an uneven, unprofessional finish.
- Dip your brush or roller only partially into the paint. Remove excess paint before applying it to the furniture.
Use the Right Tools for the Job:
- Brushes: Use a good quality angled brush for corners, edges, and detailed areas. A flat brush works well for larger flat surfaces. Apply paint in long, even strokes in the direction of the wood grain. Avoid overworking the paint.
- Rollers: Small foam rollers are excellent for large, flat surfaces like tabletops or drawer fronts. They create a very smooth finish with minimal texture. Rollers also help reduce brush marks.
- Sprayers: For the smoothest, factory-like finish, consider a paint sprayer. Sprayers apply a very even, thin coat. This option requires practice and proper setup, including masking everything nearby. Learn more about getting a smooth finish and avoiding brush marks here: how to paint furniture without brush marks. For general spraying tips, you can refer to advice like how to spray paint outdoor metal furniture, which shares principles of thin, even coats.
Allow Proper Drying Time Between Coats:
- Always follow the paint manufacturer’s recommended drying times between coats. Rushing this step can lead to peeling or bubbling.
- Even if the paint feels dry to the touch, it might not be ready for another coat. Paint needs time to cure and harden.
Light Sanding Between Coats (Optional but Recommended):
- After the first coat of paint (and sometimes subsequent coats), you can lightly sand the surface with 220-grit or finer sandpaper. This smooths any minor imperfections or dust nibs.
- Wipe away all dust with a tack cloth before applying the next coat.
Address Drips and Imperfections:
- Check for drips or runs as you paint. Smooth them out immediately with your brush or roller.
- If paint dries with drips, lightly sand them down once dry and reapply paint.
Apply at least two to three thin coats of paint for full coverage and durability. Some colors, especially lighter ones over dark wood, may need more coats. Be patient through this process. Each coat builds strength and beauty.
Sealing and Protecting Your Newly Painted Pottery Barn Furniture
After putting in all the effort to paint your Pottery Barn furniture, you need to protect your work. A proper topcoat or sealant safeguards the paint from daily wear, scratches, and moisture. This step ensures your beautiful new finish lasts for many years. Skipping the sealant means your hard work might chip or scuff easily.
Choosing the Right Topcoat
The type of sealant you choose depends on the paint you used and the desired finish.
Water-Based Polyurethane:
- Best for: Latex, mineral, or other acrylic-based paints. It offers strong durability against scratches and water.
- Finish: Available in matte, satin, semi-gloss, and gloss. Satin is popular for furniture as it provides a subtle sheen.
- Application: Apply in thin coats with a brush or foam applicator. Allow proper drying time between coats. Two to three coats are usually enough for good protection. Lightly sand with very fine grit (320-400) sandpaper between coats for extra smoothness.
- Pros: Durable, non-yellowing, easy cleanup with water, low odor.
- Cons: Can be tricky to apply without bubbles if brushed too heavily.
Furniture Wax:
- Best for: Chalk paint or true milk paint. It gives a soft, natural look and feel.
- Finish: Creates a matte or soft sheen, depending on how much you buff it.
- Application: Apply thin layers with a lint-free cloth or wax brush. Buff with a clean cloth after it dries (usually 15-30 minutes) to create a sheen and harden the wax. Multiple thin coats are better than one thick one. Reapply wax yearly for heavy-use items.
- Pros: Easy to apply, beautiful soft finish, enhances distressed looks.
- Cons: Less durable than polyurethane, requires reapplication, not as water-resistant.
Clear Coat / Lacquer:
- Best for: Specific types of paint or if you want a very high-gloss, hard finish.
- Finish: Can provide a very durable, high-gloss surface.
- Application: Often sprayed for best results. Dries very quickly.
- Pros: Extremely durable, strong protection.
- Cons: Strong fumes, requires good ventilation, can be harder to apply evenly for beginners.
Application Tips for Sealant
- Cleanliness: Ensure the painted surface is completely free of dust before applying the sealant. Use a tack cloth.
- Thin Coats: Just like with paint, apply thin, even coats of your chosen sealant. This prevents drips, unevenness, and long drying times.
- Full Curing Time: This is often overlooked. Paint and topcoats need time to fully harden or “cure.” While dry to the touch in hours, full cure can take 7 to 30 days. During this time, treat your furniture gently. Avoid heavy use, placing heavy objects, or scrubbing the surface. This waiting period ensures maximum durability.
- Testing: If unsure about a topcoat, test it on an inconspicuous area or a scrap piece of wood painted with the same process.
Protecting your painted furniture is the final, crucial step. It locks in your hard work and makes sure your beautiful Pottery Barn piece stays that way.
Creative Finishes and Maintenance Tips
Painting Pottery Barn furniture opens up many creative possibilities beyond a single solid color. You can add unique flair and ensure your piece stays beautiful for years. I love experimenting with different looks. It makes each piece feel truly custom.
Creative Finishes to Explore
Distressing:
- This technique makes new paint look old and worn. After painting, lightly sand edges and raised areas to reveal the original finish or a base coat underneath.
- Use fine-grit sandpaper or a wet rag (for chalk paint). This works well with farmhouse or shabby chic styles. Consider how to achieve a two-tone distressed look for added depth: how to paint two-tone distressed furniture.
Layering Colors:
- Apply one base color, let it dry, then apply a different top color. Lightly sand parts of the top coat to let the base color show through. This creates a rich, textured look.
- This technique adds depth and interest. For more details on layering, review this guide: how to layer paint colors on furniture.
Glazing:
- Apply a translucent glaze over your dried paint. Glaze can be tinted to add a subtle wash of color or to create an aged look. Wipe back excess glaze to highlight details.
Stenciling:
- Use stencils to add patterns or designs to your furniture. This is great for a custom touch. Use painter’s tape to secure the stencil. Apply paint with a sponge or stencil brush.
Hardware Upgrade:
- New knobs, pulls, or hinges can completely change the look of a piece. Choose hardware that matches your new style. Bronze, gold, or black hardware can create a striking contrast with new paint.
Maintenance Tips for Painted Furniture
Caring for your newly painted furniture ensures its longevity and beauty.
Gentle Cleaning:
- Dust regularly with a soft, lint-free cloth.
- For deeper cleaning, wipe with a damp cloth and mild soap. Avoid harsh chemicals, abrasive cleaners, or scrub brushes. These can damage your paint or topcoat. Always test cleaning methods in an unseen area first.
Protect from Heat and Moisture:
- Use coasters under drinks and trivets under hot dishes. Heat and moisture can damage the paint and sealant, causing rings or discoloration.
- Wipe up spills immediately. Do not let liquids sit on the surface.
Avoid Scratches:
- Lift items rather than dragging them across the painted surface.
- Place felt pads on the bottom of decorative objects.
- For high-traffic surfaces like desktops, consider using a clear protector or glass top.
Reapply Topcoat (If Needed):
- If you used wax as a topcoat, you might need to reapply it every 6-12 months, especially for frequently used pieces.
- Polyurethane or other hard sealants generally do not need reapplication unless the finish becomes damaged.
Touch-Ups:
- Keep a small amount of your leftover paint. This allows you to quickly touch up any small chips or scratches that occur over time. Clean the area, apply a tiny bit of paint, and then seal if necessary.
By giving your furniture a personalized finish and then caring for it properly, you ensure your Pottery Barn piece remains a cherished part of your home decor for many more years. Deciding on the right color is a big part of this creative process; find inspiration here: how to decide what color to paint furniture.
Frequently Asked Questions About Painting Pottery Barn Furniture
Can you paint all Pottery Barn furniture?
Most Pottery Barn furniture, especially older pieces made of solid wood or high-quality veneers, accepts paint very well. However, some pieces might have a very slick, lacquered, or laminate finish. These require extra thorough sanding and a strong bonding primer. Always test your method on an inconspicuous spot first.
Do I need to sand Pottery Barn furniture before painting?
Yes, sanding is almost always necessary. Pottery Barn furniture often has a durable factory finish that is too smooth for new paint to stick to. Lightly scuffing the surface with medium-grit sandpaper creates “tooth.” This helps the primer and paint adhere properly, preventing chipping and peeling later.
What type of paint is best for Pottery Barn furniture?
For durability and a smooth finish, water-based acrylic-latex furniture paint or mineral paint is excellent. Chalk paint works well if you want a distressed or matte look, but it requires a protective topcoat. Always choose a paint designed for furniture that can withstand daily use.
How long does painted Pottery Barn furniture last?
With proper preparation, quality materials, and a durable topcoat, your painted Pottery Barn furniture can last many years. The longevity depends on how well you prep the surface, the paint and sealant quality, and how often the piece is used. A well-cared-for piece will endure.
How do I clean painted Pottery Barn furniture?
Clean painted furniture gently. Use a soft, damp cloth with a mild dish soap solution for regular cleaning. Avoid abrasive cleaners, strong chemicals, or harsh scrubbing pads, as these can damage the paint or topcoat. Always wipe spills immediately to prevent water damage or stains.
Can I distress Pottery Barn furniture?
Yes, you can distress Pottery Barn furniture. After painting, use sandpaper to lightly wear away paint on edges, corners, and raised details. This reveals the original finish or a base
- Pottery Barn furniture
- furniture painting
- DIY furniture makeover
- refinishing furniture
- furniture restoration

Todd Martin
Senior Writer
With over 15 years of experience in home renovation and design, I started HEG to share what I’ve learned with homeowners who want to create spaces that are both beautiful and functional. I’ve always believed in a hands-on approach, and over the years, I’ve picked up practical solutions that actually work. Through HEG, I aim to make home improvement more approachable, sharing real tips that help you create a home you truly love.