· Todd Martin · Kitchen Design · 18 min read
How To Design Kitchen Cabinet Layout

Design Your Dream Kitchen: Cabinet Layout Guide
Imagine walking into your kitchen. Does it feel like a chaotic puzzle, or a smoothly operating hub of activity? For many, the kitchen is the heart of the home, and its efficiency often depends on a well-thought-out cabinet layout. Learning how to design kitchen cabinet layout is not just about aesthetics; it is about creating a space that serves your needs, optimizes workflow, and enhances daily life. I understand the challenge of making a kitchen both beautiful and highly functional. This guide will help you plan every detail, from initial measurements to selecting the right types of cabinets and integrating smart storage solutions. We will explore various kitchen layouts, discuss ergonomic considerations, and ensure your appliances fit seamlessly into your new design.
Takeaway
- Measure your kitchen accurately, noting all fixed elements.
- Understand common kitchen layouts like L-shape, U-shape, and galley, picking what suits your space.
- Prioritize the “work triangle” (sink, stove, refrigerator) for efficient workflow.
- Choose cabinet types (base, wall, tall) that maximize storage and fit your lifestyle.
- Integrate smart storage solutions and plan for appliance placement early.
Designing a kitchen cabinet layout involves a systematic approach: measure your space accurately, define functional zones, choose an appropriate layout style (e.g., L-shape, galley), select cabinet types for storage, and integrate appliances and lighting for optimal flow and ergonomics. This planning ensures a highly functional and aesthetically pleasing kitchen.
Start with a Clear Vision and Accurate Measurements
Designing a kitchen cabinet layout begins with a clear vision. You need to know what you want from your kitchen. Think about how you use the space daily. Do you cook often? Do you entertain guests? Understanding your lifestyle helps shape the design process.
Once you have a vision, accurate measurements are crucial. This is the foundation of your entire plan. Do not guess any numbers; take your time. I find that careful measuring prevents costly mistakes later.
Essential Measuring Steps
Start by drawing a rough sketch of your kitchen space. Include all walls, doorways, and windows. Also, mark any existing utilities like plumbing and electrical outlets. These fixed elements dictate much of your layout.
Measure the length of each wall. Measure from corner to corner, and then also measure sections between windows or doors. Note the height of windows and doors from the floor. Measure ceiling height accurately. This tells you how tall your wall cabinets can be.
- Measure the total length of each wall.
- Measure the distance between existing fixtures, windows, and doors.
- Measure the height from the floor to the bottom of windows, and from the floor to the ceiling.
- Note the location of all outlets, light switches, and plumbing connections.
- Identify permanent features like radiators or vents.
These precise numbers ensure your cabinets fit perfectly. They also help you plan for clearances around appliances and walkways. Skipping this step can lead to frustration when cabinets arrive and do not fit.
Tools for Measuring Your Kitchen
You do not need fancy tools to measure your kitchen. A good tape measure is essential. A notepad and pencil work well for sketching and recording. Some people use laser measures for extra precision, but it is not a requirement.
Double-check your measurements. Have a friend or family member verify them. This simple step can catch errors early. Remember, every millimeter counts when you design kitchen cabinet layout.
Defining Your Kitchen’s Work Zones
Once you have your measurements, the next step is to define work zones. A well-designed kitchen flows smoothly. This smooth flow comes from grouping related tasks together. Thinking in terms of zones helps you organize cabinets and appliances effectively.
I find that breaking the kitchen into zones makes planning much easier. This concept helps create an intuitive space. You want to move effortlessly from one task to the next.
The Classic Kitchen Work Triangle
The “work triangle” is a fundamental concept in kitchen design. It connects the three main work areas: the refrigerator, the sink, and the stove. The idea is to keep these three points relatively close. This minimizes steps and makes cooking more efficient.
Imagine yourself preparing a meal. You take food from the refrigerator, wash it at the sink, and then cook it on the stove. A well-placed work triangle makes this process fluid. The sum of the three legs of the triangle should ideally be between 12 and 26 feet. Each leg should be between 4 and 9 feet.
- Refrigerator: The starting point for most meals. Place it where it is easily accessible.
- Sink: The busiest spot in the kitchen, used for washing and rinsing.
- Stove/Cooktop: Where the cooking happens.
While the classic triangle remains important, modern kitchens often include more zones. These might include a dedicated prep zone, a baking zone, or a cleanup zone.
Expanding Beyond the Triangle
Modern kitchens have more demands than just the basic work triangle. Consider other functional areas that will shape your cabinet design. These can include:
- Pantry Zone: For food storage. This can be a dedicated pantry cabinet or a series of tall cabinets. Think about how you will access these items. You can learn how to use kitchen cabinets as a pantry effectively.
- Prep Zone: A counter space near the sink and stove for chopping and mixing. This area benefits from accessible tools and ingredients.
- Dish Storage Zone: Near the dishwasher for easy unloading. This zone often includes wall cabinets above the dishwasher.
- Baking Zone: If you bake often, a dedicated area with baking supplies and a mixer is helpful.
- Beverage Station: A coffee maker or wine cooler might need its own spot.
By outlining these zones, you ensure every item has a logical home. This helps you design kitchen cabinet layout that feels organized and efficient. It also guides where to place specific types of cabinets and accessories.
Exploring Common Kitchen Layout Styles
With measurements and zones in mind, it is time to consider overall layout styles. The shape of your kitchen often dictates which layouts are most feasible. Each layout has its strengths and weaknesses regarding efficiency, traffic flow, and cabinet placement.
I always recommend visualizing how each style works in your specific space. Imagine yourself moving through it. This helps you decide which design feels right.
The Galley Kitchen
A galley kitchen features two parallel walls of cabinets and appliances. This layout is very efficient for cooking. It creates a compact work triangle and keeps everything within easy reach. It is ideal for smaller, narrower spaces.
- Pros: Highly efficient, minimizes walking distance, good for one or two cooks.
- Cons: Can feel enclosed, limited space for multiple people, no room for an island.
Cabinets line both sides, offering ample storage. This layout is excellent for maximizing vertical space. However, ensure enough clearance between the two walls for comfortable movement, usually at least 4 feet.
L-Shape Kitchen
The L-shape kitchen has cabinets and appliances along two adjacent walls, forming an “L.” This layout is very versatile. It works well in small to medium-sized kitchens. It offers good counter space and keeps the work triangle tight.
- Pros: Open feel, good for entertaining, allows for a dining table or small island, efficient work triangle.
- Cons: Corner cabinets can be tricky for access unless planned carefully.
This layout naturally separates the kitchen from dining or living areas. It provides a flexible space. You can often add a small island to an L-shape kitchen for extra prep or seating.
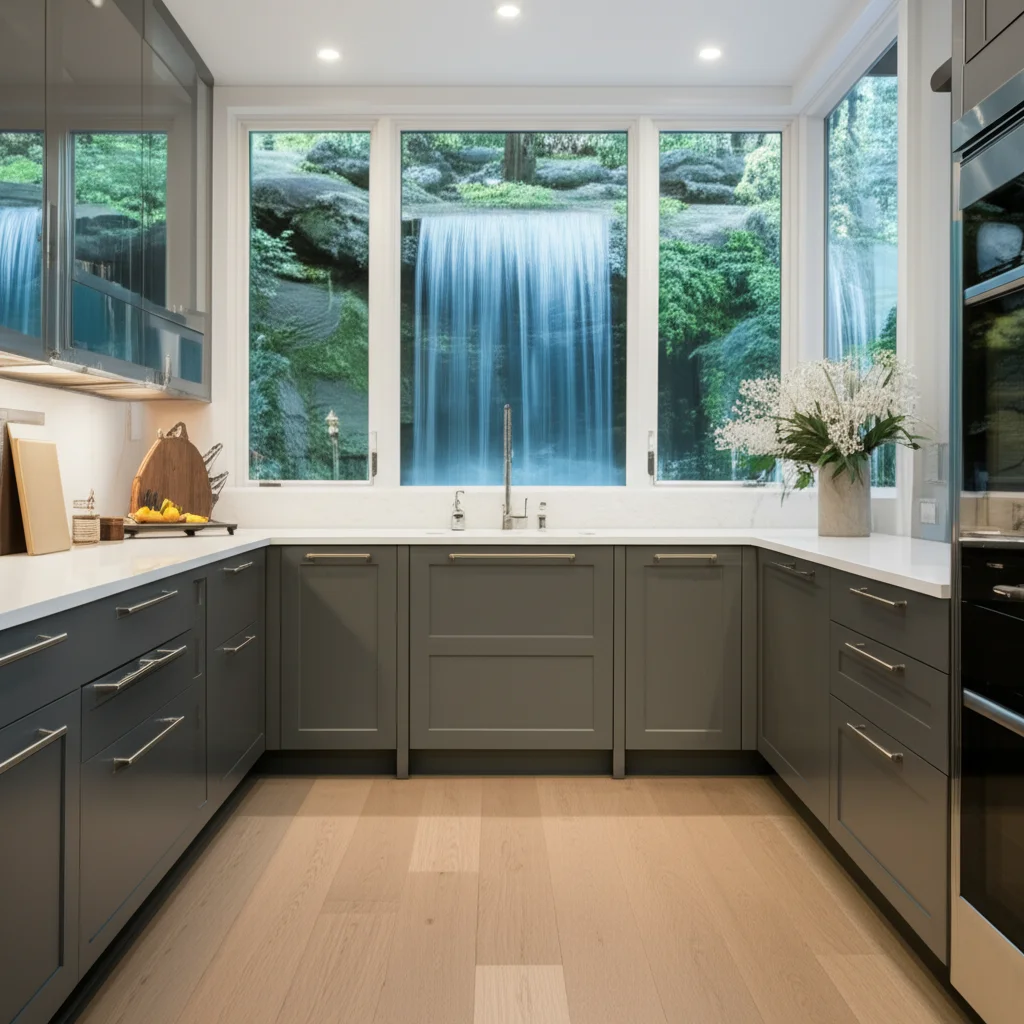
U-Shape Kitchen
The U-shape kitchen uses three walls of cabinets and appliances. This layout offers the most counter space and storage. It is perfect for larger kitchens where multiple cooks might be working. The U-shape creates a very enclosed and efficient work triangle.
- Pros: Maximum storage and counter space, ideal for multiple users, very efficient workflow.
- Cons: Can feel enclosed in smaller spaces, corners need smart solutions, can limit traffic flow if not designed with ample walkways.
When planning a U-shape, focus on smart corner solutions. Lazy Susans or pull-out shelves are very useful here. Consider an organization system for a corner cabinet or learn how to organize a lazy susan cabinet to make the most of this space.
Island and Peninsula Kitchens
Adding an island or peninsula transforms a kitchen. Islands are freestanding units placed in the center. Peninsulas attach to a wall or existing cabinetry. Both add counter space, storage, and often seating.
- Pros: Extra prep area, casual dining, additional storage, improved traffic flow.
- Cons: Requires adequate space, can impede flow if too large.
An island can house a sink, cooktop, or simply serve as a breakfast bar. A peninsula is great for connecting the kitchen to another room, like a dining room. When planning, ensure there is at least 36-48 inches of clearance around the island for movement. This space ensures smooth traffic flow around the island.
Selecting the Right Cabinet Types and Styles
After deciding on your overall layout, you need to choose the specific types of cabinets. Cabinets are the backbone of your kitchen. They provide essential storage and define the look of your space. Understanding the different types available helps you make informed decisions.
I always think about both function and aesthetics at this stage. How will these cabinets support my daily activities? And how will they contribute to the overall style of my home?
Base Cabinets: The Foundation
Base cabinets sit on the floor and support your countertops. They are typically 24 inches deep and 34.5 inches high, allowing for a standard 36-inch counter height. These are workhorses for heavy items and appliances.
- Standard Base Cabinets: Come in various widths, with shelves inside. Good for pots, pans, and dry goods.
- Drawer Base Cabinets: Offer multiple drawers for easy access to utensils, dishes, and small appliances. I prefer drawers over shelves for many items because they are easier to access.
- Specialty Base Cabinets: These include sink bases, cooktop bases, and corner cabinets. A lazy Susan cabinet is a great solution for maximizing corner storage. Also, consider specialized inserts, like a pull-out trash can in cabinet for a cleaner look.
When you design kitchen cabinet layout, consider the balance between doors and drawers. Drawers offer better organization for many items.
Wall Cabinets: Vertical Storage
Wall cabinets mount above your base cabinets. They provide easily accessible storage for dishes, glasses, and frequently used items. Standard depths are usually 12 or 15 inches. Heights vary, often from 30 to 42 inches.
- Standard Wall Cabinets: Single or double-door options with adjustable shelves.
- Corner Wall Cabinets: Designed to fit into corners, often with diagonal fronts or blind corner solutions.
- Glass-Front Wall Cabinets: These add a decorative touch. You can display glassware or china. Learning how to make glass cabinet doors can add a personal touch to your kitchen.
- Appliance Garages: A clever way to hide small appliances on the countertop.
Think about how high you want your wall cabinets. Taller cabinets offer more storage but might require a step stool. Shorter cabinets leave room for decorative elements above them.
Tall Cabinets: Maximize Pantry and Utility
Tall cabinets extend from floor to ceiling. They are ideal for pantry storage, utility closets, or integrating full-size appliances like ovens or refrigerators. They typically come in widths of 18, 24, or 30 inches.
- Pantry Cabinets: Excellent for storing bulk food items. You can choose from simple shelves to elaborate pull-out pantry systems. Maximizing a kitchen cabinet as a pantry offers great storage.
- Utility Cabinets: Good for brooms, mops, or cleaning supplies.
- Oven/Microwave Cabinets: Built specifically to house wall ovens and microwaves, often with storage above or below.
Tall cabinets are essential for a truly organized kitchen. They provide a dedicated spot for items that otherwise clutter countertops or smaller cabinets.
Cabinet Styles and Finishes
The style and finish of your cabinets set the aesthetic tone for your kitchen. There are many options, from traditional to modern.
- Shaker: A classic, versatile style with a flat panel and simple frame. It works in almost any kitchen.
- Slab (Flat Panel): Modern and minimalist, with a smooth, unadorned surface. Easy to clean.
- Raised Panel: Often found in traditional designs, with a raised central panel.
- Inset: Doors and drawers fit flush within the cabinet frame, giving a furniture-like appearance.
- Overlay: Full overlay covers most of the frame, while partial overlay leaves some frame exposed.
When choosing, consider durability and maintenance. High-gloss finishes look sleek but show fingerprints. Wood grains add warmth. Don’t forget that you can also choose kitchen cabinet color to reflect your personal style and to lighten or darken a room.
Optimizing Storage and Functionality
Designing an efficient kitchen cabinet layout goes beyond just placing boxes. It is about maximizing every inch of space and making it functional. Smart storage solutions can transform a cluttered kitchen into an organized haven. I always prioritize making things easy to find and use.
Smart Storage Solutions for Every Cabinet
Think about what you store in each cabinet. This helps you select the right internal organizers.
- Pull-Out Shelves: These allow you to easily access items at the back of deep base cabinets. No more kneeling to reach.
- Dividers: In drawers, dividers keep utensils, spices, or plates organized.
- Lazy Susans: Essential for corner cabinets. They make items at the back accessible with a spin. Learning how to organize a lazy Susan cabinet effectively is a game-changer for corner storage.
- Vertical Dividers: Perfect for storing baking sheets, cutting boards, or platters on their side.
- Roll-Out Bins: Ideal for recycling and trash, keeping them hidden but easily accessible. You can learn how to install a trash can in cabinet for a tidy solution.
These solutions prevent items from getting lost or damaged. They also help keep your kitchen tidy.
Maximizing Vertical and Horizontal Space
Do not overlook any space. Every area can contribute to storage.
- Above Cabinets: If your wall cabinets do not go to the ceiling, the space above can be used for decorative items or extra storage for less-used items. You could even build boxes above them to enclose the space, creating a more finished look.
- Under Sink Storage: Use pull-out organizers or caddies to manage cleaning supplies.
- Toe-Kick Drawers: These shallow drawers built into the base of cabinets are perfect for storing small, flat items like serving trays or placemats.
- Adding Shelves: Sometimes, you just need an extra shelf. You can learn how to add an extra shelf in cabinet to customize your storage. Similarly, consider adding shelves under kitchen cabinets for quick access to often-used items or spices.
When you design kitchen cabinet layout, remember that customization is key. You are designing for your specific needs, not just generic storage.
Ergonomics and Accessibility in Cabinet Design
Ergonomics means designing for human comfort and efficiency. An ergonomic kitchen reduces strain and makes tasks easier. Accessibility ensures everyone can use the kitchen comfortably, regardless of age or physical ability. Thinking about these aspects early makes a huge difference.
I believe a kitchen should be comfortable for everyone who uses it. Good ergonomic design makes cooking and cleaning a joy, not a chore.
Countertop Heights and Clearances
Standard countertop height is 36 inches, but this might not be ideal for everyone. Consider adjustable-height counters or different counter heights in various zones. A lower section for baking, for instance, can be very comfortable.
Clearance is crucial for movement. Ensure wide enough walkways, especially in high-traffic areas.
- Main Traffic Paths: Aim for at least 42 inches of clear space.
- Work Aisles: Between two parallel counters or an island and a counter, target 42-48 inches. This allows space for open dishwasher doors or oven doors.
Adequate clearance prevents bottlenecks and makes it easy for multiple people to work in the kitchen simultaneously.
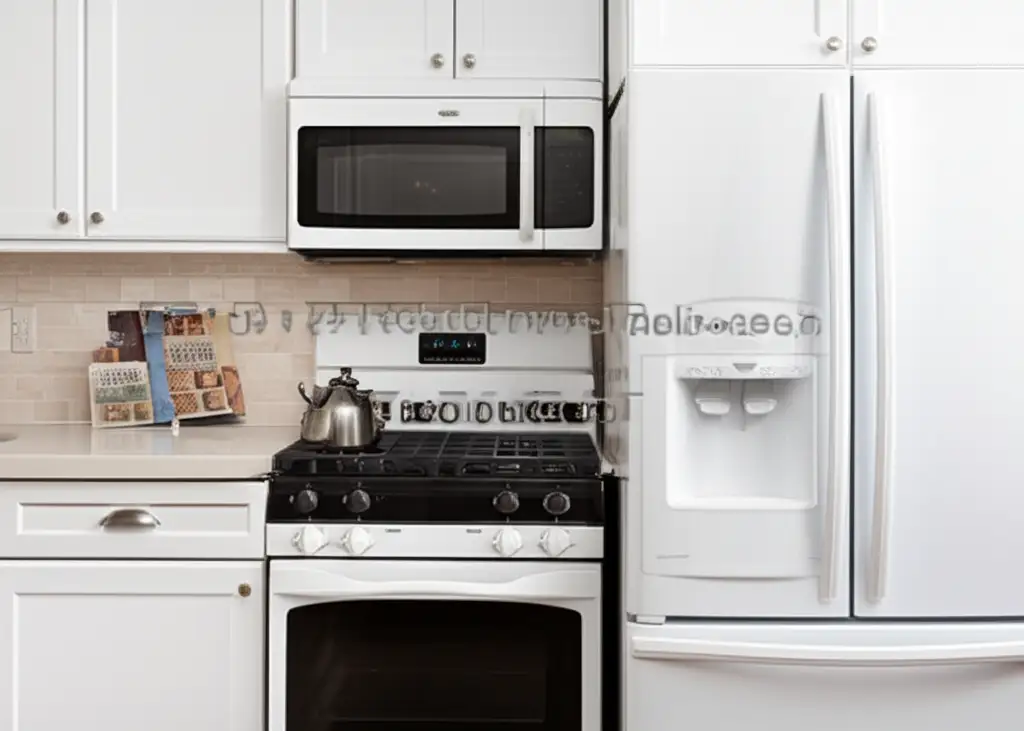
Planning for Appliance Placement and Integration
Appliance placement deeply affects kitchen ergonomics and workflow. Each major appliance needs careful consideration.
- Refrigerator: Place it near the kitchen entry and the pantry zone. This allows easy access for grabbing snacks without disturbing the main work triangle. Ensure the door swing does not block pathways or other cabinets.
- Dishwasher: Position it next to the sink. This makes rinsing and loading dishes straightforward. Make sure there is enough space in front of the dishwasher when its door is open so you can stand comfortably to load or unload. Plan for dish storage nearby for easy unloading.
- Oven/Cooktop: These are the heart of the cooking zone. Consider placement for safety and venting. If you have a separate wall oven, place it at an ergonomic height to avoid bending. Make sure you also have counter space on both sides of your cooktop or range for hot pots and prep.
- Microwave: Can be integrated into a wall cabinet, base cabinet, or placed on a shelf. Keep it at an accessible height for all users.
When you design kitchen cabinet layout, think about how the appliance doors open. Will they hit another cabinet or block a walkway? Will there be enough space for you to stand comfortably in front of the appliance?
Incorporating Lighting and Electrical Outlets
Lighting is essential for both function and ambiance. Good task lighting makes prep work safer and easier.
- Under-Cabinet Lighting: Illuminates your countertops, reducing shadows.
- In-Cabinet Lighting: Helps you see inside pantry or display cabinets.
- Recessed Lighting: Provides general ambient light.
- Pendant Lights: Can highlight an island or peninsula.
Electrical outlets are equally important. Plan for enough outlets in key work zones. No one wants to string extension cords in the kitchen. Make sure outlets are easily accessible but not directly above the sink or cooktop. Consider pop-up outlets on islands for a cleaner look.
Incorporating Unique Design Elements
A kitchen should not just be functional; it should also reflect your personality. Unique design elements can elevate your kitchen from practical to personal. This is where you infuse style and character into your design.
I love adding unexpected touches that make a kitchen feel truly custom. These details often make the biggest impact.
Open Shelving vs. Closed Cabinets
Deciding between open shelving and closed cabinets is a significant design choice. Each offers different benefits.
Open Shelving:
- Pros: Creates an airy, spacious feel; allows for display of decorative items, cookbooks, or frequently used dishes; makes items easy to grab.
- Cons: Requires constant tidiness; items collect dust; can look cluttered if not curated.
- Consideration: Use open shelving for items you use daily or that are aesthetically pleasing.
Closed Cabinets:
- Pros: Hides clutter; protects items from dust and grease; offers a clean, uniform look.
- Cons: Can feel heavy or enclosed in smaller spaces; requires opening doors to access items.
- Consideration: Use closed cabinets for less attractive items, bulk storage, or anything you want to keep hidden.
A balance of both often works best. You might use open shelves for decorative elements or spices, and closed cabinets for everything else.
Adding Decorative Elements to Cabinets
Beyond the basic cabinet box, small additions can make a big difference.
- Crown Molding: Adds a finished, architectural look to the top of wall cabinets. You can learn how to add molding to kitchen cabinets for a polished appearance.
- Decorative Legs or Feet: For base cabinets, especially on an island, these can give a furniture-like feel.
- Glass Inserts: As mentioned, glass cabinet doors add elegance and allow for display. This can break up a long line of solid cabinet fronts.
- Custom Panels: For appliances like dishwashers or refrigerators, custom panels make them blend seamlessly with your cabinetry.
- Trim: Adding trim on cabinet doors can create a more detailed or traditional look. You can also add trim to the bottom of kitchen cabinets for a finished base.
These small details add layers of design. They make the kitchen feel custom and thought-out.
Integrating Storage with Style
The most beautiful kitchen is also functional. Seamlessly combining storage with style is key.
- Built-in Pantries: A tall cabinet integrated into the wall provides significant storage. This can include pull-out shelves or rotating units.
- Appliance Garages: Hide toasters, blenders, and coffee makers behind a retractable door or lift-up panel. This keeps countertops clear.
- Display Areas: Create dedicated display areas for cookbooks, artwork, or decorative bowls. This might be a small open shelf section or glass-front cabinets.
- Cabinet Colors: The color of your cabinets dramatically impacts the mood of the room. Light colors make a space feel larger and brighter, while dark colors add drama and sophistication. Consider how the color works with your countertop and backsplash.
When you design kitchen cabinet layout, always remember that every element contributes to the overall feel and function. Aim for a cohesive look that also serves your practical needs.
Planning for Future Needs and Budget
A kitchen renovation is a significant investment. Planning for both immediate needs and future possibilities is smart. Thinking ahead can save you money and headaches down the line. I always advise clients to consider longevity when designing.
Budgeting for Your Cabinet Layout
Your budget will largely influence your choices. Cabinets range widely in price, depending on materials, construction, and customization.
- Stock Cabinets: Pre-made in standard sizes. They are the most affordable option.
- Semi-Custom Cabinets: Offer more sizes, finishes, and features than stock. They are a mid-range option.
- Custom Cabinets: Built to your exact specifications. They are the most expensive but offer unlimited design flexibility.
Factor in installation costs, hardware, and any internal organizers. Get multiple quotes from suppliers and installers. Prioritize what is most important to you. If your budget is tight, focus on functionality and quality construction over elaborate features. You can always add cabinets to an existing kitchen later if needed, though upfront planning is ideal.
Designing for Longevity and Adaptability
A well-designed kitchen should last for many years. Think about future needs.
Aging in Place: If you plan to stay in your home long-term, consider universal design principles. These include varied counter heights, pull-out shelves, wider aisles, and easy-to-grasp hardware.
Technological Advances: Keep future appliances in mind. Ensure you have enough electrical outlets and flexible spaces for new gadgets.
Timeless Style: While trends are fun, choose cabinet styles and finishes that have enduring appeal. Classic styles like Shaker or slab doors tend to age gracefully. You can always update with paint or hardware if you want a refresh.
Durability: Choose materials that can withstand daily wear and tear. Solid wood or plywood construction is typically more durable than particleboard. Quality hardware and finishes prevent early deterioration. This includes hinges and drawer slides that will last for years.
When you design kitchen cabinet layout with longevity in mind, you create a space that remains functional and beautiful for decades. This approach ensures your investment pays off over time. It is all about making smart choices today
- kitchen layout
- cabinet design
- kitchen planning
- kitchen remodel
- kitchen storage
- kitchen functionality

Todd Martin
Senior Writer
With over 15 years of experience in home renovation and design, I started HEG to share what I’ve learned with homeowners who want to create spaces that are both beautiful and functional. I’ve always believed in a hands-on approach, and over the years, I’ve picked up practical solutions that actually work. Through HEG, I aim to make home improvement more approachable, sharing real tips that help you create a home you truly love.