· Todd Martin · Home Improvement · 20 min read
How To Hang A Shelf On Tile Without Drilling
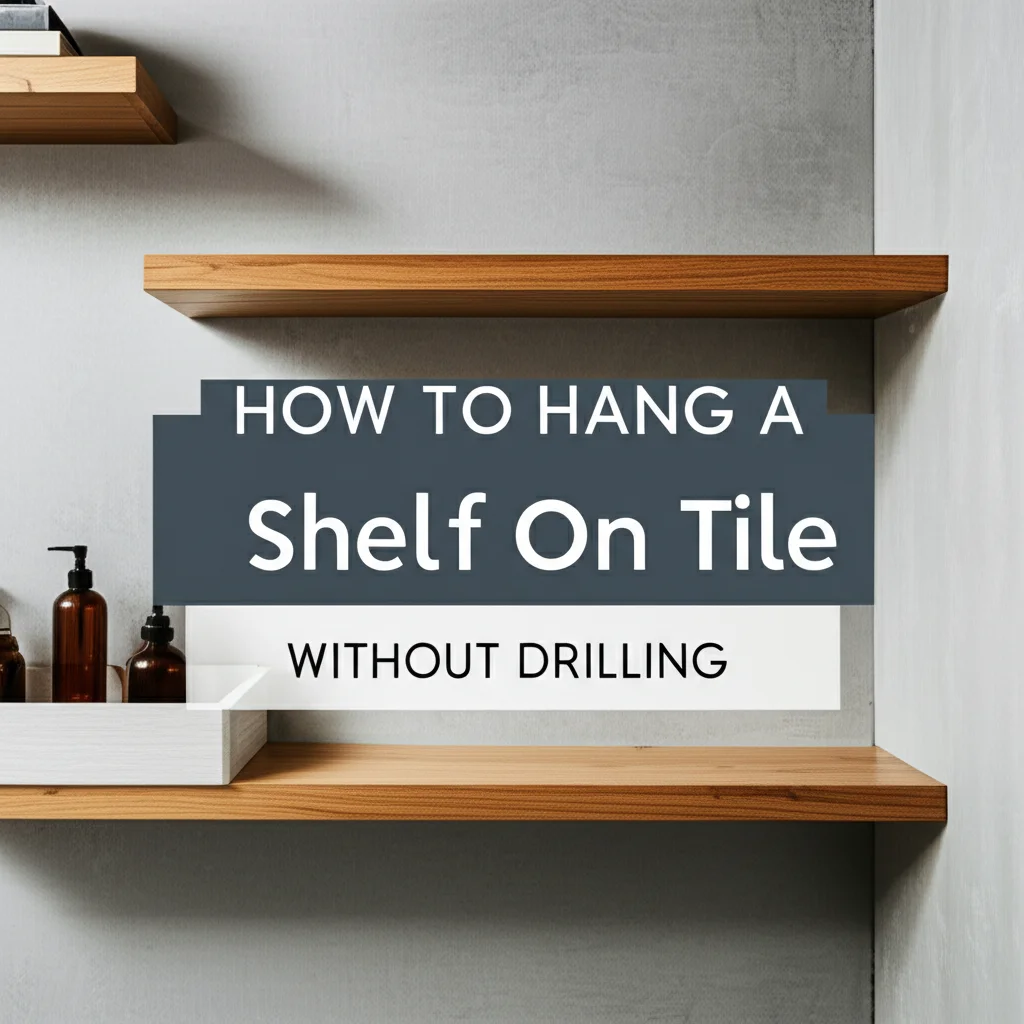
How To Hang A Shelf On Tile Without Drilling: Damage-Free Solutions
Do you want to add functional storage or decorative flair to your tiled walls without the fear of cracking tiles or compromising their integrity? I understand that drilling into tile feels like a big commitment. It can be messy and requires special tools. Perhaps you are renting and cannot drill holes. Maybe you just want to protect your beautiful bathroom or kitchen tiles.
The good news is that you can absolutely hang a shelf on tile without drilling. This guide explores various reliable methods. We will discuss powerful adhesives, clever tension systems, and easy-to-use removable strips. You will learn the best ways to prepare your tile surface. We will cover important considerations for choosing the right solution. By the end, you will feel confident to add shelves anywhere you want them.
Takeaway:
- Utilize strong adhesive solutions like silicone-based sealants or epoxy for permanent fixtures.
- Choose tension rods or suction cups for lightweight items and temporary needs.
- Prepare your tile surface meticulously by cleaning and drying it for maximum bond strength.
- Always check the weight capacity of your chosen no-drill method before loading shelves.
- Consider the tile type and environment (wet vs. dry) when selecting your attachment method.
You can hang a shelf on tile without drilling by using strong adhesive compounds, specialized adhesive strips, tension rods, or heavy-duty suction cups. These methods allow you to add storage or decoration while keeping your tile surfaces intact and free from holes.
Understanding No-Drill Shelf Options for Tile
Adding shelves to tiled areas, like bathrooms or kitchens, does not always require a drill. Many clever solutions exist for this purpose. These options help you avoid damage to your tiles. They also save you from the hassle of specialized tools. You can choose from several types of no-drill shelf systems. Each system offers unique benefits and limitations.
One popular method uses powerful adhesives. These adhesives create a strong bond directly onto the tile surface. They are good for adding permanent or semi-permanent shelves. Another option involves tension rods. These rods fit between two opposing walls. They create pressure that holds them in place. Suction cups offer a quick and temporary solution. They work best for very light items. Removable adhesive strips provide another flexible choice. These strips can hold many items. They remove cleanly when you no longer need them. Understanding these options helps you pick the right one. The best choice depends on the shelf’s purpose. It also depends on the weight it will hold.
Adhesive-Based Systems
Adhesive-based systems offer a strong hold. They bond directly to the tile. This method is often chosen for shelves holding heavier items. Many types of adhesives exist for this use. Some are general-purpose construction adhesives. Others are specific for bathroom or wet areas. You apply the adhesive to the back of the shelf bracket. Then you press the bracket firmly onto the clean tile surface. These adhesives need time to cure. Curing time allows the bond to reach full strength. This time can range from a few hours to a full day. Checking the adhesive’s weight capacity is important. This ensures the shelf will hold what you need. Adhesives like silicone sealant or strong mounting glue work well. They create a secure and long-lasting attachment.
Tension Rod Shelves
Tension rods provide a versatile option for shelves. They are simple to install and remove. You often see them used in showers or closets. A tension rod works by extending between two surfaces. It creates pressure that holds it tight. For shelves, you can use one or more tension rods. You can place a flat surface, like a board, on top of the rods. This creates your shelf. This method is best for lighter items. Books or heavy decorative objects might be too much. Tension rods are great for renters. They leave no marks on your tile walls. You can easily adjust their position. You can also take them down if you move.
Suction Cup Shelves
Suction cup shelves offer the easiest installation. They are also the most temporary. These shelves use suction cups attached to the shelf itself. You press the cups firmly against a smooth tile surface. Air pressure holds them in place. Suction cups are perfect for very light items. They work well for small toiletries in a shower. They are not suitable for anything heavy. Ensure your tile surface is very clean and smooth for suction cups. Any dirt or texture can break the seal. This causes the shelf to fall. Many people use suction cup shelves in rental properties. They allow for quick changes and zero damage.
Removable Adhesive Strips
Removable adhesive strips, like Command Strips, are another popular choice. These strips use a special adhesive that holds strongly. You can remove them later without leaving residue. This makes them ideal for temporary or decorative shelves. They come in various weight capacities. You should always check the package for this information. Each strip has two sides. One side sticks to the wall. The other sticks to the back of the shelf or its bracket. You press them together. These strips are easy to use. They are perfect for small, lightweight shelves. They also work for picture ledges. They are a good option if you like to redecorate often.
Choosing the Right Adhesive for Tile Surfaces
Selecting the correct adhesive is crucial when hanging a shelf on tile without drilling. Not all adhesives are created equal. Different types offer varying strengths and features. Some adhesives are more suited for wet areas, like bathrooms. Others provide a stronger bond for heavier items. Your choice depends on the shelf’s weight, its location, and how permanent you want the bond to be.
I find that construction adhesives and silicone sealants are excellent choices. These products create a very strong hold on smooth tile surfaces. They can support significant weight. Make sure the adhesive specifies it is suitable for ceramic, porcelain, or glass tile. Some adhesives are specifically designed for bathroom use. These often resist water and humidity. Proper surface preparation is vital. The adhesive will not bond well to a dirty or greasy tile. Always read the product instructions carefully. This ensures proper application and curing.
Heavy-Duty Construction Adhesives
Heavy-duty construction adhesives offer a very strong bond. They are designed for demanding applications. These adhesives can hold substantial weight. They work well for shelves carrying books or decorative items. Look for products labeled for use on tile or non-porous surfaces. Brands like Loctite PL Premium or Gorilla Glue Construction Adhesive are good examples. These adhesives often come in tubes. You apply them with a caulk gun.
To use them, apply a bead of adhesive to the back of the shelf bracket. Press the bracket firmly onto the clean tile surface. You may need to use painter’s tape to hold the shelf in place while the adhesive cures. Curing times can range from 24 to 72 hours. Do not place items on the shelf until the adhesive is fully cured. This ensures a lasting bond. These adhesives create a very strong, often permanent, connection.
Silicone-Based Sealants
Silicone-based sealants are another excellent option. They are particularly good for shelves in wet environments. Areas like showers or backsplashes benefit from silicone. Silicone sealants are waterproof and mold-resistant. This makes them ideal for bathrooms. They also offer flexibility. This flexibility can help absorb minor impacts. This protects the bond over time.
You apply silicone sealant similarly to construction adhesive. Place a bead on the bracket and press it to the tile. Ensure good ventilation while it cures. Silicone also needs time to cure completely. It may take longer than some construction adhesives. Check the product label for specific curing times. Always choose 100% silicone sealant for wet areas. This provides the best water resistance. A clean, dry surface is critical for a strong bond. Learn how to prepare surfaces by checking out tips on how to clean shower tile. This step is often overlooked.
Epoxy Adhesives
Epoxy adhesives provide an incredibly strong, rigid bond. They come in two parts: a resin and a hardener. You mix these two parts right before application. The mixture creates a chemical reaction. This reaction results in a very durable bond. Epoxy is suitable for small, sturdy shelves that need a super strong hold. It resists water and many chemicals.
Mixing epoxy requires precision. Follow the manufacturer’s instructions carefully. Apply the mixed epoxy to the shelf bracket. Press it firmly onto the clean tile. Epoxy cures relatively quickly, but allow full cure time before adding weight. It creates a permanent bond. Removing epoxy can be difficult. Only use epoxy if you are sure about the shelf’s placement. This strong bond ensures your shelf stays put for years.
Specialized Adhesive Strips and Tapes
Specialized adhesive strips and tapes offer a simpler solution. Brands like 3M Command Strips are popular. These products use advanced adhesives. They stick firmly to smooth surfaces like tile. You can remove them later without damage. They come in various weight ratings. This makes them suitable for different shelf sizes.
These strips are easy to apply. You peel off a liner and press the strip onto the tile. Then you attach the shelf or bracket. Follow the waiting time specified by the manufacturer. This allows the adhesive to set. While not as strong as construction adhesives, they are perfect for lighter shelves. Think small spice racks or decorative displays. Always check the maximum weight capacity. Overloading them will lead to failure.
Installing Shelves with Strong Adhesive Bonds
Installing shelves using strong adhesive bonds requires careful steps. This ensures a secure and lasting attachment. Proper application of the adhesive is just as important as choosing the right type. I always take my time with these installations. Rushing can lead to a weak bond. A weak bond means your shelf might fall.
First, your tile surface must be perfectly clean. Any dust, soap scum, or grease will prevent the adhesive from bonding properly. Second, you must apply the adhesive correctly. Too little, and the bond is weak. Too much, and it can ooze out. Third, you need to provide support while the adhesive cures. This prevents the shelf from sliding or falling before it sets. Follow the instructions on your adhesive product for specific curing times. Patience is key for a strong, reliable shelf.
Surface Preparation for Adhesion
Before you apply any adhesive, clean the tile surface thoroughly. This step is non-negotiable for a strong bond. I start by wiping the area with warm, soapy water. This removes general dirt and grime. For stubborn residue like soap scum or grease, I use a degreaser or rubbing alcohol. Make sure the cleaning agent is safe for your tile type.
After cleaning, rinse the area well with clean water. Then, dry the surface completely. A perfectly dry surface is crucial. Any moisture can weaken the adhesive bond. You can use a clean cloth or paper towels. For best results, let the area air dry for a while after wiping. This ensures no hidden moisture remains. A clean, dry, and smooth tile surface provides the best foundation for adhesive application.
Applying the Adhesive
Once your tile is clean and dry, you can apply the adhesive. Read the specific instructions on your adhesive product. Most adhesives come in tubes. You use a caulk gun to dispense them. Cut the tip of the adhesive tube at a 45-degree angle. Make the opening size appropriate for a steady bead.
Apply the adhesive to the back of the shelf bracket. You can apply it in a continuous bead around the perimeter. Or, you can apply it in several dots if the bracket is small. Avoid applying it too close to the edges. This prevents excess from squeezing out when pressed. Press the bracket firmly onto the marked spot on the tile. Apply even pressure for a few minutes.
Curing and Support
Adhesives need time to cure. This is when they reach their full strength. The curing time varies greatly by product. It can range from a few hours to several days. Check the adhesive packaging for specific instructions. During the curing period, the shelf needs support. This prevents it from sagging or falling.
You can use painter’s tape to hold the shelf bracket in place. Masking tape also works well. Apply tape across the shelf and onto the surrounding tiles. Ensure it holds the shelf securely against the wall. For heavier shelves, you might need temporary props from below. Do not place any weight on the shelf until the adhesive is fully cured. Patience during this phase guarantees a strong and reliable shelf.
Checking Weight Capacity
Before you put anything on your newly installed shelf, check its weight capacity. Every no-drill method has limits. Adhesive shelf systems are often stronger than suction cups. However, they still have a maximum load they can safely hold. Overloading a shelf can cause it to detach from the tile. This can lead to damage or injury.
The adhesive product packaging usually lists its maximum weight rating. The shelf itself might also have a weight limit. Always consider the lower of these two ratings. If you plan to store heavy items, like books or large bottles, ensure your chosen adhesive and shelf can handle it. Distribute weight evenly on the shelf. This prevents stress on specific points of attachment. Learn more about measuring for shelves to ensure you select the right size and type for your needs: how to measure a cabinet for a pull-out shelf.
Leveraging Tension Rods and Suction Cups for Light Storage
When you need temporary or very light storage, tension rods and suction cups are fantastic options. These methods offer extreme flexibility. They leave no marks on your tile. This makes them ideal for renters or people who like to change their decor often. I find them perfect for small items in a shower or a quick display in a kitchen nook.
The key to success with these methods lies in understanding their limitations. Tension rods need opposing walls to brace against. Suction cups require perfectly smooth, clean, and non-porous surfaces. Both excel at holding lightweight items. They are not suitable for heavy loads. Always clean the tile thoroughly before application. This ensures maximum grip and stability for your shelf.
Using Tension Rods for Shelving
Tension rods are simple and effective. They work by extending to fit snugly between two parallel surfaces. This creates outward pressure. This pressure holds the rod firmly in place. You can use one or more tension rods to create a shelf. Place a flat, lightweight board on top of the rods. This forms your shelf surface.
- Choose the Right Size: Measure the distance between your two walls. Select a tension rod that adjusts to this length.
- Clean the Walls: Wipe down the tile surfaces where the rod ends will rest. Ensure they are clean and dry. Any dirt or residue can cause the rod to slip.
- Install the Rod: Extend the tension rod until it is slightly longer than the space. Press one end against a wall. Compress the rod and push the other end against the opposite wall. Release the tension. The rod should feel secure.
- Add Your Shelf: If using multiple rods, ensure they are level and spaced evenly. Place a lightweight shelf board on top of the rods.
- Weight Limits: Tension rod shelves are best for light items. Think small towels, washcloths, or lightweight decorative items. Avoid heavy books or fragile objects.
This method is great for shower caddies or inside cabinets. It offers quick setup and easy removal.
Maximizing Suction Cup Shelf Stability
Suction cup shelves offer immediate storage. They are very easy to install. However, they work best for very light items. The main challenge with suction cups is keeping them from losing their grip. A smooth, clean, and non-porous tile surface is essential.
- Clean the Tile Thoroughly: Use a glass cleaner or rubbing alcohol to clean the area where the suction cups will go. Remove all soap scum, dirt, and oil. For specific tile cleaning tips, check out how to clean soap scum from shower tile.
- Dry Completely: Ensure the tile is bone dry. Moisture can prevent a strong seal.
- Moisten Cups Slightly (Optional): Some people find that lightly moistening the edge of the suction cup with water before pressing helps create a better seal. Only use a tiny bit of water. Too much can make it slip.
- Press Firmly: Press each suction cup firmly onto the tile. Apply pressure from the center outwards. This pushes out any trapped air.
- Check for Air Bubbles: Look for any visible air bubbles under the cup. If you see them, re-press the cup.
- Test the Hold: Gently tug on the shelf to test its stability before adding items.
- Weight Limit: Remember, suction cup shelves have very low weight limits. They are perfect for razors, small sponges, or light decorative items. Do not put heavy shampoo bottles on them.
- Regular Reapplication: Suction cups can lose their seal over time. Periodically remove, clean, and reapply them for best results.
Damage-Free Strips and Removable Hooks on Tile
Damage-free adhesive strips and hooks are a marvel for home organization. They provide a strong hold without the commitment of drilling. These products are designed to stick firmly to smooth surfaces like tile. The best part? You can remove them later without leaving any sticky residue or damaging your wall. This makes them perfect for temporary decorations, seasonal changes, or rental properties.
I use these strips all the time for lighter shelves and small display items. They come in various sizes and weight capacities. Always choose the right strip for the weight you plan to hold. Proper application is key to their success. Clean the tile surface thoroughly before sticking them on. Press them firmly into place. Then wait the recommended time before adding any weight. This allows the adhesive to bond properly.
Using Adhesive Strips for Light Shelves
Adhesive strips, often known by the brand name Command Strips, are fantastic for lightweight shelves. These strips feature a special adhesive that creates a strong bond. Yet, they peel off cleanly when you need to remove them. This makes them ideal for shelves holding small decorative items or very light toiletries.
- Select the Right Strips: Choose strips with a weight capacity suitable for your shelf and its intended contents. They come in various sizes, from small picture hanging strips to heavy-duty utility strips.
- Prepare the Surface: Clean the tile surface with rubbing alcohol. Wipe it thoroughly. Let it dry completely. This removes any oils or dirt that could weaken the adhesive bond.
- Apply the Strips: Attach one side of the strip to the back of the shelf or its mounting bracket. Ensure good contact. Remove the liner from the other side.
- Mount the Shelf: Press the shelf firmly onto the desired spot on the tile wall. Apply pressure for at least 30 seconds.
- Wait: Allow the adhesive to cure for the time specified by the manufacturer. This is usually an hour for light items, but longer for heavier ones. This step is critical for a strong bond.
- Add Items: Once cured, gently place your items on the shelf. Do not exceed the maximum weight capacity.
These strips are wonderful for displaying small plants, keys, or lightweight collectibles. They offer flexibility and peace of mind.
Removable Hooks for Hanging Shelf Components
While not shelves themselves, removable hooks can be part of a no-drill shelving solution. You can use strong removable hooks to hang lightweight shelf components. For example, you could hang a small wire basket that functions as a shelf. Or you could use two hooks to support a light board.
- Choose Strong Hooks: Select removable hooks with a high weight rating. Ensure they are designed for use on smooth surfaces like tile.
- Clean the Tile: Just like with strips, clean the tile surface with rubbing alcohol and let it dry.
- Apply Hooks: Press the hooks firmly onto the tile. Hold for 30 seconds.
- Wait for Adhesion: Allow the hooks to set for the recommended time before hanging anything on them. This is usually at least an hour.
- Hang Your Component: Once the hooks are ready, you can hang a lightweight basket, a small board with loops, or other suitable shelf components.
This method is highly versatile. It allows for creative shelving solutions. It is also perfect for small, quick additions of storage. Remember the weight limit. Do not overload these hooks.
Best Practices for Removal
The main benefit of damage-free strips and hooks is their clean removal. However, improper removal can still cause damage. I always follow the specific instructions on the product packaging. This usually involves stretching the adhesive strip.
- Do Not Pull Outwards: Never pull the strip directly away from the wall. This can damage the tile surface or peel off paint.
- Pull Down Slowly: Find the tab at the bottom of the adhesive strip. Hold the hook or object firmly. Slowly pull the tab straight down. Stretch the strip along the wall.
- Maintain Contact: Keep the strip against the wall as it stretches. This thins the adhesive and releases the bond.
- Continue Until Free: Continue pulling until the strip is fully extended and releases from the wall.
- Clean Residue: Sometimes, a tiny bit of residue might remain. You can often remove this with rubbing alcohol. For stubborn spots, check out guides on how to clean caulk off tile, as some techniques for caulk residue might also apply to adhesive residue.
Following these steps ensures your tile remains pristine. This preserves the integrity of your wall.
Preparing Tile Surfaces for Optimal Shelf Adhesion
Proper surface preparation is the single most important step for any no-drill shelf installation. If your tile is not clean and dry, even the strongest adhesive will fail. I cannot stress this enough. A clean surface ensures maximum contact between the adhesive and the tile. This creates the strongest possible bond.
Different types of tile may require slightly different cleaning approaches. However, the core principle remains the same: remove all dirt, grease, soap scum, and moisture. This meticulous preparation prevents future problems. It ensures your shelf stays securely in place for a long time. Take the time to do this right. It will save you frustration later.
Cleaning Ceramic and Porcelain Tile
Ceramic and porcelain tiles are common surfaces for shelving. They are generally non-porous and smooth. This makes them excellent candidates for adhesive-based shelves. Cleaning them thoroughly is straightforward.
- Initial Wipe: Start by wiping the tile surface with a clean cloth dampened with warm water. This removes loose dust and light dirt.
- Degreasing: Use a mild household degreaser or dish soap solution. Apply it to the tile. Scrub gently with a sponge or soft brush. Pay attention to any areas with grease buildup, especially in kitchens.
- Soap Scum Removal: In bathrooms, soap scum is a major culprit for adhesion failure. A solution of white vinegar and water (1:1 ratio) can work wonders. Spray it on, let it sit for a few minutes, then scrub. For more stubborn soap scum, specialized tile cleaners are effective. Get more tips on how to clean these common surfaces by reading about how to clean porcelain tile or how to clean ceramic tile shower walls.
- Rinse Thoroughly: Rinse the tile completely with clean water. Ensure no cleaning solution residue remains. Residue can leave a film that prevents proper adhesion.
- Final Drying: Dry the tile surface completely. Use a clean, lint-free cloth. For best results, allow the area to air dry for an additional 15-30 minutes. This ensures no hidden moisture.
Preparing Natural Stone Tile (e.g., Marble, Travertine)
Natural stone tiles, like marble or travertine, require more gentle care. They are often porous. They can be sensitive to harsh chemicals. Always test your cleaning solution on an inconspicuous area first.
- Gentle Cleaning: Use a pH-neutral cleaner specifically designed for
- shelf installation
- no-drill shelves
- tile mounting
- adhesive shelves
- bathroom shelves
- kitchen storage

Todd Martin
Senior Writer
With over 15 years of experience in home renovation and design, I started HEG to share what I’ve learned with homeowners who want to create spaces that are both beautiful and functional. I’ve always believed in a hands-on approach, and over the years, I’ve picked up practical solutions that actually work. Through HEG, I aim to make home improvement more approachable, sharing real tips that help you create a home you truly love.