· Todd Martin · Home Improvement · 19 min read
How To Add Molding To Kitchen Cabinets

Elevate Your Kitchen: How To Add Molding To Cabinets
Have you looked at your kitchen cabinets and felt they lacked a certain finished look? Adding molding to kitchen cabinets can significantly transform their appearance. This simple update takes your kitchen from ordinary to custom. It provides a touch of elegance and hides imperfections.
I often think about how small changes make big differences. Adding decorative trim or molding to kitchen cabinets is one of those impactful projects. It creates a cohesive and polished design. This article guides you through the process, from selecting the right molding to applying the final touches. You will learn about different types of molding and the tools you need. I will also share a step-by-step installation guide. Let’s start this rewarding DIY journey together.
Takeaway
- Adding molding elevates cabinet appearance and boosts kitchen value.
- Choose molding types like crown, base, or light rail to match your style.
- Accurate measurements and precise cuts are essential for a professional finish.
- Prepare surfaces thoroughly for proper adhesion and a smooth final look.
- Finishing molding with paint or stain provides a cohesive, integrated design.
Adding molding to kitchen cabinets involves selecting the right style, measuring carefully, and attaching the trim pieces with precision. This process includes preparing the cabinet surfaces, making accurate cuts, securing the molding with nails or adhesive, and applying a matching finish. The result is a more refined and customized kitchen aesthetic.
Why Add Molding to Kitchen Cabinets? Enhancing Kitchen Aesthetics
Adding molding to kitchen cabinets offers numerous benefits beyond just looks. It is a fantastic way to upgrade an existing kitchen without a full remodel. Molding provides a custom, built-in appearance. This makes standard cabinets look high-end.
Molding also hides gaps and imperfections. It can conceal uneven cabinet tops or walls. This creates a clean, finished line. The added architectural detail enhances your home’s overall value. It shows attention to detail in your kitchen design. Many homeowners find this a cost-effective way to achieve a luxurious feel. It gives the kitchen a more robust and substantial presence. I believe a little trim makes a huge impact.
Aesthetic Transformation
Molding transforms a plain cabinet box into a piece of furniture. It adds depth and character. Consider how a simple frame makes a picture stand out. Molding does the same for your cabinets. This visual enhancement makes your kitchen feel more inviting. It can tie together different elements of your kitchen decor.
The right molding choice complements your existing cabinet style. It enhances the visual flow of your kitchen space. This simple addition makes cabinets appear taller or more substantial. It brings elegance to functional storage.
Hiding Imperfections and Gaps
Older cabinets often have small gaps between the cabinet tops and the ceiling. Walls may not be perfectly plumb or level. Molding expertly covers these slight variations. This creates a seamless transition. It provides a clean, continuous line.
This concealment is especially useful in older homes. It gives a polished, professional look. You avoid unsightly gaps that collect dust. The molding makes everything look neat and intentionally designed. It effectively solves common installation challenges.
Types of Cabinet Molding: Choosing the Right Style
Understanding the different types of molding helps you select the best option for your kitchen. Each type serves a unique purpose. They also offer distinct aesthetic qualities. Popular choices include crown molding, base molding, and light rail molding.
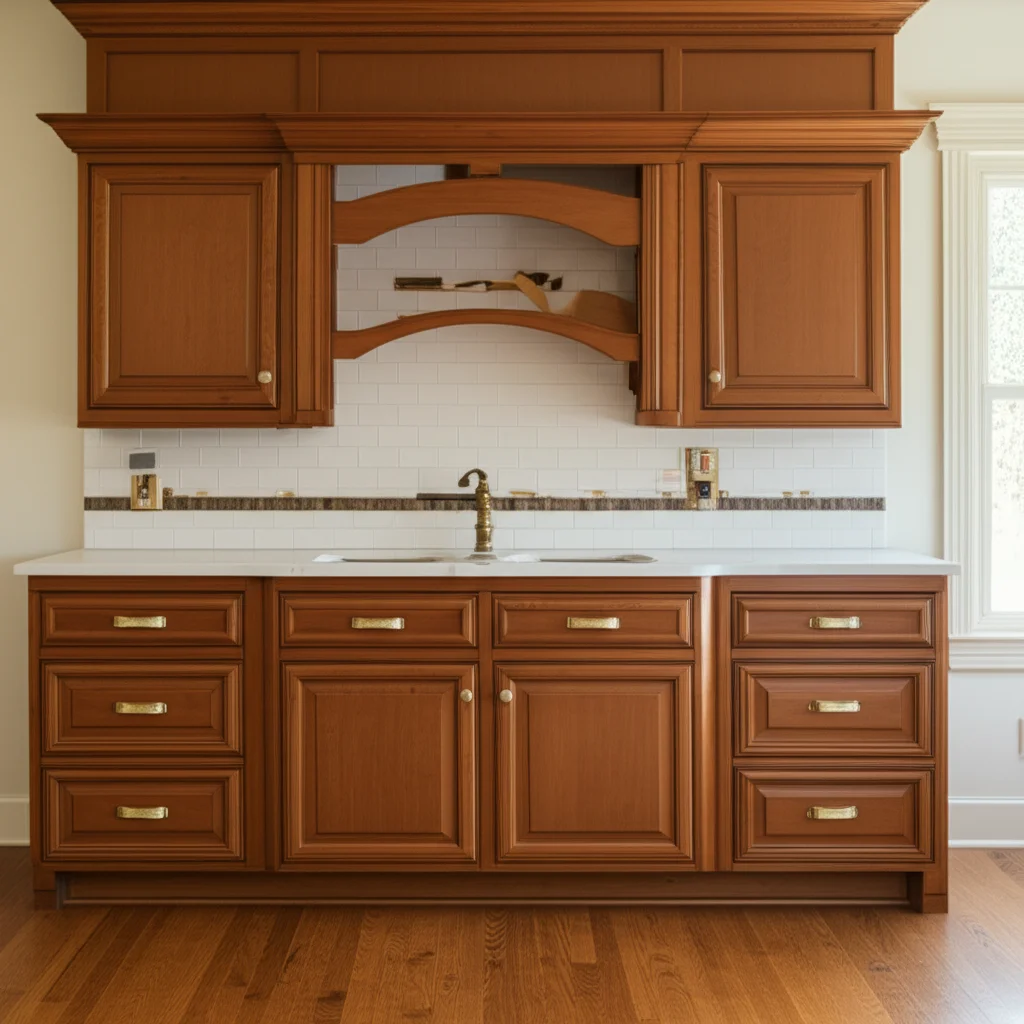
Crown molding is a classic choice for the top of upper cabinets. It bridges the gap between cabinets and the ceiling. Base molding, also known as shoe molding or toe kick molding, finishes the bottom of lower cabinets. Light rail molding hides under-cabinet lighting fixtures. Selecting the right style ensures a cohesive look. Think about your kitchen’s existing style.
Crown Molding
Crown molding is perhaps the most popular type of cabinet molding. It typically sits at the very top of upper wall cabinets. It creates a decorative transition to the ceiling. This type of molding adds elegance and height. It makes cabinets look more substantial.
Crown molding comes in various profiles and sizes. You can choose from simple coves to intricate ogees. The choice depends on your desired style. A larger crown works well in kitchens with high ceilings. Smaller profiles suit more modest spaces. This molding truly finishes the top of your cabinets. You can learn more about making your cabinets taller, which often pairs well with crown molding, by visiting this article: How To Add Height To Kitchen Cabinets.
Base Molding and Toe Kick Molding
Base molding applies to the bottom of lower cabinets. It often covers the toe kick area. This area is typically recessed. It can sometimes look unfinished. Base molding provides a decorative trim.
Toe kick molding protects the base of your cabinets from scuffs. It also prevents dirt from accumulating. This type of molding creates a more furniture-like appearance. It gives your kitchen a refined look. This molding helps blend the cabinets into the floor. For more ideas on how to finish the bottom of your cabinets, check out How To Add Trim To Bottom Of Kitchen Cabinets.
Light Rail Molding
Light rail molding is specific to upper cabinets. It attaches to the bottom edge. Its primary function is to conceal under-cabinet lighting. It provides a clean, finished look to the light fixtures. This molding creates a subtle, elegant shadow line.
It also protects the lights from direct view. This improves the overall ambiance of your kitchen. Light rail molding can be simple or decorative. It often matches the style of your crown or base molding. This ensures design consistency.
Essential Tools and Materials for Molding Installation
Before you begin adding molding to your kitchen cabinets, gather all necessary tools and materials. Having everything ready streamlines the process. It ensures a smoother installation. This preparation prevents frustrating interruptions.
You will need the molding itself, of course. Common tools include a miter saw, tape measure, and stud finder. Fasteners like nails or screws are also essential. Do not forget safety gear. A well-stocked toolkit makes this project much more manageable. I always recommend getting more material than you think you need. This accounts for mistakes or future repairs.
Molding Materials
Molding comes in various materials. Wood is a popular choice. It offers natural beauty and can be stained or painted. Medium-density fiberboard (MDF) is another common option. MDF is more affordable and dimensionally stable. It is easy to paint.
Polyurethane molding offers flexibility and moisture resistance. It works well in humid environments. Choose a material that matches your cabinets. Consider durability and ease of finishing. Your choice affects both the look and the longevity of the molding.
Cutting Tools and Measuring Equipment
Accurate cuts are crucial for professional-looking molding. A miter saw is the most important tool for this. It allows precise angle cuts. A compound miter saw is even better for crown molding. It handles bevel and miter cuts simultaneously.
You will also need a reliable tape measure. A pencil for marking cuts is also essential. A speed square or combination square helps ensure straight lines. Precision in measurement prevents waste. It makes the installation look clean.
Fasteners and Adhesives
Nails are the primary fasteners for molding. A nail gun (pneumatic or cordless) makes the job much faster. It drives nails flush without damaging the wood. A hammer and finishing nails work if you do not have a nail gun. Use nails long enough to penetrate the cabinet frame.
Wood glue or construction adhesive can provide extra holding power. Apply a thin bead to the back of the molding before nailing. This creates a stronger bond. Small clamps can hold pieces while the glue dries. This combination ensures long-lasting stability.
Finishing Supplies
Once the molding is installed, you need to finish it. This usually involves caulk, wood filler, and paint or stain. Caulk fills small gaps between the molding and the cabinet or wall. It creates a seamless look. Wood filler hides nail holes.
Sandpaper helps smooth surfaces before finishing. Choose paint or stain that matches your existing cabinets. Primer is often necessary for MDF or raw wood. Brushes or rollers apply the finish evenly. This final step integrates the molding into your cabinets.
Preparing Your Cabinets for Molding Installation
Proper preparation is key to a successful molding installation. Rushing this step can lead to poor adhesion or an uneven finish. Start by cleaning your cabinets thoroughly. This removes grease, grime, and dirt. Ensure surfaces are smooth and dry.
Inspect your cabinets for any damage or loose parts. Make any necessary repairs beforehand. Measure carefully to determine the amount of molding needed. Accounting for waste is always a good idea. A well-prepared surface ensures your new molding looks its best. I always clean cabinets before any upgrade. If you need tips on cleaning them, check out How To Clean Cabinets Before Painting.
Cleaning and Surface Preparation
Your cabinets must be clean before you attach any molding. Dust, grease, or grime will prevent good adhesion. Use a degreaser or mild soap solution to clean all cabinet surfaces. Pay close attention to the areas where the molding will attach. Rinse the cabinets thoroughly. Let them dry completely.
Smooth surfaces are also important. Sand any rough spots or old finish that could interfere with adhesion. A clean, smooth surface ensures the molding bonds properly. This prevents future peeling or lifting. This step is critical for a professional finish.
Measuring and Estimating Materials
Accurate measurement prevents material waste. Use a tape measure to determine the length of each section where molding will be installed. Measure twice, cut once. Add 10-15% extra to your total length. This accounts for miscuts or tricky angles.
When measuring crown molding, remember to account for mitered corners. These cuts consume more length. Sketch out your cabinet layout. Label each section with its required molding length. This visual guide helps with cutting and organization.
Addressing Existing Cabinet Issues
Before installing molding, address any existing issues with your cabinets. Check for loose cabinet boxes or doors. Tighten any screws or hardware. Ensure the cabinets are level and plumb. Molding highlights existing imperfections if not addressed.
Fill any large holes or cracks in the cabinet frame. Use wood filler for this. Sand these areas smooth once dry. If your cabinet finish is worn, consider repairing those spots. Learn more about fixing worn spots on kitchen cabinets to ensure a flawless base for your molding: How To Fix Worn Spots On Kitchen Cabinets. A solid foundation makes the molding installation much easier and more effective.
Step-by-Step Guide: Installing Crown Molding on Cabinets
Installing crown molding on kitchen cabinets can seem intimidating. However, with careful planning and precise execution, it is a manageable DIY project. This section focuses on crown molding specifically. It often involves compound miter cuts. Taking your time is essential.
I find that breaking the process into smaller steps makes it less daunting. We will cover marking, cutting, and fastening the molding. Proper technique ensures tight joints and a seamless look. This is where your miter saw becomes your best friend.
Marking and Cutting Crown Molding
Measuring and marking are crucial for crown molding. You must cut angles to fit corners. Inside corners require two pieces cut at opposite 45-degree angles. Outside corners also use 45-degree angles but in the opposite direction. Always test your cuts on scrap pieces first.
Use a miter saw set to the correct angle. Remember, crown molding sits at an angle. The bottom edge of the molding rests against the cabinet face. The top edge rests against the top of the cabinet. This means your saw settings might be different from typical flat trim. Crown molding jigs can help hold the molding at the correct angle for cutting.
Attaching Crown Molding to Cabinets
Once cut, attach the crown molding securely. Apply a thin bead of wood glue to the top edge of the cabinet. Also, apply glue to the molding where it meets the cabinet. Position the molding carefully. Ensure tight fits at the corners.
Use a nail gun to fasten the molding to the cabinet frame. Aim nails into the cabinet frame for a secure hold. Use finishing nails that are long enough to penetrate the cabinet box. Typically, 1 1/2-inch to 2-inch nails work well. Drive nails every 12 to 16 inches. Ensure nails are countersunk below the surface. This allows for filling later.
Handling Corners and Returns
Corners are the trickiest part of crown molding installation. Inside corners usually involve two 45-degree miter cuts that meet. Outside corners also use 45-degree miters but are cut in the opposite direction. Dry-fit pieces before applying glue and nails. This ensures a tight, professional joint.
For exposed ends of crown molding, create a “return.” This means cutting a small piece of molding at a 45-degree angle. Then, cut a tiny corresponding 45-degree angle on the end of the main molding piece. This creates a finished, wrapped look. It prevents the raw end grain from showing. This small detail elevates the overall appearance.
Step-by-Step Guide: Installing Base or Light Rail Molding
Installing base or light rail molding is generally simpler than crown molding. These pieces typically sit flat against the cabinet. The cuts are often straightforward miter cuts for corners. Both types of molding enhance the cabinet’s finish. They hide practical elements, too.
Base molding offers a refined look at the bottom of lower cabinets. Light rail molding conceals under-cabinet lighting. The installation principles are similar for both. Measure precisely and ensure clean cuts. This makes a big difference in the final outcome.
Measuring and Cutting Base or Light Rail Molding
Measure each section where you will install base or light rail molding. These moldings are usually installed flat against the cabinet surface. This makes the cutting angles simpler. Inside corners use a 45-degree miter cut. Outside corners also use a 45-degree miter cut, but angled outwards.
Use your miter saw to make precise cuts. Ensure the blade is sharp for clean edges. If you have long runs, you might need to splice pieces together. Make splice cuts at a 45-degree angle. This creates a less noticeable seam. Always measure twice before making any cut.
Attaching Base Molding to Cabinets
For base molding, apply a thin bead of wood glue to the top edge of the toe kick area. Position the molding firmly against the cabinet. Use a nail gun to secure the molding. Drive finishing nails every 12 inches or so. Ensure nails penetrate the cabinet frame.
Countersink all nail heads. This creates a smooth surface for filling. Wipe away any excess glue immediately. This prevents unsightly residue. Work in sections. This ensures proper alignment as you go.
Attaching Light Rail Molding
Light rail molding installs on the bottom of upper cabinets. It typically has a channel or recess to house wiring or light fixtures. Apply a thin bead of wood glue to the cabinet’s bottom edge. Align the molding. Use small finishing nails or screws to secure it.
If using screws, pre-drill pilot holes. This prevents splitting the wood. Ensure fasteners are short enough not to protrude into the cabinet interior. The goal is to hide the lighting. So, position the molding flush with the cabinet bottom. This creates a clean line.
Finishing Touches: Painting, Staining, and Sealing Your Molding
The final step in adding molding to kitchen cabinets is finishing. This process integrates the new molding with your existing cabinets. It involves filling nail holes, caulking gaps, and applying paint or stain. Proper finishing protects the wood and provides a seamless look.
This step is critical for a professional result. It hides all signs of installation. It also ensures the molding matches your kitchen’s aesthetic. I always enjoy this part the most, as it brings the whole project together.
Filling Nail Holes and Gaps
After installing all molding, you will have visible nail holes. Use wood filler to patch these holes. Apply a small amount of filler with a putty knife. Overfill slightly. Let the filler dry completely.
Once dry, sand the filled areas smooth. Use fine-grit sandpaper for this. Wipe away any sanding dust. Next, use caulk to fill any small gaps. Apply a thin bead of paintable caulk along all seams where the molding meets the cabinet or wall. Smooth the caulk with a wet finger or tool. This creates a seamless, professional appearance.
Sanding and Priming
Sanding prepares the molding for its final finish. After filling nail holes and caulking, lightly sand the entire surface of the molding. Use fine-grit sandpaper (e.g., 220-grit). This removes any rough spots. It also helps the paint or stain adhere better. Wipe away all sanding dust with a tack cloth or damp cloth.
If your molding is raw wood or MDF, apply a coat of primer. Primer helps create a uniform surface. It also ensures better adhesion for your paint or stain. Let the primer dry according to the manufacturer’s instructions.
Painting or Staining Your New Molding
Choose paint or stain that matches your existing cabinets. If painting, apply thin, even coats. Use a high-quality brush for smooth results. Allow each coat to dry fully before applying the next. Lightly sand between coats for an ultra-smooth finish.
If staining, apply the stain evenly. Wipe off excess according to product instructions. Then, apply a clear topcoat or sealer for protection. This step is crucial for durability. A well-finished molding completes your cabinet upgrade. For cabinet painting tips, you may find useful information on How To Paint Kitchen Cabinets Without Sanding or How To Paint Kitchen Cabinets Without Brush Marks.
Tips for a Professional Finish and Troubleshooting Common Issues
Achieving a professional finish when adding molding to kitchen cabinets requires attention to detail. Even seasoned DIYers encounter challenges. Knowing how to troubleshoot common issues saves time and frustration. Focus on precision at every step.
I always recommend patience throughout this process. Rushing often leads to mistakes. Taking the time to dry-fit and double-check measurements prevents costly errors. These tips will help you achieve a polished, integrated look for your new cabinet molding.
Achieving Seamless Joints
Seamless joints are the hallmark of professional molding installation. Practice your miter cuts on scrap pieces. Ensure your miter saw is calibrated accurately. Even a tiny misalignment shows on the finished product. Use wood glue on all joints before fastening.
After nailing, use wood filler on any small gaps in the joints. Sand them smooth once dry. Caulking any remaining hairline gaps provides a perfect finish. This attention to detail makes your molding look like it was always there.
Dealing with Uneven Walls or Ceilings
Few walls or ceilings are perfectly flat. This can create frustrating gaps between the molding and the surface. When you encounter minor gaps, caulk is your best friend. Use paintable caulk and apply it carefully. Smooth it with a wet finger or a caulk tool.
For larger gaps, you might need to scribe the molding. Scribing involves marking the contour of the uneven surface onto the molding. Then, you carefully trim the molding to match that contour. This technique ensures a tight fit, even on irregular surfaces. It takes practice, but it yields excellent results.
Maintaining Your New Cabinet Molding
Once installed and finished, your new cabinet molding requires minimal maintenance. Regular cleaning keeps it looking fresh. Use a soft, damp cloth to wipe away dust and kitchen grime. Avoid harsh chemicals that can damage the finish.
If you have painted molding, touch up any nicks or scratches promptly. This prevents further damage. For stained molding, consider reapplying a protective topcoat every few years. This preserves its luster. Proper care ensures your beautiful molding lasts for years.
FAQ Section
How long does it take to add molding to kitchen cabinets?
The time required to add molding depends on your experience and the kitchen’s size. A small kitchen with simple molding might take a dedicated DIYer one to two days. Larger kitchens or complex crown molding installations can take three to five days. This includes preparation, installation, and finishing time.
Can I add molding to existing cabinets?
Yes, you can absolutely add molding to existing kitchen cabinets. This is a popular and cost-effective way to update a kitchen’s appearance. The process involves cleaning, measuring, cutting, and attaching the molding directly to your current cabinet structure. The key is to ensure your cabinets are sturdy and clean before starting.
What kind of wood is best for cabinet molding?
Poplar is an excellent choice for painted molding due to its smooth finish and affordability. Maple and oak are good options if you plan to stain the molding. They offer attractive grain patterns. For budget-conscious projects, MDF (medium-density fiberboard) is a very cost-effective and stable material that paints beautifully.
Do I need special tools to install cabinet molding?
While basic hand tools like a tape measure and a hand saw can work for very simple trim, a miter saw is highly recommended. It ensures precise angle cuts, especially for crown molding. A nail gun also speeds up the process significantly. Essential tools include a tape measure, miter saw, level, nail gun, and caulk gun.
How do I match the finish of new molding to existing cabinets?
Matching the finish requires careful attention. If your cabinets are painted, take a cabinet door or a sample piece to a paint store for color matching. If they are stained, try to find a stain that closely matches your existing wood. Test the stain on a scrap piece of molding first. You can also distress new molding to match older, worn cabinets.
What if my cabinets are not perfectly straight or level?
Uneven cabinets or walls are common. Molding can often hide minor imperfections. For slight gaps, use caulk after installation. For more significant inconsistencies, you may need to “scribe” the molding. Scribing involves shaping the back of the molding to conform to the irregular surface. This creates a custom, tight fit.
Conclusion
Adding molding to kitchen cabinets is a rewarding home improvement project. It dramatically enhances your kitchen’s aesthetic appeal. You transform standard cabinetry into custom-looking pieces. This boosts both the style and value of your home. From selecting the right type of molding to applying the final finish, each step contributes to a polished result.
Remember, patience and precision are your greatest allies. Take your time with measurements and cuts. Use the right tools for the job. Following the steps outlined in this guide will help you achieve professional-looking results. You can confidently tackle this upgrade yourself. Ready to give your kitchen the upgrade it deserves? Start planning your cabinet molding project today and enjoy a beautifully transformed space.
- kitchen cabinet molding
- DIY cabinet trim
- crown molding kitchen
- base cabinet molding
- light rail molding
- kitchen renovation


