· Davia Murnell · Home Improvement · 19 min read
How To Clean Brick Fireplace Before Painting
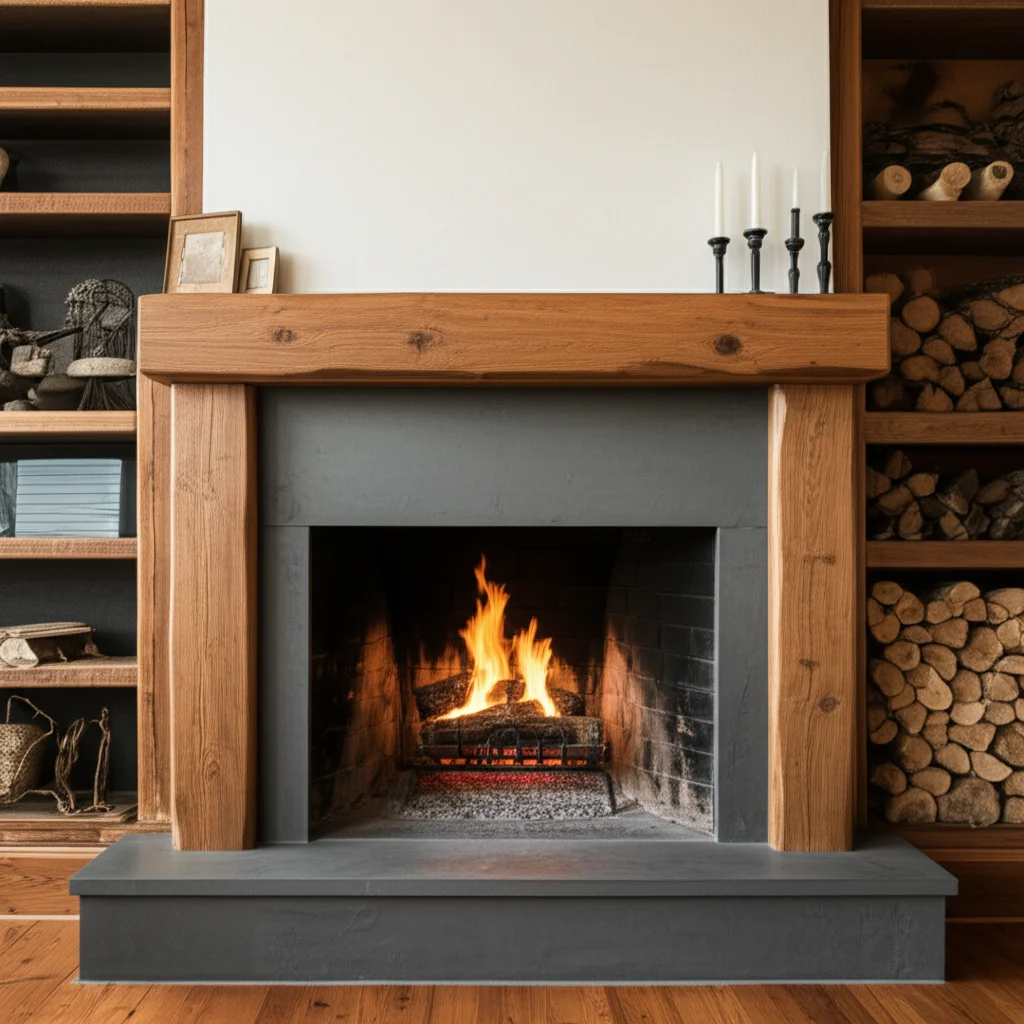
Preparing Your Brick Fireplace: The Essential Guide to Cleaning Before Painting
Thinking about giving your fireplace a fresh new look? Painting a brick fireplace can truly transform a room. However, you cannot just grab a brush and start. The most important step for a lasting finish is proper preparation. This includes thoroughly cleaning brick fireplace before painting.
A clean surface means your paint will stick better. It helps the paint look smooth and professional. Without good cleaning, your new paint might peel or look uneven. This article will guide you through all the necessary steps. We cover everything from gathering your tools to making sure your fireplace is perfectly ready for paint.
Takeaway
Achieving a flawless painted brick fireplace requires thorough cleaning. Follow these key steps for success:
- Gather Tools: Collect brushes, vacuums, cleaners, and safety gear.
- Prioritize Safety: Protect yourself and your home with proper ventilation and covers.
- Dry Clean First: Remove loose dirt and soot with brushing and vacuuming.
- Deep Clean Stains: Use appropriate cleaners for soot, creosote, and mold.
- Rinse Thoroughly: Wash away all cleaner residue to ensure paint adhesion.
- Dry Completely: Allow ample time for the brick to dry fully before any painting begins.
- Inspect and Prime: Check for issues and apply a suitable primer for best results.
To clean a brick fireplace before painting, first remove all loose debris with a wire brush and a shop vacuum. Next, apply a strong degreaser or TSP solution to remove soot, creosote, and grime, scrubbing thoroughly. Rinse the brick completely with clean water and allow it to dry fully for several days to prevent moisture from affecting the paint.
Why Cleaning Is Critical for Painting Success
Imagine painting a dusty, greasy wall. The paint would not stick well. It might peel off quickly. This is exactly what happens if you skip cleaning your brick fireplace before painting. A clean surface provides the perfect base.
Paint needs a rough, clean surface to bond properly. Brick is naturally porous, but dirt, soot, and creosote prevent good adhesion. These contaminants create a barrier between the brick and your paint. You want your new paint job to look great and last for years.
Understanding Soot and Creosote
Soot is the black, powdery residue left from burning wood. It consists of unburned carbon particles. Creosote is a tar-like substance. It builds up inside chimneys and fireplaces. Both are very difficult to remove.
Soot and creosote are oily. They can bleed through fresh paint. This causes ugly brown or yellow stains. You must remove them completely before painting. A specialized cleaner helps break down these stubborn substances. To learn more about tackling tough soot, you can find detailed methods here: how to clean black soot from inside fireplace.
The Impact of Dust and Debris
Dust and loose debris are less obvious threats. They still cause problems. Dust creates a grainy texture under the paint. It stops the paint from bonding evenly. Loose mortar or brick fragments can also ruin your smooth finish.
You must remove all loose bits before applying any liquid. A stiff brush and a powerful vacuum are your first line of defense. This initial dry cleaning sets the stage for deep cleaning. Do not underestimate its importance.
Gathering Your Cleaning Arsenal: Essential Tools and Supplies
Before you start scrubbing, collect everything you need. Having all your tools ready saves time and effort. It also ensures you can work safely and effectively. You do not want to stop halfway through because you missed something.
Think of this as preparing for a big project. You need the right weapons for the job. Your supplies will vary depending on the level of dirt. A heavily used fireplace will require stronger cleaners. A less used one might need only mild soap.
Protective Gear You Must Have
Safety is always first. Cleaning chemicals can irritate your skin and eyes. Dust and soot can harm your lungs. Always protect yourself.
- Heavy-duty rubber gloves: These protect your hands from harsh chemicals.
- Safety glasses or goggles: Eye protection is essential against splashes and airborne particles.
- Respirator mask: A good mask filters out fine dust and chemical fumes. A simple dust mask is not enough for strong chemicals.
- Old clothes: Wear something you do not mind getting dirty or stained.
- Drop cloths or plastic sheeting: Protect your floors and surrounding furniture from spills and drips.
Choosing the Right Cleaning Solutions
Your choice of cleaner depends on the type of dirt. Soot and creosote need powerful solutions. General grime might need less harsh options. Always start with the mildest option first.
- Stiff-bristle brushes: These are for scrubbing the brick surface. A wire brush can remove tough spots but use it carefully to avoid damaging the mortar.
- Shop vacuum with hose attachments: Essential for removing loose dirt and water after cleaning.
- Large buckets: You will need two, one for cleaning solution and one for rinse water.
- Sponges or rags: For applying solutions and rinsing.
- TSP (Trisodium Phosphate): This is a powerful degreaser. It works well on heavy soot and grease. Mix it according to package directions.
- Commercial fireplace cleaner: Many brands offer specific cleaners for soot and creosote. Follow their instructions closely.
- White vinegar and baking soda: A homemade solution for light stains and general grime. Mix equal parts vinegar and water. A paste of baking soda and water can tackle some stains. For more on using these common items, check out how to clean with vinegar and baking soda.
- Bleach (diluted): Use for mold or mildew. Mix one part bleach with ten parts water. Be very careful with bleach and ensure good ventilation. If you find mold on nearby wood, this link offers general advice: how to clean black mold off wood.
- Spray bottle: Useful for applying water or diluted solutions.
Having these items ready makes the cleaning process smooth and efficient. It also ensures you are prepared for any type of stain or residue you might encounter.
Safety First: Preparing Your Workspace
Before any cleaning begins, you must prepare your area. This protects your home and your health. Cleaning a fireplace can be messy and involve strong chemicals. A proper setup prevents accidents.
Start by clearing the area around the fireplace. Remove any decorations, furniture, or rugs. This gives you plenty of space to work. It also prevents items from getting dirty or damaged.
Protecting Your Home and Yourself
Good ventilation is very important. Open windows and doors. Use fans to circulate air. This helps remove chemical fumes and dust. Breathing in these substances can be harmful.
Lay down drop cloths or plastic sheeting. Cover the floor around the fireplace. Extend it several feet out. Tape the edges down securely. This catches any drips, dust, or overspray. It saves your flooring from damage. You may also want to drape sheeting over nearby furniture.
Pre-Cleaning Checks
Make sure the fireplace is completely cold. If you have used it recently, wait at least 24 hours. Hot brick and cleaning solutions do not mix well. They can create steam or harmful fumes.
If your fireplace is gas-powered, turn off the pilot light. This prevents any accidental ignition. It also makes the area safer for you to work in. Understanding how to manage pilot lights is good practice for any fireplace maintenance: how to clean pilot light on gas fireplace. Double-check that there is no active flame or gas flow.
Remove any fireplace grates, screens, or inserts. These can be cleaned separately. Store them away from your work area. Clear out any ash or debris from the firebox. Use a metal shovel and bucket for ash. Do not use your regular vacuum cleaner for ash, as it can damage the motor. A shop vacuum is best for this.
The Step-by-Step Cleaning Process for Brick Fireplaces
Now that you are prepared, it is time to clean. This process involves several stages. Each stage is important for getting the brick perfectly clean. Follow these steps carefully for the best results.
Initial Dust and Debris Removal
Start with dry cleaning. This removes loose dirt and soot. It makes the deep cleaning much easier. You do not want to mix dry soot with water. This turns it into a muddy mess.
- Brush the brick: Use a stiff-bristle brush or wire brush. Brush the entire brick surface. Focus on the mortar joints. These areas collect a lot of dust.
- Vacuum thoroughly: Use your shop vacuum. Attach the hose with a brush or crevice tool. Vacuum all surfaces you brushed. Get into all the cracks and crevices. Make sure to remove as much dry debris as possible. This step is critical for soot removal. For more tips on black soot removal, check out this guide: how to clean black soot from inside fireplace.
Deep Cleaning Soot and Stains
This is where the real work begins. You will use your cleaning solutions here. Always test your cleaner on a small, hidden spot first. This checks for any discoloration or adverse reactions.
- Prepare your cleaning solution: Mix your chosen cleaner in a bucket. If using TSP, follow package directions for dilution. For general cleaning, a solution of warm water and a strong degreaser works well.
- Apply the cleaner: Use a sponge or scrub brush. Apply the solution to a small section of brick. Work from the top down. Do not saturate the brick too much. You want it damp, not soaking wet.
- Scrub the brick: Use your stiff-bristle brush. Scrub in small circular motions. Apply firm pressure. Pay extra attention to areas with heavy soot or stains. For very tough stains, a wire brush might be needed. Use caution not to damage the brick surface.
- Let it dwell (if needed): Some cleaners need a few minutes to work. Read your cleaner’s instructions. Do not let the solution dry on the brick.
- Reapply and continue: Move to the next section. Repeat the application and scrubbing process. Overlap your sections slightly.
The All-Important Rinse and Dry
Rinsing is just as important as cleaning. Any cleaner residue left behind can affect paint adhesion. It can also cause discoloration.
- Rinse with clean water: Fill a clean bucket with fresh water. Use a clean sponge or rag. Wipe down the cleaned brick. Rinse your sponge often. Change the rinse water frequently. You want to remove all traces of the cleaning solution.
- Vacuum excess water: Use your shop vacuum to suck up any standing water. This helps the brick dry faster.
- Allow for complete drying: This is perhaps the most critical step before painting. Brick is porous. It holds a lot of moisture. You need to allow ample time for it to dry completely. This can take several days. Factors like humidity and airflow affect drying time. Use fans to help circulate air. A dehumidifier can also speed up the process. Do not paint until the brick is bone dry.
Proper rinsing prevents problems with paint. Proper drying ensures your paint adheres well. Do not rush these steps. Patience here will save you headaches later.
Dealing with Stubborn Stains and Efflorescence
Sometimes, a regular cleaning solution is not enough. Brick fireplaces can develop particularly stubborn stains. These include white powdery deposits or deep-set smoke and grease marks. Knowing how to handle these specific issues is key to a truly clean surface.
Battling White, Powdery Deposits
If you see white, powdery stains on your brick, this is likely efflorescence. Efflorescence occurs when water passes through the brick. It dissolves salts within the brick or mortar. As the water evaporates, the salts are left behind on the surface.
To remove efflorescence:
- Dry brush first: Start by scrubbing the area vigorously with a stiff, dry wire brush. This removes the loose surface salts.
- Vinegar solution: Mix equal parts white vinegar and water. Apply this solution to the efflorescence with a spray bottle. Let it sit for a few minutes. Then, scrub with a stiff brush. Rinse thoroughly with clean water. Vinegar is acidic and can help dissolve the salt deposits.
- Muriatic Acid (Last Resort): For very stubborn efflorescence, a diluted muriatic acid solution can work. This is a powerful and dangerous chemical. Only use it as a last resort. Wear full protective gear, including gloves, eye protection, and a respirator. Follow all manufacturer instructions strictly. Mix one part muriatic acid to ten parts water. Apply it carefully, scrub, and rinse immediately. Always add acid to water, never water to acid. This is an advanced technique, and extreme caution is necessary. For more details on using this strong chemical, you can review information about how to clean brick with muriatic acid.
Removing Tough Grease and Smoke Residue
Beyond soot and creosote, brick can absorb grease or deep smoke stains. These require specific approaches.
- Degreaser: For grease stains, a strong commercial degreaser is effective. Spray it directly onto the stain. Let it sit for the recommended time. Scrub with a stiff brush. Rinse thoroughly. This is similar to cleaning tough grease in a kitchen. For general grease removal ideas, think about principles used for tasks like how to clean oil out of oven.
- Poultice method: For very old or deep oil/grease stains, a poultice can draw out the stain. Mix an absorbent material (like talc, diatomaceous earth, or fuller’s earth) with a strong solvent (like mineral spirits or acetone) to form a thick paste. Apply the paste generously over the stain. Cover it with plastic wrap. Let it dry completely, usually 24-48 hours. As it dries, the poultice absorbs the stain. Scrape it off and rinse.
- Smoke stain removers: There are specialized products for smoke damage. These often contain bleaching agents. Follow product instructions carefully. They can be very effective at lightening dark smoke stains. Test them first in an inconspicuous area.
Always remember to rinse the brick thoroughly after using any strong cleaning agent. Any residue can prevent paint from adhering correctly. Proper rinsing is crucial for a successful painting project.
Post-Cleaning Prep: Ensuring the Perfect Canvas for Paint
You have cleaned the brick. You have let it dry. Now, one final stage remains before you pick up the paint brush. This post-cleaning preparation ensures your hard work pays off. It creates the perfect surface for paint. This step is about refining the canvas you have just created.
Final Inspection and Repairs
Take a close look at your brick surface. Inspect it thoroughly. What do you see?
- Check for residue: Are there any lingering spots of cleaner or stain? If so, rinse again. You want a truly clean surface.
- Look for loose mortar: Run your finger along the mortar joints. Is any mortar crumbly or loose? If yes, it needs repair.
- Find cracks: Are there any cracks in the brick or mortar? Small cracks can expand. They can also show through paint.
- Address repairs: Use a chisel and hammer to remove loose mortar. Mix new mortar according to package directions. Use a tuck-pointing trowel to fill in the joints. For cracks, use a heat-resistant caulk or sealant designed for masonry. Let all repairs dry completely. This might take several days.
Fixing these small issues now prevents bigger problems later. A solid, even surface is essential for a smooth paint job.
The Primer’s Role in a Lasting Finish
Priming is not an optional step for a brick fireplace. It is essential. A good primer acts as a bridge. It creates a barrier between the brick and the topcoat. It also prepares the surface for paint.
- Why prime?
- Seals porous brick: Brick is very absorbent. Primer seals it. This prevents the brick from soaking up too much paint. It ensures even coverage.
- Blocks stains: Soot and creosote can still bleed through. A high-quality stain-blocking primer prevents this. It traps any remaining stains.
- Promotes adhesion: Primer creates a uniform surface. It gives the paint something strong to grip. This means less peeling and chipping later.
- Improves paint coverage: You will need fewer coats of topcoat paint. Primer evens out the brick’s texture.
- Choosing the right primer:
- Stain-blocking primer: Always choose a primer specifically designed to block stains. Look for “stain-blocking” or “sealing” on the label.
- Masonry primer: These primers are made for porous surfaces like brick and concrete. They penetrate well.
- Heat-resistant primer (if applicable): If you plan to paint the inside of the firebox or areas exposed to high heat, choose a heat-resistant primer. The outside of the fireplace usually does not need high-heat primer.
- Application: Apply primer with a roller for large areas. Use a brush for mortar joints and tight spots. Apply it evenly. Allow it to dry completely. Follow the manufacturer’s recommended drying times. This is similar to preparing any wood surface for painting. You can learn more about general painting prep here: how to clean wood after sanding before painting.
Taking these final steps guarantees a beautiful and durable paint finish. Your brick fireplace will look fresh and inviting for years to come.
Common Mistakes to Avoid When Cleaning Your Brick Fireplace
Cleaning a brick fireplace before painting is a detailed process. It is easy to make mistakes. Avoiding these common errors ensures a smoother project. It also protects your efforts and the integrity of your fireplace.
Overlooking Safety Precautions
I often see people jump into cleaning without proper safety gear. This is a big mistake. Soot and chemicals can irritate your skin, eyes, and lungs.
- Not wearing PPE: Always wear heavy-duty gloves, safety glasses, and a good respirator mask. These protect you from fumes and splashes. Dust masks are not enough for strong chemicals.
- Poor ventilation: Cleaning products release fumes. Without open windows or fans, these fumes build up. This can cause dizziness or breathing problems. Make sure your workspace has plenty of fresh air.
- Working on a hot fireplace: Never clean a hot fireplace. The heat can cause cleaning solutions to evaporate too quickly. It can also create dangerous steam. Always wait until the fireplace is completely cold.
Rushing the Drying Process
Patience is a virtue, especially with brick. Brick is highly porous. It absorbs and holds a lot of moisture.
- Painting too soon: If you paint over damp brick, the paint will not adhere well. It will bubble, peel, or flake off. This ruins your entire project.
- Not accounting for humidity: Drying times vary. High humidity slows down drying. Use fans or a dehumidifier to speed it up. Give the brick several days to dry completely. Do not guess; ensure it is bone dry.
Using the Wrong Tools or Cleaners
I have seen people use tools that damage the brick. I have also seen them use cleaners that are too weak or too strong.
- Overly aggressive scrubbing: A wire brush is good for tough spots. But using it too aggressively can scratch the brick. It can also damage the mortar. Use it with caution.
- Ignoring test spots: Always test cleaners in an inconspicuous area. This checks for discoloration. Some cleaners can leave stains or bleach the brick.
- Not rinsing thoroughly: Leaving cleaner residue on the brick is a big error. The residue can prevent paint from sticking. It can also react with the paint. Rinse the brick several times with fresh water.
- Not using a stain-blocking primer: This is a crucial step that many skip. Soot and creosote will bleed through regular paint. A stain-blocking primer creates a barrier. It ensures a clean, uniform finish.
By being mindful of these common pitfalls, you can ensure your fireplace cleaning and painting project is a success. Each step is important for a beautiful, lasting result.
FAQ Section
Can I use a pressure washer to clean my brick fireplace?
I do not recommend using a pressure washer for an indoor brick fireplace. The high pressure can force water deep into the brick and mortar. This can lead to long drying times, mold growth, or even structural damage. It can also create a huge mess inside your home. Stick to manual scrubbing and rinsing for indoor projects.
How long does the brick need to dry before painting?
Brick needs to be completely dry before you paint it. This usually takes at least 2-3 days, but it can be longer depending on humidity and how wet the brick got during cleaning. Use fans or a dehumidifier to speed up drying. I wait until the brick feels totally dry to the touch and looks evenly dry in color.
What if I find mold on my fireplace brick?
If you find mold, mix a solution of one part bleach to ten parts water. Apply this solution to the moldy areas with a spray bottle or sponge. Let it sit for about 15-20 minutes. Scrub the mold away with a stiff brush. Rinse the area very thoroughly with clean water. Ensure good ventilation when working with bleach.
Do I need to prime after cleaning?
Yes, priming is essential. Primer seals the porous brick. It also blocks any remaining stains, like soot or creosote, from bleeding through your paint. A good primer creates a smooth, even surface for your paint to adhere to. It helps your final paint job look professional and last longer.
What type of paint is best for a brick fireplace?
For brick fireplaces, I recommend using a 100% acrylic latex paint or a specialized masonry paint. These paints are durable and designed for porous surfaces. They offer good adhesion and stand up well to cleaning. If you are painting inside the firebox, you will need a high-heat resistant paint.
Is it safe to use bleach on brick?
You can use a diluted bleach solution on brick to remove mold or very tough stains. Mix one part bleach with ten parts water. Always test it in an inconspicuous area first to check for discoloration. Ensure proper ventilation. Rinse the brick very thoroughly with clean water after using bleach.
Conclusion
Cleaning a brick fireplace before painting is the most important step for a successful outcome. It is not just about making the fireplace look neat. It prepares the surface so your paint will adhere properly and last for years. I have shown you that with the right tools, proper safety measures, and a systematic approach, anyone can achieve a beautifully transformed fireplace.
We covered everything from gathering your essential supplies to tackling stubborn stains like efflorescence. We also discussed the critical importance of a thorough rinse and complete drying. Remember to perform a final inspection and apply a quality primer. This detailed preparation ensures that your hard work results in a durable, flawless finish. Do not rush any step, especially the drying process. Your patience will be rewarded with a fireplace that looks stunning. Now, you are ready to give your brick fireplace that fresh new look! Start your project today and enjoy your beautifully painted fireplace.
- brick fireplace cleaning
- fireplace painting prep
- soot removal
- brick cleaning tips
- DIY home improvement

Davia Murnell
Room Cleaning Expert
Before joining HEG, I spent over a decade running my own window cleaning business, where I perfected streak-free techniques and learned the ins and outs of specialty glass care. Now, I bring that expertise to a broader mission—helping homeowners maintain sparkling windows and beautiful outdoor spaces. From skylights and sliding doors to patio glass and outdoor furniture, I believe every surface deserves attention and care. I share practical tips and proven methods that make even the toughest cleaning jobs feel manageable. Whether you're battling pollen on the porch or smudges on high windows, I’m here to help you see your home in a whole new light—literally.