· Todd Martin · Electronics Care · 20 min read
How To Clean Bose Headphones
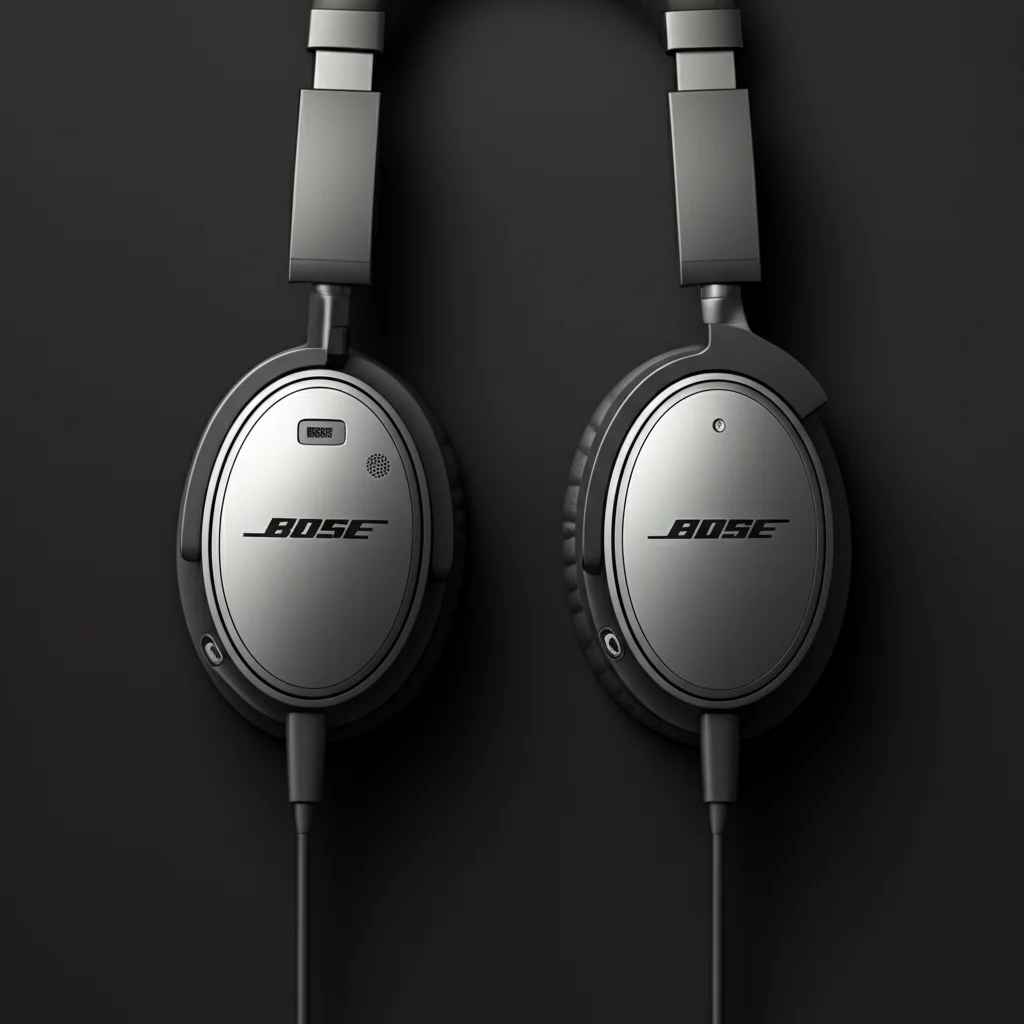
How To Clean Bose Headphones Safely and Effectively
Your Bose headphones are a personal sanctuary. They provide incredible sound and comfort, whether you are enjoying music, taking calls, or blocking out noise. Over time, these headphones can accumulate dirt, oils, and sweat. This buildup affects not only their appearance but also their hygiene and performance. Learning how to clean Bose headphones properly ensures they remain in top condition. This guide will walk you through a complete cleaning process for your beloved Bose gear. We will cover everything from daily care to a deep clean, helping you keep your audio experience pristine.
Takeaway:
- Regularly wipe down surfaces with a soft, damp cloth.
- Gently clean ear cushions and headbands with mild soap and water.
- Use cotton swabs for hard-to-reach areas and ports.
- Allow all parts to dry completely before reassembly and use.
To clean Bose headphones, use a soft, lint-free cloth lightly dampened with water or a mild, diluted soap solution. Gently wipe down all surfaces, including earcups, headband, and cables. For grilles and ports, use a dry, soft brush or cotton swab. Ensure no moisture enters openings.
Why Regular Cleaning Matters for Your Bose Headphones
Maintaining your Bose headphones goes beyond just aesthetics. Regular cleaning plays a crucial role in their longevity and your personal hygiene. I always find that a clean device simply feels better to use. Dust, skin oils, and sweat are common culprits that degrade headphone materials over time. These elements can cause ear cushions to stiffen or crack, and headbands to lose their shape. A buildup of grime can also lead to unpleasant odors.
Furthermore, neglecting to clean your headphones can impact sound quality. Dirt particles might accumulate in speaker grilles, muffling the audio or affecting the active noise cancellation. For in-ear models, earwax can block sound entirely. Keeping these areas clear ensures that the pure sound quality Bose is known for remains uncompromised. Regular maintenance also reduces the spread of bacteria and fungi, which can thrive in warm, moist environments like headphone earcups. This is especially important if you share your headphones or use them during workouts. A small effort in regular cleaning prevents bigger problems down the line. It protects your investment and enhances your listening pleasure.
Essential Tools and Supplies for Cleaning Bose Headphones
Before you start cleaning your Bose headphones, gathering the right tools is important. Using the correct supplies protects the delicate components of your headphones. I always prepare my workspace with everything I need to avoid interruptions. This approach helps ensure a thorough and safe cleaning process. You do not need many specialized items; most can be found around your home. The right tools make the task simpler and more effective.
Here is a list of what you will need:
- Soft, Lint-Free Microfiber Cloths: These are ideal for wiping surfaces without scratching or leaving fibers. They absorb moisture effectively.
- Mild Dish Soap or Hand Soap: A small amount diluted in water provides a gentle cleaning solution. Avoid harsh chemicals.
- Distilled Water: Using distilled water prevents mineral deposits that tap water can leave behind. This is especially important for electronics.
- Cotton Swabs: Perfect for reaching small crevices and around buttons or ports. They allow for precise application and cleaning.
- Soft-Bristled Brush: A clean, dry toothbrush or a small detailing brush works well for dislodging dust from speaker grilles.
- Rubbing Alcohol (Isopropyl Alcohol 70%): This is useful for disinfecting, but use sparingly and only on non-porous surfaces like plastic. It evaporates quickly.
- Small Bowl: For mixing your diluted soap solution.
- Air Blower (Optional): A small bulb blower, like those used for camera lenses, helps remove loose dust from grilles without touching them.
Always avoid abrasive cleaners, solvents, or aerosol sprays. These can damage the finishes and internal components of your Bose headphones. I prefer a gentle approach when it comes to cleaning electronics. For general cleaning tips that apply to other over-ear models, you can refer to our guide on how to clean over-ear headphones.
Step-by-Step Guide: Cleaning Bose Headband and Earcups
The headband and earcups are the parts of your Bose headphones that receive the most direct contact with your skin. They accumulate the most oils and sweat. Cleaning these areas regularly is key to maintaining comfort and hygiene. I approach this process with care, as these components are vital for both fit and sound. Taking your time ensures no damage occurs during cleaning.
1. Remove Ear Cushions (If Applicable): Many Bose over-ear models have replaceable ear cushions. Check your specific model’s manual for instructions on how to remove them. Gently twist or pull them off. Removing them allows you to clean both the cushions and the underlying headphone body thoroughly. This step also prevents moisture from getting into the speaker drivers.
2. Clean Ear Cushions:
- For Leather or Protein Leather (Pleather) Cushions: Mix a tiny drop of mild dish soap with distilled water in a small bowl. Dampen a microfiber cloth with this solution. Wring it out very well so it is barely damp. Gently wipe the surface of the ear cushions. Avoid saturating the material. For stubborn stains, I sometimes use a slightly more concentrated solution on the cloth, but always test a small, inconspicuous area first. After cleaning, wipe with a second cloth dampened with plain distilled water to remove any soap residue. Allow them to air dry completely. For general care of similar materials, insights from how to clean leather shoes can offer helpful principles regarding gentle cleaning and drying.
- For Fabric Cushions: These are trickier. Often, a dry, soft-bristled brush can remove surface dust. For light stains, a very slightly damp cloth with mild soap might work. Do not rub vigorously. Some fabric cushions can be gently hand-washed with mild soap and water, but ensure they dry completely for at least 24-48 hours before reattaching. Check your product manual for specific recommendations.
3. Clean the Headband: The headband can be made of various materials, including padded fabric, leatherette, or silicone.
- For Padded Fabric Headbands: Use a lightly dampened microfiber cloth with the mild soap solution. Gently blot and wipe the fabric. Avoid rubbing, which can push dirt deeper or damage the material. If it is very soiled, you may need multiple passes.
- For Leatherette/Silicone Headbands: Wipe with the same damp cloth and mild soap solution. These materials are generally easier to clean. Wipe off soap residue with a clean, damp cloth.
- For Plastic Headband Frames: Use the damp cloth to wipe down the plastic parts. If there are any sticky spots or tough stains on the plastic, a slightly stronger wipe with a cloth dampened with a very small amount of rubbing alcohol might be effective. For advice on cleaning stains from plastic surfaces, you might find general techniques discussed in guides like how to clean stains on plastic helpful. Always test a small area first to ensure no discoloration.
4. Allow to Dry: Crucially, allow all components to air dry completely before reassembling or using your headphones. This can take several hours, especially for fabric components. Never use a hairdryer or direct heat, as this can damage materials.
By following these steps, you ensure the most used parts of your Bose headphones stay fresh and comfortable. This greatly improves the overall user experience and extends the life of your device.
Addressing Specific Areas: Speaker Grilles and Ports on Bose Headphones
While the headband and earcups are important, the speaker grilles and various ports on your Bose headphones also demand attention. These areas are sensitive and require a delicate touch. I understand the temptation to dig into these spots, but patience and the right tools prevent damage. Dirt, dust, and lint can easily get trapped here, potentially affecting sound or connectivity. A careful cleaning approach ensures these vital functions remain unhindered.
1. Cleaning Speaker Grilles: The grilles covering the speakers are designed to protect the drivers while allowing sound to pass through. They can easily accumulate dust and tiny debris.
- Dry Cleaning First: Start with a soft-bristled brush. Gently brush the grille in various directions to dislodge any loose particles. A clean, dry toothbrush works well for this. You can also use an air blower to puff air across the grilles to remove dust without direct contact. I find this method very effective for removing surface dust.
- Damp Cleaning (Extreme Caution): If there are stubborn spots, lightly dampen a cotton swab with distilled water or the mild soap solution (ensure it is almost dry). Very, very gently dab the spot on the grille. Do NOT push or rub hard. The goal is to lift the dirt, not to force moisture into the speaker. Wipe immediately with a dry cotton swab. Ensure no liquid enters the speaker itself. Moisture inside the drivers can cause irreparable damage. I prefer to stick to dry methods for grilles whenever possible to be safe.
2. Cleaning Ports (Charging, Audio, Microphone): The various ports on your Bose headphones (like USB-C, 3.5mm audio jack, and microphone ports) are crucial for functionality. These can collect lint, dust, and other debris, which might interfere with charging or audio connections.
- Dry Method: The safest way to clean ports is with a dry, soft-bristled brush or a toothpick (use with extreme care). Gently pick out any visible lint or debris from inside the port. Be careful not to scratch the internal pins or push the debris further in. An air blower can also help dislodge loose particles from these openings.
- Cotton Swabs (Very Lightly Dampened): For very stubborn grime on the outer edges of the ports, you can use a cotton swab barely dampened with rubbing alcohol (70% isopropyl). The alcohol evaporates quickly. Do not insert the damp swab deeply into the port. Only clean the visible external surfaces. This helps in disinfecting and removing sticky residue without introducing excessive moisture.
- Microphone Grilles: Use a soft-bristled brush to gently clean any small microphone grilles. Avoid poking or using liquids on these delicate areas.
Remember, the key is to be gentle and precise. These areas are sensitive and crucial for your headphones’ performance. Always double-check that no moisture has entered any openings before you consider your cleaning complete.
Caring for Cables and Connectors on Your Bose Headphones
The cables and connectors of your Bose headphones are often overlooked during cleaning. However, they are constantly handled and can accumulate dirt, oils, and sweat just like the rest of the device. A clean cable not only looks better but also functions more reliably. I have seen many instances where a seemingly broken connection was just a dirty plug. Maintaining these components ensures a consistent and uninterrupted audio experience.
1. Cleaning the Cable: Bose headphones come with various types of cables, including audio cables, charging cables, and detachable microphone cables.
- Wipe Down: For most rubberized or braided cables, a slightly damp microfiber cloth with a very mild soap solution works well. Gently wipe the entire length of the cable. If the cable is particularly dirty or feels sticky, you might need to make a few passes.
- Remove Residue: After cleaning with soap, wipe the cable again with a cloth dampened only with distilled water to remove any soap residue. This prevents the cable from feeling tacky.
- Air Dry: Allow the cable to air dry completely before coiling it or putting it away. Ensure no moisture remains, especially near the connectors.
- Cord Management: Proper coiling and storage also contribute to cable longevity. Avoid tight bends or kinks, which can damage the internal wires.
2. Cleaning Connectors (USB, 3.5mm Jack): The metal connectors on your cables and the corresponding ports on your headphones can gather dust and oxidation. This can interfere with signal transfer or charging.
- Dry Brush: For the metal pins and surfaces of the connectors, use a dry, soft-bristled brush to gently sweep away any loose debris. A clean, dry toothbrush is suitable.
- Cotton Swab with Alcohol (for metal parts): If there’s visible grime or oxidation on the metal parts of the connector, lightly dampen a cotton swab with 70% isopropyl rubbing alcohol. Carefully wipe the metal surface of the connector. Alcohol evaporates quickly and is effective at removing oils and residue without leaving water marks. Do not saturate the cotton swab; it should be just damp.
- Inspect Ports (from previous section): While cleaning the cable connectors, also take a moment to inspect the corresponding ports on your headphones. Ensure they are free from lint and debris. Sometimes, debris in the port is the actual problem, not the cable itself.
3. Wireless Components (Bluetooth): For wireless Bose headphones, while there are no audio cables, you still have a charging cable and potentially a 3.5mm audio jack. The principles for cleaning these are the same. Also, remember to wipe down the main housing of the headphones, where the Bluetooth module and battery reside, with a damp cloth to remove fingerprints and oils. Keeping all parts of your wireless Bose headphones clean enhances their appearance and ensures reliable charging and connectivity.
Deep Cleaning and Disinfecting Your Bose Headphones
Beyond routine surface cleaning, your Bose headphones will benefit from a periodic deep clean and disinfection. This is especially true if you use them frequently for exercise or in public spaces. A deep clean targets hidden grime and ensures better hygiene. I usually perform a deep clean every few months, or more often if I notice a buildup. This extended cleaning process requires a bit more time and attention.
1. Disassembly (If Applicable): For a truly deep clean, if your specific Bose model allows for easy removal of ear cushions and perhaps even speaker grilles (check your manual!), doing so can help. This exposes areas that are otherwise hard to reach. However, never force anything. If removal isn’t straightforward, stick to external cleaning.
2. Thorough Cleaning of Each Component:
- Ear Cushions: If detachable, follow the cleaning steps outlined previously, ensuring a very thorough yet gentle wash for fabric cushions, or meticulous wiping for leatherette. Pay extra attention to seams and crevices where sweat and oils can collect. After cleaning, ensure they are completely dry, which might take 24-48 hours.
- Headband: Similarly, work through the headband section, pressing gently to ensure you’re cleaning out embedded grime from textured or padded areas.
- Speaker Grilles: Use your soft-bristled brush more extensively. A targeted puff from an air blower can dislodge deeply seated dust. If very careful, you can use a slightly damp cotton swab with rubbing alcohol (70% isopropyl) to dab only visible dirt spots on the grille itself, ensuring no liquid penetrates. Immediately dry with a clean, dry cotton swab. The quick evaporation of alcohol makes it safer than water for sensitive areas.
- Housing and Buttons: Wipe down all plastic and metal housing components. Use a cotton swab dampened with alcohol for around buttons and switches. This helps remove grime that accumulates from finger contact.
3. Disinfection: This is where the “deep clean” truly shines. After cleaning surfaces, you want to kill bacteria and germs.
- Alcohol Wipes/Solution: For non-porous surfaces (plastics, metal), use disinfectant wipes that contain 70% isopropyl alcohol. Alternatively, dampen a clean microfiber cloth with 70% isopropyl alcohol. Gently wipe down all exterior surfaces. Alcohol is excellent because it disinfects and evaporates quickly, minimizing moisture risk.
- UV-C Sanitizer (Optional): For those seeking maximum disinfection, a UV-C sanitizer box designed for electronics can be an option. Place your headphones (or detached ear cushions) inside and follow the device’s instructions. This uses ultraviolet light to kill germs without liquids. Always ensure the device is compatible with headphones.
4. Final Inspection and Drying: After a deep clean, meticulously inspect every part of your Bose headphones. Look for any remaining residue or moisture. Ensure all components are completely dry before reassembling or powering them on. This might mean leaving them to air dry in a well-ventilated area for several hours, or even overnight. Patience here prevents potential damage. A deep clean not only revitalizes your headphones’ appearance but also dramatically improves their hygiene.
Preventative Measures: Keeping Your Bose Headphones Clean Longer
Regular cleaning is important, but preventing dirt buildup in the first place is even better. Implementing a few simple habits can significantly reduce the need for deep cleaning your Bose headphones. I have found that a little consistent effort goes a long way in keeping my gear pristine. These preventative measures protect your investment and maintain the high performance of your headphones over time.
Here are some effective strategies:
- Wipe After Each Use: Make it a habit to quickly wipe down your headphones with a soft, dry microfiber cloth after each listening session. This removes surface oils, sweat, and dust before they can settle and accumulate. It takes only a few seconds.
- Store in a Case: When not in use, always store your Bose headphones in their original carrying case or a similar protective pouch. This shields them from dust, spills, and physical damage. The case acts as a barrier, keeping environmental contaminants away.
- Avoid Extreme Environments: Try not to use your headphones in excessively dusty, humid, or dirty environments. If you must, consider a protective skin or cover, especially for the earcups.
- Clean Hands Before Use: Before putting on your headphones, ensure your hands are clean and free of lotions, oils, or food residue. This simple step prevents the transfer of grime to the headphone surfaces.
- Manage Hair Products: If you use hairspray, gel, or other styling products, put on your headphones before applying them. Residue from these products can transfer to the headband and earcups, leading to sticky buildup.
- Use Ear Cushion Covers (Optional): For those who sweat heavily during workouts, disposable or washable ear cushion covers can be a great investment. They absorb sweat, protecting the original cushions from damage and making cleaning easier. These covers are typically inexpensive and simple to put on and take off.
- Regular, Light Brushing: Occasionally use a soft-bristled brush to gently sweep dust from speaker grilles and other textured areas. This prevents particles from settling deeply.
- Keep Away From Liquids: Always keep your headphones away from beverages and other liquids. Accidental spills can cause irreparable damage to internal electronics, even if the exterior seems fine.
By incorporating these preventative measures into your routine, you will notice a significant reduction in the amount of dirt and grime your Bose headphones accumulate. This means less intensive cleaning is needed, and your headphones will look and perform better for much longer. It is about consistent, small actions that yield great long-term results.
Common Mistakes to Avoid When Cleaning Bose Headphones
While cleaning your Bose headphones is important, making mistakes during the process can do more harm than good. I have learned through experience that proper technique is as crucial as the right tools. Avoiding these common pitfalls helps ensure you clean your headphones effectively without causing damage. Always prioritize the safety of your device over aggressive cleaning.
Here are critical mistakes to steer clear of:
- Using Harsh Chemicals or Abrasive Cleaners: Bleach, window cleaners, acetone, or strong solvents can strip finishes, damage materials, or even melt plastic components. Stick to mild soap and water, or 70% isopropyl alcohol for disinfection. Abrasive cloths or scrub brushes can scratch surfaces.
- Saturating Components with Liquid: Never submerge your headphones or drench any part with water or cleaning solutions. Moisture can seep into internal electronics, leading to corrosion or short circuits. Always dampen cloths lightly and wring them out thoroughly.
- Drying with Heat: Do not use hairdryers, ovens, or direct sunlight to speed up the drying process. High heat can warp plastic, damage electronics, or degrade adhesives. Always air dry in a cool, well-ventilated area.
- Forgetting to Power Off: Before you begin cleaning, always turn off your headphones. If they are wireless, disconnect them from any charging cables. This prevents accidental power fluctuations or damage from static during cleaning.
- Inserting Objects into Ports or Grilles: While cleaning ports and grilles, avoid inserting sharp objects like paper clips or pins. These can scratch or damage delicate internal components, including speaker diaphragms or charging pins. Use soft brushes or toothpicks with extreme caution for picking out lint.
- Ignoring the Manual: Your Bose headphone’s user manual often contains specific cleaning instructions for your model. Different models may have different materials or components that require particular care. Always consult it for model-specific advice.
- Rubbing Too Hard: Excessive scrubbing, especially on ear cushions or delicate plastic, can wear down materials, remove coatings, or spread dirt rather than lifting it. Use gentle, wiping, or blotting motions.
- Reassembling Before Fully Dry: Attaching ear cushions or powering on headphones that are still damp can trap moisture inside, leading to mold growth or internal damage. Always confirm everything is completely dry before reassembly and use.
By being mindful of these common mistakes, you can clean your Bose headphones safely and effectively. This approach safeguards your device, ensuring its longevity and continued high-quality performance. Remember, gentle care is the best care for delicate electronics.
FAQ Section
Q1: How often should I clean my Bose headphones?
A1: A quick wipe-down with a dry cloth after each use is ideal. For a more thorough cleaning of earcups and headbands with mild soap, aim for once a week or every other week, depending on usage. A deep clean and disinfection can be done every few months or as needed if they get particularly dirty or sweaty.
Q2: Can I wash Bose ear cushions in water?
A2: It depends on the material. Protein leather (pleather) or true leather ear cushions should only be wiped gently with a damp cloth and mild soap, never submerged. Fabric ear cushions might tolerate very gentle hand washing, but they must be air-dried completely for 24-48 hours. Always check your specific Bose model’s manual for guidance.
Q3: Is it safe to use alcohol to clean my Bose headphones?
A3: Yes, 70% isopropyl alcohol is generally safe for disinfecting non-porous surfaces like plastic housings and metal connectors on Bose headphones. Apply it to a soft cloth or cotton swab, not directly to the headphones, and ensure it’s barely damp. Avoid using it on fabric, leather, or near speaker grilles where it could seep in.
Q4: What should I do if my Bose headphones get wet?
A4: Immediately power off your headphones and disconnect them from any power source. Wipe off all visible moisture with a dry cloth. Do not attempt to use them. Place them in a dry, well-ventilated area to air dry for at least 24-48 hours. Avoid using heat to dry them, as this can cause further damage.
Q5: Can I use disinfectant wipes on my Bose headphones?
A5: You can use disinfectant wipes that contain 70% isopropyl alcohol for non-porous surfaces like the plastic body and outer parts of the earcups. Ensure the wipes are not excessively wet. Avoid using wipes that contain bleach, hydrogen peroxide, or harsh chemicals, as these can damage the materials and finishes of your headphones.
Q6: How do I clean the charging port on my Bose headphones?
A6: The safest way to clean the charging port is to use a dry, soft-bristled brush or an air blower to dislodge any lint or dust. You can also carefully use a dry toothpick to gently pick out visible debris. Avoid inserting anything wet or sharp, as this can damage the internal pins or components of the charging port.
Conclusion
Keeping your Bose headphones clean is a simple yet essential practice for their longevity, performance, and your personal hygiene. By following the detailed steps outlined in this guide, you can ensure your valuable audio companion remains in pristine condition. From routine wipes to a comprehensive deep clean, understanding how to clean Bose headphones properly prevents common issues like material degradation, sound quality reduction, and bacterial buildup. I find that taking the time to care for my electronics truly extends their life and keeps them feeling new.
Remember the key takeaways: use soft, lint-free cloths, mild solutions, and always ensure thorough drying. Be gentle, especially around sensitive areas like speaker grilles and ports. Integrating preventative measures, like storing your headphones in their case and wiping them down after each use, will minimize future cleaning efforts. By avoiding common cleaning mistakes, you safeguard your investment. A clean pair of Bose headphones not only sounds better but also provides a more enjoyable and hygienic listening experience every time you put them on. Make cleaning a regular part of your headphone care routine; your ears (and your wallet) will thank you.

Todd Martin
Senior Writer
With over 15 years of experience in home renovation and design, I started HEG to share what I’ve learned with homeowners who want to create spaces that are both beautiful and functional. I’ve always believed in a hands-on approach, and over the years, I’ve picked up practical solutions that actually work. Through HEG, I aim to make home improvement more approachable, sharing real tips that help you create a home you truly love.