· Todd Martin · Electronics Care · 16 min read
How To Clean Projector Lens
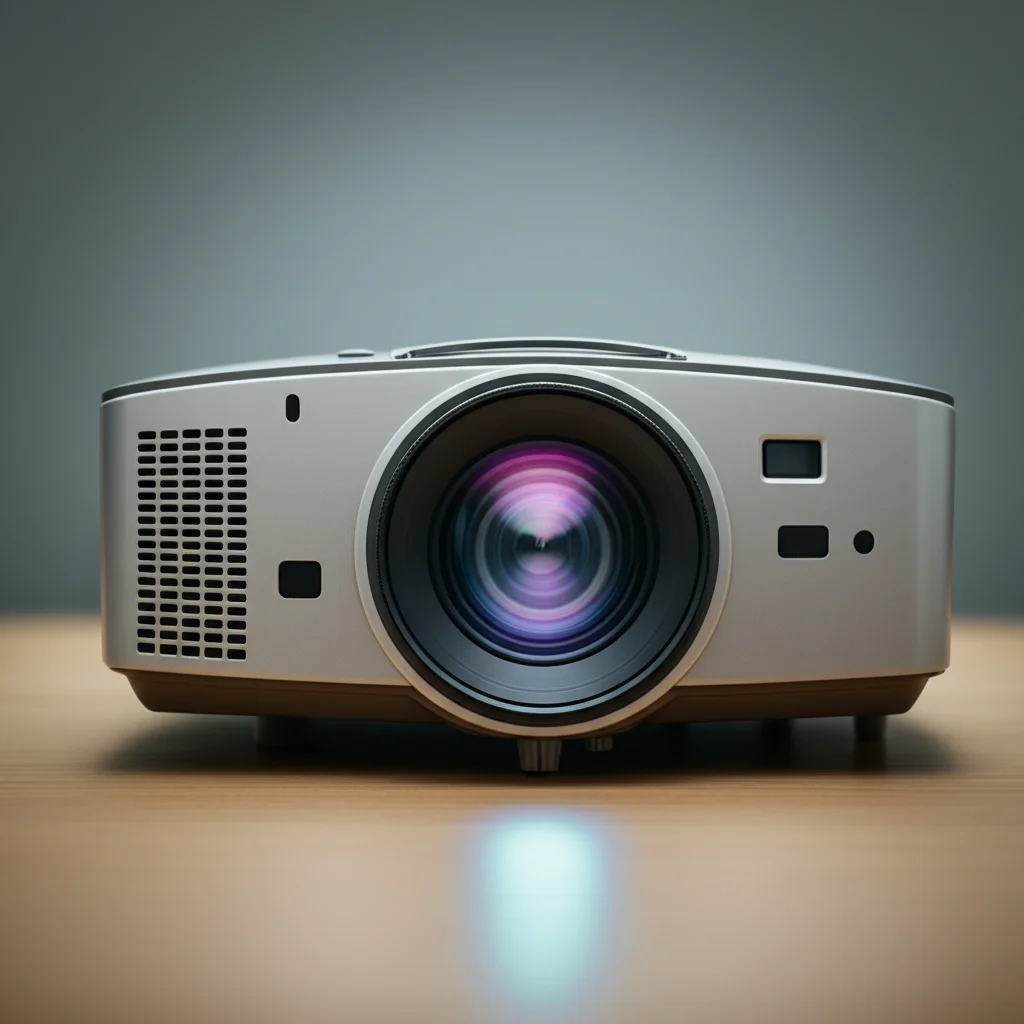
How to Clean Projector Lens: Restore Image Clarity
Is your projector displaying a blurry or dull image? You might think your projector is aging, but often, the problem is a simple fix: a dirty lens. Dust, fingerprints, and smudges can accumulate on the lens surface over time. This build-up directly impacts your viewing experience. Learning how to clean projector lens safely is a skill every projector owner should have. This article will guide you through the process step-by-step. We will cover essential tools, cleaning methods, and important precautions. By the end, you will know how to restore your projector’s picture quality, ensuring clear and vibrant projections every time.
Takeaway:
- Always use specialized tools for lens cleaning.
- Start with dry cleaning methods to remove loose dust.
- Use wet cleaning only for stubborn smudges.
- Avoid harsh chemicals or abrasive materials.
- Regular maintenance helps preserve image quality and device lifespan.
Cleaning your projector lens involves using specific tools like a blower, soft lens brush, and microfiber cloth. Carefully remove loose dust first with the blower and brush. Then, gently wipe away any remaining smudges or fingerprints using a microfiber cloth and a dedicated lens cleaning solution, applied sparingly to the cloth, not the lens. This careful process protects the delicate lens coating and maintains clear images.
Why Cleaning Your Projector Lens Matters
A crisp, clear image is why you own a projector. However, dust and grime are the silent enemies of optical clarity. Over time, tiny particles settle on your projector lens. This accumulation slowly degrades your picture quality. Smudges from fingerprints or even airborne grease can also contribute to a hazy, dim, or blurry projection. It is a common issue that many projector owners face.
Imagine watching your favorite movie or giving an important presentation. A dirty lens can turn a sharp display into a frustrating, unclear mess. This is why learning how to clean projector lens becomes essential. A neglected lens not only affects the image but can also impact the projector’s performance in the long run. The internal components may have to work harder to compensate for the obstructed light path, potentially shortening the device’s lifespan. Regular projector lens maintenance ensures you get the most out of your equipment. It preserves the vibrant colors and sharp details your projector is designed to deliver. A clean lens allows maximum light transmission, giving you the best possible viewing experience. This simple act of care can prevent costly repairs or premature replacement of your valuable equipment.
Essential Tools for Safe Projector Lens Cleaning
Cleaning a delicate projector lens requires specific tools. You cannot simply grab any cloth or cleaner from your cabinet. Using the wrong items can permanently damage the lens coating. This damage often leads to scratches or smears that are impossible to remove. I always recommend investing in a dedicated projector cleaning kit. These kits contain everything you need to clean your projector lens safely and effectively.
Here is a list of the essential tools you will need:
- Lens Air Blower: This tool uses a strong puff of air to dislodge loose dust. It looks like a small rubber bulb. Always use a dedicated lens blower, not canned air. Canned air can contain propellants that leave residue or freeze the lens, causing damage.
- Soft Lens Brush: A very fine, soft-bristled brush helps sweep away stubborn dust particles. Choose one designed for optics. This type of brush is gentle on the lens surface.
- Microfiber Cleaning Cloth: These cloths are incredibly soft and lint-free. They are perfect for wiping delicate surfaces without leaving fibers behind. Ensure it is specifically for optics, not a general cleaning cloth.
- Lens Cleaning Solution: Use a solution made for camera lenses or delicate optics. These solutions are alcohol-free and ammonia-free. They evaporate quickly without leaving streaks or residue. Never use household glass cleaners, as they often contain harsh chemicals that can strip lens coatings. For general glass cleaning around the house, like a shower door, you might use different products, but not for your projector lens.
- Cotton Swabs (Optional): These can be useful for reaching small crevices around the lens edge. Choose swabs with tightly wound tips to avoid leaving fibers.
Using these specialized tools ensures you clean your projector lens without causing harm. For instance, while you might learn how to clean a Wii lens with similar care for optics, the specific tools and methods here are tailored for larger projector lenses. Proper tools are the first step to successful and safe projector lens cleaning.
Step-by-Step Guide to Dry Cleaning Your Projector Lens
Dry cleaning is the first and most important step in how to clean projector lens. This method removes loose dust and debris without introducing any liquids. It helps prevent scratching the lens. Many times, a dry clean is all your projector needs to restore image clarity. Always begin with this method before considering any wet cleaning.
Here is how you do it:
- Power Off and Unplug: Safety first. Turn off your projector and unplug it from the power source. Allow it to cool down completely. A cool lens is less likely to attract dust. This also prevents accidental activation during cleaning.
- Inspect the Lens: Look closely at the lens surface. Use a flashlight if needed. Identify visible dust, lint, or loose particles. This inspection helps you target your cleaning efforts.
- Use the Lens Air Blower: Hold your projector lens facing slightly downward. Use the air blower to puff bursts of air across the lens surface. Do not touch the lens with the blower nozzle. The goal is to blow off all loose dust particles. Continue until no more visible dust can be seen.
- Brush Away Stubborn Dust: If any dust remains after blowing, use your soft lens brush. Gently sweep the brush across the lens in light, circular motions. Start from the center and move outwards. Avoid pressing down on the lens. The brush is only meant to dislodge and sweep away dust, not scrub.
- Microfiber Wipe (Optional, for very light smudges): For extremely light smudges or a final polish after dust removal, gently wipe the lens with a clean, dry microfiber cloth. Use very light pressure. Wipe in a gentle, circular motion. Fold the cloth frequently to use a clean section. This step should only be done if absolutely necessary, as even a dry cloth can push fine dust into the lens surface if not careful. Remember, this dry lens cleaning process is about minimizing contact with the delicate surface while effectively removing debris.
This dry cleaning process effectively removes most common dust and light smudges. It is a crucial part of proper projector lens care. If stubborn smudges or fingerprints remain after these steps, then it is time to move on to wet cleaning methods.
Advanced Wet Cleaning Techniques for Stubborn Smudges
Sometimes, dry cleaning is not enough. Fingerprints, oil smudges, or dried-on spots require a wet cleaning approach. This step must be done with extreme care to avoid damaging the delicate lens coating. Remember, the key to successful wet projector lens cleaning is using the right solution and applying it correctly. This technique is similar to how you might carefully clean other delicate optics, such as a Ring camera lens, ensuring no damage occurs.
Here is how to safely wet clean your projector lens:
- Gather Your Supplies: Ensure you have your dedicated lens cleaning solution and a clean, lint-free microfiber cloth. Never use water, soap, or household cleaners. These can leave streaks, residue, or even dissolve lens coatings.
- Apply Solution to Cloth, Not Lens: This is a crucial step. Dispense one or two drops of lens cleaning solution onto a clean corner of your microfiber cloth. Do not spray or pour the solution directly onto the projector lens. Applying it to the cloth prevents excess liquid from seeping into the projector’s internal components.
- Gently Wipe the Lens: Begin wiping the lens surface with the damp section of the microfiber cloth. Use light, circular motions, starting from the center of the lens and moving outward. Apply minimal pressure. The goal is to lift the smudge, not to scrub it. Work slowly and methodically.
- Flip and Polish: After removing the smudge, immediately flip your microfiber cloth to a dry, clean section. Gently wipe the lens again using light, circular motions. This step helps to dry the lens surface and remove any lingering streaks. The lens should appear crystal clear when you finish.
- Repeat if Necessary: If smudges persist, you can repeat the process. Always use a fresh, clean part of the cloth and apply a tiny bit more solution. Avoid over-saturating the cloth. Patience is key here.
By following these steps, you can effectively remove stubborn smudges and fingerprints. This method ensures your projector lens remains pristine. Proper wet cleaning techniques are vital for maintaining optimal image quality and preventing damage to your valuable equipment.
Common Mistakes to Avoid When Cleaning Projector Lenses
Cleaning a projector lens seems simple, but it is easy to make mistakes that can cause irreversible damage. Many common cleaning habits, while fine for other surfaces, are disastrous for delicate optics. Knowing what not to do is just as important as knowing what to do when you clean projector lens. I have seen many people unknowingly ruin their projector’s image quality.
Here are the critical mistakes you must avoid:
- Using Abrasive Materials: Never use paper towels, tissues, rough cloths, or even your shirt. These materials contain wood fibers that are abrasive at a microscopic level. They can easily scratch the delicate anti-reflective coatings on your lens. Always stick to specialized microfiber cloths designed for optics.
- Applying Too Much Pressure: Pressing hard on the lens will not clean it better. Instead, it can grind dust particles into the surface, causing scratches. Excessive pressure can also dislodge or misalign internal lens elements. Use a very light touch, letting the cleaning solution and the soft cloth do the work.
- Using Harsh Chemicals: Household glass cleaners, window cleaners, alcohol, ammonia, and other strong solvents are absolutely forbidden. These chemicals can strip away the specialized coatings on your projector lens. This leads to permanent hazing, discoloration, or reduced light transmission. Always use a dedicated, alcohol-free, and ammonia-free lens cleaning solution.
- Spraying Directly onto the Lens: Never spray any liquid directly onto the projector lens. Liquid can seep into the projector’s interior, damaging sensitive electronic components. Always apply the cleaning solution onto your microfiber cloth first, then wipe the lens.
- Touching the Lens with Fingers: The oils and acids from your skin can leave smudges and residues that are difficult to remove. Always handle your projector by the body, not the lens. If you accidentally touch it, clean it immediately using the proper wet cleaning method.
- Blowing with Your Breath: Your breath contains tiny saliva particles and moisture, which can leave new smudges on the lens. Always use a proper lens air blower to remove dust.
Avoiding these common pitfalls will protect your projector lens from damage. Proper lens care extends the life of your projector and ensures consistently clear projections.
Maintaining a Clean Projector Environment
Keeping your projector lens clean is not just about reactive cleaning. It is also about proactive maintenance and creating a clean environment. Preventing dust and debris from settling on the lens in the first place saves you time and effort. It also helps preserve your projector’s internal components. Think of it as a part of your general home maintenance routine.
Here are some tips for maintaining a clean projector environment and preventing lens contamination:
- Use a Lens Cap: Most projectors come with a lens cap. Always replace the lens cap when the projector is not in use. This simple habit protects the lens from dust, accidental touches, and minor impacts. It is the first line of defense.
- Proper Storage: When storing your projector for extended periods, place it in a dust-proof bag or its original packaging. Store it in a cool, dry place away from direct sunlight. This prevents dust accumulation and protects internal electronics.
- Dust-Free Environment: Operate your projector in as dust-free an environment as possible. Avoid placing it near open windows, vents, or high-traffic areas where dust is plentiful. Regular dusting of the room can significantly reduce airborne particles. Consider using an air purifier if dust is a significant problem in your home. Maintaining clean air filters, much like you would clean an air conditioner filter, contributes to a less dusty projection area.
- Clean External Surfaces: Periodically wipe down the projector’s body with a damp cloth to remove surface dust. This prevents dust from being drawn into the projector’s cooling vents and potentially settling on the lens or internal optics.
- Filter Maintenance: Many projectors have internal air filters. These filters trap dust before it enters the projector’s optical engine. Check your projector’s manual for instructions on cleaning or replacing these filters regularly. A clogged filter reduces airflow, leading to overheating and potential internal dust buildup.
- Cleaning Frequency: How often you clean your projector lens depends on your environment and usage. In dusty environments or with heavy use, a quick dry clean might be needed weekly or bi-weekly. In cleaner settings, monthly or quarterly dry cleaning might suffice. Wet cleaning should only be done when visible smudges appear.
By adopting these preventative measures, you minimize the need for intensive cleaning. This ensures your projector performs at its best for years to come. Proactive projector maintenance keeps your images bright and clear.
When to Seek Professional Help or Replace Your Projector
While knowing how to clean projector lens at home is valuable, there are situations where DIY cleaning is not enough. Sometimes, the issue goes beyond surface dirt. Attempting to fix internal problems can cause more harm than good. It is important to recognize when it is time to call in the experts or consider a replacement.
Here are signs that indicate you might need professional help or a new projector:
- Deep Scratches on the Lens: If you notice significant scratches on the outer lens surface, especially if they are visible during projection, a home cleaning cannot fix this. These scratches permanently impair image quality. A professional might be able to replace the lens, but it can be costly.
- Internal Dust or Debris: If you see dust motes or spots on the projected image that do not go away after thoroughly cleaning the outer lens, the problem is likely internal. Dust may have settled on internal optical components. This requires dismantling the projector, a task best left to trained technicians. Opening the projector yourself can void your warranty and lead to further damage.
- Fungus or Mold Growth: In humid environments, fungus or mold can grow on internal lens elements. This appears as fuzzy spots or web-like patterns on the projected image. This is a severe problem requiring specialized cleaning by a professional. It can spread and cause permanent etching if not addressed quickly.
- Image Discoloration or Malfunctions: If your projector displays unusual color shifts, dead pixels, or other performance issues not related to clarity, the problem is likely not the lens. These issues point to internal component failures (e.g., lamp, color wheel, main board). A professional diagnosis is needed.
- Cost of Repair vs. Replacement: Get an estimate for professional repair. Compare this cost to the price of a new projector. For older or entry-level models, repair costs can sometimes exceed the value of the projector. In such cases, investing in a new projector might be more economical. Newer models often offer better resolution, brightness, and features anyway.
- Warranty Concerns: If your projector is still under warranty, consult the manufacturer before attempting any internal cleaning or repairs. DIY attempts can void your warranty, leaving you without coverage for legitimate issues.
Understanding these boundaries helps you make informed decisions about your projector. Sometimes, the safest and most practical solution is to trust professionals or upgrade your equipment.
FAQ Section
How often should I clean my projector lens?
The frequency of cleaning depends on your environment and how often you use the projector. For general dust, I recommend a quick dry clean with an air blower every few weeks or once a month. If you live in a very dusty area or use the projector daily, you might need to do it more often. Wet cleaning should only happen when you see visible smudges or fingerprints that dry cleaning cannot remove.
Can I use rubbing alcohol to clean my projector lens?
No, you should never use rubbing alcohol or any other household cleaners like window cleaner. These products contain chemicals that can damage the delicate anti-reflective coatings on your projector lens. This damage often appears as permanent hazing or streaks. Always use a specialized, alcohol-free lens cleaning solution designed for optics.
What if I scratch the lens while cleaning?
If you accidentally scratch the lens while cleaning, unfortunately, there is no easy fix for it at home. Scratches are permanent damage to the lens coating. Minor scratches might not be noticeable during projection. However, deeper scratches can significantly impair image quality. In such cases, you might need to consult a professional for lens replacement, which can be costly, or consider replacing the projector itself.
How do I know if my image blur is from a dirty lens or something else?
A dirty lens typically causes a general haziness, dimness, or blurry spots that appear consistently on the projected image, regardless of what content is displayed. If the blurriness is uneven, or if you see dust spots that move when you adjust focus, it is likely a dirty lens. If the blur is only in certain areas, or if the projector has other display issues like pixelation or color distortion, the problem might be internal components or focus settings.
Is it safe to clean the inside of my projector lens?
No, it is generally not safe for an untrained individual to clean the inside of a projector lens. Projectors contain complex optical systems that are sensitive to dust and misalignment. Opening the projector yourself can void warranties and cause more damage. If you suspect internal dust, it is best to seek professional projector repair services. They have the specialized tools and knowledge to clean internal components safely.
Can I use glasses cleaner on a projector lens?
While some glasses cleaners are formulated for anti-reflective coatings, it is safer to use a dedicated lens cleaner specifically designed for camera lenses or projector optics. Many glasses cleaners might still contain mild alcohol or other additives that could harm your projector lens over time. Always check the ingredients and opt for a solution explicitly labeled as safe for delicate electronics or camera lenses.
Conclusion
A clear and vibrant projection truly enhances any viewing experience, whether it is for movies, games, or presentations. Learning how to clean projector lens effectively is a small step that yields big results. By understanding the right tools and techniques, you can easily maintain your projector’s performance. Remember to always start with dry cleaning to remove loose dust, and only move to wet cleaning for stubborn smudges, using only specialized solutions and microfiber cloths.
Avoiding common mistakes, like using harsh chemicals or abrasive materials, is key to preventing damage. Furthermore, establishing a clean environment and replacing your lens cap after each use contributes significantly to long-term projector lens care. This proactive approach saves you time and protects your investment. Regular, gentle maintenance will ensure your projector continues to deliver crystal-clear images for years to come. Take the time to clean your projector lens now, and enjoy the sharp, brilliant images you deserve.

Todd Martin
Senior Writer
With over 15 years of experience in home renovation and design, I started HEG to share what I’ve learned with homeowners who want to create spaces that are both beautiful and functional. I’ve always believed in a hands-on approach, and over the years, I’ve picked up practical solutions that actually work. Through HEG, I aim to make home improvement more approachable, sharing real tips that help you create a home you truly love.