· Todd Martin · DIY & Home Improvement · 15 min read
How To Build A Refrigerator Cabinet
Building Your Own Refrigerator Cabinet
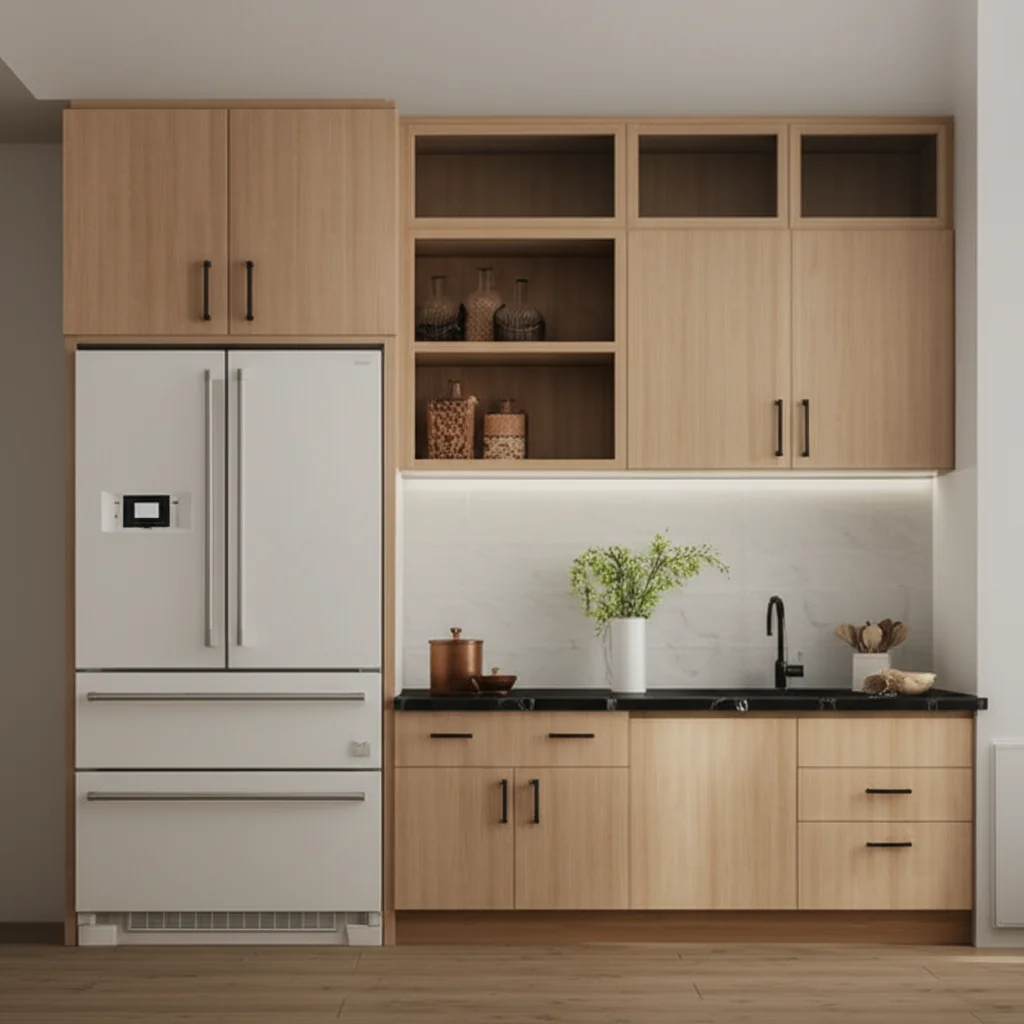
Tired of your freestanding refrigerator looking out of place in your kitchen? Imagine a sleek, custom-built enclosure that perfectly integrates your appliance, giving your space a polished, high-end feel. Learning how to build a refrigerator cabinet can transform your kitchen’s aesthetic and maximize its functionality. It creates a seamless look, making your kitchen feel larger and more organized.
This project is a rewarding way to elevate your home. I will guide you through every step, from initial planning and precise measurements to selecting the right materials and mastering construction techniques. We will cover crucial aspects like ensuring proper ventilation and adding those beautiful finishing touches. Get ready to create a stunning, integrated refrigerator cabinet that enhances your kitchen’s overall design. You can achieve a truly custom kitchen with just a bit of effort.
Takeaway
- Measure your refrigerator and space with high precision.
- Choose strong, moisture-resistant materials for lasting quality.
- Construct a square and level cabinet frame with sturdy joints.
- Design for adequate airflow around the refrigerator unit.
- Finish the cabinet with durable paint or stain to match your kitchen.
You can build a refrigerator cabinet by first measuring your appliance and available space. Then, cut and assemble wood panels to create a sturdy frame. Ensure proper ventilation openings. Secure the cabinet, adding trim and a finish for a professional, integrated kitchen look.
Planning Your Refrigerator Cabinet Project
Starting any woodworking project requires careful planning. Building a refrigerator cabinet is no different. Good planning saves you time, money, and frustration later on. It ensures your finished cabinet fits perfectly and functions correctly. We need to consider space, refrigerator dimensions, and kitchen style.
The first step is always to visualize the final result. Think about how the cabinet will look in your kitchen. Consider its height, depth, and width in relation to existing cabinetry. You want a cohesive and integrated appearance. This initial thought process helps define your project’s scope.
Taking Precise Measurements
Accurate measurements are the foundation of a successful refrigerator cabinet build. A few millimeters off can make a big difference. You must measure your actual refrigerator’s height, width, and depth. Remember to account for door swing clearance. Measure the space where the cabinet will go. This includes the height from the floor to the ceiling or existing upper cabinets, the width between adjacent cabinets or walls, and the depth from the wall.
I always add a small allowance, typically 1/2 to 1 inch, to the width and height. This allows for slight imperfections in the frame or the refrigerator. This extra space also makes it easier to slide the refrigerator in and out. The depth measurement needs to consider how flush you want the refrigerator to sit. You may want to consult resources on how to make refrigerator flush with cabinets for design ideas. Make sure to note any existing baseboards or crown molding that might affect the fit.
Designing for Ventilation and Access
Refrigerators need proper airflow to operate efficiently. Without adequate ventilation, your appliance will work harder, use more energy, and shorten its lifespan. This is a critical design consideration for any enclosed refrigerator cabinet. You must ensure there is enough space around the coils and compressor for heat dissipation.
Design your cabinet with an open back or large ventilation cutouts at the top and bottom. Some designs include a grille or louvered panels at the top. This allows warm air to escape and cool air to enter. Plan for future access to the back of the refrigerator for cleaning or maintenance. Consider access to the electrical outlet and water line if applicable. Think about the overall structure to ensure it supports the weight and hides the necessary components.
Gathering Tools and Materials
Before you begin cutting wood, gather all necessary tools and materials. Having everything ready saves trips to the hardware store. It makes the building process smoother and more efficient. A well-stocked workspace is a happy workspace.
Essential Tools for Cabinet Building
You do not need a professional workshop to build a refrigerator cabinet, but certain tools are essential. A tape measure, pencil, and a good quality square are crucial for accurate marking. A circular saw or table saw is necessary for making straight, precise cuts in plywood or MDF. A miter saw is helpful for cutting trim pieces at angles. A drill and driver are indispensable for pre-drilling holes and driving screws.
You will also need clamps to hold pieces together while assembling. A level ensures your cabinet is plumb and true. Safety glasses and hearing protection are a must for any woodworking project. I also recommend a good dust mask, especially when cutting sheet goods. These tools form the basic kit for any cabinet project.
Selecting the Right Materials
Choosing the right materials impacts the cabinet’s durability and appearance. Plywood is a popular choice for cabinet carcasses due to its strength and stability. Hardwood plywood, such as birch or maple, offers a smooth surface ready for finishing. MDF (medium-density fiberboard) is another option, often used for face frames and doors because of its consistent density for painting. However, MDF can be heavy and does not hold screws as well as plywood.
For the cabinet’s face frame, solid hardwood like poplar, maple, or oak is ideal. This material provides strength and a beautiful finish. Consider the thickness of your materials. Typically, 3/4-inch plywood is used for the main structure, while 1/4-inch plywood can be used for the back panel. Choose screws specifically designed for woodworking. Use wood glue for strong, lasting joints. Think about your desired finish: paint or stain? This will influence your material choices.
Constructing the Cabinet Frame
The frame is the skeleton of your refrigerator cabinet. It must be strong, square, and level to support the appliance and last for years. This part of the build requires precision and patience. I find it satisfying to see the structure take shape. A well-built frame ensures the entire cabinet will look professional.
Building the Base and Side Panels
Start by cutting the base and side panels from your chosen plywood. Use your precise measurements, subtracting for the thickness of any connecting pieces. For example, if your cabinet width includes the side panels, your base will be shorter than the overall width. Ensure all cuts are perfectly square. This is critical for preventing a wobbly or crooked cabinet. I always double-check my cuts before assembly.
Assemble the base first. This typically involves attaching front and back support pieces to the main base panel. Use wood glue and screws for strong joints. Next, attach the side panels to the base. You can use pocket hole joinery for invisible screws, or traditional butt joints reinforced with screws and glue. Clamps are your best friend here, holding everything firmly while the glue dries and you drive screws. Ensure the side panels are perfectly perpendicular to the base. This forms the essential structure of your refrigerator cabinet. For general cabinet building tips, you might find it helpful to review resources on how to build a simple wall cabinet box.
Adding the Top and Back Supports
With the base and side panels in place, add the top supports. These typically consist of front and back stretchers running between the side panels. These stretchers provide rigidity and a surface to attach a top cabinet or upper decorative panel if your design includes one. Just like the base, use wood glue and screws for secure attachments. Make sure the stretchers are level with the top edges of the side panels.
For the back, you can either leave it open for maximum ventilation or create a partial back. If you choose a partial back, use 1/4-inch plywood or a series of stretchers. This provides additional rigidity without blocking airflow completely. Remember to design for ventilation here. Many refrigerator cabinets have an open back to allow air circulation. Ensure that all joints are strong and square. This robust framework will support the weight of your refrigerator for years to come. Thinking about larger cabinetry? You might also want to read about how to build a pantry cabinet with doors for more complex designs.
Integrating the Refrigerator and Ventilation
A refrigerator cabinet is more than just a box; it is an appliance enclosure. Proper integration means ensuring the refrigerator functions optimally within its new home. This requires careful consideration of airflow and accessibility. I learned the hard way that inadequate ventilation can lead to a struggling fridge.
Ensuring Proper Airflow
Refrigerators generate heat as they operate. This heat must escape for the appliance to run efficiently and prevent overheating. Your cabinet design must provide clear pathways for air circulation. The most common approach is an open back, allowing warm air to rise and dissipate. If an open back is not feasible, install large grilles or vents at the top and bottom of the cabinet. These vents allow cool air to enter at the bottom and warm air to exit at the top.
Ensure there is at least a 1-inch gap between the sides and top of the refrigerator and the cabinet interior. This small buffer allows air to move freely around the appliance. Some refrigerators also require space at the front for coil ventilation, often under the door. Consult your refrigerator’s manual for specific clearance requirements. Neglecting ventilation can shorten your refrigerator’s life and increase your energy bills.
Securing the Appliance
Once the cabinet frame is built, it’s time to integrate the refrigerator. Carefully slide the refrigerator into the cabinet opening. It should fit snugly but not be so tight that it scratches the sides. The front of the refrigerator should ideally be flush with the front of your cabinet doors or face frame. This creates that desirable built-in look. You can find more tips on achieving this flush look by checking out how to make refrigerator flush with cabinets.
You do not typically “secure” the refrigerator to the cabinet itself, as it needs to be movable for cleaning or maintenance. Instead, the cabinet is secured to the wall and floor, providing a stable enclosure for the appliance. Ensure the cabinet is level before sliding the refrigerator in. This prevents the refrigerator from leaning or moving accidentally. Double-check that the refrigerator doors open fully without hitting adjacent cabinets or walls.
Finishing Your Custom Cabinet
The finishing touches are what transform a functional box into a beautiful piece of kitchen furniture. This stage includes adding face frames, doors, and applying your chosen paint or stain. This is where your custom refrigerator cabinet truly comes to life. I always enjoy this part the most because I see the vision become reality.
Adding Face Frames and Doors
A face frame gives your cabinet a finished, furniture-like appearance. It also provides a sturdy mounting surface for doors. Cut pieces of solid hardwood to create stiles (vertical pieces) and rails (horizontal pieces) that frame the opening. Assemble the face frame using pocket hole screws or mortise and tenon joints for strength. Attach the completed face frame to the front of the cabinet carcass using glue and screws or brad nails. Ensure the face frame is flush with the cabinet’s edges and perfectly square.
If your design includes an upper cabinet above the refrigerator, now is the time to build and attach its doors. You can purchase pre-made doors or build your own. Measure carefully for door sizes. Attach hinges to the doors and the face frame. Adjust the hinges to ensure the doors hang straight and close properly. Doors provide storage and hide items, creating a clean look.
Painting or Staining for a Cohesive Look
The final finish brings everything together. Your choice of paint or stain should complement your existing kitchen decor. If you are matching existing cabinets, try to get a color sample. For painting, properly prepare the surface by sanding all wood components smooth. Apply a good quality primer. Then, apply two or more thin coats of high-quality cabinet paint. Lightly sand between coats for a smooth finish.
If you choose to stain, sand the wood thoroughly to ensure even stain absorption. Apply a wood conditioner first, especially on plywood, to prevent blotchiness. Apply your chosen stain, wiping off excess as directed. Follow with several coats of a durable clear coat, such as polyurethane, for protection. A beautiful finish protects the wood and gives your custom refrigerator cabinet a professional, integrated appearance. If you are deciding on colors, you might find tips on how to choose kitchen cabinet color useful.
Installation and Final Touches
You have built a beautiful refrigerator cabinet. Now, it is time to install it securely in your kitchen. Proper installation ensures stability and a truly integrated look. This stage confirms all your hard work pays off. I always feel a sense of accomplishment at this point.
Leveling and Securing the Cabinet
Before you move the cabinet into its final position, ensure the floor is level where it will sit. If not, use shims under the cabinet base to achieve a perfectly level surface. A level cabinet prevents the refrigerator from sitting unevenly, which can affect its operation and door closure. Once leveled, push the cabinet into place against the wall.
Secure the cabinet to wall studs. Use long screws, at least 2.5 to 3 inches, driven through the cabinet’s back supports into the studs. If studs are not available, use heavy-duty wall anchors. This step is crucial for preventing the cabinet from tipping or shifting. You can also secure it to adjacent cabinets using cabinet screws. Ensure all connections are tight and stable.
Final Adjustments and Clean-Up
With the cabinet secured, make any final adjustments. Check that the refrigerator slides in and out smoothly. Ensure the doors open and close without obstruction. Adjust any hinges on upper cabinet doors to ensure perfect alignment. Install any decorative trim or molding to hide gaps or rough edges. This adds a polished, finished look to your work.
Finally, clean up your workspace. Remove all sawdust, stray screws, and tools. Wipe down the cabinet surfaces to remove any dust or fingerprints. Stand back and admire your handiwork. You have successfully built a custom refrigerator cabinet. This project enhances your kitchen’s functionality and aesthetic. For general cabinet installation advice, exploring resources like how to build your own closet cabinets or how to build floor to ceiling cabinets can offer broader insights into securing large cabinet structures.
FAQ Section
Q1: How much space do I need around a refrigerator in a cabinet? You need proper airflow for a refrigerator in a cabinet. Most manufacturers recommend at least 1 inch of clearance on the sides and top. Allow 2-3 inches behind the unit for ventilation. This space lets heat dissipate and prevents the compressor from overworking. Always check your specific refrigerator’s manual for exact clearance requirements to ensure efficient operation and longevity.
Q2: What materials are best for building a refrigerator cabinet? High-quality plywood, typically 3/4-inch, is excellent for the main cabinet carcass. It offers strength and stability. Solid hardwood like maple, oak, or poplar is ideal for face frames and doors. These materials provide durability and a good surface for finishing. Avoid particle board, as it is less durable and sensitive to moisture.
Q3: Can I add storage above my refrigerator cabinet? Yes, adding an upper cabinet above your refrigerator cabinet is a common and practical design choice. This utilizes vertical space, providing extra storage for kitchen items you do not use daily. You can build this cabinet as part of the overall structure or as a separate unit attached above the main enclosure. Ensure it aligns with your existing upper cabinets.
Q4: How do I ensure proper ventilation for a built-in refrigerator? Ensure proper ventilation by designing an open back for the cabinet. Alternatively, use large vents or grilles at the top and bottom. This allows warm air to rise and escape, and cool air to enter. Maintain the recommended clearances around your refrigerator. This helps prevent overheating and extends the life of your appliance.
Q5: Is building a refrigerator cabinet a beginner-friendly project? Building a refrigerator cabinet requires basic woodworking skills, including accurate measuring, cutting, and assembly. While not for absolute beginners with no tool experience, a motivated DIYer with some prior project experience can tackle it. Start with detailed plans and take your time. Learning basic joinery and measuring techniques is key to success.
Q6: How can I make my refrigerator cabinet match existing kitchen cabinets? You can match your new refrigerator cabinet to existing cabinets by using similar materials and finishes. If your existing cabinets are painted, match the paint color precisely. If they are stained, try to match the wood species and stain color. Pay attention to door styles, hardware, and any decorative trim for a cohesive look.
Conclusion
Building a refrigerator cabinet is a rewarding DIY project that significantly enhances your kitchen’s aesthetics and functionality. You have transformed a standalone appliance into an integrated design feature. I remember the satisfaction of seeing my own custom cabinet perfectly fitted. This project not only improves your home’s appearance but also maximizes your kitchen’s storage and efficiency.
You learned about crucial steps, from precise measurements and material selection to robust construction and vital ventilation. You also discovered the importance of the finishing touches that bring the entire look together. By following these guidelines, you can create a durable and beautiful custom solution for your refrigerator. Embrace the satisfaction of creating something functional and beautiful with your own hands. Are you ready to take your kitchen to the next level? Start planning your custom refrigerator cabinet today!
- DIY refrigerator cabinet
- custom kitchen cabinetry
- woodworking projects
- appliance enclosure
- built-in refrigerator
- home improvement
- cabinet construction
- kitchen design

Todd Martin
Senior Writer
With over 15 years of experience in home renovation and design, I started HEG to share what I’ve learned with homeowners who want to create spaces that are both beautiful and functional. I’ve always believed in a hands-on approach, and over the years, I’ve picked up practical solutions that actually work. Through HEG, I aim to make home improvement more approachable, sharing real tips that help you create a home you truly love.