· Katria Melrose · Appliance Troubleshooting · 17 min read
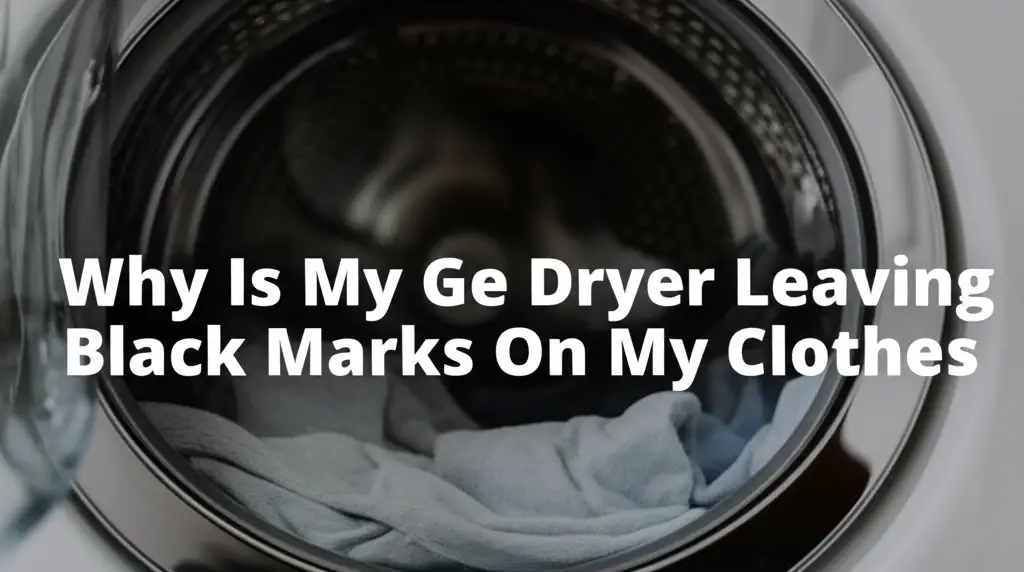
Why Is My Ge Dryer Leaving Black Marks On My Clothes
Stop Black Marks: Why Your GE Dryer Stains Clothes
There are few laundry frustrations worse than pulling freshly dried clothes from your appliance, only to find them marred with unsightly black marks. If you own a GE dryer and notice these dark streaks, you are not alone. This issue points to a problem within your machine. Understanding the root cause helps you fix it quickly. We will explore common reasons why your GE dryer leaves black marks on clothes. This article provides clear steps to diagnose and resolve these frustrating stains. You can restore your dryer’s performance and keep your clothes pristine.
Takeaway
- Worn Components: Black marks often signal worn drum rollers, support glides, or a damaged drum seal.
- Internal Debris: Lint buildup, grease, or foreign objects inside the drum can transfer dark residue.
- Vent Issues: Restricted airflow from a dirty vent can cause overheating and material degradation.
- Overloading: Too many clothes prevent proper tumbling, leading to friction and wear.
- Regular Maintenance: Timely cleaning and part inspection prevent most black mark issues.
Why Your GE Dryer Leaves Black Marks
Your GE dryer leaves black marks on clothes due to worn internal components like drum rollers, support glides, or a faulty drum seal. Lint buildup or foreign objects in the drum can also cause staining. Regular cleaning and part replacement resolve these issues.
Understanding Common Causes of Black Marks
It is quite upsetting to see your clean laundry emerge from the dryer covered in black marks. These stains are usually signs of internal issues with your GE dryer. Identifying the exact cause helps you prevent future problems. We need to look closely at what happens inside the dryer. This section covers the most common reasons behind these frustrating marks.
Worn Drum Rollers or Bearings
Inside your GE dryer, drum rollers support the weight of the drum. They allow it to spin smoothly. These rollers have bearings that can wear out over time. When rollers wear down, they create friction. This friction generates heat and can cause the rubber or plastic material of the rollers to degrade.
The worn material grinds into a fine, black dust. This dust transfers directly onto your clothes as they tumble. You might also hear squeaking or thumping noises if the rollers are the problem. Replacing these rollers is a common repair. It stops the black marks and restores quiet operation.
Damaged Drum Glides or Slides
Dryer drums also rest on glides or slides located at the front. These are often made of plastic or felt. They provide a smooth surface for the drum to move against. Over many cycles, these glides wear down. This wear causes the plastic or felt to chip and break apart.
The degraded material creates a dark residue. This residue can transfer to your clothes. If you notice black streaks mostly near the dryer door, worn glides are a likely culprit. Checking these glides involves opening the dryer front panel. They are relatively easy to replace once identified.
Faulty Drum Seal
A drum seal runs along the edges of the dryer drum, either at the front or back. This seal prevents clothes from slipping into gaps between the drum and the dryer cabinet. It also keeps hot air inside. These seals are often made of felt or rubber.
Over time, the seal can become worn, torn, or detached. A damaged seal exposes metal parts of the dryer. These exposed metal parts can rub against the clothes, leaving dark scuff marks. The seal material itself can also break down into a dark residue. Inspecting the drum seal for damage is important. Replace a worn seal quickly to protect your clothes.
Excessive Lint Buildup and Dirty Vents
Lint is a common byproduct of drying clothes. It consists of small fibers, dust, and debris. While your lint trap catches most of it, lint can accumulate in other areas. It often builds up in the dryer’s exhaust vent system. A clogged vent restricts airflow.
Restricted airflow forces your dryer to work harder. It can cause components to overheat. This overheating might lead to the scorching of internal parts or lint, creating black residue. Lint can also mix with moisture and grease, forming a sticky, dark substance that stains clothes. Regular cleaning of the lint trap is essential, but deeper vent cleaning is also necessary. Learn how to perform a thorough GE dryer cleaning to prevent these issues.
Foreign Objects in the Dryer Drum
Sometimes, small items accidentally enter the dryer drum. These can be pens, coins, paper clips, or even pieces of non-laundry items. These foreign objects can get caught between the drum and the dryer cabinet. They might then rub against the drum’s interior.
This rubbing action can cause black marks. The object itself might leave a mark. It could also abrade a part of the drum, causing dark residue. Always check pockets before washing and drying clothes. This simple step prevents many unexpected dryer problems.
Diagnosing the Black Marks on Your GE Dryer
When your GE dryer leaves black marks on your clothes, proper diagnosis is crucial. You need to identify the exact source of the problem. A systematic approach helps you find the culprit efficiently. I always start by gathering clues. This section explains how to pinpoint the issue.
Visual Inspection of the Dryer Drum
Start by thoroughly examining the inside of your dryer drum. Look for any unusual marks or residues.
- Surface Scratches: Check for scratches or gouges on the drum’s inner surface. These could indicate a foreign object trapped inside.
- Sticky Residue: Run a clean, damp white cloth over the drum. If it picks up dark, sticky residue, you likely have oil, grease, or burnt lint buildup.
- Dark Streaks: Look for specific dark streaks along the drum. These can point to worn components rubbing against the drum.
Pay attention to areas near the front and back edges of the drum. These are common spots for wear on components like drum glides or seals. This initial visual check often provides immediate clues.
Checking for Worn Drum Rollers and Bearings
Worn drum rollers are a frequent cause of black marks. They are usually located at the back of the dryer drum.
- Listen for Noise: Start your dryer empty and listen for unusual noises. Squealing, grinding, or thumping sounds often signal worn rollers.
- Manual Drum Spin: With the dryer off, try to rotate the drum by hand. It should spin smoothly and quietly. If it feels rough, stiff, or makes noise, the rollers might be failing.
- Access and Inspect: You will need to access the dryer’s interior to visually inspect the rollers. This usually involves removing the back panel or sometimes the front. Look for flat spots, cracks, or excessive wear on the roller wheels.
If you find damaged rollers, replacement is necessary. This step ensures the drum spins correctly without creating friction.
Inspecting Drum Glides and Front Bearings
Drum glides are typically found at the front of the dryer. They support the front of the drum.
- Location: Open your dryer door. Look along the inside of the front panel, where the drum meets the housing.
- Material Check: These glides are often plastic or felt pads. Check for pieces that are chipped, cracked, or completely missing.
- Feel for Roughness: Gently press against the drum and try to move it slightly. If it feels loose or wobbly at the front, the glides may be worn.
Worn glides cause the drum to sag. This sagging leads to friction and can leave black marks. Replacing these small parts can make a big difference.
Examining the Drum Seal
The drum seal prevents clothes from getting caught in gaps. It also keeps air contained.
- Visual Scan: Inspect the felt or rubber seal running around the drum’s circumference. Check both the front and rear seals.
- Look for Damage: Look for tears, fraying, or sections where the seal has detached from the drum.
- Rub Test: Gently rub your finger along the seal. If black residue comes off easily, the seal itself might be degrading.
A damaged seal can expose metal parts or release its own material onto clothes. Replacing a worn seal maintains proper drum operation.
Checking the Exhaust Vent and Lint Trap
Lint buildup is a less obvious cause but can still lead to black marks.
- Lint Trap Cleanliness: Ensure your lint trap is clean before every load. If you consistently find an excessive amount of lint, it might indicate a deeper problem.
- Exhaust Vent: Disconnect your dryer’s exhaust hose from the wall. Inspect the hose and the wall vent for significant lint accumulation. A clogged vent restricts airflow, causing the dryer to overheat. This overheating can scorch lint or even internal components. This creates black residue. I always recommend clearing the vent annually. This is a vital part of how to clean your dryer machine.
- Outdoor Vent Cap: Check the outdoor vent cap. Make sure it opens fully when the dryer is running. Clear any bird nests or debris.
Cleaning the exhaust system improves dryer efficiency. It also prevents lint-related issues.
Step-by-Step Fixes for Black Marks
Once you have diagnosed the cause of the black marks, you can begin the repair process. Some fixes are simple and require minimal effort. Others might involve replacing internal components. I will guide you through the most common solutions. Always prioritize safety first. Disconnect power to your GE dryer before beginning any internal repairs.
1. Cleaning the Dryer Drum and Interior
If the black marks are due to residue buildup, a thorough cleaning is the first step.
- Materials Needed: Gather a clean cloth, warm water, mild detergent (or rubbing alcohol/all-purpose cleaner), and a soft brush.
- Initial Wipe-Down: Wipe the entire inside of the dryer drum with a damp cloth. This removes loose residue.
- Targeted Cleaning: For stubborn black marks or sticky spots, apply a small amount of rubbing alcohol or all-purpose cleaner to a clean cloth. Rub the affected areas firmly. Avoid abrasive cleaners or scouring pads, as they can scratch the drum.
- Rinse and Dry: After cleaning, wipe the drum with a cloth dampened with plain water. Then, dry the drum completely before using the dryer again.
- Lint Trap and Housing: Don’t forget to clean the lint trap and the housing it sits in. Use a vacuum cleaner attachment to remove any lint from this area.
A clean drum prevents residual transfer to your clothes. This initial cleaning step can sometimes resolve the problem entirely. Regular cleaning helps prevent buildup. For comprehensive steps, consider following a guide on how to clean your dryer.
2. Replacing Worn Drum Rollers
If your diagnosis points to worn drum rollers, replacement is necessary.
- Obtain Parts: Purchase GE-compatible drum rollers. You often need a kit that includes new rollers, axles, and sometimes retaining clips.
- Access the Rollers: This usually involves removing the dryer’s back panel or, in some models, the front panel and drum. Consult your GE dryer’s service manual for specific access instructions.
- Remove Old Rollers: Note how the old rollers are installed. Use appropriate tools to remove the retaining clips or nuts that hold them in place. Carefully slide the old rollers off their axles.
- Install New Rollers: Slide the new rollers onto the axles. Secure them with the new retaining clips or nuts. Ensure they spin freely.
- Reassemble: Carefully reassemble the dryer. Make sure all wires and connections are secure before powering on.
Replacing worn rollers restores smooth drum rotation. This stops the friction that causes black marks. It also eliminates grinding noises.
3. Replacing Damaged Drum Glides or Slides
Worn drum glides are usually simpler to replace than rollers.
- Purchase Parts: Get the correct replacement glides for your specific GE dryer model. They usually come in sets.
- Access the Glides: These are at the front of the dryer drum. You often need to remove the top panel and the front panel of the dryer to reach them.
- Remove Old Glides: The old glides typically snap into place or are held by small screws. Carefully pry them out or unscrew them.
- Install New Glides: Press or screw the new glides into their proper positions. Make sure they are seated firmly.
- Reassemble: Put the dryer’s panels back in place. Test the drum’s movement before running a cycle.
New glides ensure the drum slides smoothly. This prevents it from rubbing against the front housing.
4. Replacing a Faulty Drum Seal
A damaged drum seal can cause friction and leave marks.
- Get a New Seal: Buy a new felt or rubber drum seal compatible with your GE dryer model.
- Access the Seal: You will need to remove the dryer drum to access both the front and rear seals. This is a more involved process. It often requires disconnecting heating elements and various sensors.
- Remove Old Seal: The old seal is usually glued onto the drum or held by clips. Carefully peel or scrape off the old seal and any adhesive residue.
- Prepare Surface: Clean the drum edge thoroughly where the new seal will attach. Ensure it is free of dirt and old adhesive.
- Apply New Seal: Apply a thin, even bead of high-temperature adhesive (often included with the new seal) to the drum edge. Carefully press the new seal onto the adhesive, ensuring it is straight and secure. Allow adequate drying time as per adhesive instructions.
- Reassemble: Reinstall the dryer drum and all other components.
A fresh drum seal provides a proper barrier. It protects clothes from internal components.
5. Cleaning the Exhaust Vent System
A clogged exhaust vent can lead to black marks indirectly through overheating.
- Disconnect Power: Always unplug your dryer before cleaning the vent system.
- Disconnect Ductwork: Detach the dryer vent hose from the back of the dryer and from the wall connection.
- Vacuuming: Use a long, narrow vacuum attachment to clean out the flexible ductwork and the exhaust port on the dryer itself.
- Brush Cleaning: For longer ducts or heavily clogged vents, use a dryer vent cleaning brush kit. These brushes attach to a drill and extend through the ductwork.
- Wall Vent: Clean the wall vent opening and the exterior vent cap. Ensure the flapper on the outside vent opens freely.
- Reconnect: Reconnect all ductwork securely. Ensure there are no kinks or crushing of the hose.
Regular vent cleaning improves safety and dryer efficiency. It prevents potential overheating issues. This can avoid the scorching of lint or materials.
Preventive Measures and Best Practices
Preventing black marks on your GE dryer is far easier than fixing them. Regular maintenance and careful usage habits extend your dryer’s life. They also keep your clothes clean and stain-free. I have found a few key practices really help.
Regular Dryer Maintenance Schedule
Establishing a consistent maintenance routine is the best defense against dryer problems.
- Clean the Lint Trap Every Load: This is the simplest yet most effective habit. A full lint trap restricts airflow. It makes your dryer work harder and increases fire risk.
- Clean the Lint Trap Housing: Periodically use a vacuum cleaner with a narrow attachment to remove lint from the area where the lint trap slides in. Lint can accumulate here.
- Inspect and Clean the Exhaust Vent Annually: Lint buildup in the vent hose and ductwork is a major issue. Hire a professional or use a dryer vent cleaning kit. This prevents overheating and improves efficiency. This is a crucial aspect of how to clean your dryer properly.
- Check Drum Interior: Every few months, wipe down the inside of the dryer drum with a damp cloth. Look for any sticky residue or new scuff marks.
- Inspect Seals and Glides: Once a year, or if you notice new noises, take a moment to visually inspect the drum seal and glides if easily accessible. Early detection of wear saves bigger repairs.
Consistent maintenance helps catch issues before they cause significant damage or stains.
Proper Loading Techniques
How you load your dryer impacts its performance and the longevity of its parts.
- Avoid Overloading: Do not stuff your dryer full. Overloading restricts airflow and prevents clothes from tumbling freely. This causes excessive friction. It also puts undue stress on drum rollers and glides. Clothes need space to move.
- Mix Load Sizes: For best results, mix large items with smaller ones. This helps the load tumble more effectively. It prevents large items from balling up.
- Check Pockets: Always check pockets for foreign objects like pens, coins, or paper clips before drying. These items can get stuck and cause marks or damage. I always make this a habit for everyone in my house.
Proper loading reduces wear and tear on your dryer’s internal components. It ensures even drying.
Addressing Unusual Noises Promptly
Your dryer communicates problems through sounds. Do not ignore unusual noises.
- Squealing or Grinding: These noises often indicate worn drum rollers or idler pulleys.
- Thumping or Banging: A thumping sound could mean a worn drum support roller or a foreign object.
- Scraping: A scraping noise can point to a worn drum seal or something caught between the drum and the cabinet.
Addressing these sounds quickly prevents further damage. It stops potential black marks from appearing on your clothes. Early intervention saves time and money.
Professional Servicing
While many dryer repairs are DIY-friendly, some issues require expert attention.
- Complex Repairs: If you are unsure about disassembling your dryer or handling electrical components, call a certified appliance technician.
- Persistent Problems: If you have tried common fixes and the black marks persist, professional diagnosis might be necessary.
- Gas Dryers: For gas dryers, always consider professional help for internal repairs involving gas lines. Safety is paramount.
A professional technician can accurately diagnose complex issues. They have specialized tools and knowledge to fix problems safely and effectively.
Frequently Asked Questions About Dryer Black Marks
Q1: Can a dirty dryer cause black marks on clothes?
Yes, a dirty dryer can certainly cause black marks on clothes. Lint, dirt, and even grease can accumulate inside the drum or in the dryer’s exhaust system. When these materials combine with heat and moisture, they can become sticky or scorch. This creates a black residue that transfers directly onto your tumbling laundry. Regular cleaning prevents this problem.
Q2: Are black marks from a dryer permanent on clothes?
The permanence of black marks from a dryer depends on their source and how quickly you act. If the marks are from lint or light residue, they often wash out with a re-laundering. However, if they are from grease, burnt rubber, or metal abrasion, they can be much harder to remove. Act fast and try pre-treating stains before rewashing.
Q3: How do I clean the inside of my GE dryer drum to remove black residue?
To clean the inside of your GE dryer drum, first unplug the appliance. Use a clean cloth dampened with warm water and a small amount of mild detergent, or rubbing alcohol. Wipe down the entire drum interior, focusing on any black residue or sticky spots. After cleaning, wipe the drum with a damp cloth of plain water, then dry it completely before use.
Q4: Why do I smell burning rubber when my GE dryer is running?
A burning rubber smell from your GE dryer often indicates a worn or failing component made of rubber. Common culprits include worn drum rollers, drive belts, or idler pulleys. As these parts wear down, they create friction and generate heat, causing the rubber to burn and release a distinct odor. Prompt inspection and replacement are necessary.
Q5: Can overloading my dryer lead to black marks?
Yes, overloading your dryer can indirectly lead to black marks. An overloaded dryer restricts airflow and prevents clothes from tumbling freely. This increased friction puts excessive stress on internal components like drum rollers and glides. Over time, this stress causes these parts to wear down faster. They can then break apart and leave black residue on your clothes.
Q6: How often should I clean my dryer’s exhaust vent?
You should clean your dryer’s exhaust vent at least once a year. For larger households, frequent dryer users, or homes with pets, cleaning every six months is better. Regular vent cleaning prevents lint buildup. This reduces fire risk and improves dryer efficiency. It also helps avoid issues like overheating, which can cause black marks.
Conclusion
Finding black marks on your clothes after a dry cycle is disheartening. However, understanding why your GE dryer leaves black marks on clothes provides a clear path to resolution. We have explored the common culprits, from worn drum rollers and glides to faulty seals and lint buildup. Each issue has specific diagnostic steps and effective fixes.
By regularly inspecting your dryer’s internal components, maintaining clean vents, and practicing proper loading, you can prevent these frustrating stains. Remember, early detection of unusual noises or visible wear saves you time and money. If you prefer professional help, or if the problem persists, do not hesitate to consult a qualified appliance technician. Take action today to restore your GE dryer’s performance and ensure your clothes emerge perfectly clean, every single time. Your laundry deserves to be spotless.
- ge dryer
- black marks on clothes
- dryer stains
- appliance repair
- dryer maintenance
- laundry tips
- troubleshooting

Katria Melrose
Cleaning Specialist
With over 12 years of experience in commercial cleaning and a certification in workplace ergonomics, I’ve developed a deep understanding of what makes a workspace truly productive. At HEG, I specialize in helping people transform their home offices into clean, efficient, and comfortable environments. Through smart cleaning routines and strategic organization solutions, I empower readers to create spaces that support focus, comfort, and success—one well-organized desk at a time.