· Todd Martin · Home Maintenance · 14 min read
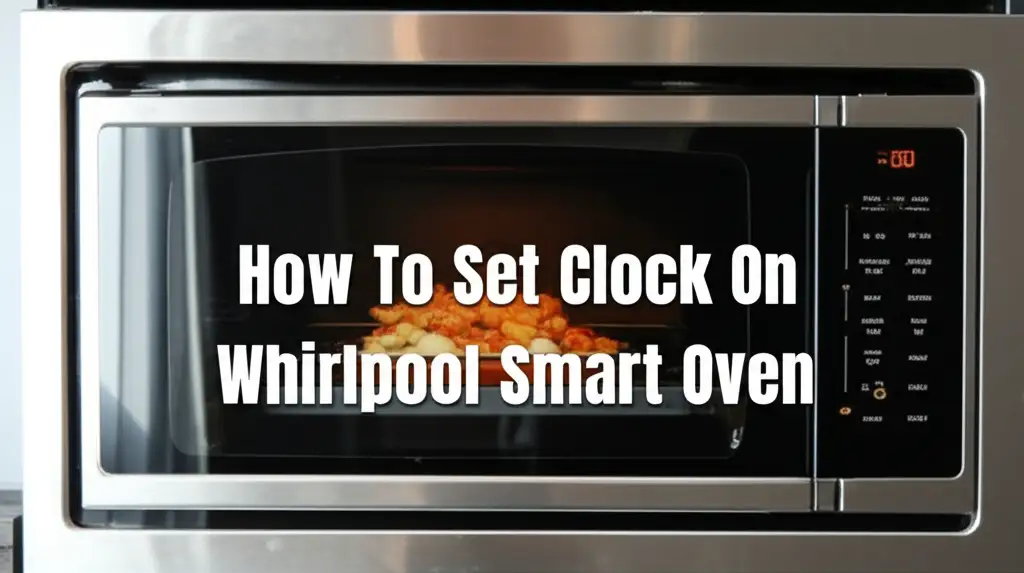
How To Set Clock On Whirlpool Smart Oven

Setting the Clock on Your Whirlpool Smart Oven: A Simple Guide
Your kitchen is a busy place. A reliable clock on your oven helps with daily routines and cooking times. If you have a Whirlpool Smart Oven, setting the clock might seem like a small task. However, it ensures your appliance works at its best. Knowing how to set the clock on your Whirlpool Smart Oven is important for precise cooking. It also helps manage your kitchen schedule. This guide will walk you through manual adjustments and using the Whirlpool app. We will cover common issues and advanced settings. I will show you clear, simple steps to keep your oven’s time accurate.
Takeaway
- Manually set your Whirlpool Smart Oven clock using the control panel’s “Clock” or “Settings” button.
- Use the Whirlpool app (Whirlpool Home) for convenient remote clock adjustments.
- Troubleshoot common issues like power outages or Wi-Fi disconnection.
- Understand advanced settings for 12/24-hour formats and daylight saving.
To set the clock on your Whirlpool Smart Oven, press the “Clock” or “Tools” button on the control panel. Then, use the number pad or navigation arrows to enter the current time. Confirm your selection by pressing “Start” or “Enter.” If your oven is connected to Wi-Fi, you can also use the Whirlpool app for automatic time updates.
Understanding Your Whirlpool Smart Oven’s Interface
Whirlpool Smart Ovens offer modern features and sleek designs. They come with different control panel layouts. Most models have a central display screen and touch-sensitive buttons. Some models may have physical knobs alongside the digital interface. Knowing your specific model helps you set the clock easily. You can often find your model number inside the oven door.
Each control panel has dedicated buttons for settings. Look for buttons labeled “Clock,” “Settings,” “Tools,” or a clock icon. These buttons give you access to the time adjustment menu. The display screen will show prompts guiding you through the process. Different models might show options slightly differently. I recommend checking your oven’s user manual for precise button names.
The smart features of your Whirlpool oven connect to your home Wi-Fi. This allows app control and software updates. Wi-Fi connectivity also lets some models automatically update the time. This happens especially after a power outage. Familiarize yourself with the main control panel and its functions. This makes setting the oven clock simple. You can also learn how to find out what Whirlpool oven you have for specific instructions.
Step-by-Step Guide: Setting the Clock Manually
Setting the clock manually is a straightforward process. This method works even without Wi-Fi connectivity. It ensures your oven displays the correct time. I will guide you through the typical steps.
- Locate the “Clock” or “Settings” Button: First, find the button that controls the clock. On many Whirlpool Smart Ovens, this button is labeled “Clock” or “Tools.” Some models might show a clock icon. Pressing this button opens the clock settings menu on the display.
- Enter Clock Adjustment Mode: After pressing the button, the display usually shows “Set Time” or “Enter Time.” The current time might start blinking. This means the oven is ready for you to input a new time. If you have a Whirlpool microwave hood combination, the process might be similar.
- Input the Current Time: Use the numerical keypad to enter the current hour and minute. For example, for 3:45 PM, you would press “0,” “3,” “4,” “5.” Some models might use up and down arrows to adjust the numbers. Be sure to select AM or PM if your model uses a 12-hour format.
- Confirm the Time: Once you have entered the time, press the “Start” or “Enter” button. Some models may have a “Clock Set” or “Done” button. This action saves the new time. The clock display should now show the correct time.
It is a simple process. Many Whirlpool appliances follow a similar method. For example, if you need to set time on your Whirlpool microwave without a clock button, you might use the “Options” or “Settings” menu instead. Always double-check the time after setting it. This ensures accuracy.
Using the Whirlpool App to Set Your Oven Clock
Whirlpool Smart Ovens offer the convenience of app control. The Whirlpool Home app lets you manage various oven functions from your smartphone. This includes setting the clock. Using the app can be quicker than manual input. It also allows for automatic updates if connected.
- Ensure Your Oven is Connected to Wi-Fi: Before using the app, confirm your Whirlpool Smart Oven connects to your home Wi-Fi network. If it is not connected, the app cannot communicate with the oven. You will need to set up Wi-Fi connectivity first. Follow the instructions in your oven’s user manual for initial setup.
- Open the Whirlpool Home App: Launch the Whirlpool Home app on your smartphone or tablet. Make sure you are logged into your account. The app should display your connected appliances. Select your Whirlpool Smart Oven from the list of devices.
- Navigate to Clock Settings: Inside the oven’s control screen in the app, look for “Settings” or a gear icon. Tap on it. Within the settings menu, you should find an option related to “Clock” or “Time.” Tap this option to access the clock settings. The app will often have a clear interface for this.
- Set or Sync the Time: The app usually offers options to set the time manually or sync it. If you choose to sync, the oven will automatically get the correct time from your phone’s network. This is usually the easiest way. If you set it manually, you will use a digital keypad on your phone screen. Confirm your selection, and the new time will appear on your oven’s display.
Using the app provides flexibility. You can adjust the clock from anywhere. This is helpful for daylight saving changes. It also helps after power outages, provided your oven reconnected to Wi-Fi.
Troubleshooting Common Clock Setting Issues
Sometimes, setting your Whirlpool Smart Oven clock does not go as planned. You might face issues like the clock not saving or resetting. Do not worry. Many common problems have simple solutions. I can help you figure them out.
- Clock Not Saving: If you set the time, but it reverts to the old time or blanks out, check your power supply. A brief power interruption might reset the clock. Make sure the oven receives consistent power. Also, ensure you press the “Start,” “Enter,” or “Confirm” button after setting the time. Without confirmation, the changes do not save.
- Clock Resets After Power Outage: It is common for appliances to lose settings after a power outage. Most Whirlpool Smart Ovens need a manual reset of the clock. If your oven is Wi-Fi connected, it should automatically update the time once power restores and it reconnects to Wi-Fi. If it does not, try unplugging the oven for a minute. Then plug it back in. This can sometimes force a Wi-Fi re-connection and time sync.
- Buttons Not Responding: If the control panel buttons are not responding when trying to set the clock, the panel might be locked. Some models have a “Control Lock” feature. Look for a padlock icon or “Control Lock” button. Press and hold it for a few seconds to unlock the panel. Another reason could be a dirty panel. Wipe it clean with a soft cloth.
- Wi-Fi Connection Issues Preventing Sync: If you rely on the app for time setting, a weak or lost Wi-Fi connection causes problems. Check your home Wi-Fi network. Ensure the oven is within range of your router. You can try restarting your router. In the Whirlpool app, check the oven’s connection status. If the app cannot connect to the oven, try restarting both the oven (by unplugging) and your phone. If your oven is part of a Whirlpool Smart Oven Microwave Combo, you may encounter similar connectivity challenges.
These steps cover most common issues. If problems continue, consult your oven’s user manual. You may also contact Whirlpool customer support.
Daylight Saving Time and Power Outages: Adjusting Your Oven Clock
Daylight Saving Time (DST) changes and power outages often affect appliance clocks. Your Whirlpool Smart Oven is no exception. Knowing how to handle these events keeps your kitchen time accurate. I find these situations a common reason for clock resets.
Daylight Saving Time Adjustments: When DST begins or ends, you need to adjust your oven clock by an hour.
- Manual Adjustment: If you primarily use manual settings, follow the “Step-by-Step Guide: Setting the Clock Manually” section. Just add or subtract one hour from the current time. Confirm the change to save it. This method is reliable.
- App-Based Adjustment: For Wi-Fi connected ovens, the Whirlpool Home app often handles DST changes automatically. If the oven is connected to the internet, it should receive time updates. This typically happens without you doing anything. However, it is good to check your oven display after the time change. Make sure it updated correctly. If not, open the app and find the clock settings. You might see an option to “Sync Time” or “Update Time” there.
Power Outage Recovery: Power interruptions, even short ones, can reset your oven’s clock.
- Manual Reset: If your oven loses power, the clock will usually revert to a default (e.g., 12:00) or blank out. You will need to set it manually once power restores. Follow the manual setting steps detailed earlier. This is the most common way to fix it.
- Automatic Wi-Fi Sync: Many smart ovens are designed to regain connection and sync the time automatically after a power outage. This feature depends on your oven’s model and its Wi-Fi stability. If your oven has this capability, ensure it reconnects to your home network. Give it a few minutes after power returns. Check the display to see if the time updated itself. If not, proceed with manual adjustment or use the app.
Being prepared for these events saves you time. It keeps your oven clock accurate. This means no more guessing the correct time when you are cooking.
Advanced Clock Features and Customization
Whirlpool Smart Ovens offer more than just basic time display. You can customize certain clock settings. These features improve your overall user experience. I will explain some of these advanced options.
12-Hour vs. 24-Hour Format: Many Whirlpool models let you choose between a 12-hour (AM/PM) and a 24-hour (military time) format.
- How to Change: Access the clock settings menu, usually through the “Clock” or “Tools” button. Look for an option like “Time Format” or “Display Format.” Select your preferred option, then save the setting. This choice depends on your personal preference.
- App Control: The Whirlpool Home app also typically provides this option within the oven’s settings. You can switch formats directly from your phone.
Display Brightness: Some smart oven models allow you to adjust the brightness of the clock display. This is useful in different lighting conditions.
- How to Change: In the main “Settings” or “Tools” menu, look for “Display Brightness” or a similar option. You can usually choose from low, medium, or high brightness levels. Adjust it to your comfort.
Clock On/Off Option: In rare cases, some users might prefer to turn off the clock display completely. This is not common for ovens but might exist as an option.
- How to Change: Check the “Settings” menu for a “Clock Display” or “Show Clock” toggle. If present, you can turn it off. I recommend keeping the clock on for convenience.
Automatic Time Synchronization: This is a key feature of a smart oven. When connected to Wi-Fi, the oven can synchronize its time with internet time servers. This means it updates automatically.
- Benefits: You avoid manual adjustments for DST or after power outages. It ensures continuous accuracy.
- Ensuring it Works: Make sure your oven maintains a stable Wi-Fi connection. Check the connection status in the Whirlpool Home app regularly.
Exploring these advanced features allows you to personalize your oven. It makes the time display work best for you.
Maintaining Your Smart Oven’s Time Accuracy
Keeping your Whirlpool Smart Oven’s clock accurate is important for everyday life. It helps with cooking schedules and household timing. Regular checks and good practices ensure consistent time display. I have a few tips to help you maintain accuracy.
- Regular Wi-Fi Connection Checks: If your oven relies on automatic time syncing, regularly check its Wi-Fi connection. A stable connection is vital for receiving accurate time data. You can check the connection status through the Whirlpool Home app. If the connection is weak or lost, try moving your router closer or using a Wi-Fi extender.
- Software Updates: Keep your Whirlpool Smart Oven’s software updated. Manufacturers release updates to improve performance and add features. These updates can also enhance time synchronization capabilities. The Whirlpool Home app usually notifies you when an update is available. Follow the app’s instructions to install them.
- Power Surge Protection: Power surges can sometimes damage electronic components, including the clock mechanism. Using a good quality surge protector for your oven’s outlet can offer protection. This prevents potential issues that might cause the clock to malfunction or reset frequently.
- Avoid Unnecessary Power Cycles: Frequently unplugging and replugging your oven can cause the clock to reset. Unless you are troubleshooting a specific issue, avoid power cycling. This helps maintain the clock’s accuracy and stability.
- Reference a Reliable Time Source: If you ever doubt your oven’s time, compare it to a known accurate source. Use your smartphone, a digital clock, or an atomic clock for reference. This helps confirm if your oven needs adjustment. If it consistently drifts, it might indicate a more serious issue. You might then need to contact Whirlpool support.
By following these maintenance tips, you ensure your Whirlpool Smart Oven’s clock remains accurate. This provides peace of mind and convenience in your kitchen.
FAQ Section
Q1: Why does my Whirlpool Smart Oven clock keep resetting randomly?
A: Random clock resets often point to unstable power. Check your oven’s power outlet. Ensure it is securely plugged in. Brief power fluctuations, even unnoticed ones, can cause a reset. A weak or intermittent Wi-Fi signal can also interfere with automatic time updates, leading to perceived resets if the oven struggles to sync.
Q2: Can I set the clock on my Whirlpool Smart Oven without Wi-Fi?
A: Yes, you can set the clock manually on your Whirlpool Smart Oven without a Wi-Fi connection. Simply use the control panel buttons, typically labeled “Clock” or “Tools.” Follow the on-screen prompts to enter the current time. This method works on all models, regardless of smart features.
Q3: What if my Whirlpool oven doesn’t have a dedicated “Clock” button?
A: If your Whirlpool oven lacks a “Clock” button, look for “Settings,” “Tools,” or an “Options” button on the control panel. Pressing these buttons usually brings up a menu. Within this menu, you will find a “Clock” or “Time” setting. Select it to adjust the time.
Q4: How do I change between 12-hour and 24-hour clock formats?
A: To change the time format, access the clock settings on your Whirlpool Smart Oven. This is usually done via the “Clock” or “Settings” button. Look for an option labeled “Time Format” or “Display Format.” Select either 12-hour (AM/PM) or 24-hour (military) format, then confirm your choice.
Q5: Does the Whirlpool app need to be open for the oven’s clock to update automatically?
A: No, the Whirlpool app does not need to be open for your oven’s clock to update automatically. Once your Whirlpool Smart Oven is connected to Wi-Fi and configured for automatic time synchronization, it receives time data from the internet. The app just acts as a control interface, not a constant connection bridge.
Conclusion
Setting the clock on your Whirlpool Smart Oven is an essential task for any homeowner. Whether you prefer using the manual control panel or the convenience of the Whirlpool Home app, the process is straightforward. We have covered every step, from basic input to troubleshooting common issues. We also talked about managing daylight saving changes and maintaining long-term accuracy.
I hope this guide gives you confidence in keeping your oven’s time precise. An accurate clock means better meal timing and a more organized kitchen. If you ever have questions or issues, remember your user manual. Also, the Whirlpool app and support resources are always there to help. Keep your Whirlpool Smart Oven running on time. Enjoy all its smart features.


