· Todd Martin · Furniture Repair · 17 min read
How To Repair Wicker Furniture Legs
Fix Wicker Furniture Legs: A Full Repair Guide
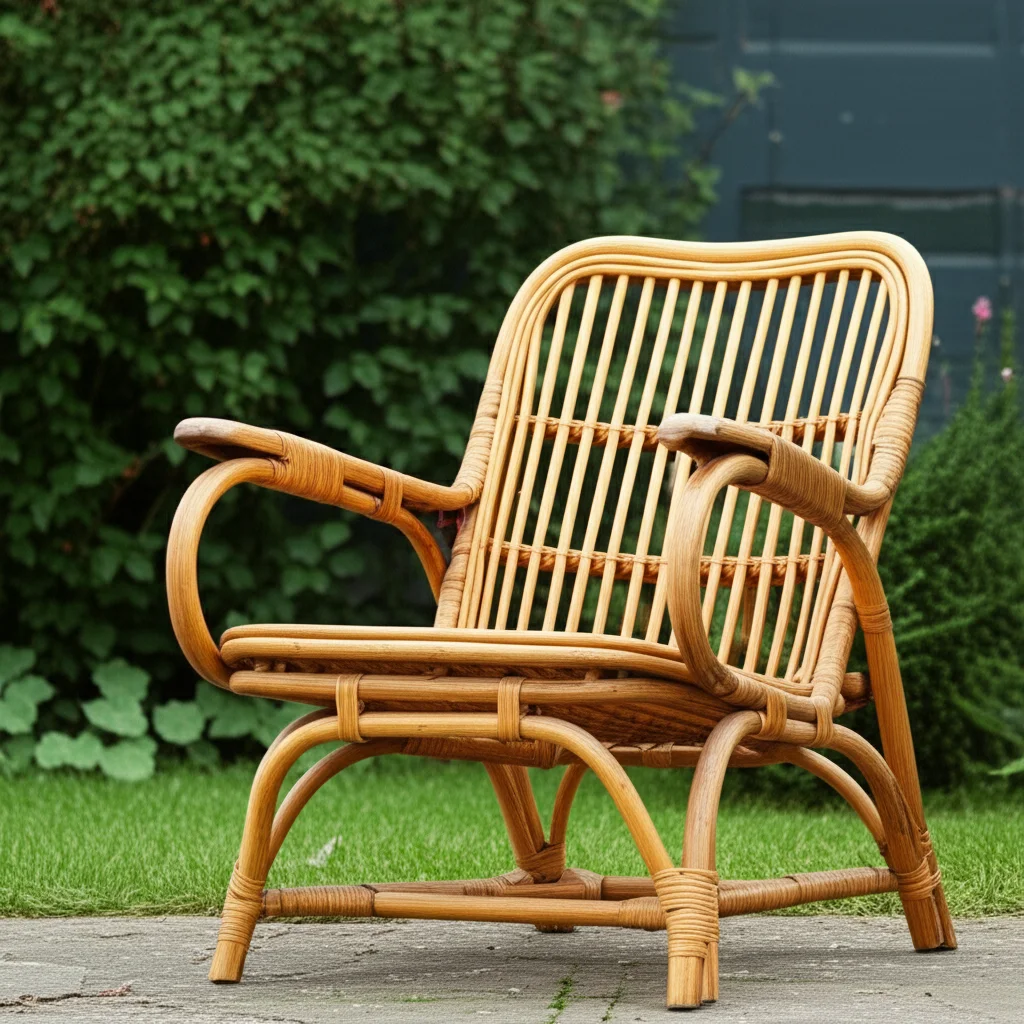
Wicker furniture adds charm and comfort to any home, inside or out. Over time, constant use or exposure to elements can damage its legs. A wobbly or broken leg makes your favorite chair or table unusable. Restoring these pieces saves money and keeps beloved items out of the landfill.
Learning how to repair wicker furniture legs is a rewarding DIY project. It brings new life to old pieces. This guide gives you the information and steps needed to fix common leg issues. We cover everything from assessing damage to the final finish. You will learn about tools, materials, and specific repair techniques. Let’s make your wicker furniture sturdy and beautiful again.
Takeaway
- Assess Damage Thoroughly: Understand the type and extent of leg damage before starting.
- Gather Proper Tools: Have all necessary materials ready for a smooth repair process.
- Clean Before Repair: Always clean the furniture legs to ensure adhesives and finishes work correctly.
- Use Appropriate Techniques: Apply specific repair methods for minor loose strands or major structural breaks.
- Reinforce and Finish: Strengthen the repaired area and apply a protective finish for durability.
- Maintain Regularly: Follow care tips to prevent future damage and extend furniture life.
Main Query Answer
To repair wicker furniture legs, first clean and assess the damage. Then, use appropriate materials like glue, new wicker strands, or wood dowels to fix breaks or loose weaving. Finally, reinforce the repair and apply a protective finish to ensure stability and durability.
Understanding Wicker Furniture Leg Damage
Wicker furniture legs face unique stresses. They support weight and can suffer from various types of damage. Identifying the specific problem helps you choose the right repair method. Wicker uses natural materials like rattan, reed, or willow, or synthetic ones like resin. Each material reacts differently to wear and tear.
Common problems include loose weaving, broken strands, or detached legs. Natural wicker can become dry and brittle, making it prone to cracking. Synthetic wicker often resists moisture but can crack or fray from UV exposure. Knowing the material guides your repair choices. You must understand how these materials behave to perform a lasting fix.
- Loose Weaving: This is a common issue. Strands can come undone from their base. This happens from constant friction or general aging. Loose strands make the leg look untidy and can lead to structural weakness over time. They are often easy to reattach or secure with glue.
- Broken Strands: Individual wicker strands can snap. This leaves gaps or sharp edges. Broken strands compromise the leg’s appearance and strength. They often need new material woven in or patched over. Direct impact or brittleness causes these breaks.
- Structural Breaks: A leg can crack or break completely. This is a severe problem. It makes the furniture unstable and unsafe. This type of damage requires reinforcing the core structure of the leg. This might involve using internal supports like dowels. This damage often comes from heavy impact or extreme stress.
- Water Damage and Rot: Natural wicker exposed to moisture can absorb water. This leads to mold, mildew, and eventual rot. Rot makes the material soft and weak. It requires removing damaged parts and replacing them. This type of damage often happens with outdoor wicker furniture. Proper cleaning prevents such issues. You can learn more about how to clean outdoor wicker furniture to protect your pieces.
- Pest Damage: Insects like termites can tunnel through natural wicker. This weakens the legs from the inside. Signs include small holes or sawdust. Pest damage requires treatment before repair. Sometimes, the damage is too extensive to fix.
Assessing the extent of the damage is your first crucial step. Check all legs, not just the visibly damaged one. Small issues can hide larger problems. A thorough inspection helps you plan your repair effectively.
Tools and Materials for Wicker Leg Repair
Having the right tools and materials is crucial for successful wicker repair. Gathering everything beforehand saves time and frustration. Some items are standard household tools, while others are specific to wicker work. Your chosen materials depend on the type of wicker and the damage.
You will need various adhesives. Wood glue is good for natural wicker or joining wood parts. Epoxy is stronger for structural repairs and works on both natural and synthetic materials. Zip ties or clamps help hold repairs while glue dries. Pliers and scissors are essential for cutting and shaping wicker strands.
- Adhesives:
- Wood Glue: Use for natural wicker, especially for reattaching loose strands or small breaks. It dries clear and strong.
- Epoxy Adhesive: This is for serious structural breaks. It creates a very strong bond. Two-part epoxy resin is ideal for reinforcing leg joints or cracks. It works on both natural and synthetic wicker.
- Hot Glue Gun (optional): Useful for quickly securing small, temporary fixes or holding pieces in place while stronger glue dries. Not for main structural bonds.
- Wicker Material:
- New Wicker Strands: Match the original material if possible. Rattan cane, reed, or synthetic resin strips are available. Buy enough to cover the repair. Matching the thickness is also important.
- Wood Dowels or Splints: For internal reinforcement of severely broken legs. Choose a diameter that fits inside the leg structure.
- Cutting and Shaping Tools:
- Sharp Scissors or Utility Knife: For clean cuts of wicker strands.
- Pliers: Help pull and shape stubborn strands. Needle-nose pliers are useful for tight spaces.
- Awl or Pick: Useful for opening up tight weaves or guiding new strands.
- Clamping and Holding Tools:
- Spring Clamps or C-Clamps: To hold glued parts firmly while they dry.
- Painter’s Tape or Zip Ties: Good for securing smaller sections or loose strands.
- Finishing Supplies:
- Sandpaper (fine-grit): Smooths out rough edges or excess glue.
- Protective Finish: Varnish, shellac, or paint, matching the original finish. This protects the repair and leg.
- Brush or Applicator: For applying glue and finish.
- Cleaning Supplies:
- Mild Soap and Water: For cleaning the furniture before repair. You can find more details on how to clean wicker basket for guidance.
- Soft Brush or Cloth: For scrubbing and wiping.
Always work in a well-ventilated area, especially when using strong adhesives or finishes. Safety glasses and gloves are also good to have on hand. Preparing your workspace ensures a smoother and safer repair process.
Pre-Repair Preparation: Cleaning and Inspection
Before you start any repair, proper preparation is essential. This includes thoroughly cleaning the wicker furniture legs and conducting a detailed inspection. Dirt, grime, and old finishes can prevent new adhesives from bonding properly. A clean surface ensures a strong, lasting repair.
Start by cleaning the entire furniture piece, especially the legs. Use a mild soap solution and a soft brush. For outdoor wicker, you might need a stronger approach. Refer to guides on how to clean outdoor furniture for thorough cleaning steps. Rinse well and let the furniture dry completely. This step removes mold, mildew, and accumulated dirt.
- Initial Dusting and Vacuuming:
- Use a soft brush or a vacuum cleaner with a brush attachment.
- Remove loose dirt, dust, and cobwebs from all surfaces of the legs.
- Pay attention to crevices where debris can accumulate.
- Washing the Wicker:
- Mix mild dish soap with warm water in a bucket.
- Dip a soft cloth or brush into the soapy water.
- Gently scrub the wicker legs, focusing on dirty or stained areas.
- For natural wicker, avoid saturating it with water. Wipe it down rather than soaking.
- For synthetic wicker, you can be more generous with water.
- You may also find tips on how to clean rattan furniture helpful, as rattan often shares cleaning methods with wicker.
- Rinsing and Drying:
- Rinse the legs with clean water. Use a damp cloth for natural wicker.
- For synthetic wicker, you can lightly hose it down.
- Allow the furniture to air dry completely. This might take 24-48 hours. Ensure no moisture remains trapped, as it can cause mold or weaken natural fibers.
- Detailed Inspection:
- Once dry, inspect the legs closely again.
- Identify all areas of damage: loose strands, breaks, cracks, or rot.
- Use a flashlight to check hidden spots or undersides of the legs.
- Feel the legs for instability or weakness. Gently wiggle each leg to check its attachment point.
- Make notes or mark the damaged areas with painter’s tape. This ensures you do not miss any spots during the repair.
- Determine the type of wicker material if you are unsure. This affects the adhesive and repair material choices.
A clean, dry, and thoroughly inspected leg provides the best foundation for a successful repair. This careful preparation prevents future issues and makes the repair process smoother.
Repairing Minor Wicker Leg Damage
Minor damage to wicker furniture legs often involves loose strands or small breaks. These issues are usually simple to fix. Addressing them quickly prevents bigger problems later. The goal is to reattach or secure the existing wicker material.
Most minor repairs require good adhesive and patience. You will use wood glue for natural wicker or a strong craft glue for synthetic. The process focuses on making the leg look neat and preventing further unraveling. I find that working slowly gives the best results for these small tasks.
- Reattaching Loose Strands:
- Identify the loose strand and its original path.
- Carefully weave the strand back into place. Use an awl or pick to open gaps in the weave if needed.
- Once repositioned, apply a small amount of wood glue (for natural wicker) or strong craft glue (for synthetic) underneath the strand.
- Press the strand firmly down.
- Use painter’s tape or a spring clamp to hold the strand in place while the glue dries. Remove tape after 24 hours.
- Fixing Small Breaks or Frays:
- For a broken strand, try to align the two ends if they are clean breaks.
- Apply glue to both ends and press them together.
- Wrap the area tightly with tape or a zip tie until dry.
- If the break is jagged or a piece is missing, you may need a small patch.
- Cut a small piece of new wicker strand that matches the original.
- Carefully tuck the ends of the new strand under existing healthy strands.
- Secure with glue. Feather the edges so they blend.
- Tightening Loose Joints (if the leg itself is loose):
- Sometimes, the entire leg attachment feels wobbly, not just the wicker.
- If the leg connects to a wooden frame, check for loose screws. Tighten them.
- If the joint is glued, you might need to separate it carefully. Clean out old glue.
- Apply fresh wood glue or epoxy to the joint.
- Reassemble the leg firmly.
- Clamp the leg securely until the glue cures completely. Allow at least 24 hours.
Working with minor damage is often about precision and patience. Do not rush the drying time for adhesives. A fully cured bond is a strong bond. Once repaired, the leg should feel stable and look seamless. You can also explore methods to repair other wicker components, like learning how to repair wicker chair seat damage, to extend your skills.
Addressing Major Wicker Leg Damage
Major damage to wicker furniture legs requires more involved repair techniques. This includes significant breaks, missing sections, or structural instability. These repairs often involve adding new material or reinforcing the leg from the inside. They are more challenging but entirely doable with the right approach.
When a leg has a complete break, you must restore its load-bearing capacity. This means rebuilding or reinforcing the leg’s core. For large missing sections of wicker, you need to weave in new material. I always focus on creating a strong, stable foundation first. The appearance comes second, but still matters.
- Repairing a Broken Leg (Structural Break):
- Clean the Break: Ensure the broken surfaces are clean and free of debris.
- Internal Reinforcement (for hollow legs):
- If the leg is hollow, insert a wood dowel or metal rod into the core.
- The dowel should extend well into both broken sections.
- Apply strong epoxy adhesive to the dowel and inside the broken leg sections.
- Align the broken pieces precisely and press them together.
- Clamp the leg tightly. Use C-clamps or strong tape to hold the repair in place while the epoxy cures (often 24 hours or more).
- External Reinforcement (for solid legs or added strength):
- If the leg is solid or needs extra support, you might apply splints.
- Attach small, thin pieces of wood or metal along the break line using epoxy.
- Cover these splints with new wicker strands for aesthetic blending.
- Replacing Missing Wicker Sections:
- Source Matching Wicker: Obtain new wicker strands that match the original in type and thickness.
- Prepare the Area: Trim any frayed or loose ends around the missing section to create clean edges.
- Weave in New Strands:
- Start by securing one end of the new strand to an existing sturdy strand nearby. Use a strong glue or discreetly tuck it.
- Follow the original weaving pattern of the leg. Weave the new strand over and under existing ones.
- Work slowly, pulling the new strands taut to maintain tension.
- As you weave, apply small dabs of wood glue (for natural wicker) to secure the new strands to the underlying structure or existing wicker.
- When you reach the end of the missing section, secure the new strand by tucking it under existing wicker or gluing it discreetly.
- Layering (for thicker sections): If the missing section is thick, you may need to add multiple layers of new wicker, building up the repair gradually.
- Dealing with Rotted or Heavily Damaged Sections:
- Cut Away Damaged Material: Use a sharp utility knife to remove all rotted or irreparable wicker. Cut back to sound, healthy material.
- Rebuild or Patch: Depending on the size of the removed section, you will either rebuild the area with internal reinforcement (as above) and then weave new wicker around it, or create a larger patch by securing new wicker material directly to the healthy base structure. This is similar to replacing missing sections, but often on a larger scale.
Major repairs demand precision and patience. Allow ample drying time for all adhesives. A strong, stable repair will last for many years. Once the structural integrity is restored, you can move to the finishing touches.
Reinforcing and Finishing Wicker Furniture Legs
After completing the structural and weaving repairs, the next steps are reinforcement and finishing. These steps protect your repair, enhance durability, and restore the furniture’s original appearance. A good finish also helps prevent future damage to the wicker furniture legs.
Reinforcement ensures the repair holds up to daily use. Finishing applies a protective layer and matches the furniture’s look. This part of the process brings the entire repair together. I always pay close attention to blending the new and old sections for a seamless look.
- Reinforcement Techniques:
- Internal Dowels/Rods: If you used internal supports for a major break, ensure they are fully cured. These dowels add significant strength.
- Epoxy Application: For areas with high stress or newly joined parts, applying a thin coat of clear epoxy over the repair can add an extra layer of protection. Ensure it is a compatible type that dries clear and hard.
- Additional Weave Layers: In areas where wicker was replaced, consider adding an extra layer of matching wicker. This adds bulk and strength, especially for areas under pressure. Use strong adhesive to secure each layer.
- Sanding and Smoothing:
- Once all adhesives are dry and the repair is structurally sound, gently sand any rough spots.
- Use fine-grit sandpaper (e.g., 180-220 grit) to smooth out excess glue or uneven new wicker strands.
- Be careful not to damage the original, healthy wicker around the repair.
- Wipe off all sanding dust with a damp cloth before applying any finish.
- Applying a Protective Finish:
- Matching the Original: Determine if the original finish was paint, stain, varnish, or natural.
- Paint: If painted, choose a paint color that matches the existing finish. Apply thin, even coats.
- Stain: For stained natural wicker, select a stain color that blends with the wood tone. Apply with a brush or cloth and wipe off excess.
- Varnish/Shellac/Polyurethane: These clear coats offer excellent protection.
- Apply a thin, even coat with a brush.
- Allow each coat to dry completely as per product instructions.
- Lightly sand between coats with very fine sandpaper (e.g., 320 grit) for a smoother finish.
- Apply 2-3 coats for maximum durability.
- Natural Oil (for unsealed natural wicker): Linseed oil or tung oil can nourish and protect natural wicker. Apply sparingly and wipe off excess.
- Outdoor Wicker Considerations: For outdoor wicker, use a finish that offers UV protection and water resistance. This helps prevent future water damage or sun fading.
- Final Inspection:
- Once the finish is dry, give the repaired leg a final check.
- Ensure stability by gently testing the leg.
- Check for any missed spots or areas needing touch-ups.
- The repair should blend seamlessly with the rest of the leg, both structurally and aesthetically.
Proper reinforcement and finishing are critical for the longevity of your wicker furniture repair. They not only make the repair last but also restore the beauty of your furniture.
Maintenance Tips for Wicker Furniture Longevity
After repairing your wicker furniture legs, ongoing maintenance is vital. Regular care prevents future damage and extends the life of your furniture. Proper maintenance keeps your wicker pieces looking great and strong for years to come. Neglecting maintenance can lead to similar problems appearing again.
My personal routine includes regular cleaning and protective measures. This prevents common issues like brittleness, rot, or structural weakening. Simple habits go a long way in preserving your investment. Protecting the legs from daily wear and tear is a key focus.
- Regular Cleaning:
- Dusting: Dust wicker furniture regularly with a soft brush or vacuum cleaner. This prevents dirt buildup that can abrade fibers.
- Washing: Periodically wash natural wicker with a damp cloth and mild soap. For outdoor or synthetic wicker, you can use a hose and mild detergent. Always rinse thoroughly and dry completely. How to Clean Outdoor Wicker Furniture provides detailed instructions.
- Protection from Elements:
- Sunlight: Prolonged exposure to direct sunlight can make natural wicker brittle and synthetic wicker fade. Use furniture covers or move pieces to shaded areas when not in use, especially for outdoor items.
- Moisture: Natural wicker is very susceptible to water damage and rot. Do not leave natural wicker outdoors in rain or high humidity. If it gets wet, dry it immediately. Use waterproof covers for outdoor pieces.
- Temperature Extremes: Avoid extreme temperature fluctuations, which can cause natural fibers to expand and contract, leading to cracking.
- Moisturizing Natural Wicker:
- Natural wicker can dry out and become brittle in arid climates or heated indoor environments.
- Mist natural wicker with water periodically using a spray bottle. This adds moisture to the fibers.
- You can also apply a light coat of boiled linseed oil every few months. This nourishes the wood fibers. Wipe off any excess oil.
- Addressing Wobbly Legs Early:
- If you notice a leg becoming wobbly, address it immediately.
- Check for loose screws, detached weaves, or cracking.
- Early intervention can prevent minor issues from becoming major structural breaks.
- Using Furniture Glides/Pads:
- Place felt or rubber glides on the bottom of the furniture legs.
- These pads protect the leg ends from abrasion and moisture contact with the floor.
- They also reduce noise when moving furniture.
- Proper Storage:
- If storing wicker furniture for the off-season, clean it thoroughly first.
- Store in a dry, well-ventilated area, away from extreme temperatures or pests.
- Use breathable furniture covers to protect from dust.
Consistent maintenance keeps your wicker furniture legs strong and beautiful. It makes your repair efforts last longer. These simple steps ensure your furniture continues to be a cherished part of your home for many years.
FAQ Section
Q1: How do I know if my wicker furniture leg is natural or synthetic? A1: Natural wicker, made from rattan, reed, or willow, often shows slight imperfections, varied textures, and natural wood grain. Synthetic wicker, usually resin or PVC, has a very uniform, smooth texture and consistent color. Natural wicker often feels cooler to the touch. Synthetic wicker can feel more like plastic.
Q2: Can I paint or stain my wicker furniture legs after repair? A2: Yes, you can paint or stain wicker furniture legs after repair. Ensure the repair is fully dry and smooth. Use paint or stain formulated for the type of wicker material you have (natural or synthetic). Always apply a primer first if painting, and finish with a protective sealant for durability.
Q3: What kind of glue works best for wicker repairs? A3: For natural wicker, wood glue is excellent for loose strands and minor breaks. For stronger, structural repairs on both natural and synthetic wicker, a two-part epoxy adhesive provides the best bond. Hot glue can be used for temporary holds, but it is not strong enough for permanent structural fixes.
Q4: How long does a wicker leg repair typically last? A4: A properly done wicker leg repair, especially for structural damage, can last many years. Its longevity depends on the quality of the repair, the materials used, and ongoing maintenance. Regular cleaning and protection from harsh elements significantly extend the life of the repair.
Q5: Is it possible to repair wicker legs if the entire core is rotted? A5: If the entire core of a natural wicker leg is rotted, repair is very difficult. You must remove all rotted material. Then, you need to rebuild the core with new wood or a sturdy synthetic replacement. Weaving new wicker around this new core is possible, but it is a complex and extensive repair. Sometimes, replacing the entire leg is a more practical solution.
- wicker repair
- furniture restoration
- DIY furniture repair
- wicker furniture care
- furniture legs fix

Todd Martin
Senior Writer
With over 15 years of experience in home renovation and design, I started HEG to share what I’ve learned with homeowners who want to create spaces that are both beautiful and functional. I’ve always believed in a hands-on approach, and over the years, I’ve picked up practical solutions that actually work. Through HEG, I aim to make home improvement more approachable, sharing real tips that help you create a home you truly love.