· Todd Martin · Furniture Repair · 19 min read
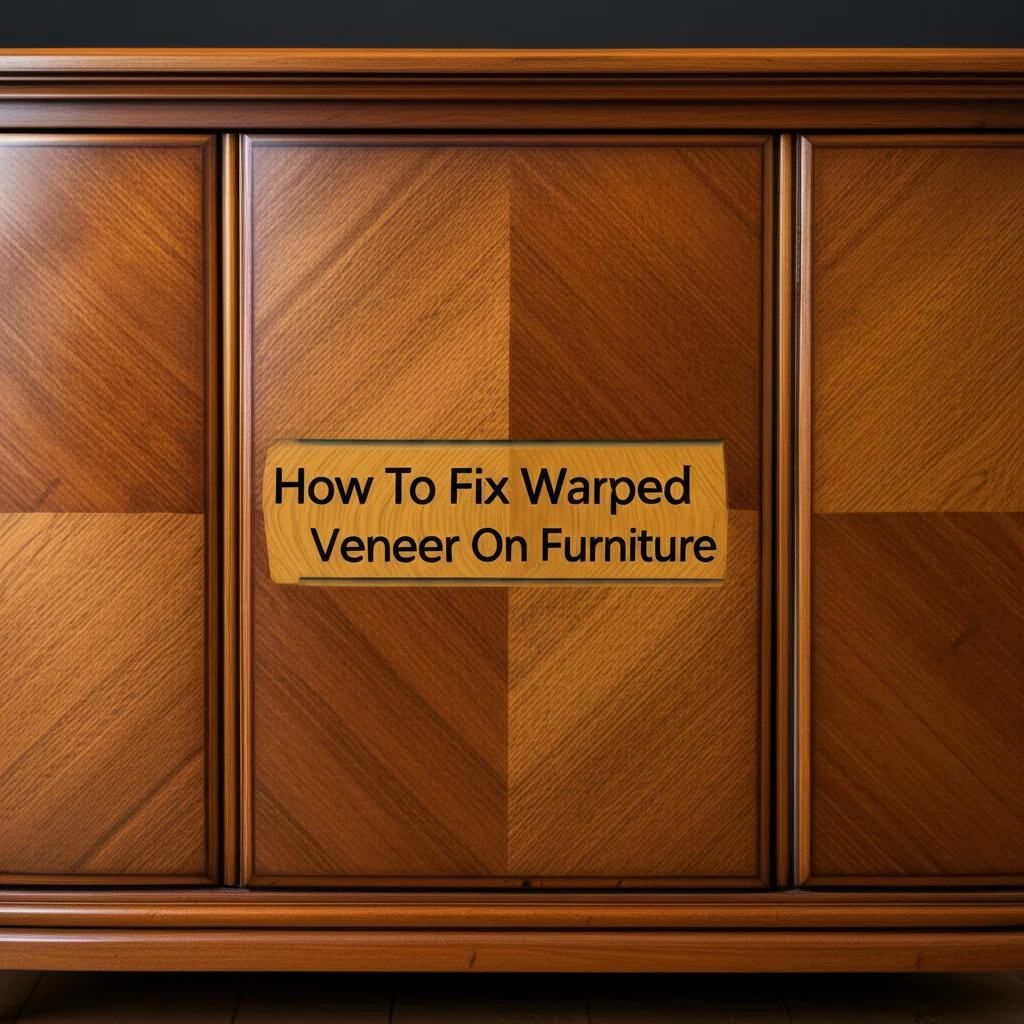
How To Fix Warped Veneer On Furniture

Fix Warped Veneer: Restore Your Furniture
Have you noticed your favorite piece of furniture showing signs of distress? Perhaps the beautiful wood veneer is rippling or lifting in places. This issue, known as warped veneer, commonly happens to veneered furniture pieces. It can be frustrating to see, but please know it is often repairable.
In this guide, I will show you how to fix warped veneer on furniture effectively. We will explore the common causes behind this problem. Then, I will walk you through step-by-step methods to repair minor bubbles and more significant lifted areas. You will also learn how to finish your repair and prevent future warping. Let’s bring your furniture back to its former glory.
Takeaway:
- Identify the cause of warped veneer to choose the right repair method.
- Minor warps and bubbles often respond to heat and pressure.
- Severely lifted veneer requires careful re-gluing and clamping.
- Proper cleaning and maintenance prevent future warping.
To fix warped veneer on furniture, first understand the cause, usually moisture or heat. For minor warps or bubbles, apply heat with an iron and then pressure to re-bond the veneer. For larger lifted sections, carefully re-adhere the veneer using wood glue and clamps, ensuring thorough drying before finishing the surface.
Understanding Warped Veneer: Causes and Types
Warped veneer occurs when the thin layer of wood veneer separates or distorts from the furniture substrate. This issue primarily happens due to environmental factors. Knowing the cause helps you choose the correct repair method. I see this problem often with older pieces.
The main culprit behind warped veneer is changes in moisture. Wood naturally expands when it absorbs moisture and contracts when it dries out. If the veneer and the core wood absorb or release moisture at different rates, tension builds. This tension causes the veneer to bubble, lift, or warp. For instance, a spill left on a table can quickly lead to localized swelling. This swelling lifts the veneer.
Heat can also contribute to veneer problems. Direct sunlight or close proximity to a heat source can dry out the veneer too quickly. This rapid drying causes it to shrink faster than the underlying wood. As a result, the glue bond weakens, and the veneer starts to warp. I have seen many instances where furniture placed near a radiator developed this problem.
There are a few types of warped veneer you might encounter. Minor warps appear as small bubbles or slight ripples on the surface. These are often superficial and relatively easy to fix. More severe warping involves large lifted sections where the veneer completely detaches from the furniture. In some cases, the veneer might even crack or break, making the repair more challenging. Identifying the type helps you prepare.
Sometimes, the original adhesive fails over time. Old glue can become brittle and lose its bonding power. This adhesive failure allows the veneer to lift, even without significant moisture or heat damage. Understanding these underlying reasons gives you a clear path forward for repair. This knowledge helps you address the root problem.
Gathering Your Tools: Essential Supplies for Veneer Repair
Before you begin to fix warped veneer on furniture, gathering the right tools is crucial. Having everything ready saves time and ensures a smooth repair process. You do not want to stop midway to find a missing item. I always prepare my workspace before starting any project.
Here is a list of the essential supplies you will need for most veneer repair jobs:
- Clothes Iron: A standard household iron is excellent for applying heat. Make sure it has a steam setting but use it dry for this purpose.
- Clean Cloth: You will need a clean, lint-free cloth to place between the iron and the veneer. This cloth protects the veneer from direct heat.
- Wood Glue or Veneer Adhesive: Choose a high-quality wood glue, preferably one that dries clear. For larger areas, specific veneer adhesives work well. This glue is essential for re-bonding the lifted sections.
- Syringe or Small Brush: A small syringe (without a needle, or a blunt-tipped one) helps apply glue precisely under bubbles. A small artist’s brush also works for this.
- Scraper or Putty Knife: A thin, flexible scraper or putty knife helps lift the veneer gently. It also helps spread glue.
- Clamps: C-clamps or bar clamps are necessary to apply consistent pressure. You will need cauls, which are flat pieces of wood, to protect the furniture surface under the clamps.
- Wax Paper: Place wax paper between the veneer and the cauls or clamps. This prevents glue from sticking to your clamping setup.
- Sandpaper: Fine-grit sandpaper (220-grit or higher) is needed for smoothing the repaired area.
- Finish (Varnish, Lacquer, Oil): You will need a matching finish to seal and protect the repaired veneer.
- Cleaning Supplies: A mild cleaner and rags help prepare the surface. You can use a gentle cleaner or even a damp cloth. For comprehensive cleaning before any repair, consider learning how to clean wood veneer.
Having these items on hand makes the repair process efficient. I always double-check my supplies before starting. This preparation step makes a big difference in the final outcome.
Fixing Minor Warps and Bubbles in Veneer
Minor warps and bubbles are common issues with veneer. These usually occur when a small amount of moisture or heat has affected the adhesive. You can often fix these problems without needing to re-glue the entire area. This method is surprisingly effective.
Here is how you can address small bubbles and minor warps:
- Clean the Surface: First, ensure the furniture surface is clean. Wipe away any dust or grime with a damp cloth. A clean surface helps the repair hold better.
- Prepare the Iron: Set your clothes iron to a medium-heat setting. Do not use the steam function. The goal is to gently warm the existing adhesive, not to introduce more moisture.
- Apply Heat and Pressure: Place a clean, dry cloth over the bubbled or warped area. Then, press the warm iron firmly onto the cloth over the problem spot. Hold it for 10-15 seconds. The heat will soften the old glue underneath the veneer.
- Check for Re-adhesion: Lift the iron and cloth. Immediately press down on the area with your hand or a flat block of wood. Apply firm, even pressure. This step helps re-bond the veneer to the substrate.
- Repeat if Necessary: If the bubble persists, repeat the heating and pressing process. Sometimes, it takes a few applications for the glue to reactivate. Be patient and work slowly.
- Consider Adding Glue (If persistent): If the bubble does not disappear after several attempts, the old glue might be completely gone. In this case, you need to introduce new glue. Carefully make a small slit along the grain of the veneer with a sharp utility knife, or gently lift an edge if possible. Use a syringe to inject a small amount of wood glue under the bubble.
After injecting glue, press down firmly with a flat block. Wipe away any excess glue that squeezes out immediately with a damp cloth. Then, place wax paper over the repair. Clamp the area using cauls for even pressure. Let it dry for at least 24 hours. This combination of heat, pressure, and sometimes new glue, typically fixes minor veneer issues.
Repairing Severely Warped or Lifted Veneer
When veneer warps significantly, or large sections lift completely, a more involved repair is needed. This process usually requires re-gluing the detached veneer. Do not worry; this task is manageable with patience and the right steps. I have helped many pieces of furniture recover from this damage.
Here are the steps to repair severely warped or lifted veneer:
- Prepare the Area: Gently lift the warped or lifted veneer further using a thin scraper or putty knife. Be very careful not to crack or break the veneer. Remove any old, loose glue particles from both the back of the veneer and the furniture surface. A light sanding with fine-grit sandpaper can help here. This creates a fresh surface for the new glue to bond. Sometimes, you may find that the underlying wood is water damaged or swollen. Address these issues first if present.
- Apply New Adhesive: Apply a thin, even layer of quality wood glue or veneer adhesive to both the back of the lifted veneer and the exposed furniture surface. Use a small brush or a glue roller for even distribution. Do not over-apply; a thin, consistent layer is best.
- Position the Veneer: Carefully lay the veneer back into its original position. Align the edges perfectly. Take your time to ensure it sits flat and smooth. Gently press it down with your hands to initially secure it.
- Remove Air Bubbles: Starting from the center of the repair, gently work outwards with a roller or a flat object. This action helps push out any trapped air bubbles and excess glue. Wipe away any glue that seeps out immediately with a damp cloth.
- Apply Pressure with Clamps: Cover the re-glued area with wax paper. Then, place flat wooden cauls (boards) over the wax paper. The cauls distribute pressure evenly. Secure the cauls with C-clamps or bar clamps. Apply firm, even pressure. If the veneer has a large crack along the warp, make sure the clamp pressure spans the crack to hold it together.
- Allow for Drying: Let the glue dry completely. This usually takes at least 24 hours, but refer to your glue’s instructions. Do not rush this step, as insufficient drying time will compromise the repair.
- Inspect and Clean: Once dry, remove the clamps, cauls, and wax paper. Inspect the repair. The veneer should now be flat and securely bonded. Clean off any residual dried glue with a damp cloth or by gently scraping it away.
This detailed approach ensures a strong, lasting repair for severely warped veneer. Taking your time during each step is key to success.
Addressing Unique Warping Scenarios
Not all warped veneer issues are straightforward. Sometimes, you encounter specific challenges that require tailored solutions. Understanding these scenarios helps you tackle even the trickiest repairs. I often find that each furniture piece presents its own quirks.
Repairing Warped Edges and Corners
Edges and corners are particularly vulnerable to warping because they receive more wear and tear. They are also prone to accidental bumps and spills. When edges lift or warp, the process is similar to a flat surface but requires more focused clamping.
- Clean and Prepare: Gently lift the edge. Clean any old adhesive.
- Apply Glue: Apply a thin layer of wood glue to both surfaces.
- Realign and Clamp: Carefully press the veneer back into place. Use painter’s tape or masking tape to hold it initially. Then, use small clamps or spring clamps with small cauls that fit the corner. If the edge is on a tabletop, and you’ve also noticed white spots on the wood table from moisture, you might need to address those separately after the veneer is secure.
- Drying: Allow ample drying time, at least 24 hours. The smaller clamping area might require extra time for a strong bond.
Dealing with Severely Curved or Multiple Warps
Some furniture pieces, like curved cabinet doors or chair backs, have veneers applied to non-flat surfaces. When these warp, the repair can be more complex due to the inherent curve.
- Heat Application: For minor warps on curved surfaces, the iron method still works. Use less pressure and a slightly lower heat setting.
- Flexible Clamping: For larger detached areas, after applying glue, you might need to create custom cauls that match the curve of the furniture. These can be made from flexible wood or even layers of cardboard. Another option is using strong elastic bands or straps to apply even pressure around the curve.
- Multiple Applications: You might need to work on smaller sections at a time if the curve is severe. Let one section dry, then move to the next.
Fixing Warped Veneer with Missing Pieces
Sometimes, the veneer is not just warped but also chipped or has small pieces missing. This requires a two-step approach: re-attaching the existing veneer, then patching the gaps.
- Re-attach Existing Veneer: Follow the steps for severely warped veneer. Secure all existing pieces first.
- Patching: Once dry, you will need a matching veneer patch. Cut the patch slightly larger than the missing area. Trace the exact shape of the gap onto the new veneer, then cut it precisely. Glue the patch into place. You can also learn how to fix chipped paint on wood furniture if the damage extends to the finish.
- Sanding and Finishing: After the patch dries, carefully sand it flush with the surrounding veneer. Then, apply a matching finish.
These unique scenarios require a bit more ingenuity, but they are entirely within reach for a determined DIYer. Patience remains your best tool.
Finishing Touches: Sanding and Refinishing Veneer
After you successfully fix warped veneer, the work is not quite finished. The repaired area might look slightly different from the rest of the furniture. You need to blend the repair seamlessly and protect the veneer from future damage. This involves careful sanding and refinishing.
Here is how to complete the finishing touches:
Light Sanding: Once the glue is completely dry (at least 24 hours), lightly sand the repaired area. Use fine-grit sandpaper, such as 220-grit or higher. Sand gently along the grain of the wood. The goal is to smooth out any unevenness or dried glue spots. Avoid aggressive sanding, as veneer is thin. You do not want to sand through it. This step helps the new finish adhere properly.
Clean the Surface Again: After sanding, wipe away all sanding dust with a tack cloth or a slightly damp cloth. A clean surface is essential for a smooth finish. Ensure no dust particles remain that could mar your finish. For general wood care, knowing how to clean wooden furniture properly is always helpful.
Choose Your Finish: Select a finish that matches your furniture’s existing look. Common options include:
- Varnish: Offers good durability and protection.
- Lacquer: Dries quickly and provides a hard, protective coat.
- Oil Finish: Penetrates the wood, enhancing its natural beauty. It requires more maintenance but is easy to repair.
- Polyurethane: Provides excellent durability and moisture resistance.
Consider testing the finish on an inconspicuous area first. This helps ensure it blends well.
Apply the Finish: Apply the chosen finish according to the manufacturer’s instructions. Use a brush, foam applicator, or spray gun. Apply thin, even coats. Allow each coat to dry completely before applying the next. Lightly sand between coats with very fine sandpaper (e.g., 320-grit) if recommended by the product. This creates a smoother final surface.
Cure Time: Allow the finish to cure fully. This can take several days or even weeks, depending on the product. During this time, avoid placing heavy objects on the surface. This ensures the finish hardens properly and offers maximum protection.
By following these finishing steps, your repaired veneer will blend in beautifully. The furniture will look restored and ready for use. This complete process makes your repair truly shine.
Preventing Future Veneer Warping: Care and Maintenance
After putting in the effort to fix warped veneer, you want to ensure it stays in pristine condition. Preventing future warping is simpler than repairing it. Good care and maintenance habits will extend the life of your veneered furniture. I always tell my clients that prevention is key.
Here are essential tips to prevent veneer from warping again:
- Control Humidity Levels: Veneer is highly sensitive to changes in humidity. Use a humidifier in dry climates during winter months. Use a dehumidifier in humid climates during summer. Aim for a consistent indoor humidity level between 40% and 55%. This stability minimizes expansion and contraction of the wood.
- Protect from Moisture:
- Wipe Spills Immediately: Liquid is a primary enemy of veneer. If you spill anything, wipe it up at once. Do not let water or other liquids sit on the surface.
- Use Coasters and Trivets: Always place coasters under drinks. Use trivets or hot pads under hot dishes. This protects the veneer from both moisture rings and heat damage.
- Avoid Wet Cleaning: Do not clean veneered furniture with excessive water. Use a damp cloth, then immediately dry the surface. You can use specialized wood cleaners. Knowing how to clean wood furniture with vinegar can be an effective, gentle cleaning method.
- Shield from Direct Sunlight and Heat:
- Position Furniture Carefully: Avoid placing veneered furniture directly in front of sunny windows or near heat sources like radiators, fireplaces, or heating vents. Intense heat and UV rays can dry out the veneer and weaken the adhesive.
- Use Window Coverings: Curtains or blinds can block direct sunlight when not in use.
- Regular Cleaning and Polishing:
- Dust Regularly: Use a soft, dry cloth to dust your furniture regularly. This prevents abrasive particles from scratching the surface.
- Use Appropriate Polish: Apply a quality furniture polish or wax as needed. This creates a protective barrier and keeps the veneer moisturized. Avoid silicone-based polishes, as they can build up and attract dust. For more in-depth cleaning, you can review guides on how to clean wooden furniture.
- Handle with Care: When moving veneered furniture, lift it rather than dragging it. Dragging can stress the joints and cause veneer edges to lift or chip. Be gentle with your furniture.
By implementing these preventative measures, you significantly reduce the risk of future warping. Your veneered furniture will remain beautiful and intact for many years. Regular attention to these details pays off in the long run.
When to Seek Professional Help for Veneer Repair
While many veneer warping issues are fixable at home, some situations call for professional assistance. Knowing when to call in an expert can save you time, effort, and potentially prevent further damage. I recommend this when the complexity exceeds your comfort level.
Consider seeking professional help if:
- Extensive Damage: The entire veneer surface is severely warped, cracked, or disintegrating. If more than 50% of the veneer needs re-gluing or patching, a professional can complete the job more efficiently and effectively. They have specialized tools and techniques for large-scale repairs.
- Valuable or Antique Furniture: If the piece is a valuable antique or has significant sentimental worth, a professional restorer is the best choice. They have the expertise to preserve the furniture’s integrity and value. They know how to handle delicate, older veneers.
- Complex Veneer Patterns: Some furniture features intricate veneer patterns, such as marquetry or parquetry. Repairing these patterns requires specialized skills to match grains and patterns seamlessly. A DIY repair might unintentionally ruin the aesthetic.
- Underlying Structural Issues: If the warping is due to significant structural damage to the core wood, such as extensive water damaged swollen wood furniture or wood rot, a professional can address both the structural problem and the veneer. Veneer repair alone will not fix the root cause in such cases.
- Lack of Proper Tools or Experience: You might not have the necessary clamps, specialized glues, or confidence for complex repairs. Professionals have all the required equipment and extensive experience. This ensures a high-quality repair.
- Time Constraints: Repairing severe veneer damage can be time-consuming. If you lack the time or patience, a professional can complete the work efficiently.
A professional can assess the damage accurately. They can also provide a detailed plan for restoration. While there is a cost involved, it is often a worthwhile investment for preserving cherished furniture pieces. Do not hesitate to get a quote.
FAQ Section
Q1: Can I fix warped veneer without removing it?
Yes, for minor warps and bubbles, you can often fix warped veneer without removal. Use a warm iron over a damp cloth to reactivate the old adhesive. Then, apply firm pressure to re-bond the veneer. If glue is missing, carefully inject wood glue under the bubble through a small slit. This method works well for surface-level issues.
Q2: What causes veneer to warp?
Veneer warps primarily due to changes in moisture and temperature. Wood expands with humidity and contracts when dry. If the veneer and the underlying wood react differently, tension builds, causing the veneer to lift or bubble. Direct heat, like sunlight or radiators, can also dry out and shrink veneer, weakening the glue bond.
Q3: How long does veneer repair take to dry?
The drying time for veneer repair depends on the type of glue used and the humidity. Most wood glues require at least 24 hours to dry completely under clamps. For a full cure and maximum strength, it is best to wait 48 to 72 hours before handling the furniture or applying new finishes. Always follow the specific glue’s instructions.
Q4: Can warped veneer be re-used after being removed?
It is generally not advisable to re-use warped veneer after complete removal. Once veneer warps significantly, it becomes brittle and prone to cracking. It also loses its ability to lay flat. It is better to replace it with new veneer if you must remove it entirely. This ensures a smoother, more durable repair.
Q5: What kind of glue is best for fixing warped veneer?
For fixing warped veneer, a high-quality wood glue, such as PVA wood glue (yellow or white glue), is generally best. These glues offer strong bonds and are easy to work with. For water-resistant applications, a waterproof wood glue can be suitable. Ensure the glue is designed for wood and dries clear.
Conclusion
Seeing warped veneer on your furniture can be discouraging. However, I hope this guide shows you that it is a fixable problem. You now have the knowledge and steps to fix warped veneer on furniture, whether it is a small bubble or a larger lifted section. We covered understanding the causes, gathering your tools, and executing the repairs.
Remember, patience and attention to detail are your best allies in furniture repair. From carefully applying heat to re-adhere minor bubbles to precisely clamping severely lifted areas, each step contributes to a successful outcome. We also discussed the importance of sanding and refinishing to blend the repair seamlessly. Finally, prevention through proper care and maintenance is vital. By controlling humidity and protecting your furniture from moisture and heat, you can keep your veneered pieces looking beautiful for years to come.
Do not let warped veneer diminish the beauty of your cherished furniture. With these tips, you can restore its original charm. Take on this DIY project and enjoy the satisfaction of bringing your furniture back to life. Your furniture will thank you for it.
- veneer repair
- warped furniture
- wood furniture repair


