· Todd Martin · Home Improvement · 20 min read
How To Paint Unfinished Cabinets
Transform Your Home: How to Paint Unfinished Cabinets
Are you dreaming of a fresh new look for your kitchen or bathroom? Painting unfinished cabinets offers a fantastic opportunity to personalize your space and boost its appeal. This project allows you to choose your desired color and finish. It also saves money compared to buying new units.
Learning how to paint unfinished cabinets properly ensures a durable and beautiful result. Unfinished wood provides a perfect canvas, ready to absorb primer and paint. I will guide you through each necessary step for a professional-looking finish. We will cover everything from initial preparation to final sealing. Get ready to transform your home with confidence.
Takeaway
Painting unfinished cabinets creates a beautiful and lasting finish. Here are the key steps:
- Prepare surfaces by cleaning and light sanding.
- Apply a quality primer to ensure paint adhesion.
- Apply paint in thin, even coats.
- Finish with a protective topcoat.
Painting unfinished cabinets involves several important steps. First, ensure the wood is clean and smooth. Then, apply a wood-specific primer. After priming, apply two to three thin coats of high-quality paint. Finally, protect the painted surface with a durable topcoat for long-lasting beauty.
Why Paint Unfinished Cabinets? Benefits and Considerations
Painting unfinished cabinets provides many benefits for homeowners. It is a cost-effective way to update your home’s appearance. You can achieve a custom look without replacing entire cabinet sets. This choice allows for unique color and style selections.
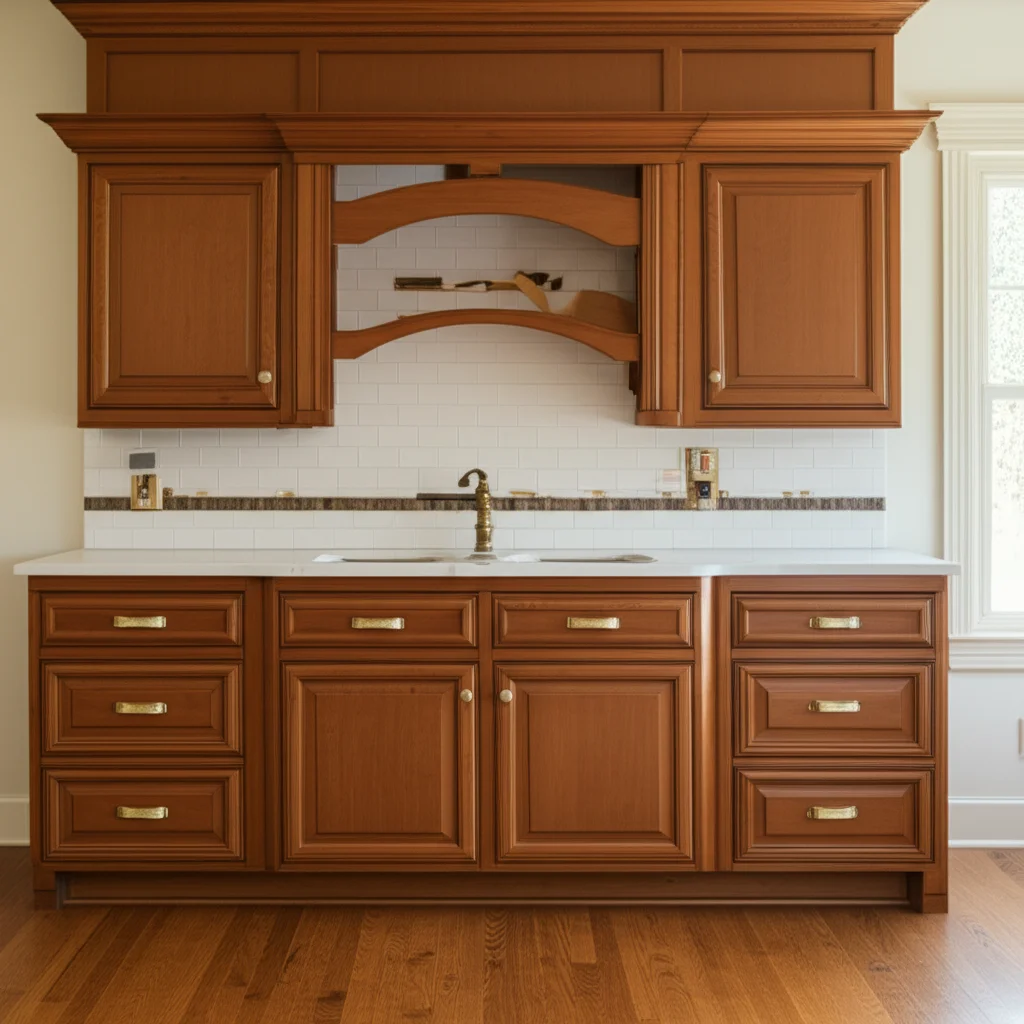
Unfinished cabinets are new, raw wood surfaces. They absorb paint well because they lack previous finishes. This means less preparation work compared to painting already finished cabinets. It also ensures better adhesion for the new paint. You gain full control over the final outcome.
Cost-Effective Home Makeover
Opting to paint unfinished cabinets significantly reduces expenses. New custom cabinets can be very costly. Refinishing existing cabinets is also an option, but often requires more work. With unfinished cabinets, you bypass the cost of pre-finishing. You also avoid the high price tag of factory-painted units.
This project uses common painting supplies. These items are readily available at most hardware stores. You can save money on labor by doing it yourself. This makes it an ideal DIY project for budget-conscious homeowners.
Customization and Personal Style
Unfinished cabinets offer a blank slate for your creativity. You are not limited by existing colors or finishes. You can select any paint color that matches your home’s decor. This includes bold statements or subtle tones. You can also choose from various paint types like latex, oil-based, or hybrids.
You control the sheen, from matte to high-gloss. This level of customization is hard to achieve with pre-finished options. You create a space that truly reflects your personal style. Your cabinets become a unique feature of your home.
Enhanced Durability and Protection
Applying paint and a topcoat adds a protective layer to the wood. This layer shields the cabinets from moisture, stains, and daily wear. Unfinished wood is vulnerable to damage. Painting them makes them more resilient. This is especially true in areas like kitchens and bathrooms.
A good paint job extends the life of your cabinets. It prevents the wood from warping or cracking. This protection helps maintain their appearance for many years. Regular cleaning of your painted cabinets will keep them looking great. You can also learn how to clean painted cabinets properly.
Gathering Your Tools and Materials for Cabinet Painting
Before you begin painting, assemble all necessary tools and materials. Having everything on hand makes the process smooth and efficient. Missing items can cause delays and frustration. A well-stocked workspace ensures a quality finish.
This project requires more than just paint. You need items for cleaning, sanding, and application. Proper ventilation and personal protective equipment are also important. Take time to gather everything on this list.
Essential Supplies for Preparation
Preparation is key for a successful paint job on unfinished cabinets. Start with thorough cleaning. Use a good degreaser or cleaner to remove any dirt or oils from the wood surface. Even new unfinished wood can have residue from manufacturing or handling.
You will need sanding tools to smooth the wood. This ensures primer and paint adhere well. A tack cloth removes dust after sanding. Painter’s tape protects surrounding areas. Drop cloths shield floors and countertops from spills.
- Degreaser or all-purpose cleaner: To remove dirt, grease, and grime.
- Clean rags or sponges: For cleaning the cabinet surfaces.
- Fine-grit sandpaper (180-220 grit): For light sanding between coats and smoothing.
- Sanding block or orbital sander: For easier and more even sanding.
- Tack cloth: To pick up fine dust particles.
- Painter’s tape: To protect hinges, walls, and other unpainted surfaces.
- Drop cloths or plastic sheeting: To cover floors and countertops.
- Screwdriver (manual or power): To remove cabinet doors and hardware.
Choosing the Right Primers and Paints
Selecting the correct primer and paint is crucial for unfinished cabinets. A good primer seals the wood and prevents bleed-through from tannins. It also creates a uniform surface for the paint. Choose a primer specifically designed for wood or bare surfaces.
For paint, consider durability and ease of cleaning. Acrylic-latex or alkyd (oil-based) paints are popular choices. Hybrid enamel paints offer benefits of both. A topcoat, or clear coat, protects the painted surface. This adds to the longevity and durability of your new finish.
- Wood primer (stain-blocking, shellac, or high-quality acrylic latex): Essential for sealing raw wood and promoting adhesion.
- High-quality cabinet paint (acrylic latex, alkyd, or hybrid enamel): Choose a paint designed for cabinets and high-traffic areas.
- Clear protective topcoat (polyurethane or polycrylic): Adds durability and protects the paint.
- Paint stirrer: For mixing paint and primer.
- Paint tray liners: For easier cleanup.
Application Tools and Safety Gear
The right application tools ensure a smooth, professional finish. High-density foam rollers provide a smooth surface with minimal texture. Quality brushes are good for corners and detailed areas. A paint sprayer can give the smoothest finish if you have one.
Always prioritize safety during any painting project. Wear appropriate gear to protect yourself. Good ventilation is also essential. This helps fumes dissipate and speeds up drying.
- High-quality angled brush (2-2.5 inches): For cutting in and detailed areas.
- Small foam rollers or cabinet-specific rollers: For smooth, even coverage on flat surfaces. Avoid brush marks when painting kitchen cabinets by using a good roller.
- Paint sprayer (optional): For the smoothest possible finish.
- Respirator or N95 mask: To protect against paint fumes and dust.
- Safety glasses: To protect your eyes.
- Gloves: To keep paint off your hands.
Essential Preparation for Painting Unfinished Cabinets
Proper preparation is the most important step when painting unfinished cabinets. Skipping these steps can lead to a poor finish or peeling paint. A clean, smooth, and dust-free surface ensures excellent adhesion. It also gives you a professional-looking result.
Take your time during this phase. Rushing here often means doing the work again later. Your hard work in the following steps depends on a solid foundation. This stage prepares the raw wood for its new look.
Disassembly and Cleaning the Wood
First, remove all cabinet doors, drawers, and hardware. Label each item to ensure easy reassembly later. A simple numbering system works well. This allows you to paint all surfaces evenly. It also protects your hardware from paint.
Next, thoroughly clean all unfinished wood surfaces. Even new wood can have dust, oils from handling, or manufacturing residue. Use a degreaser or an all-purpose cleaner. Wipe down all surfaces, then rinse with a clean, damp cloth. Allow the wood to dry completely before moving on. For more details on cleaning, refer to how to clean cabinets before painting.
- Remove doors and drawers: Use a screwdriver to detach them.
- Remove hardware: Take off hinges, pulls, and knobs.
- Label everything: Use tape and a marker to label each piece and its location.
- Clean surfaces: Use a degreaser and a clean rag.
- Rinse and dry: Wipe with a damp cloth and let air dry completely.
Sanding and Dust Removal
Sanding is crucial for unfinished cabinets. It smooths any imperfections in the raw wood. It also creates a slightly rough surface, which primer and paint can grip better. Start with a medium-grit sandpaper (around 120-150 grit) if the wood is very rough. Then, follow with a fine-grit (180-220 grit) sandpaper. Sand with the grain of the wood.
After sanding, remove all dust. Use a vacuum with a brush attachment first. Then, wipe every surface with a tack cloth. Repeat this step until no dust remains. Dust will cause bumps and an uneven finish if not removed.
- Initial sanding: Use 120-150 grit sandpaper if needed to smooth rough areas.
- Final sanding: Use 180-220 grit sandpaper for a smooth finish and better adhesion. Sand with the wood grain.
- Vacuum dust: Use a vacuum cleaner with a brush attachment.
- Wipe with tack cloth: Remove all remaining fine dust particles.
Protecting the Work Area
Protecting your work area prevents paint spills and splatters. This step saves you a lot of cleanup time later. Lay down drop cloths or plastic sheeting on floors. Cover countertops and any appliances nearby. Use painter’s tape to mask off areas that you do not want painted. This includes walls adjacent to cabinet frames, inside cabinet boxes (unless you plan to paint inside of cabinets), and drawer openings.
Make sure the tape forms a tight seal to prevent paint from seeping underneath. Spend extra time on this step. A well-protected area leads to a cleaner finished project.
- Lay drop cloths: Cover floors and countertops completely.
- Mask adjacent surfaces: Use painter’s tape on walls, edges, and inside cabinet frames.
- Ensure tight seals: Press down firmly on the tape edges.
Priming Unfinished Wood: The Crucial Step
Priming is a non-negotiable step when you paint unfinished cabinets. It prepares the raw wood for paint in several important ways. Primer creates a barrier, preventing wood tannins from bleeding through. These tannins can cause yellow or brown stains in your final paint color, especially with light paints.
Primer also provides a uniform surface. Raw wood absorbs paint unevenly. Primer evens out this absorption. This results in a smoother, more consistent paint finish. It also improves paint adhesion, making your paint job last longer.
Why Primer is Essential for Unfinished Cabinets
Unfinished wood is porous. It acts like a sponge, soaking up the first coat of any liquid. Without primer, your paint would absorb unevenly, leading to a splotchy finish. Primer seals the wood grain. This creates a uniform surface for the topcoat.
Some woods, like oak or pine, contain natural tannins. These are colored compounds that can bleed through light-colored paints. A quality stain-blocking primer stops this bleed-through. It is a critical step for preventing future discoloration.
Choosing the Right Primer Type
Several types of primers work well on unfinished wood. Each has its own benefits. Shellac-based primers are excellent for blocking stains. They dry quickly and offer good adhesion. Oil-based primers also block stains well and provide a durable base. They take longer to dry but offer good leveling properties.
Water-based (acrylic latex) primers are easier to clean up and dry faster. However, ensure they are labeled “stain-blocking” if you are working with tannin-rich woods. Choose a high-quality primer. It makes a significant difference in your final paint job.
- Shellac-based primer: Best for blocking heavy stains and knots. Dries fast.
- Oil-based primer: Good for blocking stains and providing a smooth base. Longer dry time.
- High-quality water-based (acrylic latex) stain-blocking primer: Easier cleanup, faster drying, good for most woods.
Application of Primer
Apply primer in thin, even coats. Avoid applying it too thick, as this can lead to drips or an uneven surface. Use a high-quality brush for corners and detailed areas. Use a small foam roller for flat surfaces. Rollers help achieve a smooth, consistent finish.
Allow the first coat of primer to dry completely according to the manufacturer’s instructions. This usually takes a few hours. Lightly sand the primed surface with 220-grit sandpaper. This creates a smooth base for the paint. Wipe off any dust with a tack cloth before applying a second coat if needed. Two thin coats of primer are often better than one thick one.
- Apply thin, even coat: Use a brush for details and a roller for flat areas.
- Allow to dry: Follow manufacturer’s instructions for drying time.
- Lightly sand: Use 220-grit sandpaper to smooth the primed surface.
- Clean dust: Wipe thoroughly with a tack cloth.
- Apply second coat (if needed): Repeat if wood grain or stains are still visible.
Painting Unfinished Cabinets: Techniques for Success
Once your cabinets are properly primed, it’s time for the exciting part: painting. Applying paint correctly is crucial for achieving a beautiful, durable finish. Remember to work in a well-ventilated area. Take your time with each coat.
Focus on even coverage and smooth application. The goal is to build up color gradually, not to cover everything in one heavy coat. This section will guide you through the best painting practices for unfinished cabinets.
Application of First Paint Coat
Begin by applying your first coat of paint. Use a high-quality angled brush for detailed areas and corners. Then, use a small, high-density foam roller for flat surfaces like doors and drawer fronts. Rollers create a smoother finish with fewer brush marks. For larger areas like the cabinet frames, a roller works well too.
Apply the paint in thin, even coats. Overloading the brush or roller can lead to drips and runs. Work in sections, maintaining a wet edge to avoid lap marks. Allow the first coat to dry completely. Drying times vary based on paint type, humidity, and temperature. Always check the manufacturer’s recommendations.
- Use appropriate tools: Brush for details, foam roller for flat surfaces.
- Apply thin, even coats: Avoid drips and runs.
- Work in sections: Maintain a wet edge for a seamless finish.
- Allow complete drying: Follow paint manufacturer’s instructions.
Sanding Between Coats and Second Coat Application
After the first coat dries, lightly sand the entire painted surface. Use a very fine-grit sandpaper, such as 220-grit or higher. This step removes any small imperfections, dust nibs, or slight texture from the first coat. It also helps the next coat adhere better. Be gentle, you are just smoothing, not removing the paint.
After sanding, thoroughly wipe down all surfaces with a tack cloth. Remove all sanding dust. Now, apply your second coat of paint using the same thin, even technique. Two coats usually provide good coverage and color depth. For a darker or more vibrant color, a third coat may be necessary. Always sand lightly and clean between coats. This method works well, even for specific wood types like painting oak kitchen cabinets.
- Lightly sand: Use 220-grit or higher sandpaper after the first coat.
- Remove dust: Use a tack cloth thoroughly.
- Apply second coat: Use the same thin, even application method.
- Assess coverage: Determine if a third coat is needed for full opacity.
Achieving a Smooth Finish
Several techniques help achieve a smooth, professional finish. Using a good quality paint designed for cabinets is essential. These paints often have better leveling properties. High-density foam rollers minimize stippling and brush marks. If using a brush, “lay off” the paint with a light, final pass. This helps smooth out brush strokes.
For the smoothest possible finish, consider using a paint sprayer. A sprayer applies paint very evenly and without brush or roller marks. However, sprayers require more setup and masking. They also need practice to use correctly. If you’re looking for tips on how to paint kitchen cabinets without brush marks, proper technique and tools are key.
- Use cabinet-specific paint: Look for paints with good leveling.
- Utilize foam rollers: They reduce texture and marks.
- Practice good brush technique: “Lay off” paint with light strokes.
- Consider a paint sprayer (optional): For the highest level of smoothness.
Sealing and Finishing Your Painted Cabinets
After the final coat of paint has dried, the project is not quite finished. Sealing your painted cabinets with a clear topcoat is a vital step. This topcoat provides protection and durability. It shields your beautiful new paint job from daily wear and tear.
A good topcoat prevents chips, scratches, and moisture damage. It also makes the cabinets easier to clean. This final layer ensures your hard work lasts for many years. Choosing the right topcoat and applying it properly is important.
The Importance of a Protective Topcoat
Paint alone, even high-quality paint, can be vulnerable to damage. Kitchen and bathroom cabinets face constant use. They are exposed to moisture, grease, and impacts. A clear protective topcoat adds a durable barrier. This barrier makes the painted surface much more resilient.
It helps the paint resist scratches, scuffs, and chips. It also seals the paint, making it more resistant to water and food stains. The topcoat enhances the longevity of your cabinet finish. This means your cabinets will look good for a longer time.
Choosing the Right Topcoat
Several types of clear topcoats are available. Each offers different levels of durability and finish. Polycrylic is a popular choice for cabinets. It is water-based, low odor, and dries quickly. It does not yellow over time, making it ideal for light-colored paints.
Polyurethane is another strong option. It is very durable but can have a stronger odor and longer drying times. Oil-based polyurethane can amber over time, which may affect white or very light colors. Choose a topcoat that matches your paint’s base (water-based with water-based, oil-based with oil-based).
- Polycrylic: Water-based, fast-drying, low odor, non-yellowing. Great for light paints.
- Polyurethane: Very durable. Choose water-based for non-yellowing on light colors.
- Match base: Use water-based topcoat with water-based paint, oil-based with oil-based.
Application of Topcoat
Apply the clear topcoat in thin, even coats. Just like with paint, multiple thin coats are better than one thick one. Use a high-quality brush or a foam roller for application. Ensure the previous paint coat is fully cured before applying the topcoat. This means letting it dry for at least 24-72 hours, depending on the paint and conditions.
Lightly sand between coats of topcoat with very fine-grit sandpaper (320-400 grit). This smooths any imperfections and ensures good adhesion for the next layer. Wipe off dust with a tack cloth. Two to three coats of topcoat generally provide excellent protection. Allow the final coat to cure completely before reattaching hardware and hanging doors. This curing process can take several days to a few weeks.
- Apply thin coats: Use a brush or foam roller.
- Ensure paint is cured: Wait 24-72 hours after final paint coat.
- Lightly sand between coats: Use 320-400 grit sandpaper.
- Clean dust: Wipe with a tack cloth.
- Apply 2-3 coats: For optimal protection.
- Allow full cure: Wait several days to weeks before heavy use.
Common Mistakes to Avoid When Painting Unfinished Cabinets
Even with the best intentions, mistakes can happen when painting cabinets. Knowing these common pitfalls can help you avoid them. Proper planning and attention to detail are your best defenses. Avoiding these errors ensures a smooth process and a beautiful, long-lasting finish.
This section covers key areas where painters often stumble. Learn from these examples to make your project successful. Your efforts will result in cabinets you can be proud of. If you face issues like paint peeling off cabinets, understanding the cause is the first step to repair.
Inadequate Surface Preparation
One of the biggest mistakes is not preparing the surface properly. This includes skipping cleaning, sanding, or dust removal. If the wood is not clean, primer and paint will not adhere well. Any grease or grime will prevent proper bonding.
Failing to sand means the surface is too smooth for paint to grip effectively. This leads to poor adhesion and paint peeling later. Leaving dust on the surface causes bumps and an uneven finish. Always clean, sand, and remove all dust before priming. This foundation is critical for a lasting paint job.
- Don’t skip cleaning: Always remove dirt, grease, and residue.
- Don’t skip sanding: Sanding provides proper adhesion.
- Don’t leave dust: Dust causes imperfections in the finish.
Not Using Primer or Using the Wrong Type
Painting directly onto unfinished wood without primer is a major error. Unfinished wood is very absorbent. Without primer, paint soaks in unevenly. This creates a splotchy, unprofessional look. Also, wood tannins can bleed through the paint, causing discoloration.
Using the wrong type of primer is also a mistake. For example, using a non-stain-blocking primer on oak can lead to tannin bleed. Using a primer incompatible with your paint can cause adhesion issues. Always use a high-quality primer specifically for wood. Ensure it is compatible with your chosen paint.
- Always use primer: It’s essential for adhesion and even finish.
- Choose correct primer: Use stain-blocking for tannin-rich woods.
- Ensure compatibility: Primer and paint must work together.
Applying Too Much Paint or Not Enough Coats
Applying paint too thickly is a common mistake. Thick coats lead to drips, runs, and a very noticeable texture. They also take longer to dry and are more prone to chipping. It’s better to apply multiple thin coats. This allows each layer to dry properly and cures harder.
On the other hand, applying too few coats results in poor coverage. The original wood or primer may show through. The color will not be as vibrant or consistent. It also reduces the durability of the finish. Aim for at least two to three thin, even coats of paint for full coverage and durability.
- Avoid thick coats: They cause drips and runs.
- Apply multiple thin coats: This provides better finish and durability.
- Ensure full coverage: Two to three coats are usually necessary.
Insufficient Drying and Curing Times
Rushing the drying process between coats or before reassembly is a critical error. Paint needs time to dry and cure. Drying means the paint feels dry to the touch. Curing means the paint has hardened completely. This can take days or even weeks.
If you sand or apply another coat before the previous one is dry, you can ruin the finish. Reassembling cabinets or putting items inside before the paint is cured can cause sticking, chipping, or damage. Always follow the manufacturer’s recommended drying and curing times. Patience leads to a durable and beautiful result.
- Respect drying times: Wait for each coat to dry to the touch.
- Allow full curing: Give the final coat ample time to harden.
- Avoid premature use: Do not reassemble or use cabinets too soon.
Maintaining Your Newly Painted Cabinets
Congratulations! You have successfully painted your unfinished cabinets. Now, the key is to maintain their beautiful new finish. Proper care ensures your hard work lasts for many years. Regular cleaning and attention to potential issues will keep your cabinets looking fresh.
Maintaining painted cabinets is simple but important. This section provides tips for everyday care and addressing minor problems. Your diligence will protect your investment.
Regular Cleaning for Longevity
Regular cleaning is essential for keeping your painted cabinets looking their best. Dust and kitchen grease can accumulate on cabinet surfaces. This can dull the finish and make them look dirty. Use a soft, damp cloth for routine cleaning. Avoid abrasive cleaners or scrubbing pads. These can scratch or damage the paint.
For tougher grease or grime, use a mild soap and water solution. Dish soap works well. Wipe the cabinets with the solution, then rinse with a clean, damp cloth. Dry immediately with a soft towel to prevent water spots or streaks. Consistent, gentle cleaning will maintain the finish. You can find more tips on how to clean wood cabinets for general care.
- Dust regularly: Use a soft, dry cloth.
- Clean with damp cloth: For light dirt.
- Use mild soap for grease: Mix with water, wipe, rinse, and dry.
- Avoid harsh cleaners: They can damage the paint.
Protecting Against Wear and Tear
Painted cabinets, especially in kitchens, are subject to daily wear. Take steps to protect them from excessive damage. Use cabinet bumpers on doors and drawers. These small, clear pads prevent the wood from banging against the frame. This reduces wear on the paint around contact points.
Avoid leaving wet rags or sponges on painted surfaces. Moisture can soften paint over time. Be mindful of sharp objects or heavy impacts. These can cause chips or scratches. Using liners in drawers and shelves also helps protect the interior paint.
- Use cabinet bumpers: Protect against impacts.
- Avoid prolonged moisture: Do not leave wet items on surfaces.
- Be careful with sharp objects: Prevent scratches and chips.
- Use drawer/shelf liners: Protect interior surfaces.
- cabinet painting
- DIY cabinets
- unfinished wood
- kitchen renovation
- home upgrade

Todd Martin
Senior Writer
With over 15 years of experience in home renovation and design, I started HEG to share what I’ve learned with homeowners who want to create spaces that are both beautiful and functional. I’ve always believed in a hands-on approach, and over the years, I’ve picked up practical solutions that actually work. Through HEG, I aim to make home improvement more approachable, sharing real tips that help you create a home you truly love.