· Todd Martin · Home Improvement · 23 min read
How To Measure Cabinet Doors
Unlock Perfect Fits: How To Measure Cabinet Doors
Do you dream of updating your kitchen or bathroom cabinets? Perhaps you want to replace old, worn-out doors with a fresh, new style. Getting the right fit for new cabinet doors starts with precise measurement. This is a crucial step that many people overlook or get wrong. In this guide, I will share exactly how to measure cabinet doors, ensuring your project goes smoothly.
Accurate measurement prevents costly mistakes and ensures your new doors hang perfectly. We will cover the tools you need, different door types, and common pitfalls to avoid. By the end, you will have the knowledge and confidence to measure your cabinet doors like a professional. Let’s begin your journey to beautiful, well-fitting cabinet doors.
Takeaway
Achieving perfectly fitting cabinet doors requires careful measurement.
- Always use a metal tape measure for accuracy.
- Measure both width and height multiple times.
- Distinguish between overlay and inset door types before measuring.
- Account for hinge type and door swing when planning.
- Double-check all figures before placing an order.
To measure cabinet doors, first determine if they are overlay (covering the frame) or inset (sitting within the frame). For overlay doors, measure the opening and add the desired overlay amount to both width and height. For inset doors, measure the exact opening and subtract a small clearance gap for smooth operation.
Understanding Cabinet Door Measurement Basics
Getting the correct measurements for your cabinet doors is the most important step in any cabinet update project. A good measurement ensures your new doors fit well and operate smoothly. Without proper sizing, doors can rub, sag, or leave unsightly gaps. This applies whether you are replacing existing doors or making new ones.
Different types of cabinet doors require different measuring approaches. Knowing your cabinet style is key before you pick up your tape measure. Most cabinets feature either overlay or inset doors, and some modern ones use frameless designs. Each design has specific measurement rules to follow.
Common Cabinet Door Styles:
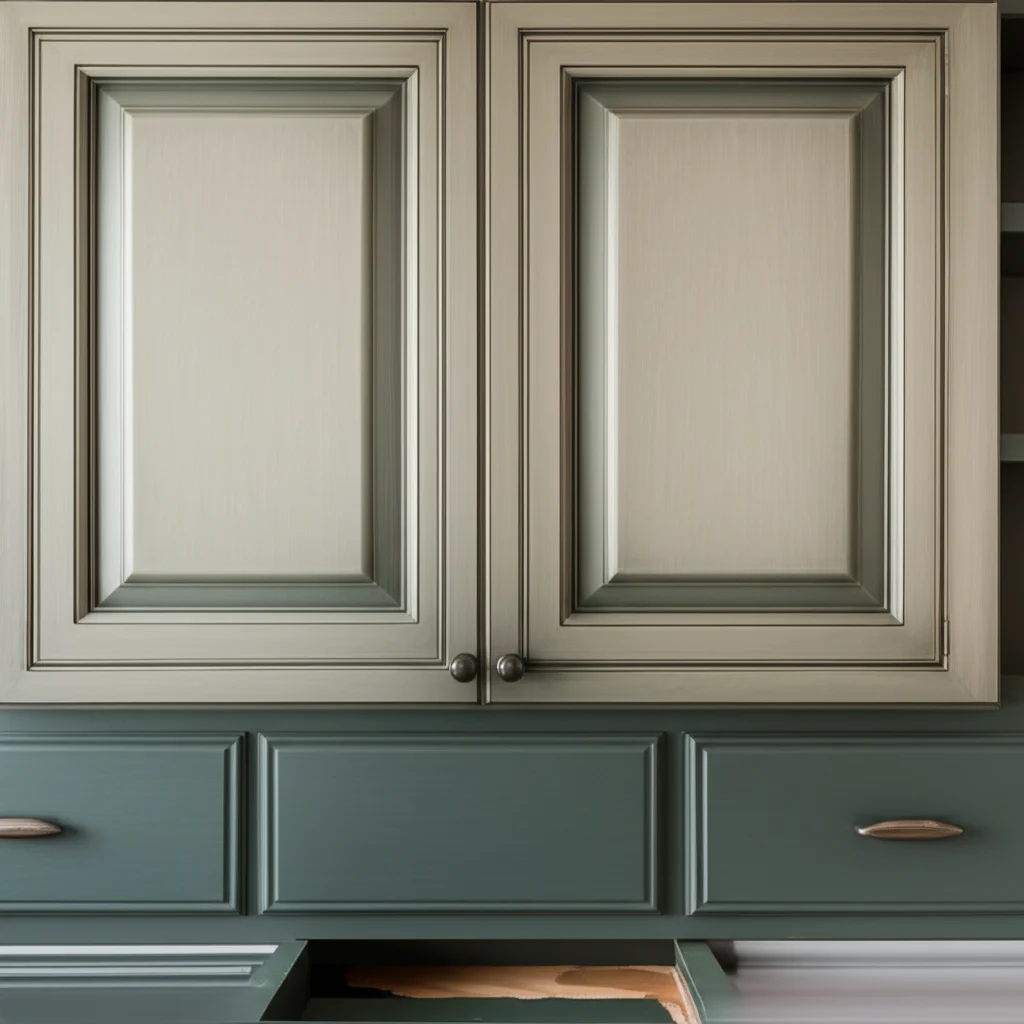
- Overlay Doors: These doors cover the cabinet frame or box opening. They are the most common type found in homes today. Overlay doors can be full overlay, covering almost the entire frame, or partial overlay, covering only part of the frame and leaving some of it exposed. The measurement process for overlay doors involves adding extra inches to the cabinet opening dimensions.
- Inset Doors: Inset doors sit inside the cabinet frame, flush with the face of the cabinet. They offer a classic, furniture-like appearance. Measuring for inset doors requires extreme precision. You must consider a small gap around all edges for the door to open and close freely without binding.
- Frameless Cabinets: These cabinets, often called European style, do not have a face frame. The doors attach directly to the cabinet box. For frameless cabinets, the doors are typically full overlay, covering the entire front of the cabinet box. Measuring involves the full external dimensions of the cabinet box opening.
Each door type has its own set of rules for calculating the final door size. Taking the time to understand your cabinet type before you measure helps you avoid errors. This foundational knowledge makes the entire process much easier. It also saves you money and frustration in the long run.
Essential Tools for Accurate Cabinet Door Measurement
Having the right tools makes a significant difference when you measure cabinet doors. Using precise tools helps ensure your measurements are accurate. Inaccurate tools lead to ill-fitting doors and wasted materials. Always gather your supplies before you start the measuring process.
Here is a list of the essential tools you will need:
- Metal Tape Measure: A good quality, rigid metal tape measure is indispensable. Cloth or soft tape measures stretch and provide unreliable readings. Ensure your metal tape measure is at least 12 feet long for most cabinet projects. Look for one with clear, easy-to-read markings.
- Pencil: You will need a pencil to mark your measurements and make notes. A standard pencil works fine.
- Notebook or Graph Paper: Record all your measurements clearly in a notebook. Using graph paper can help you sketch out cabinet openings and door placements. This visual aid makes organizing complex measurements simpler. You can also create a table to list each door’s dimensions.
- Calculator: A basic calculator helps you add or subtract for overlay and clearance. It ensures mathematical accuracy, especially when dealing with many doors.
- Level: A level helps you check if your cabinet openings are truly square. Sometimes, old cabinets are slightly out of square. Knowing this helps you adjust your door measurements if needed. It allows you to anticipate potential issues before installation.
- Stepladder (Optional but Recommended): For upper cabinets, a sturdy stepladder provides safe access. Do not attempt to stretch or stand on unstable objects. Safety always comes first when working in your home.
Using these tools properly helps you get the most accurate results. Take your time with each measurement. Remember, measuring once and ordering incorrectly costs more than measuring twice and ordering correctly. Investing in these basic tools is a small price for a successful cabinet door replacement project.
Measuring for Overlay Cabinet Doors
Overlay doors are a very common choice for kitchens and other rooms. They sit on top of the cabinet face frame, covering part or all of it. Knowing how to measure cabinet doors of this type correctly is vital. There are two main types: full overlay and partial overlay. The process is similar for both, but the final addition to your measurements differs.
Steps to Measure for Overlay Cabinet Doors:
Measure the Cabinet Opening:
- Width: Use your metal tape measure to find the exact width of the cabinet opening. Measure from the inside edge of the face frame on one side to the inside edge on the other side. Take this measurement in three places: top, middle, and bottom of the opening. Use the largest of these three measurements as your base width.
- Height: Similarly, measure the exact height of the cabinet opening. Measure from the inside edge of the top rail to the inside edge of the bottom rail. Take this measurement in three places: left, middle, and right of the opening. Use the largest of these three measurements as your base height.
- Record these “opening size” measurements clearly in your notebook.
Determine Your Desired Overlay:
- The overlay is how much the door extends past the cabinet opening on each side.
- For a full overlay door, you typically want the door to cover almost the entire face frame. A common full overlay is 3/4 inch or 1 inch on each side of the opening. This means your door will be 1 1/2 inches or 2 inches wider and taller than the opening. For example, if you want a 3/4-inch overlay, you add 1.5 inches to your width and 1.5 inches to your height (3/4 inch on each of the two sides).
- For a partial overlay door, the overlay is usually smaller, such as 1/2 inch or 3/8 inch on each side. This means you add 1 inch (1/2 + 1/2) or 3/4 inch (3/8 + 3/8) to your opening dimensions.
- Your existing hinges or new hinge type may dictate your overlay. Many standard hinges are designed for a specific overlay amount. If you are changing your doors, you might also consider updating your hinges. You can learn more about how to change cabinet doors and their hinges to achieve your desired look.
Calculate Final Door Dimensions:
- Final Door Width = Opening Width + (2 x Desired Overlay)
- Final Door Height = Opening Height + (2 x Desired Overlay)
For example, if your opening is 15 inches wide and you want a 3/4-inch full overlay, your door width will be 15 + (2 x 0.75) = 15 + 1.5 = 16.5 inches. Repeat this for the height.
Special Considerations for Multiple Doors:
- If you have two doors covering one opening (e.g., for a wide base cabinet), divide the calculated final door width by two.
- Then, subtract a small fraction (e.g., 1/16 inch) from each door’s width. This creates a tiny gap in the middle, preventing the doors from rubbing together when closed.
- So, for two doors: Each Door Width = (Opening Width + (2 x Desired Overlay) - 1/16 inch) / 2.
- Remember that hinges also play a role in how your doors hang. Different hinges offer various types of overlay. If you are struggling with aligning your doors, you might want to learn about how to fix gap between cabinet doors.
Always double-check your calculations. It is better to re-measure and recalculate than to order doors that do not fit. Your new overlay doors will look fantastic with these careful measurements.
Measuring for Inset Cabinet Doors
Inset cabinet doors provide a sophisticated, flush appearance. They sit perfectly within the cabinet frame opening, giving a built-in furniture look. Accurate measurement is critical for inset doors. Even a small error can cause them to bind or leave unsightly gaps. This method focuses on the exact opening size and a specific clearance.
Steps to Measure for Inset Cabinet Doors:
Measure the Cabinet Opening with Precision:
- Width: Take three width measurements across the cabinet opening: at the top, middle, and bottom. Measure from the inside edge of the frame to the opposite inside edge. Record all three measurements. You will use the smallest of these measurements for your calculations. This ensures the door will not bind if the opening is slightly out of square.
- Height: Take three height measurements for the cabinet opening: at the left, middle, and right sides. Measure from the inside edge of the top rail to the inside edge of the bottom rail. Record all three measurements. Again, use the smallest of these measurements as your base height.
- Clearly write down these “smallest opening size” measurements.
Determine Your Clearance Gap:
- Unlike overlay doors, inset doors need a small gap around all four edges. This gap allows the door to open and close freely without rubbing against the cabinet frame.
- A standard clearance gap for inset doors is typically 1/16 inch or 3/32 inch on all sides. This means your door will be 1/8 inch or 3/16 inch smaller in both width and height than your smallest opening measurement.
- For example, if you choose a 1/16 inch gap, you will subtract 1/8 inch (1/16 inch for the left side + 1/16 inch for the right side) from the width. You will also subtract 1/8 inch from the height.
Calculate Final Door Dimensions:
- Final Door Width = Smallest Opening Width - (2 x Clearance Gap)
- Final Door Height = Smallest Opening Height - (2 x Clearance Gap)
For example, if your smallest opening width is 15 inches and you want a 1/16 inch clearance gap (meaning 1/8 inch total reduction), your door width will be 15 - 0.125 = 14.875 inches. Do the same for height.
Special Considerations for Inset Multiple Doors:
- If you have two inset doors sharing one opening (e.g., for a double-door base cabinet), the calculation is slightly different.
- You need clearance between the two doors in the middle, as well as on the outer edges.
- For two doors:
- Total Clearance for Width = (2 x Outer Clearance Gap) + (1 x Inner Clearance Gap). For example, if outer is 1/16 inch and inner is 1/16 inch, total clearance is 1/16 + 1/16 + 1/16 = 3/16 inch.
- Each Door Width = (Smallest Opening Width - Total Clearance for Width) / 2.
- Make sure you account for the hinges. Inset hinges are different from overlay hinges. If you are changing the door type, you are also likely to change the hinge type. Explore options for how to hang cabinet doors with exposed hinges or hidden hinges for different looks.
Accuracy is paramount when measuring for inset cabinet doors. Re-check all your measurements and calculations before you finalize your order. These detailed steps will help you achieve a beautifully flush, custom look for your cabinets.
Special Considerations When Measuring Cabinet Doors
Measuring cabinet doors sometimes involves more than just basic width and height. Certain situations require extra thought and specific measurements. These special cases ensure your new doors function properly and look good in your space. Paying attention to these details prevents headaches later on.
Here are some important considerations:
Hinge Boring (Cup Holes):
- If you are ordering new doors that will use European-style cup hinges (often called concealed hinges), you need to specify the hinge boring location.
- This includes the diameter of the cup hole (usually 35mm), and the “cup distance” or “bore distance.” The cup distance is the measurement from the edge of the door to the center of the hinge cup hole.
- Standard cup distances vary, but common ones are 3mm, 5mm, or 8mm. This measurement is critical for the door to close properly and have the correct overlay or inset.
- If you are reusing old hinges, measure the existing cup distance on your old doors. If buying new hinges, check their specifications.
- You might also need to specify the number of hinge bores per door, typically two for standard doors, but three or more for very tall doors.
Door Swing and Obstructions:
- Consider how your new doors will open. Will they hit a wall, another cabinet, or an appliance handle?
- For corner cabinets, ensure that doors can open fully without colliding. Sometimes, a smaller door or specific hinge type (like a piano hinge or a 170-degree hinge) is needed for proper clearance.
- Think about appliances. A dishwasher or refrigerator handle might block a nearby cabinet door from opening all the way. Plan door sizes or hinge types to avoid this.
Adjacent Doors and Drawers:
- When multiple doors or a door and a drawer are next to each other, ensure you account for proper spacing.
- For adjacent overlay doors, you might add a small “reveal” or gap (e.g., 1/16 inch) between them. This prevents rubbing.
- For a door above a drawer, the door usually sits flush with the drawer front, sharing the same reveal.
- Always measure each opening independently, even if they appear identical. Cabinet boxes are rarely perfectly square or consistent. This is especially true if you are measuring for specific projects, like replacing a door on an existing cabinet.
Frameless Cabinets (European Style):
- As mentioned before, frameless cabinets lack a face frame. The doors attach directly to the cabinet box.
- For these, the doors are almost always full overlay. You will measure the exact exterior dimensions of the cabinet box opening.
- The door typically extends past the box opening by a standard amount on all sides (e.g., 1/2 inch or 3/4 inch), leaving a tiny reveal between doors or against a wall. This is a simple process to size cabinet doors.
Glass Ready Doors:
- If you are ordering doors for glass inserts, specify “glass ready” doors. These come without a panel, with a rabbet or groove for glass installation.
- You will need to measure the opening for the glass itself. This involves measuring the inside dimensions of the door frame where the glass will sit. Some people even make glass cabinet doors themselves for a custom look.
These special considerations help you fine-tune your measurements. They ensure that your new cabinet doors fit and function perfectly, giving your cabinets a truly professional finish.
Double-Checking Your Cabinet Door Measurements for Success
You have taken all your measurements, written them down, and even calculated the final door sizes. Now comes a critical step: double-checking everything. Skipping this part is a common mistake that leads to expensive errors. Think of this as your final quality control before you order.
Here’s how to effectively double-check your cabinet door measurements:
Measure Three Times: This old carpenter’s adage holds true. Go back to each cabinet opening and measure the width and height again. Do this at least three times for each dimension (top, middle, bottom for width; left, middle, right for height). If you get different readings, investigate why. It could be an uneven opening or a slight difference in how you hold the tape. Always use the largest measurement for overlay doors and the smallest for inset doors. This helps account for out-of-square openings.
Verify Calculations:
- Re-do all your math. Use your calculator to re-add overlays or re-subtract clearances.
- Even simple arithmetic errors can lead to wrong door sizes.
- If you have a partner or friend, ask them to re-check your calculations independently. A fresh set of eyes can spot mistakes you missed.
Cross-Reference with Existing Doors (If Applicable):
- If you are replacing existing doors, and they fit well, you can use them as a rough guide.
- Measure your existing doors and compare them to your newly calculated dimensions.
- Are the new calculations close to the old door sizes? If there is a big difference, try to understand why. This could indicate a measurement error or a change in desired overlay.
- However, do not rely solely on old doors, especially if they are warped or were not a perfect fit. They are a good cross-reference, but your new measurements from the opening are primary.
Sketch Cabinet Layout:
- Draw a simple diagram of your cabinets. Label each opening with its unique dimensions (e.g., “Upper Cabinet Left - 15W x 30H”).
- This visual representation helps you see the overall plan. It also helps you identify any potential overlaps or inconsistencies.
- You can then assign each door its final calculated size next to the opening. This prevents mixing up dimensions for different doors.
Consider Door Quantity and Orientation:
- Count the total number of doors you need.
- For each opening, confirm if it is a single door or a double door setup.
- Are there any “dummy” doors (panels that look like doors but do not open)? Measure these as well.
- Pay attention to grain direction. If you want the wood grain to run vertically on all doors, make sure you note this when ordering.
- If you are planning to change the style of your doors, like making them into a specific design, you might want to look at how to make glass cabinet doors or even how to make shaker cabinet doors from old flat fronts. These resources can help you understand design choices impacting dimensions.
Review the Order Form Carefully:
- Before submitting your order to a cabinet door supplier, review their specific ordering instructions.
- They might have preferences for how measurements are submitted (e.g., width first, then height; fractional inches or decimals).
- Confirm that all hinge boring specifications are correct if you are requesting them.
- Ensure all final dimensions on the order form match your carefully double-checked figures.
Taking the time to double-check your cabinet door measurements ensures accuracy. This small effort pays off by avoiding costly mistakes. Your new doors will arrive with the correct sizes, ready for installation, and fitting perfectly.
Common Mistakes to Avoid When Measuring Cabinet Doors
Measuring cabinet doors seems simple, but it is easy to make errors. These mistakes can lead to ill-fitting doors, wasted materials, and frustration. Knowing what pitfalls to avoid saves you time and money. I have seen these issues many times.
Here are common mistakes and how to avoid them:
- Using a Flexible Tape Measure:
- Mistake: Using a cloth, fabric, or old, worn-out plastic tape measure. These stretch, especially over longer distances. This results in inaccurate readings.
- Avoid: Always use a new, rigid metal tape measure. Ensure it extends straight and does not bend or sag when measuring.
- Measuring Only Once:
- Mistake: Taking a single measurement for width and height and assuming it is correct. Cabinet openings are rarely perfectly square or consistent.
- Avoid: Measure each dimension (width and height) in at least three different spots across the opening. For width, measure top, middle, and bottom. For height, measure left, middle, and right. Use the largest measurement for overlay doors and the smallest for inset doors to account for any inconsistencies.
- Forgetting About Overlay or Clearance:
- Mistake: Measuring the opening exactly and ordering doors that exact size. This is a very common error.
- Avoid: Always remember to add the desired overlay amount (for overlay doors) or subtract the necessary clearance gap (for inset doors). This is the difference between a door that fits and one that does not. The general rule is to add twice the desired overlay to both width and height for overlay doors, and subtract twice the desired clearance for inset doors.
- Not Accounting for Hinges:
- Mistake: Ordering doors without specifying hinge boring or considering how existing hinges will affect the fit.
- Avoid: If using European-style hinges, know the correct hinge bore diameter and the “cup distance” (distance from the door edge to the center of the bore). This impacts how the door overlays or sits. If you are reusing hinges, measure the bore distance from your old doors. If you are changing doors, you might also be changing hinges, so understanding how to hang cabinet doors properly is key.
- Mixing Up Width and Height:
- Mistake: Accidentally writing down the width measurement as the height, or vice-versa, when ordering.
- Avoid: Always clearly label your measurements (W for width, H for height). When placing an order, most suppliers expect width first, then height. Double-check your entries on the order form.
- Ignoring Obstructions:
- Mistake: Not considering nearby walls, other cabinets, appliance handles, or decorative trim that might block the door swing.
- Avoid: Open existing doors fully and visualize how new, potentially larger, doors will operate. Ensure there is enough space for full swing. Adjust door sizes or consider specialized hinges if obstructions exist. This attention to detail can help you avoid problems when you install new cabinet doors.
- Failing to Double-Check Everything:
- Mistake: Rushing through the final review. This is where many small errors slip through.
- Avoid: Once all measurements are taken and calculations are done, go back and re-verify everything. Have someone else check your work if possible. A few minutes of review can save hours of headaches and hundreds of dollars.
By being aware of these common mistakes, you can approach your cabinet door measurement project with greater confidence. Precision and patience are your best tools for success.
Replacing Existing Doors vs. New Cabinet Measurements
When you decide to update your cabinets, you typically face one of two scenarios: replacing existing doors on an old cabinet box, or needing measurements for an entirely new cabinet setup. While the core principle of “how to measure cabinet doors” remains, the approach and considerations differ slightly for each. Understanding these differences helps ensure accuracy.
Measuring for Replacing Existing Cabinet Doors:
If your current cabinet boxes are in good condition and you simply want to refresh their look, you are likely replacing existing doors. This is a common and cost-effective way to update a kitchen or bathroom.
- Assess the Current Fit: Before measuring, examine how your existing doors fit.
- Are there any gaps that are too wide or too narrow?
- Do the doors rub anywhere when opening or closing?
- If they fit perfectly, you have a good starting point. If not, you will want to correct these issues with your new measurements.
- Measure the Opening: As detailed in previous sections, measure the exact width and height of the cabinet opening. Take multiple measurements (top, middle, bottom for width; left, middle, right for height).
- Determine Current Overlay/Inset: Observe how your current doors interact with the cabinet frame.
- Do they sit on top of the frame (overlay)? How much do they cover on each side? Measure this “current overlay” if you like the look.
- Do they sit inside the frame (inset)? What is the gap around the edges? Measure this “current clearance” if you like it.
- Use this information to inform your desired overlay or clearance for the new doors. You can choose to maintain the existing style or switch to a full overlay for a more modern look, or an inset for a traditional furniture feel.
- Hinge Compatibility: If you plan to reuse your existing hinges, ensure the new doors can accommodate them. Most likely, you will need to specify the hinge boring (cup hole locations) on the new doors to match your old ones or your existing hinge type. If you are changing the door style, you might also need to change the hinges. For instance, if you decide to decorate cabinet doors with new hardware, you might consider how it impacts existing hinge placement.
- Old Doors as a Reference: You can measure your old doors as a reference, but never as the definitive measurement. Old doors can warp over time, or they might not have fit perfectly to begin with. Always rely on your fresh measurements of the cabinet opening.
Measuring for New Cabinet Doors on a Newly Built Cabinet:
If you are building new cabinet boxes or installing pre-assembled frameless cabinets, you have more flexibility. You are essentially creating the fit from scratch.
- Measure the Cabinet Box/Frame: Measure the outer dimensions of the cabinet box opening (for frameless) or the inner dimensions of the face frame (for framed cabinets).
- Determine Desired Aesthetics: With new cabinets, you can choose any door style.
- Full Overlay: This is popular for a contemporary, seamless look. The doors cover almost the entire cabinet box. You decide how much overlay you want (e.g., 3/4 inch or 1 inch on each side).
- Partial Overlay: This leaves more of the face frame exposed, offering a more traditional or classic feel. You decide the partial overlay amount (e.g., 1/2 inch).
- Inset: This creates a high-end, furniture-like appearance. You decide on the small, consistent clearance gap around the doors.
- Consider how the new doors will interact with other elements in your kitchen, like how they will look if you were to put trim on cabinet doors.
- Plan for Hinges: For new cabinets and doors, you have the freedom to choose your hinge type. Concealed (European) hinges are popular for their clean look and adjustability. Select hinges that match your desired overlay or inset. Confirm the hinge boring requirements with your chosen hinge type.
- Consistency: When building new cabinets, strive for consistency in your openings. This makes measuring and installing doors much easier.
Whether replacing old doors or creating new ones, the goal is the same: a perfect fit. By understanding these nuances, you ensure your measuring process is accurate and tailored to your specific project needs. This sets the stage for beautiful, functional cabinets.
FAQs About Measuring Cabinet Doors
Q1: Why is precise measurement so important for cabinet doors?
Precise measurement is essential for cabinet doors to fit and function correctly. Incorrect measurements lead to doors that rub, do not close completely, or have uneven gaps. This can make your cabinets look unprofessional and cause frustration during use. Accuracy saves money by avoiding the need to reorder custom-sized doors.
Q2: Can I just use my old cabinet doors as a template for new ones?
While you can measure your old cabinet doors for reference, it is not ideal to use them as the sole template. Old doors can warp, swell, or shrink over time. They might not have fit perfectly to begin with. Always measure the actual cabinet opening directly, then calculate the new door size based on your desired overlay or inset.
Q3: What if my cabinet openings are not perfectly square?
Many older cabinet openings are not perfectly square. This is why you measure in three spots (top, middle, bottom for width; left, middle, right for height). For overlay doors, use the largest measurement to ensure full coverage. For inset doors, use the smallest measurement to ensure the door does not bind. A slight out-of-square condition requires careful calculation to prevent issues.
Q4: Do I need to account for hinges when measuring for new doors?
Yes, you absolutely need to account for hinges. If you are using European-style (concealed) hinges, you must specify the hinge boring (cup hole) locations and diameters. The “cup distance” (distance from the door edge to the center of the bore) is critical for proper overlay or inset. Discuss hinge requirements with your door supplier or research new hinges if you are buying them separately.
- cabinet measurement
- kitchen cabinets
- DIY home
- door replacement
- cabinet renovation

Todd Martin
Senior Writer
With over 15 years of experience in home renovation and design, I started HEG to share what I’ve learned with homeowners who want to create spaces that are both beautiful and functional. I’ve always believed in a hands-on approach, and over the years, I’ve picked up practical solutions that actually work. Through HEG, I aim to make home improvement more approachable, sharing real tips that help you create a home you truly love.