· Todd Martin · DIY & Crafts · 16 min read
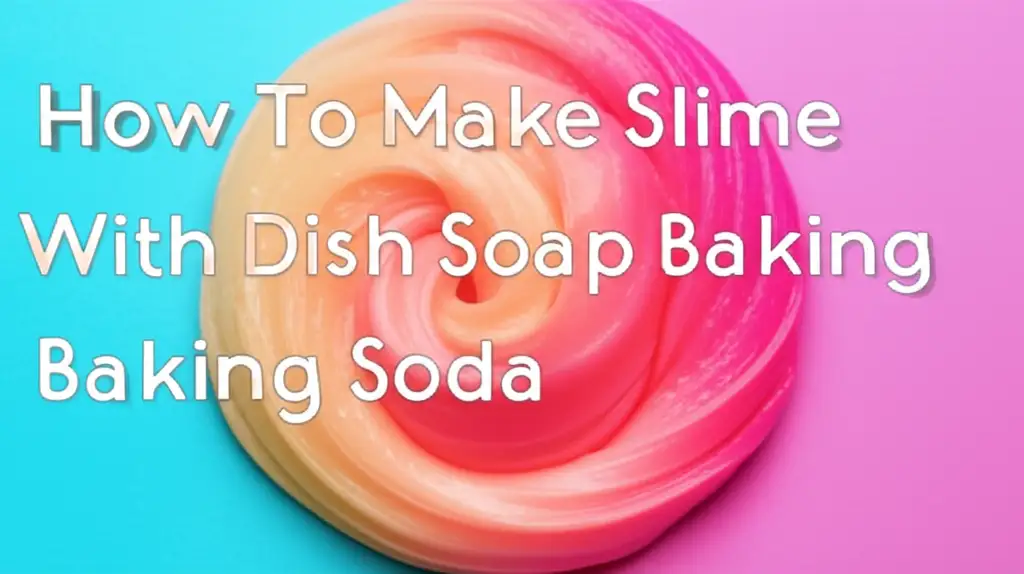
How To Make Slime With Dish Soap And No Glue
Effortless Fun: Crafting Slime with Dish Soap & No Glue
Have you ever wanted to make slime but found yourself without glue? Perhaps you worried about harsh chemicals. I understand that feeling. Many traditional slime recipes rely on specific ingredients like PVA glue and borax. These can be hard to find or raise safety concerns for parents. The good news is, you can still enjoy the satisfying stretch and squish of homemade slime. This guide will show you exactly how to make slime with dish soap and no glue. We will use simple household items. You will discover an easy, fun, and accessible way to create this popular sensory toy. I will walk you through each step. You will learn the best ingredients to use. I will also share tips for perfect consistency and creative additions. Let’s dive into making some amazing, glue-free slime!
Takeaway
- Simple Ingredients: Use readily available dish soap and a thickening agent like cornstarch or salt.
- Easy Steps: Follow clear, sequential instructions for mixing and kneading.
- Safe Alternative: Create slime without the need for traditional glue or borax.
- Customization: Personalize your slime with colors, glitter, or scents for added fun.
You can make slime with dish soap and no glue by combining dish soap with a thickening agent. Common household items like cornstarch, salt, or even flour work well. You mix these ingredients until a cohesive, stretchy texture forms. This method offers a simple, accessible way to create a fun sensory toy.
Why Choose Glue-Free Slime? Benefits and Simplicity
Making slime without glue offers many advantages. First, it simplifies the process. You usually have dish soap at home already. This eliminates a trip to the store. It also means you save money on specialized craft supplies. Many people prefer avoiding glue. Some glues contain chemicals they want to keep away from children. Making slime with dish soap can be a gentler alternative. It uses ingredients generally considered safe for handling. This provides peace of mind for parents and caregivers.
Another benefit is accessibility. Not everyone has access to craft stores. In rural areas or during certain times, getting glue might be difficult. Dish soap is a common household staple. This makes the recipe available to almost anyone. I find it very satisfying to use everyday items for fun projects. It teaches resourcefulness. It also shows that you do not need expensive kits for creative play. This method is also less messy to start. Traditional glue slime can be very sticky during preparation. Our no-glue version often begins with a more manageable consistency. This can lead to a less frustrating crafting experience.
Choosing glue-free slime also promotes experimentation. You can try different types of dish soap. You can experiment with various thickening agents. This helps you understand how different ingredients interact. It turns a simple craft into a mini science lesson. This fosters a curious mindset in young creators. Plus, if you need to clean up any spills, dish soap is already a cleaning agent. This makes post-slime cleanup a bit easier. However, cleaning up any type of slime still requires care. For tough messes, you might need specific methods like how to clean slime off couch or how to clean up slime from your dining table.
Essential Ingredients: What You Need for Dish Soap Slime
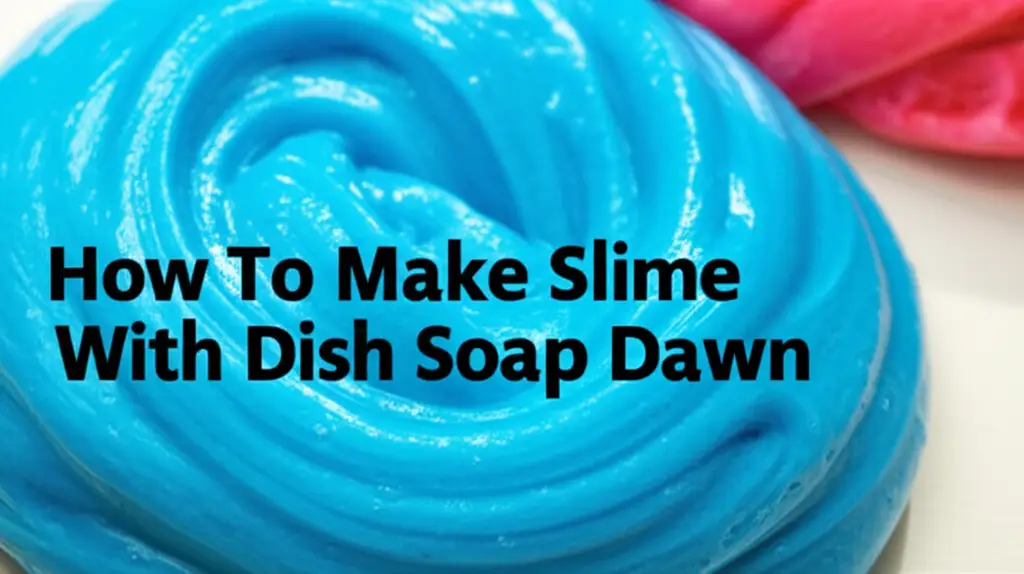
Creating slime with dish soap and no glue requires only a few basic items. You likely have most of them in your kitchen right now. The main ingredient is, of course, dish soap. Not all dish soaps are equal for this purpose. I recommend using a thicker, gel-like dish soap. Brands like Dawn or Palmolive often work best. Thin, watery soaps may not provide the necessary consistency. Experiment with what you have on hand. You might be surprised by the results. The type of dish soap directly affects the slime’s texture.
The second key ingredient is a thickening agent. This is what helps the dish soap transform into slime. There are a few common options you can use:
- Cornstarch: This is a popular choice. It creates a soft, dough-like slime. Cornstarch absorbs moisture from the dish soap. This forms a pliable mixture. It is easy to find and gentle to work with.
- Salt: Fine table salt can also work. It reacts with the dish soap to thicken it. The result might be a bit stickier or more liquidy than cornstarch slime. Start with small amounts and add more slowly. Too much salt can make the slime break apart.
- Flour: All-purpose flour can act as a thickener. It often results in a doughier, less stretchy slime. This option is excellent if you have no cornstarch.
- Baking Soda: While less common alone, baking soda can be used in combination with salt or cornstarch to adjust texture. It often helps make the slime less sticky.
You will also need a mixing bowl and a spoon. These are for combining your ingredients. Measuring spoons or cups are helpful for accuracy. Lastly, consider optional additions like food coloring, glitter, or essential oils. These add character and sensory appeal to your slime. For more variations, you can even explore how to make slime with dish soap, no glue, or borax for an even simpler recipe.
Step-by-Step: Making Your Basic Dish Soap Slime Recipe
Making your own dish soap slime without glue is a straightforward process. I find it enjoyable to watch the ingredients transform. Here is a simple recipe using cornstarch, which is my preferred method for a soft, pliable slime.
Ingredients:
- 1/2 cup dish soap (thick, gel-like works best)
- 1 cup cornstarch
- Food coloring (optional)
Instructions:
- Measure the Dish Soap: Pour 1/2 cup of your chosen dish soap into a mixing bowl. If you want colored slime, add a few drops of food coloring now. Mix it well with the dish soap.
- Add Cornstarch Gradually: Begin adding the cornstarch to the dish soap. Do not add all of it at once. Start with about half a cup. Mix it thoroughly with your spoon.
- Mix and Observe: As you mix, the mixture will start to thicken. It will look clumpy at first. Continue to add the remaining cornstarch, a little at a time. Mix until it forms a thick, sticky dough. You might need slightly more or less cornstarch. The exact amount depends on your dish soap’s thickness.
- Knead the Slime: Once the mixture is too thick to stir, it is time to use your hands. Lightly dust your hands with a little extra cornstarch if needed. Take the mixture out of the bowl. Begin to knead it like dough. This step is crucial. Kneading helps the ingredients combine fully. It also develops the slime’s texture.
- Adjust Consistency: If the slime is too sticky, add a small pinch more cornstarch. Knead it in. If it is too dry or crumbly, add a tiny drop of dish soap. Continue kneading until you reach your desired consistency. It should be stretchy but not overly sticky. You want it to pull apart without breaking immediately. This recipe is very similar to how to make slime out of dish soap no glue in other easy methods.
Remember, practice makes perfect. Your first batch might not be exactly right. Do not worry! Just keep adjusting the cornstarch or dish soap. You will get the hang of it quickly.
Using Salt for Slime
If you prefer using salt, the process is slightly different.
Ingredients:
- 1/4 cup dish soap
- 1 teaspoon salt
- Food coloring (optional)
Instructions:
- Combine Dish Soap and Color: Pour 1/4 cup of dish soap into a bowl. Add food coloring if desired. Stir well.
- Add Salt Slowly: Add salt, about 1/4 teaspoon at a time. Stir continuously after each addition. The mixture will start to thicken and form clumps.
- Mix Until Slime Forms: Keep mixing until it forms a cohesive, somewhat stretchy blob. This version tends to be softer and more gel-like. It might not be as firm as cornstarch slime.
- Chill (Optional but Recommended): For salt-based slime, placing it in the refrigerator for 10-15 minutes can help firm it up.
Both methods provide a fun, glue-free slime experience. Experiment to find your favorite texture.
Mastering Your Slime: Troubleshooting Common Issues
Even with simple recipes, sometimes things do not go as planned. I have faced my share of slime failures. Knowing how to fix common problems saves a lot of frustration. Here are some tips for troubleshooting your dish soap slime. You can achieve the perfect consistency.
Slime is Too Sticky
This is one of the most common issues. If your slime is sticking to everything, it means it has too much liquid or not enough thickening agent.
- Add More Thickener: Slowly add small amounts of your chosen thickener. If using cornstarch, sprinkle a teaspoon at a time. Knead it thoroughly after each addition. Keep adding until the stickiness reduces. If using salt, add just a pinch. Too much salt can actually reverse the thickening effect.
- Knead More: Sometimes, the ingredients just need more time to combine. Continue kneading the slime. The warmth from your hands can also help activate the thickener.
- Chill It: For salt-based or slightly sticky slimes, place them in the refrigerator for 10-15 minutes. Cold temperatures can help the slime firm up.
Slime is Too Dry or Crumbly
If your slime breaks apart easily and feels dry, it has too much thickening agent.
- Add More Dish Soap: Add a very small drop of dish soap. Knead it into the slime. Be careful not to add too much at once. It is easier to add more liquid than to remove it.
- Add a Few Drops of Water: If you are hesitant to add more dish soap, try a few drops of water instead. Water can help rehydrate the dry components. Mix it in slowly until the slime becomes more pliable.
- Knead Thoroughly: Ensure you are kneading the mixture well. Sometimes, the dry parts just need to be fully incorporated into the wet parts.
Slime is Not Forming
Sometimes, the mixture just does not come together. It stays soupy or completely separates.
- Check Ingredient Ratios: Double-check your measurements. Ratios are important in slime making. Even a small deviation can affect the outcome.
- Use the Right Dish Soap: As mentioned, thin, watery dish soaps often do not work well. Try a thicker, gel-like dish soap if your current one is too runny.
- Patience and Kneading: Give the slime time. Sometimes, it takes several minutes of mixing and kneading for the chemical reaction to occur.
- Switch Thickening Agents: If one thickener is not working, try another. For instance, if salt is not giving you the desired result, switch to cornstarch. Different thickeners react differently with various dish soaps.
By following these troubleshooting tips, you can rescue most slime batches. You will quickly learn to adjust the consistency by feel.
Unleash Creativity: Customizing Your Homemade Slime
Making slime is fun. Making unique slime is even better! Once you master the basic dish soap and no glue recipe, you can start customizing it. This is where your creativity truly shines. I love seeing how different additions change the look and feel of the slime. It transforms a simple craft into a personalized sensory experience.
Adding Color
Food coloring is the easiest way to add vibrant hues to your slime.
- When to Add: Introduce food coloring with the dish soap, before adding the thickener. This ensures an even distribution of color.
- Amount: Start with a few drops. You can always add more to deepen the color. Gel food colorings often produce more intense colors than liquid ones.
- Mixing Colors: Experiment by mixing different primary colors to create new shades. For example, blue and yellow make green.
Incorporating Sparkle
Glitter is a must-have for many slime enthusiasts. It adds a magical shimmer.
- Glitter Type: Fine glitter works best. Chunky glitter can make the slime feel bumpy or fall out easily.
- Adding Glitter: Stir glitter into the dish soap and food coloring mixture. You can also knead it into the slime once it has started to form.
- Experiment: Try different colors of glitter. Mix silver and gold for a metallic look. Use iridescent glitter for an extra magical effect.
Adding Scent
A pleasant scent can greatly enhance the slime experience.
- Essential Oils: Add a few drops of essential oil to your dish soap before mixing. Lavender, peppermint, or citrus oils are popular choices. Ensure the oil is safe for skin contact.
- Extracts: Vanilla or almond extracts can also add a sweet aroma.
- Caution: Always use small amounts. Some scents can be strong.
Textured Additions
Small, safe items can add interesting textures to your slime.
- Foam Beads: Small foam beads create a satisfying squishy texture.
- Sequins: Flat sequins can add sparkle and a slight texture.
- Small Plastic Sprinkles: These can mimic a “confetti” look. Ensure they are not too sharp.
- Safety First: Always choose additions that are non-toxic and small enough to not pose a choking hazard, especially if young children will be playing with the slime.
Customizing your slime makes each batch unique. It encourages exploration and imagination. Remember, if you have any cleaning needs related to glue, you can always check guides like how to clean glue off glass or how to clean glue residue, though these apply to glue, not dish soap based slime itself.
Care and Play: Storing Slime and Fun Activities
Once you have created your perfect batch of dish soap slime, proper care ensures it lasts longer. I have learned that even homemade slime needs a little attention to stay fresh and fun. Storing it correctly prevents it from drying out. It also keeps it clean for future play sessions.
Storing Your Slime
The key to long-lasting slime is airtight storage.
- Airtight Container: Place your slime in an airtight container or a Ziploc bag. A small plastic container with a lid works perfectly. This prevents air from drying out the slime.
- Cool, Dry Place: Store the container in a cool, dry place, away from direct sunlight. A cabinet or drawer is ideal. Heat can make the slime sticky or degrade its consistency.
- Refrigeration (Optional): For some dish soap slimes, especially those made with salt, refrigerating them can help maintain their texture and extend their life.
- Check for Mold: Since this slime is made with organic materials like cornstarch, it can eventually mold. If you see any signs of mold or a foul smell, it is time to discard the slime. Always wash your hands before and after playing with slime.
Dish soap slime typically lasts for a few days to a week. Its longevity depends on the ingredients used and how well it is stored.
Fun Activities with Homemade Slime
Slime is more than just a toy. It is a fantastic tool for sensory play and creativity. Here are some fun ways to enjoy your homemade dish soap slime:
- Stretch and Pull: The most basic activity is simply stretching and pulling the slime. Observe how far it can stretch before breaking.
- Squish and Squeeze: Enjoy the satisfying squishy texture. This can be very calming and stress-relieving.
- Make Bubbles: If your slime is stretchy enough, try to create air bubbles within it. You can flatten it out and then pull it up quickly.
- Shape and Mold: Use cookie cutters or your hands to shape the slime. While it is not as firm as playdough, it can hold simple shapes for a short time.
- Hidden Treasures: Bury small, non-toxic objects (like beads or tiny plastic toys) within the slime. Then, have children dig them out. This adds a treasure hunt element.
- Sensory Bin Addition: Incorporate your slime into a larger sensory bin with other textures. You can use rice, beans, or water beads for varied play.
- Science Exploration: Discuss why the dish soap and thickener react the way they do. Talk about states of matter and non-Newtonian fluids.
Slime provides a wonderful tactile experience. It can help develop fine motor skills and creativity in children. Always supervise young children during slime play to ensure safety. This is especially true with smaller add-ins. Enjoy your handmade creation!
Frequently Asked Questions
What kind of dish soap works best for making slime without glue?
Thicker, gel-like dish soaps typically work best. Brands like Dawn, Palmolive, or similar concentrated varieties provide the necessary viscosity for slime formation. Avoid thin, watery soaps, as they may not create a cohesive slime texture. Experiment with what you have, but a rich, sudsy soap is ideal.
Why is my dish soap slime not forming or too sticky?
If your slime is not forming, it might lack enough thickening agent. Gradually add more cornstarch, salt, or flour, kneading well after each addition. If it’s too sticky, you have too much liquid or not enough thickener. Add a small pinch of thickener and knead. For salt-based slime, chilling it can help reduce stickiness.
How long does dish soap slime last, and how should I store it?
Dish soap slime generally lasts from a few days to a week. Its longevity depends on the ingredients and storage. Store it in an airtight container or a sealed plastic bag in a cool, dry place. Refrigeration can extend its life. Discard the slime if you notice any mold or a foul odor.
Is dish soap slime safe for children to play with?
Dish soap slime made with common household ingredients is generally considered safe for play. However, it is not for consumption. Always supervise young children to prevent ingestion. Ensure hands are washed before and after play. Use non-toxic food coloring and additions. If skin irritation occurs, discontinue use.
Can I use other household items instead of cornstarch or salt as a thickener?
Yes, you can experiment with other thickening agents. All-purpose flour is a common alternative. It creates a doughier slime. Baking soda can sometimes be used in combination with other thickeners to adjust texture. Each option will give a slightly different slime consistency, so experimentation is key.
What are some ways to add scent to my homemade dish soap slime?
You can easily add scent to your slime by incorporating a few drops of essential oils. Add them with the dish soap before mixing in your thickener. Popular choices include lavender, peppermint, or citrus oils. Make sure the essential oil is skin-safe. You can also use a few drops of food extracts like vanilla or almond.
Conclusion
Making slime with dish soap and no glue is a rewarding and simple project. It uses everyday items you likely already own. I have found this method offers an accessible way to enjoy a popular sensory toy without special ingredients. We covered everything from gathering your basic supplies to troubleshooting common issues. You now know how to customize your creations with colors, scents, and textures. You can make unique batches of slime every time. This approach not only saves money but also provides a safer, more natural alternative to traditional glue-based slimes.
The joy of crafting something with your own hands is truly special. I hope you feel confident to try this fun experiment at home. It is a fantastic activity for all ages. So, gather your dish soap, pick your favorite thickener, and let your creativity flow. Get ready to enjoy hours of stretchy, squishy fun. Start making your own homemade slime today!
- slime
- dish soap slime
- no glue slime
- homemade slime
- DIY crafts

Todd Martin
Senior Writer
With over 15 years of experience in home renovation and design, I started HEG to share what I’ve learned with homeowners who want to create spaces that are both beautiful and functional. I’ve always believed in a hands-on approach, and over the years, I’ve picked up practical solutions that actually work. Through HEG, I aim to make home improvement more approachable, sharing real tips that help you create a home you truly love.