· Katria Melrose · DIY & Crafts · 20 min read
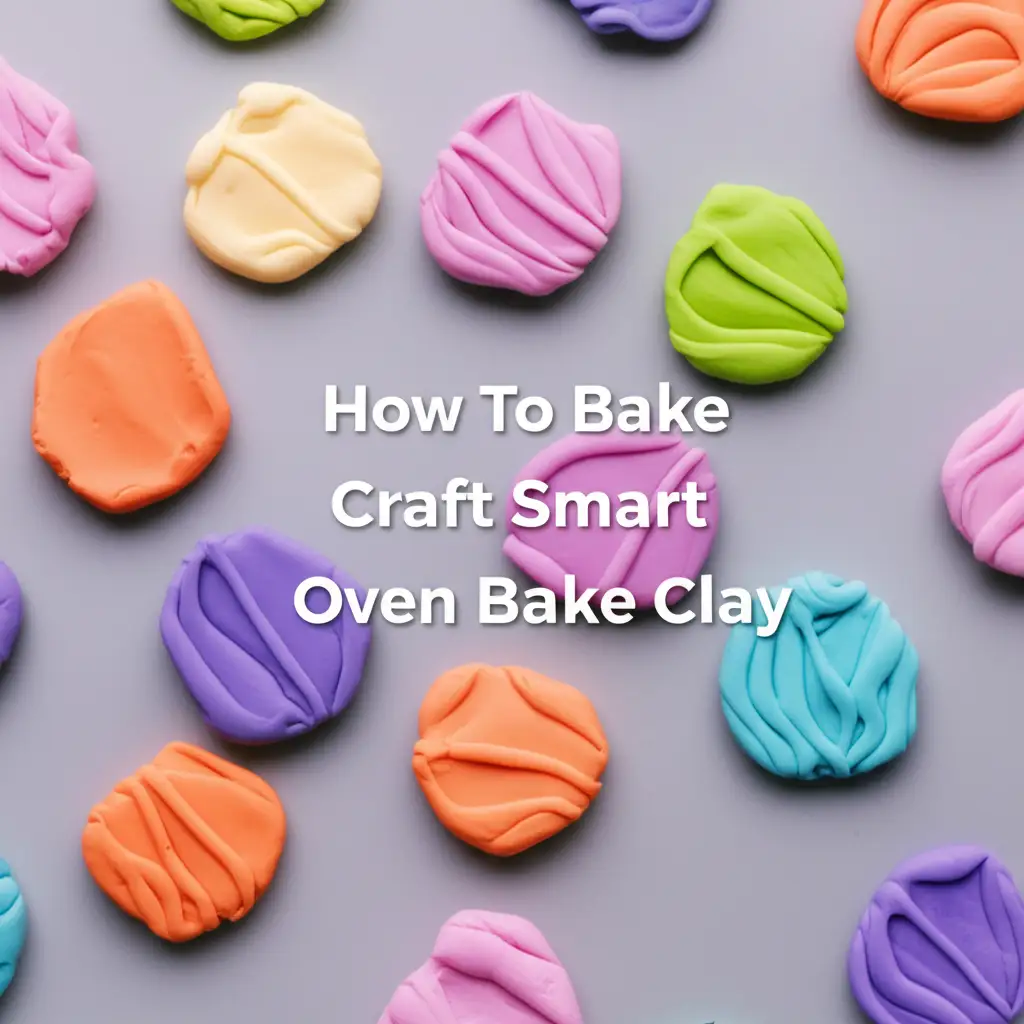
How To Bake Craft Smart Oven Bake Clay

Bake Craft Smart Oven Bake Clay Perfectly
Creating beautiful things with clay brings joy. You spend hours shaping your vision. When you use Craft Smart Oven Bake Clay, the final step makes all the difference. Baking your clay correctly ensures your art becomes strong and lasts. It moves from a soft, moldable material to a solid, durable piece. This guide helps you achieve the best results for your Craft Smart Oven Bake Clay projects. We cover every step, from preparing your workspace to cooling your finished art.
Understanding the right temperature and time protects your hard work. Improper baking can lead to brittle pieces or even a sticky mess. This article shares clear instructions. We focus on precise temperatures, baking methods, and troubleshooting common issues. You will learn how to prepare your oven, place your clay art correctly, and know when it is done. Let us make sure your Craft Smart Oven Bake Clay creations last for years.
Takeaway
- Always use an oven thermometer for accurate temperature control.
- Bake Craft Smart clay at 275°F (130°C) for 15-30 minutes per ¼ inch thickness.
- Place clay on a baking sheet lined with parchment paper or foil.
- Allow pieces to cool completely inside the oven after baking.
- Troubleshoot issues like cracking or burning with simple adjustments.
To bake Craft Smart Oven Bake Clay, preheat your oven to 275°F (130°C). Place your sculpted clay pieces on a baking sheet lined with parchment paper. Bake for 15-30 minutes per ¼ inch (6mm) of thickness. Monitor the clay closely. Allow the pieces to cool inside the oven before handling them. This process hardens the clay, making your creation permanent.
Understanding Craft Smart Oven Bake Clay
Craft Smart Oven Bake Clay is a popular choice for artists and crafters. It is a type of polymer clay. This clay stays soft until you bake it. Polymer clay does not dry out when exposed to air. You have ample time to sculpt and refine your creations. This feature makes it forgiving for beginners and experienced artists alike.
The clay hardens through a process called polymerization. Heat from your oven triggers this chemical change. The clay becomes durable and permanent after baking. This transformation makes it suitable for jewelry, figurines, decorative items, and more. Craft Smart clay offers a wide range of colors. You can mix colors to create custom shades. Its consistency is easy to work with. It holds detail well, which is great for intricate designs. I find it very user-friendly.
Proper baking is crucial for the clay’s strength and finish. Under-baked clay remains brittle. It can easily break or crumble. Over-baked clay can burn, crack, or become discolored. It might also lose its structural integrity. Achieving the correct bake makes your projects strong. They will withstand handling and time. Knowing your clay’s specific baking requirements helps you achieve perfect results.
You can create many items with this versatile clay. Consider making small ornaments or keychains. Sculpting miniature figures is also popular. I enjoy making custom buttons for my sewing projects. The clay’s ability to hold detail helps with small designs. Its non-drying nature means you can take breaks during sculpting. This flexibility makes crafting enjoyable for long sessions.
Gathering Your Baking Essentials
Before you bake your Craft Smart Oven Bake Clay, gather all necessary tools. Having everything ready streamlines the process. This preparation ensures a smooth baking experience. The right equipment helps you achieve optimal results. It also promotes safety in your kitchen workspace.
First, you need a conventional home oven. This is where your clay will harden. Most standard kitchen ovens work well for baking polymer clay. Ensure your oven is clean inside. Food residue can affect clay color or leave odors. Next, an oven thermometer is an absolute must-have. Oven thermostats are often inaccurate. An external thermometer gives you the true temperature. This accuracy prevents under-baking or over-baking. I always use one to confirm my oven is at the correct temperature. You can find these at most kitchen supply stores.
You will also need a baking surface. A metal baking sheet or ceramic tile works well. Line your baking surface with parchment paper or aluminum foil. This prevents your clay from sticking. It also protects your baking sheet from potential marks. Never place clay directly on a metal surface without a barrier. Consider using a small ceramic tile as your baking surface. You can move the tile directly into the oven. This helps avoid distorting delicate pieces.
A timer is also essential. Baking Craft Smart Oven Bake Clay requires precise timing. Use a kitchen timer on your oven, microwave, or phone. You want to track the baking duration accurately. Remember to note the thickness of your clay pieces. This helps determine the correct baking time. Finally, a small fan or open window for ventilation is good. Some polymer clays emit a slight odor during baking. Good airflow keeps your space fresh. Getting these items ready before you start saves you time and stress.
Preparing Your Craft Smart Clay Creations
Proper preparation of your clay pieces is key. This step ensures they bake evenly and look their best. Spend time on this stage. It impacts the final appearance and durability of your art. Your patience here pays off.
Start by ensuring your clay creations are clean. Dust, lint, or pet hair can stick to raw clay. They will bake right into your piece. Gently wipe your finished sculpture with a soft, lint-free cloth. You can also use rubbing alcohol for stubborn smudges. Be gentle. You do not want to distort the shape. I often use a piece of painter’s tape to dab away small fibers. This works wonders for picking up tiny particles.
Smooth out any fingerprints or imperfections. Your fingers naturally leave marks on soft clay. Use a soft brush or a silicone tool to gently smooth the surface. You can also lightly rub the clay with your finger. Wear disposable gloves while sculpting if fingerprints are a major concern. Gloves also help keep your clay clean. They prevent natural oils from your skin transferring to the clay. This is a practice I adopted early on.
Consider reinforcing delicate parts of your sculpture. Thin areas or protruding pieces can break easily. For instance, wire armatures add strength to thin limbs. You can insert a small piece of wire into a delicate part. This provides internal support during baking and after. You can also build up thicker sections. This prevents stress points from forming. These reinforcements make your baked items more durable.
Place your prepared clay pieces carefully on your baking surface. Use a baking sheet lined with parchment paper or aluminum foil. Ensure pieces are not touching each other. Give them enough space for air to circulate. This promotes even baking. Small, delicate items can be placed on a bed of cornstarch or baking soda. This support helps them maintain their shape. It also prevents flat spots. Use an oven-safe glass dish or ceramic tile if your items are very delicate. This allows you to transfer them without disturbing the shape. Your careful preparation makes a big difference in the final quality of your baked clay.
The Critical Role of Oven Temperature and Time
Baking Craft Smart Oven Bake Clay correctly relies on two vital factors: temperature and time. Ignoring these can ruin your projects. Precision ensures your clay hardens perfectly. This makes it strong and long-lasting. Getting these right is not hard. You just need to pay attention.
The recommended baking temperature for Craft Smart Oven Bake Clay is 275°F (130°C). This temperature is standard for many polymer clays. It allows the polymerization process to occur steadily. It is hot enough to cure the clay without scorching it. Always preheat your oven fully before placing your clay inside. An oven that is still heating up will not provide a consistent temperature. This can lead to uneven baking. Use your oven thermometer to confirm the correct temperature. Ovens can fluctuate, so checking is important. I always wait at least 15-20 minutes after the oven light indicates it is preheated. This ensures the temperature inside is stable. If you have a Samsung oven, learn how to turn on Samsung oven to bake properly to ensure accurate preheating.
Baking time depends on the thickness of your clay piece. A good rule of thumb is 15-30 minutes for every ¼ inch (6mm) of thickness. For example, a piece ¼ inch thick bakes for 15-30 minutes. A piece ½ inch thick bakes for 30-60 minutes. Thicker items need more time. This allows the heat to penetrate through the entire mass. For larger or unusually shaped items, you might need to bake them longer. Do not guess the thickness. Measure your thickest part. If your oven has a “quick bake” or “convection” setting, like on a Frigidaire oven, be cautious. Convection ovens can bake faster and hotter. If you use one, you might need to adjust the temperature down by 25°F (15°C) and reduce baking time. Learn how to use quick bake on frigidaire oven to understand its functions.
Always set a timer. Do not just estimate the time. Over-baking can cause brittleness or burning. Under-baking leaves your clay soft and fragile. When baking multiple pieces, group items of similar thickness. This helps ensure they all cure properly. Consistency in temperature and time is key to successful clay baking. Knowing how to use a Samsung Smart Oven for baking can also help you manage precise temperatures and times more effectively.
Proper Baking Techniques for Craft Smart Clay
Once your oven is ready and your clay pieces are prepared, it is time to bake. Proper placement inside the oven improves results. It helps ensure consistent heat exposure. Following these techniques gives your clay the best chance to cure perfectly.
Place your baking sheet with clay creations on the middle rack of your oven. The middle rack provides the most even heat distribution. Avoid placing items too close to heating elements. This can cause scorching or uneven baking. Leave ample space around your baking sheet for air circulation. Do not overcrowd the oven. Baking too many pieces at once can lower the oven temperature. It can also block heat flow to some items. If you are baking in a high-end oven, understanding how to bake in a Wolf oven might provide specific tips for rack placement in such advanced appliances.
Some crafters prefer to cover their clay pieces during baking. You can loosely tent aluminum foil over your clay. This helps protect delicate colors from browning. It also can prevent scorching on thin areas. The foil should not touch the clay. It merely acts as a shield. This is especially useful for light-colored clays or pieces with fine details. Covering helps maintain a more even temperature around the clay. This can lead to a more consistent cure.
Once the baking time is complete, turn off your oven. Do not remove the clay pieces immediately. Allow them to cool down slowly inside the oven. This gradual cooling process is very important. Sudden temperature changes can shock the clay. This can lead to cracking or brittleness. I usually open the oven door a crack after about 10 minutes. This allows a very slow decrease in temperature. Let the pieces cool completely inside the oven until they reach room temperature. This might take an hour or more, depending on the size of your items.
When completely cool, carefully remove your baked items. They should feel hard and solid. A properly baked piece will not bend or crumble. Test a hidden area if you are unsure. If it feels flexible or soft, it may need more baking time. Repeat the baking process if necessary, checking every 10-15 minutes. Proper cooling makes your Craft Smart Oven Bake Clay projects strong and durable.
Troubleshooting Common Baking Issues
Even with careful preparation, baking issues can sometimes arise. Knowing how to identify and fix these problems saves your projects. Do not get discouraged if your first bake is not perfect. Most common issues have simple solutions.
One common problem is under-baked clay. This happens when the clay feels flexible, soft, or crumbly after cooling. It might bend easily or leave fingernail marks. This indicates the clay did not reach full polymerization. The solution is to re-bake the piece. Place it back in the oven at the recommended 275°F (130°C). Bake for another 15-30 minutes per ¼ inch thickness. Check again after it cools. You can re-bake polymer clay multiple times until it is fully cured. Just ensure it does not burn.
Over-baked or burnt clay is another issue. This occurs if the temperature is too high or the baking time too long. The clay might appear dark, brittle, or have a distinct burnt odor. Light-colored clays often show browning. Unfortunately, over-baked clay cannot be fixed. The chemical structure has been damaged. You will need to start over with a new piece. To prevent this, always use an oven thermometer. Reduce baking time slightly for very thin areas. You might also try tenting with foil to prevent scorching.
Cracking can happen for several reasons. Rapid temperature changes cause thermal shock. This is why slow cooling is important. Thick areas on a piece may cure at different rates than thin areas, leading to stress. To avoid this, try to make your clay pieces of uniform thickness. If you must have varying thicknesses, cure them for longer at a slightly lower temperature (e.g., 265°F or 129°C) to allow heat to penetrate slowly. Air bubbles trapped inside the clay can also cause cracking. Knead your clay thoroughly to remove air before sculpting.
Discoloration or unwanted browning, especially with lighter clays, can be frustrating. This is often a sign of slightly too high heat or proximity to heating elements. To fix this, use a lower temperature within the recommended range (e.g., 265°F instead of 275°F). You can also tent your clay with aluminum foil to shield it. Place a ceramic tile on a lower rack to diffuse heat. Remember that some pigments in polymer clay may slightly deepen or change color after baking, which is normal. Understanding these common issues helps you refine your baking process for Craft Smart Oven Bake Clay.
Finishing Your Baked Clay Projects
Once your Craft Smart Oven Bake Clay creations are baked and fully cooled, the fun is not over. The finishing touches enhance their appearance. They also add durability. This stage lets your creativity shine even further. You can transform a simple baked piece into a polished work of art.
Sanding is often the first step. Baked polymer clay can have small imperfections. These include fingerprints, rough spots, or tool marks. Use fine-grit sandpaper (400-grit or higher) for a smooth finish. You can wet-sand for an even smoother surface. This involves dipping the sandpaper in water. Sanding removes blemishes. It also prepares the surface for other finishes. Always sand in one direction. Work your way up to higher grits for a glass-like feel. For example, start with 400-grit, then move to 600, 800, and even 1000 or 1200. This process takes time but yields impressive results.
After sanding, you might choose to glaze or varnish your pieces. Glazes add shine and a protective layer. They make colors appear more vibrant. Make sure to use a glaze specifically for polymer clay. Other varnishes can remain sticky or degrade the clay over time. Apply glazes in thin, even coats. Allow each coat to dry completely before applying the next. You can choose from glossy, satin, or matte finishes. This depends on your desired look. A good glaze protects your art from scratches and dirt.
Painting is another popular finishing option. You can use acrylic paints on baked polymer clay. This allows for intricate details or color corrections. Ensure the paint is fully dry before applying any glaze. Painting before glazing seals the color. It also creates a cohesive finish. For small details, fine-tip brushes work best. You can also use paint pens for precise lines. Always allow paint to cure fully. This prevents smudging under a glaze layer.
Finally, consider how you will store your finished Craft Smart Oven Bake Clay projects. Store them away from direct sunlight. Sunlight can cause some polymer clay colors to fade over time. Keep them in a cool, dry place. For delicate items, store them separately to prevent damage. With these finishing steps, your baked clay art will look professional. It will also stand the test of time.
Maximizing Durability and Lifespan
You want your Craft Smart Oven Bake Clay creations to last. Proper baking is the foundation for durability. However, some extra steps can further extend the lifespan of your projects. These actions help protect your hard work. They ensure your art remains beautiful for years to come.
One key aspect is ensuring the clay is fully cured. We discussed this in the baking section. An under-cured piece is fragile. It will break easily. Always perform the “flex test” on a hidden part of your cool piece. A thin, properly cured piece should be flexible. It should not snap. A thicker piece should be very hard and resistant to marks. If it still feels soft or brittle, re-bake it. Adequate curing makes the clay incredibly strong. It withstands drops and general handling better.
Applying a protective finish greatly enhances durability. As mentioned, polymer clay specific glazes or varnishes are ideal. They form a clear, hard barrier over your baked clay. This layer guards against scratches, scuffs, and dirt. It also makes your pieces easier to clean. Choose a finish that suits your project. A glossy finish can highlight colors. A matte finish gives a more natural look. Always follow the manufacturer’s instructions for application and drying times. This ensures the protective layer performs its best.
Handle your finished pieces with care, especially delicate parts. While baked polymer clay is strong, it is not indestructible. Thin projections, like arms or antennae, can still break if subjected to excessive force. Avoid dropping your creations on hard surfaces. Store them carefully to prevent accidental damage. For jewelry, consider using strong findings that will not easily detach. Reinforce attachment points during the sculpting phase if possible.
Cleaning your baked clay items also contributes to their longevity. For most pieces, a soft, damp cloth is enough. Avoid harsh chemicals or abrasive cleaners. These can dull or damage the surface. For deeper cleaning, a mild soap and water solution works well. Gently wipe the surface. Then, rinse and dry thoroughly. Proper cleaning keeps your art looking fresh. Regular care helps maintain its appearance. These practices ensure your Craft Smart Oven Bake Clay creations endure. They can become cherished items or gifts that last.
Exploring Advanced Craft Smart Clay Techniques
Once you master basic baking, you can explore more advanced techniques. Craft Smart Oven Bake Clay offers many possibilities. These methods allow for greater detail and unique effects. They expand your creative horizons. You can take your clay art to a new level.
One popular technique is caning. Caning involves creating a long “log” of clay with a pattern running through it. You reduce this log by gently pressing and stretching it. This shrinks the pattern while maintaining its design. Then, you slice thin pieces from the cane. These slices reveal the intricate pattern. You can apply these slices to other clay forms. Baking these composite pieces cures them together. This method is great for intricate jewelry or decorative surfaces. It creates complex designs without sculpting each detail individually.
Another exciting technique is mokume gane. This is inspired by an ancient Japanese metalworking technique. You stack several layers of different colored clays. Then, you impress patterns into the stack using tools or stamps. Slicing off thin layers reveals a unique, swirled design. This creates organic, marble-like patterns. You can use these patterned sheets to cover beads or other shapes. Each slice yields a distinct, beautiful pattern. It is a wonderful way to add visual depth to your projects.
You can also experiment with surface treatments. Before baking, you can add texture to your clay. Use stamps, texture sheets, or everyday objects like lace or leaves. After baking, you can use various mediums to enhance the surface. Consider painting with acrylics, using mica powders for a metallic sheen, or applying inks for washes. Embedding small objects into the clay before baking is also possible. Think about small beads, glitter, or tiny dried flowers. Just ensure embedded items are oven-safe.
Combining Craft Smart clay with other materials extends its versatility. After baking, you can attach your clay pieces to metal findings for jewelry. Use strong adhesives for this purpose. You can also incorporate your baked clay into mixed media art. Create unique embellishments for scrapbooks or cards. The key is to ensure the clay is fully baked and cooled before combining it with other elements. These advanced techniques help you create truly unique and impressive pieces with Craft Smart Oven Bake Clay.
FAQ Section
Can I bake Craft Smart clay in a toaster oven?
Yes, you can bake Craft Smart clay in a toaster oven. Ensure the toaster oven has accurate temperature control. Use an oven thermometer to verify the temperature. Place your clay on a baking sheet. Monitor it closely due to possible hot spots. Smaller projects fit well.
How do I know if my clay is fully baked?
After baking and cooling, a fully baked piece of Craft Smart clay will feel hard and solid. Thin areas might be slightly flexible but should not break easily. Thicker areas should be rigid and difficult to mark with a fingernail. If it feels soft or brittle, re-bake it.
What if my clay cracks during baking?
Cracking often occurs from rapid temperature changes or trapped air bubbles. Ensure slow cooling in the oven after baking. Thoroughly knead your clay before sculpting to remove air. For very thick pieces, bake at a slightly lower temperature for longer.
Can I rebake Craft Smart clay?
Yes, you can rebake Craft Smart clay. If your piece is under-baked, simply put it back in the oven. Use the same temperature and time guidelines. You can re-bake multiple times until it feels fully cured. Ensure it does not burn with repeated baking.
Is Craft Smart oven bake clay toxic?
Craft Smart Oven Bake Clay is generally non-toxic when used as directed. It conforms to ASTM D-4236 safety standards. Avoid ingesting the clay. Do not use tools for clay that you also use for food. Ensure good ventilation during baking, especially if odors are present.
What is the shelf life of unbaked Craft Smart clay?
Unbaked Craft Smart Oven Bake Clay has a long shelf life. Store it in an airtight container or plastic wrap. Keep it in a cool, dry place away from direct sunlight. This prevents it from drying out or hardening prematurely. It can last for years when stored properly.
Conclusion
Mastering how to bake Craft Smart Oven Bake Clay transforms your creative efforts. This process cures your soft clay creations into durable, lasting works of art. We have covered every vital step, from gathering your supplies to refining your finished pieces. Precise temperature control and correct baking times are your best friends. These steps ensure your clay hardens properly. They prevent common issues like cracking or breaking.
Remember to always use an oven thermometer. This simple tool helps you maintain the recommended 275°F (130°C) for consistent baking. Allow your beautiful clay creations to cool slowly inside the oven. This crucial step prevents thermal shock and strengthens the clay. With practice, you will gain confidence in baking your Craft Smart Oven Bake Clay projects. Your hard work in sculpting deserves a perfect finish. Keep experimenting with colors and techniques. Now you have the knowledge to make sure your handmade treasures last. Happy crafting!


