· Todd Martin · DIY Crafts · 22 min read
How To Make Dish Soap Slime Without Cornstarch
Crafting Dish Soap Slime Without Cornstarch
Making slime brings so much joy. Kids and adults love its squishy, stretchy feel. Often, slime recipes ask for cornstarch. But what if you do not have any on hand? Or maybe you prefer to use other items? Good news: you can still make amazing dish soap slime without cornstarch. I have explored many methods to achieve this goal. This guide shows you how.
We will dive into several creative recipes. You will learn how simple ingredients in your kitchen become fun, gooey slime. We cover the science behind these transformations. You will get practical tips for success. We will also discuss troubleshooting common issues. Get ready to unleash your inner scientist and make fantastic homemade slime!
Takeaway
- Make dish soap slime using salt, sugar, or other household items instead of cornstarch.
- Adjust ingredient ratios carefully to achieve the best slime consistency.
- Store homemade slime in airtight containers to keep it fresh for longer.
To make dish soap slime without cornstarch, combine dish soap with a thickening agent like salt, sugar, or flour. Mix slowly and thoroughly until the mixture forms a cohesive, non-sticky consistency. Chill the mixture briefly for better texture.
The Magic of Dish Soap Slime Without Cornstarch
Creating dish soap slime without cornstarch is a popular challenge for many DIY enthusiasts. Most traditional slime recipes rely on cornstarch for its thickening properties. Cornstarch absorbs liquid well. It creates a soft, dough-like texture. However, it is not the only option available. Many common household items can act as effective substitutes. You likely have these items in your pantry already.
The key to making slime from dish soap is finding an ingredient that interacts with the soap. This ingredient needs to change the soap’s viscosity. Viscosity refers to how thick or thin a liquid is. Dish soap has a low viscosity on its own. Adding certain substances makes it thicker. These substances act as binding agents. They cause the soap molecules to clump together. This clumping creates the familiar slime texture. This texture is stretchy and moldable.
People look for cornstarch alternatives for various reasons. Sometimes, they simply ran out of cornstarch. Other times, they want to experiment with different textures. Some prefer to use fewer ingredients. Using everyday items makes slime accessible to everyone. It encourages creativity in children and adults. You do not need special craft supplies. You just need a bottle of dish soap and a few common kitchen staples. This method saves money and time. It also reduces trips to the store.
I have found that understanding the basic principle helps a lot. You are essentially looking for an absorbent or binding agent. This agent will transform the liquid dish soap into a semi-solid. This change makes it fun to play with. This process is similar to how other slime recipes using dish soap without glue work. They all rely on the soap’s chemical properties and an added activator. Let us explore some of these exciting alternatives.
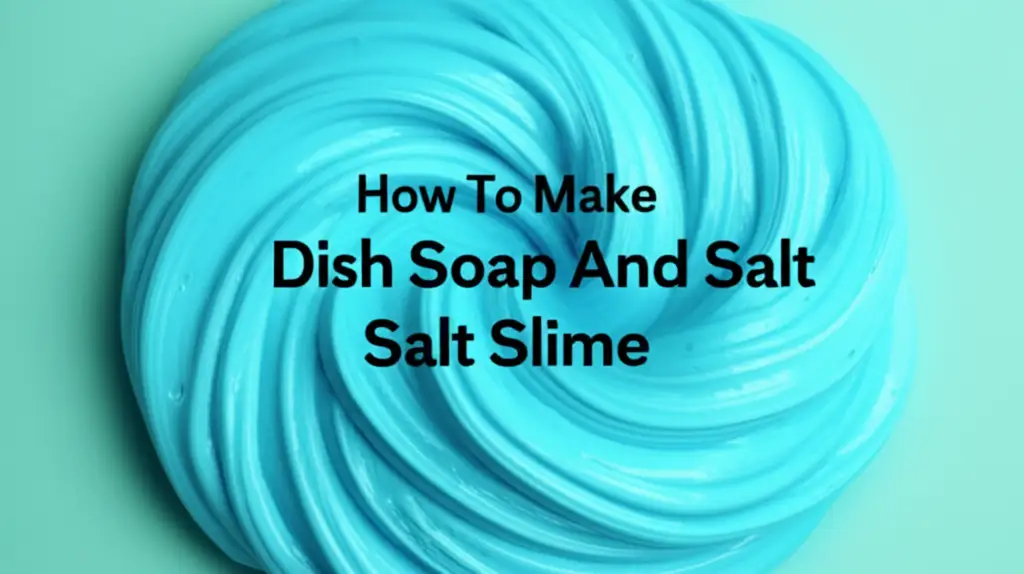
Crafting Slime with Dish Soap and Salt
The salt method is one of the most popular ways to make dish soap slime without cornstarch. It is incredibly simple. You only need two ingredients: dish soap and table salt. The scientific reason this works is quite interesting. Salt is an electrolyte. When salt dissolves in water, its ions interact with the soap molecules. This interaction changes the soap’s structure. The soap becomes thicker. It forms a gel-like substance. This substance is your slime.
I recommend starting with a small amount of dish soap. Pour about two to three tablespoons into a bowl. Any brand of dish soap works. I have found thicker dish soaps give better results. Next, add a tiny pinch of salt. Do not add too much at once. A little salt goes a long way. Stir the mixture gently. Use a spoon or a craft stick. You will notice the soap start to thicken immediately. It turns from liquid to a more viscous state.
If the mixture is still too sticky, add another tiny pinch of salt. Stir again. Repeat this process slowly. Be patient. Adding too much salt can ruin the slime. The mixture will become watery if you add too much salt. This is because excessive salt breaks down the soap structure. It causes the slime to liquefy. You want a smooth, stretchy consistency. It should not stick to your fingers excessively. It also should not be crumbly.
Once you achieve the desired consistency, place the slime in the refrigerator. Chill it for 10-15 minutes. This step is crucial. The cold temperature helps the slime firm up even more. It makes it less sticky. After chilling, your dish soap and salt slime is ready for play. This method is quick, easy, and uses materials found in almost every home. It is a perfect go-to recipe when you need a fast slime fix.
Step-by-Step Salt Slime Method
Making slime with dish soap and salt is straightforward. Follow these steps for the best results:
- Gather Ingredients: You need dish soap, table salt, a mixing bowl, and a spoon.
- Measure Dish Soap: Pour about 2-3 tablespoons of dish soap into your bowl. I usually start with this amount.
- Add Salt Gradually: Take a small pinch of salt. Sprinkle it into the dish soap.
- Stir Slowly: Mix the soap and salt gently but thoroughly. Watch the mixture. It should start to thicken right away.
- Adjust Consistency: If the slime is too liquid, add another tiny pinch of salt. Continue mixing. If it becomes too watery from too much salt, try adding more dish soap. This helps balance it.
- Chill Time: Once the slime feels right, put the bowl in the refrigerator. Let it chill for 10 to 15 minutes. This makes it less sticky.
- Enjoy: Take out your slime and play! It should be stretchy and fun.
Remember, the amount of salt needed varies. Different dish soap brands have different thicknesses. Always add salt in very small increments. This control helps you get the perfect texture every time.
Exploring Sugar as a Slime Activator
Using sugar to make dish soap slime without cornstarch is another fascinating method. Similar to salt, sugar acts as a thickening agent. Sugar molecules interact with the soap. They change its chemical structure slightly. This interaction leads to increased viscosity. The result is a slime that can be surprisingly soft and pliable. This method offers a different texture compared to the salt method. I find it sometimes produces a smoother slime.
You start this process the same way as with salt. Pour a small amount of dish soap into a clean bowl. Again, about two to three tablespoons is a good starting point. For sugar, I prefer granulated sugar. It dissolves well. Start by adding a very small amount of sugar. A quarter teaspoon is often enough to begin with. Stir the mixture slowly and consistently. You will observe the soap starting to transform. It gets thicker.
The key with sugar is even more patience than with salt. Sugar takes a little longer to dissolve and integrate fully. Keep stirring gently. If the mixture is still too thin, add another tiny amount of sugar. Continue this process. Do not rush. Adding too much sugar too quickly can make the slime grainy. It can also make it too stiff. You want a consistency that is moldable. It should stretch without breaking easily.
After mixing thoroughly, you might notice it is still a bit sticky. This is normal. Just like with the salt slime, chilling is essential. Place the sugar slime in the refrigerator for about 15-20 minutes. The cold helps the mixture solidify. It makes it less messy to handle. This method is a great alternative if you want to avoid salt. It also provides a unique tactile experience. You can also make other slime with dish soap and no glue variations.
Sugar Slime Recipe Guide
Follow these steps for a successful sugar slime:
- Prepare: Get your dish soap, granulated sugar, a mixing bowl, and a spoon.
- Add Dish Soap: Put 2-3 tablespoons of dish soap into the bowl.
- Introduce Sugar: Start with a quarter teaspoon of granulated sugar. Sprinkle it into the soap.
- Mix Gently: Stir the mixture slowly. Be thorough. Watch for thickening. It may take a moment.
- Adjust Slowly: If needed, add another very small amount of sugar. Continue stirring until it reaches a desired slime texture. It should be thick but still pliable.
- Chill: Place the bowl in the refrigerator for 15-20 minutes. This step enhances the texture.
- Playtime: Remove the chilled slime. Enjoy stretching and playing with your new creation.
The sugar slime might not be as stretchy as glue-based slimes. However, it offers a fun, unique texture. It is a great experiment for kids. It teaches them about simple chemical reactions.
Other Household Ingredients for Slime Success
While salt and sugar are common, other household ingredients can also help you make dish soap slime without cornstarch. Each alternative offers a slightly different texture and challenge. Experimenting with these can be fun. It lets you discover new ways to make slime. These methods are great when you want to try something different.
One option is all-purpose flour. Flour is a common thickener in cooking. It can absorb liquids effectively. When you mix flour with dish soap, it creates a dough-like consistency. For this method, start with dish soap in a bowl. Add flour a little at a time. Stir well after each addition. You will need to use more flour than salt or sugar. The goal is a pliable, non-sticky dough. This type of slime might be less stretchy. It will be more moldable. It feels like playdough but is still unique.
Another interesting ingredient is toothpaste. This might sound strange, but many toothpastes contain gelling agents. These agents can react with dish soap. The result is often a surprisingly stretchy slime. Choose a gel toothpaste for the best outcome. Avoid abrasive kinds. Mix a small amount of toothpaste with dish soap. Stir slowly. You might need to add more dish soap or toothpaste to get the right feel. This method sometimes requires more trial and error. The texture can vary greatly depending on the toothpaste brand.
You can also use baking soda. While it is often used with glue and contact solution for slime, it can thicken dish soap on its own too. For this, mix dish soap with a small amount of baking soda. Stir well. The slime might not be as stretchy. It often has a unique, almost foamy texture. For more details on this, you can check out how to make slime with dish soap and baking soda. Each of these options gives you a different sensory experience. They prove that slime making is flexible.
Remember to always start with small amounts of your chosen activator. It is easier to add more than to fix a watery mixture. These alternative methods are fantastic for exploring the chemistry of everyday items. They open up a world of creative play.
Quick Guide to Other Slime Ingredients
Let us look at quick tips for using these alternative ingredients:
Flour Method:
- Ingredients: Dish soap, all-purpose flour.
- Process: Mix a few tablespoons of dish soap. Gradually add flour, about a tablespoon at a time.
- Consistency: Stir until it forms a thick, dough-like consistency. It will be less stretchy than traditional slime. It is more like a soft playdough.
- Tip: If it is too crumbly, add a tiny bit more dish soap.
Toothpaste Method:
- Ingredients: Dish soap, gel toothpaste.
- Process: Combine equal parts dish soap and toothpaste in a bowl.
- Consistency: Mix slowly until it thickens. The texture will vary a lot. It can be quite stretchy or soft.
- Tip: Experiment with different brands of gel toothpaste. Some work better than others.
Baking Soda Method:
- Ingredients: Dish soap, baking soda.
- Process: Add a half teaspoon of baking soda to 3-4 tablespoons of dish soap.
- Consistency: Stir until it thickens. It might have a slightly gritty or foamy feel. It will not be as clear.
- Tip: This method works best if you plan to play with it right away. It can become watery over time.
These methods offer unique ways to enjoy homemade slime. They show how versatile dish soap can be.
Tips for Perfect Slime Consistency and Troubleshooting
Achieving the perfect slime consistency can be a bit of an art. When you make dish soap slime without cornstarch, there are variables to consider. The type of dish soap you use matters. Different brands have different thicknesses. The humidity in your environment can also affect the outcome. It is a good idea to understand how to adjust your slime. This helps you fix common issues.
One common problem is slime that is too sticky. If your slime sticks to your hands excessively, it needs more activator. For salt or sugar slime, add a tiny pinch more of the respective ingredient. Mix it in thoroughly. Do this slowly. Remember, a little goes a long way. For flour slime, add a bit more flour. Keep kneading or stirring until the stickiness reduces. Sometimes, chilling the slime for an extra 10-15 minutes can also help reduce stickiness.
Conversely, slime that is too watery is another frequent issue. This usually happens if you added too much activator. If your salt or sugar slime turns watery, it means the bond between the soap molecules broke. You can try to fix this by adding more dish soap. This dilutes the excess activator. It helps rebuild the structure. If this does not work, you might need to start over. It is why I always stress adding activators in tiny amounts.
Slime that is too stiff or crumbly is also a possibility. This occurs when there is too much activator. Or not enough dish soap. If your slime is breaking apart easily, it lacks flexibility. To fix this, add a small amount of dish soap. Knead it in slowly. This will add moisture and elasticity. It makes the slime more pliable. You are essentially rehydrating and softening the mixture. This adjustment takes patience.
I always recommend starting with smaller batches. This way, if something goes wrong, you have not wasted many materials. It is also easier to control the consistency of a small batch. Take notes of your ratios if you find a perfect recipe. This helps you replicate it later. Slime making is a journey of discovery. Every batch teaches you something new.
Essential Slime-Making Tips
Here are some general tips to ensure your slime turns out great:
- Use Fresh Ingredients: Fresh dish soap and activators tend to work best. Older ingredients might not perform as well.
- Mix Thoroughly: Proper mixing is vital. Ensure the activator is fully incorporated into the dish soap. Use a spoon or spatula to scrape the sides of the bowl.
- Chill is Key: Almost all no-glue, no-cornstarch slime recipes benefit from refrigeration. This step helps the slime set. It improves its texture and reduces stickiness.
- Store Properly: Keep your homemade slime in an airtight container. This prevents it from drying out. A small plastic container or a Ziploc bag works well.
- Clean Up Spills: Slime can sometimes make a mess. If you get slime on your couch, act quickly. A damp cloth and gentle scrubbing often work.
- Experiment Safely: Always supervise children during slime making. Ensure they understand not to eat the ingredients.
By following these tips, you can increase your chances of making amazing dish soap slime without cornstarch. Each successful batch builds confidence.
Safety Measures and Storage for Homemade Slime
Safety is paramount when making and playing with homemade slime. Even though you are using common household items like dish soap, salt, or sugar, precautions are necessary. These ingredients are not meant for consumption. Always emphasize that slime is for play, not for eating. This is especially important when children are involved in the activity.
When handling dish soap, some people might have sensitive skin. It is a good practice to wear gloves if you have known skin sensitivities. After playing with slime, always wash your hands thoroughly with soap and water. This removes any residue and keeps hands clean. Ensure children also wash their hands after playing. This simple step prevents accidental ingestion or skin irritation.
Keep all ingredients and the finished slime out of reach of very young children and pets. Small children might try to put things in their mouths. Slime, even non-toxic slime, can pose a choking hazard. Store it in a secure place. Supervise playtime, especially with younger children. This ensures a fun and safe experience for everyone.
Proper storage extends the life of your homemade dish soap slime. Slime made without common binders like glue or borax tends to have a shorter lifespan. It can dry out or become watery over time. To keep your slime fresh for as long as possible, store it in an airtight container. A small plastic container with a lid works perfectly. Even a resealable plastic bag can work. Make sure to squeeze out all the air before sealing.
Refrigeration can also help preserve your slime. Storing it in the fridge keeps it cooler and delays breakdown. It also often maintains a better texture. If your slime starts to get watery, putting it in the fridge can sometimes help firm it up again. However, if it separates or grows mold, it is time to discard it. Do not try to salvage old slime. Dispose of it properly in the trash. By following these safety and storage tips, you can enjoy your homemade dish soap slime for longer periods.
Slime Safety and Longevity Tips
Here are the key points for keeping slime safe and durable:
- No Eating: Remind everyone that slime is for play only. It is not food.
- Handwashing: Wash hands before and after playing with slime. This keeps the slime clean and your hands free of residue.
- Supervision: Always supervise young children. Slime can be a choking hazard for small kids.
- Gloves (Optional): If you have sensitive skin, wear gloves while mixing or playing.
- Airtight Storage: Store all slime in a sealed container. This prevents it from drying out.
- Refrigeration: Keep your slime in the refrigerator. This helps maintain its texture and extends its life.
- Discard When Needed: If slime gets moldy, smells bad, or breaks down, throw it away. Do not try to reuse it.
These practices ensure your slime activities are both enjoyable and responsible.
Creative Variations and Add-Ins for Your Slime
Making dish soap slime without cornstarch is just the beginning. Once you master the basic recipes, you can start experimenting with creative variations. Adding colors, glitter, or scents can transform your slime. It makes it even more unique and appealing. These additions do not usually affect the slime’s core consistency. They simply enhance the sensory experience.
Adding Color: Food coloring is the easiest way to color your slime. Add a few drops of liquid food coloring to your dish soap before adding the activator. Mix it in thoroughly until the color is even. Then proceed with adding salt, sugar, or flour. You can use single colors or mix different colors to create new shades. Gel food coloring also works well. It produces vibrant hues. I find that gel colors are less likely to water down the mixture.
Adding Sparkle: Glitter is a popular slime add-in. It gives your slime a magical, shimmering look. Add fine glitter or chunky glitter to your dish soap mixture. Do this before you add the activator. Mix it in well. The glitter will be suspended throughout the slime. When you stretch the slime, the glitter catches the light. This adds another layer of fun to your creation. I prefer fine glitter for a more even sparkle.
Adding Scent: While dish soap already has a scent, you can enhance it or change it entirely. Essential oils are great for this. Add one or two drops of a skin-safe essential oil to your dish soap before mixing. Popular choices include lavender, peppermint, or citrus scents. Be careful not to add too much. A little goes a long way. Always check if the essential oil is safe for skin contact. Some essential oils can irritate skin in larger amounts.
These additions allow for endless customization. You can create themed slimes for holidays or special occasions. Imagine green slime for St. Patrick’s Day or red and green for Christmas. The possibilities are limited only by your imagination. Remember that while these add-ins make the slime more fun, they do not make it edible. Continue to follow all safety guidelines.
Enhancing Your Slime Creations
Let us recap how to make your slime extra special:
- Color It Up:
- Method: Add liquid or gel food coloring to the dish soap first.
- Tip: Mix colors for unique shades. Remember that the color of your dish soap will slightly influence the final color.
- Sparkle and Shine:
- Method: Stir in fine or chunky glitter before adding your activator.
- Tip: Use iridescent glitter for a multi-dimensional effect.
- Scent-sational Slime:
- Method: Add 1-2 drops of skin-safe essential oil to the dish soap.
- Tip: Start with a tiny amount. You can always add more if the scent is too light.
- Small Additions:
- Consider adding tiny beads or sequins for extra texture. Ensure they are not too small to be a choking hazard.
These creative touches make your dish soap slime without cornstarch even more exciting to play with. They add visual appeal and engaging textures.
The Science Behind Cornstarch-Free Slime
Understanding the science helps us appreciate how simple ingredients become playful slime. When you make dish soap slime without cornstarch, you are observing basic chemistry. It is all about how different molecules interact. These interactions change a liquid’s properties.
Dish soap itself is a mixture of water, surfactants, and other chemicals. Surfactants are molecules that reduce the surface tension of water. This property makes dish soap effective at cleaning. When surfactants interact, they can form structures called micelles. These are tiny spheres that trap grease and dirt. In slime making, we are changing how these micelles behave.
When you add salt to dish soap, a process called “salting out” occurs. Salt dissolves into ions. These ions are charged particles. They compete with the soap molecules for water. Water molecules are attracted to both the salt ions and the soap molecules. When there is a lot of salt, water molecules are drawn away from the soap. This causes the soap molecules to come closer together. They aggregate. This aggregation leads to thickening. The dish soap becomes less liquid and more gel-like. It forms the slime. The process is similar to how a traditional dish soap slime without glue or borax works, relying on these molecular changes.
Sugar works differently but achieves a similar result. Sugar molecules are larger than salt ions. They contain many hydroxyl groups (OH groups). These groups can form hydrogen bonds with water molecules and with the soap molecules. When sugar is added, it creates a network of bonds. This network traps water. It also intertwines with the soap molecules. This process increases the viscosity of the mixture. The soap becomes thicker and more cohesive. The result is a soft, often smoother slime.
Flour, unlike salt or sugar, is a starch. Although this article focuses on making slime without cornstarch, other starches like flour can still be used. Flour’s starch granules absorb water. They swell up. This absorption and swelling make the mixture thicker. When mixed with dish soap, the flour particles absorb the liquid component of the soap. They create a denser, dough-like material. This material has limited stretch but is very moldable.
Each activator creates different intermolecular forces. These forces change the texture of the soap. It shifts from a free-flowing liquid to a connected, stretchy material. This process is simple chemistry in action. It is a great way to learn about states of matter. It also teaches about the properties of different substances.
Understanding Slime Transformation
Let us break down the scientific concepts simply:
- Dish Soap Basics: Dish soap has special molecules called surfactants. These make water slippery and help clean.
- Salt’s Role (“Salting Out”):
- Salt breaks into tiny charged pieces in water.
- These pieces pull water away from the soap molecules.
- Soap molecules then stick together more closely. This makes the soap thick.
- Sugar’s Role (Hydrogen Bonding):
- Sugar has parts that like to stick to water and soap.
- It creates a network. This network traps the liquid.
- The soap becomes thicker and holds together better.
- Flour’s Role (Absorption):
- Flour contains starch. Starch acts like tiny sponges.
- These sponges soak up the liquid from the dish soap.
- The mixture becomes dense and dough-like.
- Viscosity Change: All these actions change the “thickness” of the soap. It goes from runny to solid-like. This is what makes it slime.
This basic understanding helps you adapt recipes. It empowers you to create your own slime experiments. It is all about observing how different materials react with each other.
Frequently Asked Questions About Cornstarch-Free Slime
Is dish soap slime without cornstarch edible?
No, dish soap slime is not edible. Even though it uses common kitchen ingredients like salt or sugar, dish soap is a cleaning product. It contains chemicals that are not safe for consumption. Always ensure children understand the slime is for play only.
How long does homemade dish soap slime last?
Homemade dish soap slime without cornstarch typically lasts for a few days to a week. Its lifespan depends on storage and ingredients. Keep it in an airtight container in the refrigerator to maximize its freshness. Discard it if it dries out, gets moldy, or smells bad.
Can I use any type of dish soap?
Yes, you can use most types of liquid dish soap. Thicker dish soaps often yield better results. They provide a better base for the activator to work with. Experiment with different brands if one does not work well. Gel dish soaps usually work best.
What if my slime is too watery?
If your dish soap slime is too watery, it likely has too much activator (salt or sugar). Try adding a small amount of extra dish soap to balance the mixture. Mix thoroughly. If it remains watery, you might need to start a new batch, adding the activator more slowly this time.
- dish soap slime
- no cornstarch slime
- homemade slime
- easy slime
- DIY slime without glue

Todd Martin
Senior Writer
With over 15 years of experience in home renovation and design, I started HEG to share what I’ve learned with homeowners who want to create spaces that are both beautiful and functional. I’ve always believed in a hands-on approach, and over the years, I’ve picked up practical solutions that actually work. Through HEG, I aim to make home improvement more approachable, sharing real tips that help you create a home you truly love.