· Todd Martin · Home Improvement · 19 min read
How To Finish Butcher Block Desk

Mastering the Perfect Finish for Your Butcher Block Desk
A butcher block desk brings natural beauty and warmth into any space. It feels sturdy and looks inviting. But, a raw butcher block top needs protection. Finishing it properly ensures its beauty lasts for many years. You protect it from spills, scratches, and everyday wear. This guide will help you understand how to finish a butcher block desk effectively. We will cover choosing the right products, preparing the surface, and applying your chosen finish. You will learn about different finish types and their benefits. Get ready to transform your desk into a durable, stunning centerpiece.
Takeaway
Finishing your butcher block desk protects it and enhances its beauty.
- Choose Wisely: Select a finish based on durability, maintenance, and desired look. Options include oil, polyurethane, and varnish.
- Prepare Meticulously: Proper sanding and cleaning are crucial for a smooth, lasting finish.
- Apply Correctly: Follow specific application steps for each finish type to avoid imperfections.
- Maintain Regularly: Ongoing care extends the life and appearance of your finished desk.
To finish a butcher block desk, first sand the surface thoroughly for smoothness. Then, choose your finish: a penetrating oil for a natural, food-safe look, or a film-building finish like polyurethane for maximum durability. Apply multiple thin coats, allowing proper drying time between each.
Understanding Your Butcher Block Desk and Finishing Needs
Your butcher block desk is more than just a surface; it is a significant piece of furniture. It consists of many wood strips glued together. This construction gives it strength and a unique grain pattern. Butcher block is popular for its warmth and organic appeal. However, raw wood is porous. It readily absorbs moisture, oils, and dirt. This can lead to stains, warping, or cracking over time.
This makes finishing your butcher block desk essential. A good finish acts as a barrier. It seals the wood, preventing liquids from soaking in. It also protects against physical damage like scratches and dents. A finish enhances the wood’s natural color and grain. It also makes the surface easier to clean. Choosing the right finish depends on how you use your desk. Do you need high durability, or a natural feel? Your answer guides your choice.
Different finishes offer different levels of protection and aesthetics. Some penetrate the wood, others form a protective layer on top. Consider your daily activities on the desk. A busy office desk needs more robust protection than a decorative one. Think about how often you want to reapply the finish. Some finishes require more frequent maintenance. Properly finishing your butcher block desk ensures it remains beautiful and functional for years.
Choosing the Best Finish for Your Butcher Block Desk
Selecting the right finish is the most important decision for your butcher block desk. Each type offers distinct benefits and drawbacks. Your choice impacts the desk’s look, durability, and maintenance needs. Let’s explore the most common options. You can decide what suits your desk best.
Oil-Based Finishes for Natural Beauty
Oil finishes penetrate deep into the wood fibers. They condition the wood from within. This type of finish enhances the wood’s natural color. It provides a soft, warm luster. Common oil finishes include tung oil, linseed oil, and mineral oil. Some products are blends, offering combined benefits.
These finishes are often food-safe, making them excellent if your desk might double as a dining or craft surface. Oil finishes are easy to apply and repair. You can simply reapply more oil to fix scratches or dry spots. They offer good water resistance if maintained. However, oil finishes require more frequent reapplication than film-building finishes. They provide less protection against heavy impacts or sharp objects. For ongoing maintenance, regular oiling keeps the wood hydrated and protected.
Polyurethane Finishes for Maximum Durability
Polyurethane creates a durable, protective film on the wood’s surface. It offers excellent resistance to scratches, water, and heat. This makes it ideal for high-traffic desks. Polyurethane comes in oil-based and water-based formulas. Water-based polyurethane dries faster and has low odor. It also tends to be clearer, yellowing less over time. Oil-based polyurethane is more durable and amber-toned. It takes longer to dry.
Polyurethane finishes are a good choice if you need robust protection. They require less frequent maintenance than oil finishes. Once applied, they form a hard, clear coat. This coat seals the wood completely. However, polyurethane can be more challenging to repair. Scratches or damage usually mean sanding down and reapplying a whole section. Applying it smoothly is important to avoid brush marks. This finish offers superior protection for your butcher block desk.
Varnish for Enhanced Resistance
Varnish is another film-building finish. It is similar to polyurethane but often contains more natural resins. This gives it a slightly different appearance and feel. Varnish offers very good durability and water resistance. It provides a strong protective layer. This layer protects the wood from daily wear. Marine varnish, for example, is highly resistant to water and UV light. This makes it suitable for extreme conditions.
Varnish can be oil-based or water-based. It offers a slightly different aesthetic than polyurethane. It often brings out the wood grain beautifully. Like polyurethane, it forms a hard surface. It protects against spills and general use. Varnish is a good option when you want a highly durable finish. It balances protection with a rich, clear appearance.
Combining Finishes for Specific Benefits
Sometimes, a single finish might not meet all your needs. You can combine finishes for a better result. For instance, you could apply an oil finish first. This enhances the wood’s natural depth. Then, you can top it with a few coats of polyurethane. This provides added durability. This method offers the best of both worlds. The oil nourishes the wood. The polyurethane creates a tough, protective shell.
This approach requires careful planning. Ensure the oil is fully cured before applying a film-building finish. Otherwise, adhesion problems may occur. Always read product labels for compatibility. Combining finishes gives your butcher block desk custom protection. It allows you to tailor the finish to your exact needs.
Essential Preparation Steps for Butcher Block Finishing
Proper preparation is the secret to a flawless finish. Skipping steps here can lead to a less durable or unsightly result. Preparing your butcher block desk correctly ensures the finish adheres well. It also makes the surface perfectly smooth. This is a crucial phase in the finishing process.
Unboxing and Initial Inspection
When your butcher block desk arrives, unbox it carefully. Lay it flat in the area where you will finish it. Allow the wood to acclimate to your home’s humidity and temperature. This might take a few days, or even a week. Acclimation helps prevent warping after finishing. Look for any visible damage. Check for deep scratches or dents. Address these before starting your work.
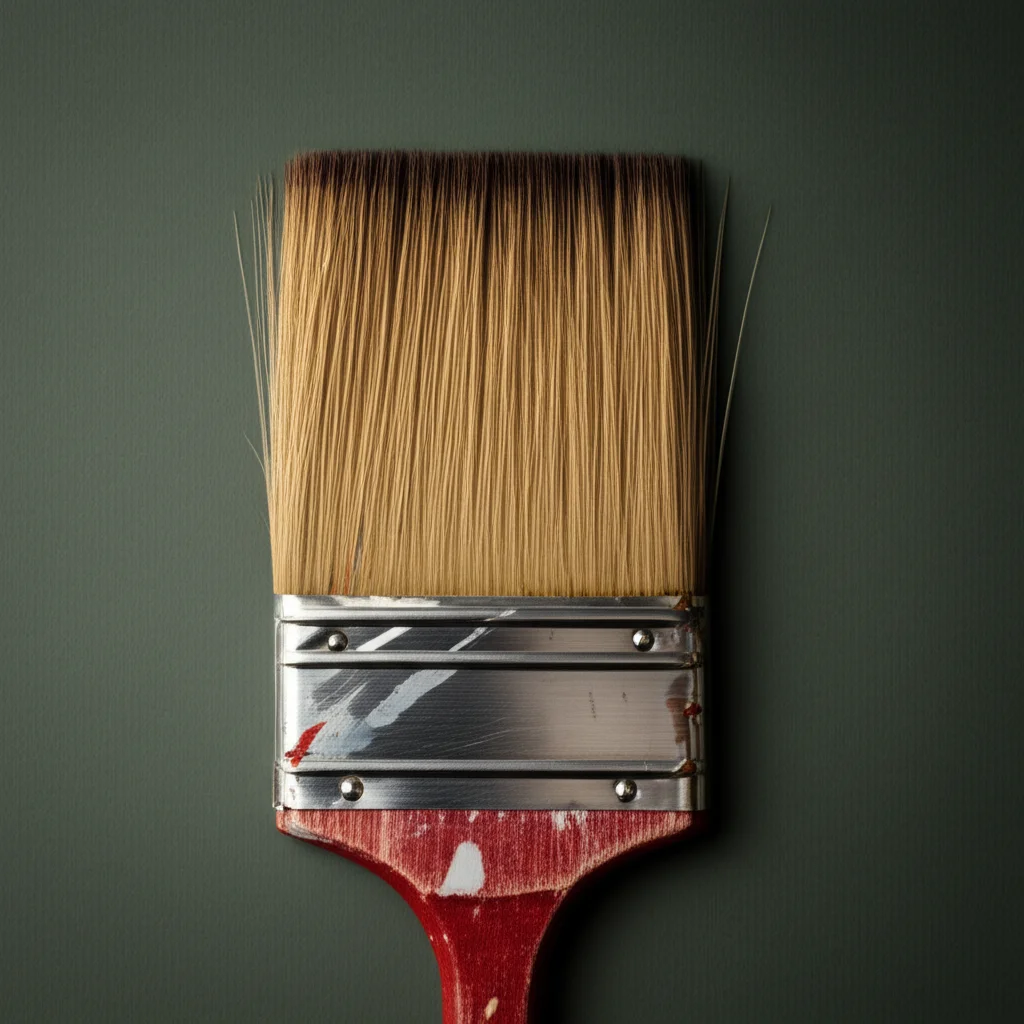
Thorough Sanding for a Smooth Surface
Sanding is perhaps the most critical step. It creates a smooth, even surface for the finish. Start with a coarser grit sandpaper, like 80 or 100-grit. Use an orbital sander for efficiency. Sand in the direction of the wood grain. Do not sand across the grain, as this creates visible scratches. Gradually move to finer grits. Progress through 120, 150, 180, and finally 220-grit. For an exceptionally smooth finish, you can even go up to 320-grit. Each successive grit removes the scratches from the previous one. Ensure you sand all surfaces evenly, including the edges. For tips on achieving a super smooth surface, you might find guidance here: How to Get Smooth Finish on Cabinets.
After each grit, wipe down the surface thoroughly. Use a tack cloth or a clean microfiber cloth. This removes all dust. Dust left on the surface can embed in your finish. This will create a bumpy texture. Feel the surface with your hand. It should feel perfectly smooth at each stage.
Cleaning and Dust Removal
Once sanding is complete, meticulous cleaning is essential. All sanding dust must be removed. Use a shop vacuum with a brush attachment to pick up most of the dust. Then, wipe the entire surface with a tack cloth. A tack cloth is sticky and picks up fine dust particles. You can also use a clean cloth dampened with mineral spirits. This helps lift any remaining residue and dust. Allow the mineral spirits to evaporate fully. The surface must be completely dry and dust-free before applying any finish. A clean surface is paramount for proper finish adhesion and a clear appearance. This step ensures no imperfections are trapped under your finish.
Applying an Oil-Based Finish: A Step-by-Step Guide
Oil-based finishes are popular for their natural look and ease of repair. They penetrate the wood, enhancing its natural beauty. Applying an oil finish is a straightforward process. It typically involves multiple thin coats. This method makes your butcher block desk look rich and warm.
Materials You Will Need
Before you start, gather your supplies. You will need your chosen oil finish (e.g., tung oil, mineral oil, or a specialized butcher block oil). Also, prepare clean, lint-free cloths or rags. Gloves are advisable to protect your hands. Have a clean workspace ready. Ensure good ventilation.
Application Technique for Penetrating Oils
Begin by pouring a generous amount of oil directly onto the butcher block desk. Use a clean, lint-free cloth to spread the oil evenly. Rub the oil into the wood, following the grain. Ensure the entire surface is saturated. Pay extra attention to the end grains, as they absorb more oil. Let the oil soak in for 20-30 minutes, or according to the product’s instructions. The wood will absorb the oil.
After the soaking time, wipe off any excess oil completely. Use a fresh, clean cloth. No standing oil should remain on the surface. Buff the surface gently. This helps push the oil deeper into the wood. It also creates a smooth feel. Let the first coat dry. Drying times vary by product, often 12-24 hours. Refer to your oil’s specific instructions.
Apply multiple thin coats. Most oil finishes require at least 3-5 coats for good protection. Some heavy-use desks may benefit from 7-10 coats. Allow each coat to dry fully before applying the next. Lightly sand with 320-grit sandpaper between coats, if the manufacturer recommends it. This smooths any raised grain. Always wipe clean between coats.
Curing and Initial Maintenance
Oil finishes need time to cure fully. This curing period can last from a few days to several weeks. Avoid heavy use during this time. The oil hardens and provides maximum protection. Wipe down the desk with a clean, dry cloth for initial maintenance. For general cleaning of your butcher block, refer to How to Clean Butcher Block Countertop. If you encounter any stubborn stains, specialized cleaning methods are available, as detailed in How to Clean Butcher Block Stains. Regular reapplication of oil will be necessary over time to maintain protection and appearance. This is typically every few months, depending on use.
Applying a Polyurethane or Varnish Finish for Durability
Polyurethane and varnish finishes create a tough, protective film on the surface. These are excellent choices for a butcher block desk that needs maximum durability. Applying them correctly ensures a smooth, long-lasting clear coat.
Selecting Your Application Tools
The right tools are essential for a smooth finish. For polyurethane or varnish, you can use a high-quality natural bristle brush for oil-based products. Use a synthetic brush for water-based products. Foam brushes also work well for a smooth, streak-free application. A roller with a very fine nap can cover large areas quickly. However, brushes often provide more control. Make sure your tools are clean and free of debris.
Step-by-Step Application of Film Finishes
Before applying, stir the finish gently. Do not shake it, as this creates bubbles. Bubbles can show up in your final finish. Pour a small amount into a separate container. Dip your brush or applicator only halfway. Apply a thin, even coat over the entire butcher block desk. Work in long, overlapping strokes. Always follow the wood grain. Avoid overworking the finish, as this can also cause bubbles.
Once the first coat is applied, let it dry completely. Drying times are specified on the product label. This can range from 2-4 hours for water-based products to 6-12 hours for oil-based ones. Once dry, lightly sand the surface with 220 or 320-grit sandpaper. This creates a fine “tooth” for the next coat to adhere to. It also smooths out any dust nibs or raised grain. Wipe away all sanding dust with a tack cloth before applying the next coat.
Apply 2-4 coats for optimal protection. More coats generally mean more durability. Allow each coat to dry and sand lightly between applications. The final coat should not be sanded. For insights into how a professional might handle staining for countertops, which involves similar application principles, see How to Stain a Butcher Block Countertop.
Curing and Full Hardness
Film finishes require a longer curing time than drying time. The finish may feel dry to the touch in hours, but it takes weeks to reach full hardness. Avoid placing heavy objects on the desk during this period. Be gentle with the surface. The full curing time can be anywhere from 7 days to 30 days. Refer to the product’s specific instructions for the exact curing period. Once fully cured, your butcher block desk will have a tough, protective shield.
Maintaining Your Finished Butcher Block Desk
Finishing your butcher block desk is an investment. Proper maintenance extends its life and keeps it looking beautiful. Different finishes require different care routines. Regular attention prevents damage and preserves the desk’s protective layer.
Daily Cleaning and Spill Management
For daily cleaning, use a soft, damp cloth. Wipe down your butcher block desk with a mild soap and water solution. Always wipe dry immediately. Do not let liquids sit on the surface, especially near seams or edges. Even a durable finish can be compromised by prolonged moisture exposure. Avoid harsh chemical cleaners, as these can strip or damage the finish. A gentle approach is always best.
Regular Reapplication for Oil Finishes
If you used an oil-based finish, regular reapplication is key. How often depends on usage. A heavily used desk might need re-oiling every 1-3 months. A desk with lighter use could go 6-12 months. You will notice the wood starting to look dull or dry. This is your sign to reapply. Simply clean the surface, apply a thin coat of oil, let it soak, and wipe off the excess. This keeps the wood nourished and protected.
Care for Film Finishes (Polyurethane/Varnish)
Film finishes are more resilient, but they still need care. Avoid using abrasive cleaners or scouring pads. These can scratch the surface. Use cutting boards for tasks that might scratch the desk. Use coasters under drinks to prevent moisture rings. If you spill something sticky, clean it promptly. For persistent stickiness, you might find solutions in How to Fix a Sticky Table Finish. While polyurethane and varnish are durable, direct impact can still damage them. If the finish gets a cloudy appearance, information about restoring clarity can be found at How to Fix Cloudy Finish on Wood Table.
Addressing Scratches and Damage
Minor scratches on oil finishes are easy to fix. Just apply more oil to the affected area. Let it soak, then wipe away any excess. For film finishes, scratches are harder. Small, shallow scratches might be buffed out with a fine automotive polishing compound. Deeper scratches might require sanding down the area. Then, reapply the finish in that spot. For significant damage or wear, you might need to refinish the entire top. This involves sanding off the old finish and applying new coats. Guidance for a complete overhaul is available at How to Refinish a Butcher Block Table. Regular maintenance helps avoid these larger repairs.
Troubleshooting Common Finishing Problems
Even with careful preparation, problems can sometimes arise during the finishing process. Knowing how to identify and fix these issues saves time and frustration. Many common problems have simple solutions. We will cover some typical challenges you might face.
Bubbles in the Finish
Bubbles in a film finish (polyurethane or varnish) are a common issue. They usually happen due to shaking the can too vigorously. Shaking introduces air bubbles into the liquid. Applying the finish too thickly or overworking it can also cause bubbles.
To fix bubbles, you often need to let the coat dry. Then, sand the affected area lightly with fine-grit sandpaper (220-320 grit). Wipe away dust thoroughly. Apply another thin, even coat of finish. Remember to stir the finish gently, not shake it. Use a good quality brush or applicator. Apply thin coats to prevent bubbles.
Uneven or Streaky Finish
Unevenness or streaks can occur for several reasons. Applying the finish too quickly or with an uneven hand is a common cause. Using an old or dirty brush can also lead to streaks. Improper sanding or inadequate dust removal also creates an uneven surface.
To correct streaks, allow the finish to dry fully. Sand the streaky areas lightly with fine-grit sandpaper. Ensure the surface is smooth. Clean off all dust. Then, apply another thin, even coat. Use consistent strokes, flowing with the wood grain. Make sure your brush is clean and free of debris. Ensure the room temperature is stable. This helps the finish dry evenly.
Sticky or Tacky Finish
A sticky or tacky finish means the finish has not cured properly. This can happen if the coats were applied too thickly. It also occurs if there is insufficient drying time between coats. High humidity or low temperatures can also extend drying times. Using incompatible products, such as an oil finish not fully cured before applying a film finish, can also cause tackiness.
Patience is key here. Allow more time for the finish to dry and cure. Increase air circulation in the room. You can use fans, but direct air onto the desk. If the finish remains tacky for days, it might need more drastic action. Sometimes, you must remove the sticky layer with mineral spirits or a solvent. Then, reapply the finish correctly. For issues with stickiness, this article might help: How to Fix a Sticky Table Finish.
Dull Spots or Lack of Sheen
Dull spots can appear if the finish was not applied evenly. They also occur if the wood absorbed more finish in certain areas. Inadequate sanding can also lead to dullness. Dust or residue left on the surface before finishing can also affect sheen.
To fix dull spots, clean the surface well. Lightly sand the entire area with very fine steel wool (0000 grade) or 600-grit sandpaper. This provides a very smooth base. Apply another thin, even coat of your chosen finish. Ensure full coverage. For film finishes, buffing with a soft cloth after the final coat can also enhance the sheen. If your wood surface has a cloudy appearance, consider solutions presented in How to Fix Cloudy Finish on Wood Table.
Dealing with Dust Nibs
Dust nibs are tiny bumps in the finish caused by airborne dust settling on the wet surface. They are almost unavoidable. To minimize them, work in a clean, dust-free environment. Turn off fans and air conditioners before finishing.
To remove dust nibs, allow the finish to dry completely. Gently sand the nibs away using very fine sandpaper (320-grit or higher) or steel wool. Be careful not to sand through the finish. Wipe off the dust with a tack cloth. Apply another thin coat of finish. This final coat will hide the sanded areas. Always clean your workspace thoroughly before applying any finish.
Longevity and Care: Making Your Desk Last
Finishing your butcher block desk is the first step toward long-term durability. To truly make it last, ongoing care and mindful use are essential. A well-maintained desk remains beautiful and functional for decades. This section explores how to ensure your finished butcher block desk stands the test of time.
Protecting Against Daily Wear and Tear
Your desk faces daily challenges from items placed on it, writing, and spills. Protect it from these common threats. Use desk mats or blotters for writing areas. These prevent pen marks or indentations. Always use coasters under glasses and mugs. Even water-resistant finishes can suffer from prolonged exposure to moisture. Place felt pads under lamps, monitors, and other heavy objects. This prevents scratches and scuffs when moving items.
Avoid sliding heavy or rough objects across the surface. Lift them instead. If you have a computer mouse, use a mouse pad. This protects the finish from constant friction. Teach anyone using the desk about proper care. These small habits make a big difference in preserving your desk’s finish.
Regular Cleaning Practices
Consistent cleaning prevents dirt and grime buildup. For oil-finished desks, use a damp cloth with mild soap, then wipe dry. Avoid abrasive cleaners or harsh chemicals. For film-finished desks (polyurethane, varnish), a slightly damp cloth is often sufficient. If needed, use a diluted, pH-neutral cleaner specifically designed for finished wood surfaces.
Never use cleaners containing silicone, ammonia, or bleach. These can damage the finish over time. For specific cleaning methods that maintain your finish, you might find more general advice useful from How to Clean Kitchen Cabinets Without Removing Finish. Regularly wiping down the surface removes dust and prevents grime from hardening. This keeps your desk looking fresh and clean.
Addressing Spills Immediately
Spills are inevitable. Reacting quickly is crucial to prevent damage. Blot up spills immediately with a clean, dry cloth. Do not rub, as this can spread the liquid or push it deeper into the wood grain (especially with oil finishes). For sticky spills, use a slightly damp cloth. Then, wipe dry. Even with a durable finish, acids from food or drinks can etch the surface if left too long. Prompt action minimizes the risk of stains or damage.
Reapplication and Refinishing Schedule
The type of finish dictates its reapplication schedule. Oil finishes require regular re-oiling, typically every few months to a year. This keeps the wood nourished and protected. You will notice the wood looking dry or dull as a sign it needs more oil.
Film finishes like polyurethane or varnish last much longer, often many years. They do not typically require reapplication unless the finish is worn through or damaged. If you notice dull spots, deep scratches, or areas where the finish is peeling, it might be time for a touch-up or a complete refinishing. A complete refinish involves sanding down the old finish and applying new coats. Information on extensive repairs can be found at How to Refinish a Butcher Block Table. Inspect your desk regularly for signs of wear. Proactive care ensures its longevity.
FAQ Section
How long does a butcher block desk finish last?
The lifespan of a butcher block desk finish varies greatly. Oil finishes may need reapplication every 3-12 months, depending on use. Film finishes like polyurethane or varnish can last 5-15 years or more with proper care. High traffic areas wear down faster. Regular maintenance and careful use extend any finish’s durability.
Can I use my butcher block desk right after finishing?
You can typically handle a butcher block desk after the final coat feels dry to the touch. This usually takes 24-
- butcher block
- desk finish
- wood finishing
- DIY desk
- furniture protection

Todd Martin
Senior Writer
With over 15 years of experience in home renovation and design, I started HEG to share what I’ve learned with homeowners who want to create spaces that are both beautiful and functional. I’ve always believed in a hands-on approach, and over the years, I’ve picked up practical solutions that actually work. Through HEG, I aim to make home improvement more approachable, sharing real tips that help you create a home you truly love.