· Todd Martin · Home Safety · 17 min read
How To Clean Smoke Detector
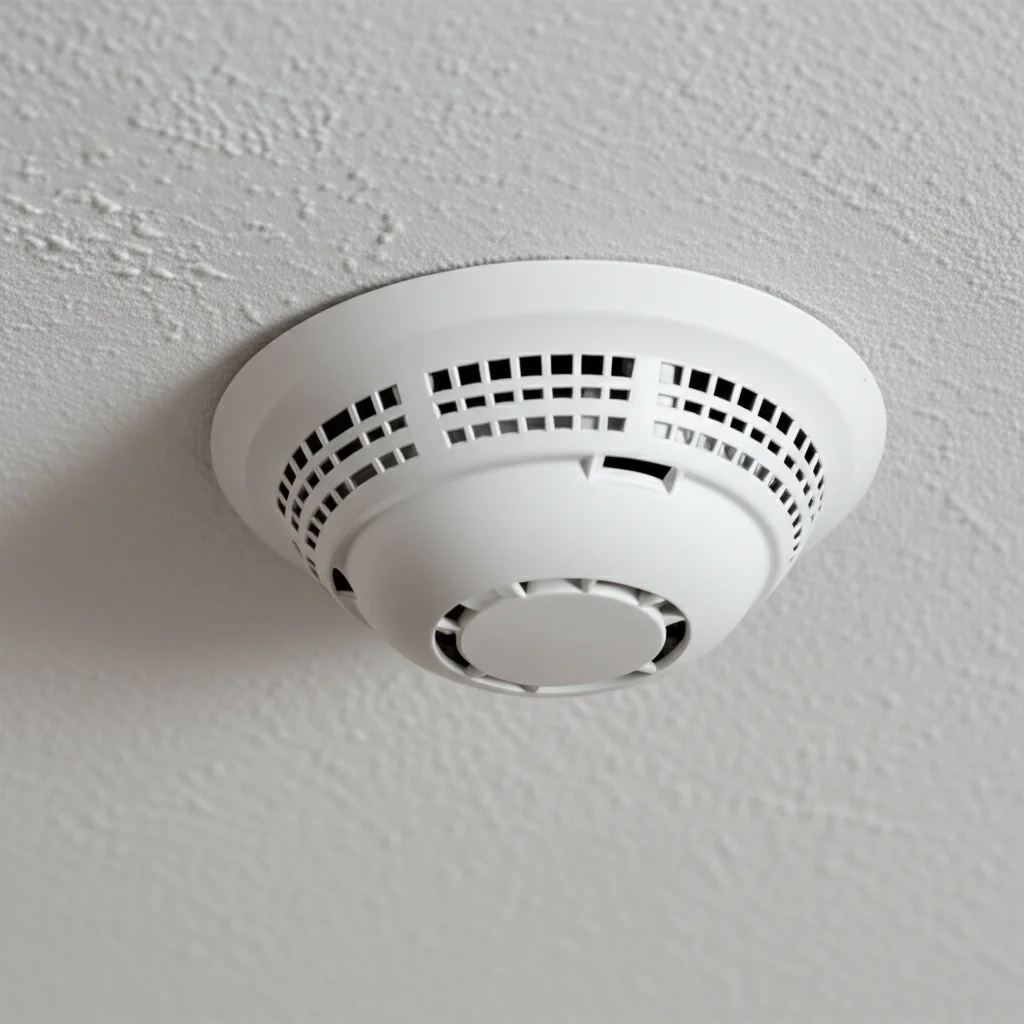
Maintain Safety: How to Clean Your Smoke Detector
Have you ever wondered why your smoke detector goes off for no clear reason? A sudden piercing alarm when you are just cooking dinner can be frustrating. Often, a dirty sensor is the cause. Learning how to clean a smoke detector prevents these annoying false alarms. It also ensures your crucial safety device works when you really need it. This article will guide you through the process.
I will explain why cleaning is important. I will list the tools you need. You will get clear steps to clean different detector types. We will also cover preventing dirt buildup and what to do after cleaning. Proper smoke alarm maintenance helps keep your home and family safe from fire dangers.
Takeaway
- Regularly clean smoke detectors every six months.
- Use a soft brush vacuum attachment to remove dust.
- Wipe the exterior with a slightly damp cloth.
- Do not use cleaning sprays or chemicals inside the unit.
- Test the smoke detector immediately after cleaning.
To clean a smoke detector, first turn off power or remove batteries. Gently vacuum the exterior vents and crevices using a soft brush attachment. Wipe the outside with a damp cloth. Never use harsh chemicals or spray directly into the unit. Regular cleaning prevents dust buildup, reducing false alarms and ensuring proper function.
Why Keeping Your Smoke Detector Clean Is Vital for Home Safety
Smoke detectors are essential home safety devices. They provide early warning of a fire. This gives you precious time to escape. However, these devices can become less effective over time. Dust and debris build up inside them. This buildup obstructs the sensor’s ability to detect smoke accurately.
A dirty smoke detector often leads to false alarms. These alarms can happen during cooking or even when there is no smoke at all. This becomes annoying for homeowners. People might disable the alarm to stop the nuisance. Disabling a smoke detector puts everyone in the home at risk. A clean detector functions correctly. It alerts you only when a real threat exists.
There are two main types of smoke detectors: ionization and photoelectric. Ionization detectors use a small piece of radioactive material. This material creates an electric current. Smoke disrupts this current, triggering the alarm. These detectors are very sensitive to small, fast-flaming fires. Dust and airborne particles can also disrupt this current, causing false alarms.
Photoelectric detectors work differently. They use a light beam inside a chamber. Smoke entering the chamber scatters the light, which hits a sensor and triggers the alarm. These detectors respond best to large, slow-burning, smoky fires. Dust can also block the light beam or reflect it, leading to similar false alarm issues. Regular cleaning is crucial for both types. It maintains their sensitivity and reliability. This ensures your home stays protected.
Essential Tools for Cleaning Your Smoke Detector
Cleaning a smoke detector does not require special tools. Most items you need are probably already in your home. Gather your supplies before you begin. This makes the cleaning process quick and easy. Proper tools help you clean effectively and safely.
Here is what you will need:
- Step Stool or Ladder: Smoke detectors are often on ceilings or high on walls. A stable step stool or ladder allows you to reach them safely. Always ensure it is sturdy before you climb. Do not stand on chairs or unstable objects.
- Small, Soft-Bristled Brush: A soft brush is perfect for gently sweeping away dust. You can use a clean paintbrush. A soft toothbrush also works well. The bristles must be gentle to avoid damaging the sensor.
- Vacuum Cleaner with a Hose Attachment: A vacuum cleaner is highly effective. Use it with a soft brush attachment. This helps suction away dust from vents without pushing it further inside. Make sure the attachment is clean.
- Damp Cloth (Optional): You can use a slightly damp cloth to wipe the outside casing of the detector. Use water only. Do not use cleaning solutions. Make sure the cloth is only damp, not wet.
- New Batteries (Optional but Recommended): While cleaning, it is a good time to replace the batteries. Most manufacturers recommend changing batteries yearly. This ensures the detector has power.
Safety is important when cleaning. Always turn off the power to hardwired smoke detectors at the circuit breaker first. If your detector is battery-powered, simply remove the batteries. This prevents accidental shocks or false alarms during cleaning. Never use harsh chemical sprays or abrasive cleaners on your smoke detector. These products can damage the internal components. They may even make the device stop working. Only use dry methods or a very lightly damp cloth on the exterior.
Step-by-Step Guide: How to Properly Clean Your Smoke Detector
Cleaning your smoke detector is a straightforward task. It is a vital part of home maintenance. Follow these simple steps for effective cleaning. This will help your detector work correctly.
Before You Start: First, disable the detector’s power. For battery-powered units, remove the battery cover and take out the batteries. For hardwired units, go to your home’s main circuit breaker panel. Locate the breaker that controls the smoke detectors. Flip it to the “off” position. This ensures no electricity flows to the device during cleaning. Safety is always your top concern.
Step 1: Access the Detector Carefully climb your step stool or ladder. Make sure it is stable. Reach the smoke detector without straining. Most detectors twist off their mounting bracket. Turn the unit counter-clockwise. Some may have small clips or tabs to release. Read your detector’s manual if you are unsure how to remove it.
Step 2: Clean the Exterior and Vents Use your vacuum cleaner with the soft brush attachment. Gently vacuum the exterior of the smoke detector. Pay close attention to the vents and openings. These are where dust and airborne particles accumulate most. Move the brush slowly around all sides. This helps to suction away loose debris. Do not press hard.
Step 3: Brush Away Stubborn Dust For dust stuck in crevices, use a small, soft-bristled brush. Gently brush around the vents and openings. You want to dislodge any remaining particles. Do not poke anything into the internal components. Focus on the outer casing and sensor chamber openings. This step helps remove dust that the vacuum could not reach.
Step 4: Wipe the Casing (Optional) If the outer casing looks dirty, you can wipe it. Use a cloth that is barely damp with plain water. Wipe the outside surfaces gently. Do not let water drip into the unit. Avoid any cleaning solutions. Chemicals can harm the plastic or internal parts. Let the casing air dry completely before reassembling.
Step 5: Replace Batteries and Reinstall If you removed the batteries, insert new ones now. Pay attention to the correct polarity (+/-). If your unit is hardwired, make sure its backup battery is fresh. Place the detector back onto its mounting bracket. Twist it clockwise until it locks into place. Make sure it feels secure.
Step 6: Restore Power and Test Go back to your circuit breaker panel. Flip the breaker back to the “on” position. If it is a battery unit, the unit should power on. Press the test button on the smoke detector. You should hear a loud, piercing alarm sound. If it does not sound, replace the batteries again or check the breaker. If it still does not work, the unit may need replacement.
Regular cleaning helps your smoke detector perform its job effectively. It provides peace of mind, knowing your home is protected.
Common Causes of Smoke Detector Dirtiness and How to Prevent Them
Smoke detectors get dirty from many sources within a home. Understanding these causes helps you prevent buildup. Prevention means less frequent cleaning and fewer false alarms. It also means your detector works better when you need it.
One major cause of dirtiness is household dust. Dust particles float in the air. They settle on surfaces, including smoke detectors. Over time, these particles accumulate inside the detector’s sensing chamber. This can block the sensor or interfere with its operation. Regular dusting of your home helps reduce overall airborne dust. You might also consider cleaning your air conditioner filter more often. This improves indoor air quality.
Cooking activities are another common culprit. Fumes from cooking, especially frying or broiling, contain grease and microscopic food particles. These particles can travel to the detector. They stick to the sensor. This is a common reason for false alarms in kitchen areas. If you cook often, consider installing a range hood. Use it every time you cook. This vents smoke and odors outside. Excessive cooking smoke can also stain nearby walls. Learn how to clean smoke off walls if this happens.
Candles and fireplaces also contribute to detector dirtiness. Burning candles release fine soot particles into the air. Similarly, wood-burning fireplaces create smoke and creosote buildup. This soot and smoke can settle on your detector’s sensor. If you frequently burn candles, ensure good ventilation. Keep detectors away from direct airflow from fireplaces. Soot from candles can leave yellow stains on walls over time.
Smoking inside the home is a significant source of detector buildup. Cigarette or cigar smoke leaves tar and nicotine residue. This residue is sticky and quickly coats sensors. It severely impairs the detector’s function. If someone smokes indoors, consider smoking outside. This prevents residue buildup on detectors and other surfaces. Persistent smoking can require deep cleaning, for example, to clean cigarette smoke from a house. Even smoke from specific sources like a nearby candle can cause smoke damage to walls and other surfaces, indicating the fine particles that can enter your detector.
Insects can also get inside detectors. Small bugs like spiders or gnats can crawl into the sensing chamber. Their presence can trigger false alarms. Regularly cleaning around the detector helps deter insects. Seal any cracks or openings near detector mounts.
By being aware of these factors, you can take steps to reduce dirt buildup. This keeps your smoke detectors working efficiently. Regular cleaning and prevention practices ensure your home remains safe.
Testing and Troubleshooting Your Smoke Detector After Cleaning
After you clean your smoke detector, the next critical step is testing it. Testing confirms the device works properly. It also gives you peace of mind. A simple test button helps you verify its function.
How to Test Your Smoke Detector: Find the “Test” button on your smoke detector. It is usually a small button on the outside casing. Press and hold this button for a few seconds. You should hear a loud, piercing alarm sound. This indicates the alarm circuitry and horn are working. Release the button once you hear the sound. If your detector is interconnected with others, testing one should trigger all alarms in the system. This confirms they are communicating.
What to Do if the Alarm Does Not Sound: If you press the test button and hear no alarm, several issues could be present.
- Check Batteries: For battery-powered units, ensure the batteries are new and correctly inserted. Batteries have a positive (+) and negative (-) end. They must align with the markings inside the compartment.
- Check Power (Hardwired Units): If your unit is hardwired, confirm the circuit breaker is “on.” Also, ensure the backup battery (if present) is installed and fresh. Hardwired detectors use house current but need battery backup during power outages.
- Dust Still Present: Sometimes, stubborn dust remains. Try another light vacuuming or brushing of the vents. Be gentle.
- Detector Failure: If batteries are new and power is on, the detector may be faulty. Smoke detectors have a lifespan. Most manufacturers recommend replacement every 7-10 years. Look for a manufacturing date on the back of the unit.
Dealing with Persistent False Alarms: Even after cleaning, a smoke detector might still produce false alarms. This can be frustrating.
- Location Issues: The detector might be too close to a kitchen. Cooking fumes, steam from a shower, or fireplace smoke can trigger it. Consider moving the detector to a different spot. Place it at least 10 feet from cooking appliances.
- Environmental Factors: High humidity or extreme temperature changes can sometimes affect sensors. Ensure your home has stable indoor conditions.
- Pest Infestation: Small insects inside the chamber can cause false alarms. If cleaning does not help, insects might be the problem. You might need to replace the unit or have it professionally checked.
- Detector Age: An old detector can become unreliable. Its components degrade over time. If your detector is older than 7-10 years, replace it. Age is a common reason for malfunction.
Troubleshooting ensures your smoke detector works reliably. Do not ignore persistent issues. A non-working alarm puts your family at risk. A frequently false-alarming unit might be disabled, which is also dangerous. Address problems quickly for continued home safety.
Maintaining Your Smoke Detectors: Beyond Just Cleaning
Cleaning your smoke detector is an important task. However, it is just one part of keeping your home safe. Regular maintenance involves several other key steps. These steps ensure your detectors are always ready to alert you to danger.
First, test your smoke detectors monthly. This is perhaps the most crucial maintenance step. Find the test button on each detector. Press and hold it for a few seconds. The alarm should sound loudly. If it does not, replace the battery or check the circuit breaker. Monthly testing confirms the entire unit is operational. It ensures the siren works, which is vital for an audible warning.
Second, replace batteries annually. Even if your detectors appear to work, batteries lose power over time. A common way to remember is to change batteries when you change your clocks for Daylight Saving Time. Some detectors have a non-replaceable 10-year battery. If yours does, you still need to test it monthly.
Third, replace the entire smoke detector unit every 7-10 years. Smoke detectors do not last forever. Their sensing components degrade over time. The manufacturing date is usually on the back of the unit. Do not rely on a detector older than 10 years. An old detector might not respond quickly enough to a fire. This is a critical safety upgrade.
Fourth, install the correct types and number of detectors. Have both ionization and photoelectric detectors, or dual-sensor models. Ionization alarms respond faster to flaming fires. Photoelectric alarms react better to smoldering fires. Install detectors on every level of your home. Place them inside and outside sleeping areas. This provides comprehensive coverage.
Fifth, consider carbon monoxide (CO) alarms. While separate from smoke detectors, CO alarms are another vital safety device. Carbon monoxide is an invisible, odorless gas. It can be deadly. CO alarms are often combined with smoke detectors in dual-purpose units. Test CO alarms monthly and replace them every 5-7 years.
Sixth, keep surrounding areas clear. Do not paint over or obstruct your smoke detectors. Avoid placing them near drafty windows, air vents, or dusty areas. These locations can cause false alarms or prevent proper detection. Keep at least a foot of clear space around the detector.
Regular cleaning combined with these maintenance practices ensures your smoke detection system is robust. This proactive approach protects your family and property. Your peace of mind comes from knowing your essential safety devices are always prepared.
When to Replace Your Smoke Detector: Beyond Just Cleaning
Cleaning your smoke detector extends its life and improves performance. However, there comes a time when cleaning is not enough. Knowing when to replace your smoke detector is crucial for ongoing home safety. These devices do not last forever. Their effectiveness degrades over time.
The most important factor is the age of the detector. Most manufacturers recommend replacing smoke detectors every 7 to 10 years. Look for the manufacturing date on the back of the unit. This date is often printed near the battery compartment or on the mounting plate. If your detector is older than 10 years, it is time for a new one. The internal components, including the sensing technology, wear out. They become less reliable in detecting smoke. Even if your old detector passes its monthly test, its ability to detect a real fire quickly may be compromised.
Another sign it is time for replacement is frequent false alarms that persist after cleaning and battery replacement. If your detector constantly goes off without any clear reason, it may be faulty. This happens when the sensor is too sensitive due to age or internal component failure. Annoying false alarms might lead people to disable the detector, which is a dangerous habit. Replacing the unit solves this problem and keeps your home protected.
Chirping or beeping that does not stop after changing batteries signals a potential issue. While a low battery causes a chirp, persistent chirping after a fresh battery indicates a problem with the unit itself. Some detectors have an “end of life” warning chirp. This sound signals it is time for replacement. Consult your user manual to understand these specific beeps.
If your detector has visible damage, replace it immediately. Cracks in the casing, discoloration, or signs of impact can affect its function. A damaged detector cannot protect your home reliably. Even if it seems to work, internal damage might prevent it from operating correctly during a fire.
Finally, if you move into an older home, it is a good practice to replace all existing smoke detectors. You do not know their age or history. Installing new, up-to-date detectors provides a fresh start for your home’s safety system. Newer models often have improved technology. They might include dual sensors or integrated carbon monoxide detection.
Investing in new smoke detectors is a small price to pay for your family’s safety. Do not wait for a malfunction to occur. Be proactive and replace old units according to manufacturer guidelines.
FAQ Section
How often should I clean my smoke detector? You should clean your smoke detector at least once or twice a year. This helps prevent dust buildup. Regular cleaning reduces false alarms. It also ensures the detector functions properly when needed. Make it part of your spring and fall home maintenance routine.
Can I use compressed air to clean my smoke detector? It is generally not recommended to use compressed air. Compressed air can push dust further into the sensing chamber. This compacts the debris. It can also damage delicate internal components. Use a vacuum cleaner with a soft brush attachment instead.
What should I do if my smoke detector keeps chirping after cleaning and new batteries? If your smoke detector still chirps after cleaning and replacing batteries, it likely indicates a fault. The unit may be at its end of life. Most smoke detectors have a lifespan of 7-10 years. Check the manufacturing date on the back of the unit. If it is old, replace it.
Is it safe to clean a hardwired smoke detector? Yes, it is safe to clean a hardwired smoke detector. First, turn off the power at your home’s circuit breaker. This removes electricity from the unit. Then proceed with vacuuming and gentle wiping. Remember to restore power and test the unit after cleaning.
Can a dirty smoke detector cause a fire? No, a dirty smoke detector does not cause a fire. However, a dirty detector can fail to detect a fire. It might also cause annoying false alarms. A non-working or frequently disabled detector leaves your home unprotected. This increases fire risk by removing the warning system.
Conclusion
Keeping your smoke detectors clean is a simple yet crucial step for home safety. We have explored why proper maintenance, including learning how to clean a smoke detector, prevents frustrating false alarms. It also ensures these life-saving devices work precisely when you need them most. From understanding the types of detectors to gathering the right tools, you now have the knowledge to perform this important task effectively.
Remember to regularly vacuum the vents and gently wipe the exterior of your smoke alarm. Always prioritize safety by disconnecting power or removing batteries before cleaning. Beyond just cleaning, maintain your detectors by testing them monthly, replacing batteries annually, and swapping out the entire unit every 7 to 10 years. These simple actions ensure your home’s first line of defense against fire remains ready. Your family’s safety depends on it. Take action today to clean and maintain your smoke detectors.
- smoke detector cleaning
- smoke alarm maintenance
- home safety tips
- false alarms
- fire prevention

Todd Martin
Senior Writer
With over 15 years of experience in home renovation and design, I started HEG to share what I’ve learned with homeowners who want to create spaces that are both beautiful and functional. I’ve always believed in a hands-on approach, and over the years, I’ve picked up practical solutions that actually work. Through HEG, I aim to make home improvement more approachable, sharing real tips that help you create a home you truly love.