· Todd Martin · Home Cleaning · 22 min read
How To Clean Smoke Off Walls
Restore Your Walls: How To Clean Smoke Off Walls Safely
Smoke damage on walls can feel overwhelming. It leaves unsightly stains, a lingering odor, and a general feeling of uncleanliness. Whether from a small kitchen mishap, a fireplace backdraft, or years of cigarette smoke, dealing with smoke residue requires the right approach. I understand the frustration of seeing discolored walls and smelling that tell-tale smoky scent. My goal is to help you restore your home to a fresh, clean state. This article will guide you through understanding smoke types, preparing your space, choosing the best cleaning solutions, and applying effective techniques. We will cover methods for different wall surfaces and offer advice for both light and heavy smoke damage. By following these steps, you can confidently clean smoke off walls and reclaim your living space.
Takeaway:
- Identify the smoke type to choose the right cleaning method.
- Always prepare your area and protect yourself with proper gear.
- Test cleaning solutions in a hidden spot before full application.
- Work from the bottom up to prevent streaks and control drips.
- Consider professional help for severe fire damage or stubborn odors.
To clean smoke off walls, first vacuum loose soot. Then, wipe the walls using a mild cleaner like white vinegar solution or a specialized smoke cleaner. Always start in an inconspicuous area to test for paint damage. Rinse cleaned areas with plain water and dry them thoroughly to prevent new stains or streaks.
Understanding Smoke Damage on Walls
Smoke damage is not all the same. Different sources of smoke leave unique residues on your walls. Knowing the type of smoke helps you choose the most effective cleaning method. This knowledge prevents further damage and saves time. Let’s look at the common culprits.
Different Types of Smoke and Their Impact
Cigarette Smoke: This is a common type of smoke found in homes. It leaves a sticky, yellowish-brown residue. This residue builds up over time. It often causes a strong, stale odor that permeates fabrics and porous surfaces. Walls often turn yellow or brown. You can learn more about specific methods for these stains in our guide on how to clean yellow walls from smoke.
Candle Smoke: Candles, especially those made from paraffin wax, can produce black soot. This soot settles on walls and ceilings. It appears as dark smudges or a fine, dusty layer. While less pervasive than cigarette smoke odor, candle soot can still be tough to remove. Check out our specific article on how to clean candle smoke off walls for detailed steps.
Fire Smoke (Soot): This is the most severe type of smoke damage. It results from actual fires, even small ones like a kitchen grease fire. Fire smoke leaves behind a thick, oily, and often black residue known as soot. This soot is highly acidic and can cause permanent damage if not cleaned quickly. It also carries a very strong, pervasive burnt smell. Dealing with fire soot is challenging. You may want to review strategies for how to clean soot off walls for heavy applications.
Wood Smoke: Fireplaces or wood stoves can cause this type of smoke. It often contains creosote, a tar-like substance. This makes it particularly difficult to clean. It leaves behind a greasy, dark film. The odor can be very strong.
Understanding these differences helps you prepare. Each type requires a slightly different approach. Some might need stronger cleaners. Others might require more gentle handling. Your walls absorb these residues. They also hold the odors. Cleaning is vital to remove both.
Essential Preparations Before Cleaning Smoke
Proper preparation makes a big difference when cleaning smoke from walls. Skipping steps can lead to frustration or even more damage. Before you even touch a cleaning solution, you must set up your space safely and efficiently. I always start with safety. Your health and the protection of your home matter most.
Ensuring Safety and Protecting Your Space
Ventilation is Key: Open windows and doors to allow fresh air to circulate. This helps dissipate strong odors. Good ventilation also reduces your exposure to cleaning fumes and airborne smoke particles. Use fans to direct air out of the room. I find this simple step often gets overlooked, but it is very important.
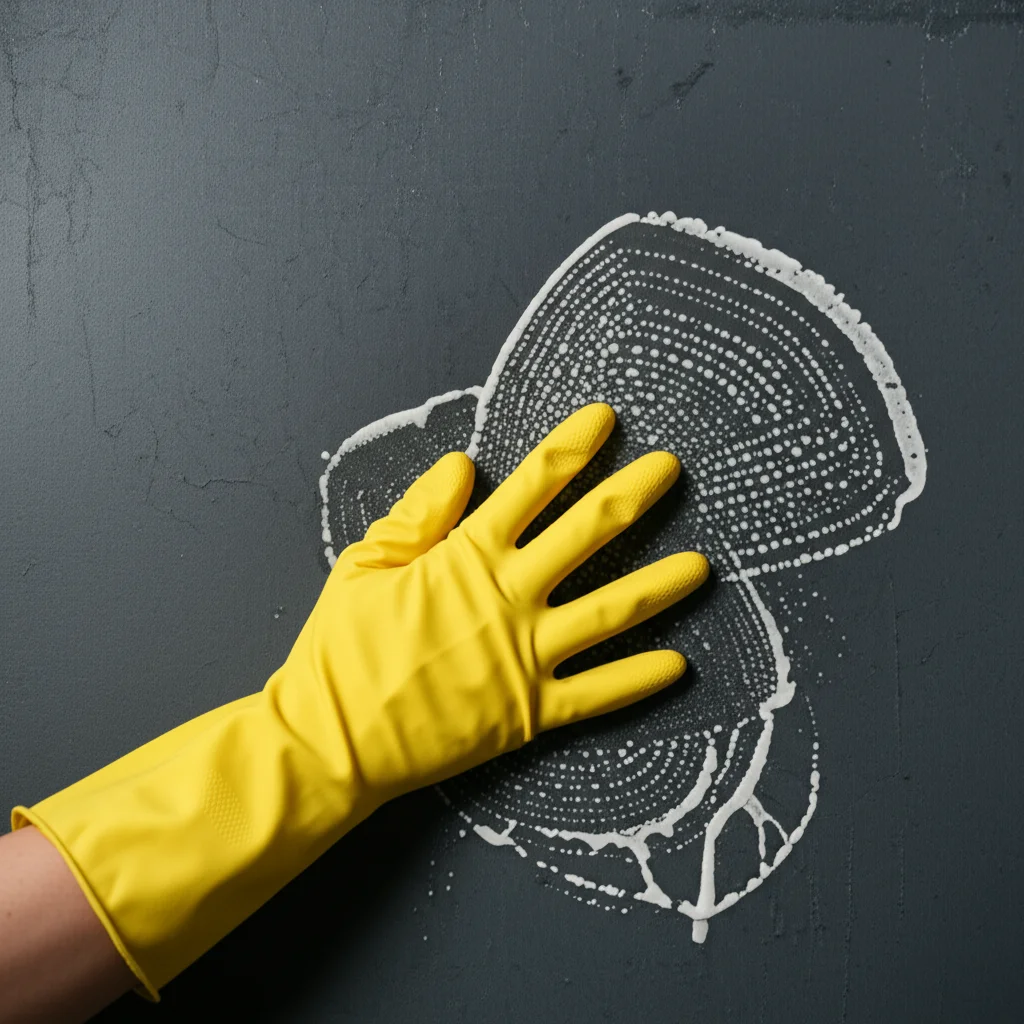
Wear Protective Gear: Smoke residue, especially soot, can irritate your skin, eyes, and lungs. Cleaning solutions can also be harsh. Wear gloves to protect your hands. Use safety goggles to shield your eyes from splashes and dust. An N95 mask is essential to avoid inhaling fine smoke particles and cleaning product fumes. This gear keeps you safe during the cleaning process.
Protect Furniture and Floors: Remove as much furniture as possible from the room. Cover any remaining items with plastic sheeting or old tarps. Lay down drop cloths or old towels on the floor directly beneath the walls you plan to clean. This prevents cleaning solutions and dirty water from dripping onto your floors or furniture. It saves you from extra cleanup later.
Gathering Your Supplies and Testing Solutions
Assemble Your Cleaning Arsenal: Before you begin, gather all necessary supplies. This prevents interruptions once you start cleaning. You will need:
- Vacuum cleaner with brush attachment
- Several buckets (at least two: one for cleaning solution, one for rinse water)
- Clean sponges or microfiber cloths (many of them!)
- Selected cleaning solutions (more on these in the next section)
- Dry cleaning sponges (chemical sponges)
- Old towels for drying
- Protective gear (gloves, goggles, mask)
Test Cleaning Solutions First: This step is non-negotiable. Different wall finishes react differently to cleaners. An improper cleaner can strip paint or cause discoloration. Find an inconspicuous spot on your wall, such as behind a large piece of furniture or inside a closet. Apply a small amount of your chosen cleaning solution. Wait a few minutes. Blot it dry. Check for any adverse reactions like paint removal, streaking, or discoloration. If the test area looks good, you can proceed with confidence. This simple test prevents costly mistakes.
Effective Cleaning Solutions for Smoke-Damaged Walls
Choosing the right cleaning solution is crucial when you want to clean smoke off walls. The effectiveness depends on the type and severity of the smoke damage. What works for light candle soot might not cut it for heavy fire residue. I always keep a few reliable options on hand. Let’s explore the most common and effective cleaning agents.
Vinegar Solution for Everyday Smoke Residue
White vinegar is a natural and effective cleaner for many household tasks. It works especially well on light to moderate smoke stains and helps neutralize odors. I often reach for it first. It is gentle enough for most painted surfaces.
- Preparation: Mix equal parts warm water and white vinegar in a bucket. For stronger odors or stains, you can use a 1:2 ratio of vinegar to water. You can find more detailed instructions for various applications in our guide on how to clean walls with vinegar.
- Application: Dip a clean microfiber cloth or sponge into the solution. Wring it out well so it is damp, not dripping. Wipe down the affected areas of the wall.
- Benefits: Vinegar is non-toxic and eco-friendly. It helps break down the sticky residue from cigarette smoke. It also eliminates lingering smoky smells.
Tri-Sodium Phosphate (TSP) for Heavier Stains
Tri-Sodium Phosphate, or TSP, is a heavy-duty cleaner. It is much stronger than vinegar. Use it for significant smoke stains, especially from fire or heavy cigarette residue. TSP is an alkaline cleaner that excels at cutting through grease and soot.
- Preparation: Always read the manufacturer’s instructions carefully. TSP requires dilution with water. Typically, you mix about 1/4 cup of TSP per gallon of warm water. Always add TSP to water, not water to TSP, to prevent splashing.
- Application: Use a separate bucket for rinse water. Apply the TSP solution with a sponge or cloth. Work in small sections. Rinse the sponge frequently in the rinse water. Follow immediately with a clean, damp cloth to remove any TSP residue.
- Caution: TSP is powerful. It can dull paint finishes or strip paint if left on too long. Wear heavy-duty rubber gloves and eye protection. Ensure good ventilation. It’s not suitable for all surfaces, so always test first.
Commercial Smoke Cleaners
Many commercial products are specifically formulated to clean smoke and soot. These often contain degreasers and odor neutralizers. They come in sprays or concentrated liquid forms. They are designed for quick and efficient cleaning.
- Examples: Brands like Kilz, Simple Green, or specialized fire restoration products offer options. Look for products labeled “smoke residue cleaner” or “soot remover.”
- Application: Follow the product’s instructions precisely. Most require spraying or applying with a cloth, then wiping or rinsing.
- Benefits: These cleaners are formulated for tough smoke. They can save time and effort on stubborn stains. They often contain additives that directly target smoke odors.
Baking Soda Paste for Spot Treatment
Baking soda is a mild abrasive and an excellent odor absorber. It can be effective for small, localized smoke spots or for neutralizing persistent odors. I often use it as a paste.
- Preparation: Mix baking soda with a small amount of water to form a thick paste.
- Application: Apply the paste directly to the smoke stain. Let it sit for 15-20 minutes. Then, gently scrub the area with a damp cloth or sponge. Rinse thoroughly with clean water.
- Benefits: It’s non-toxic and safe for most surfaces. It helps lift light stains and absorbs lingering smells.
Choosing the right cleaner sets the stage for success. Remember to always consider the wall type and the severity of the smoke. A combination of these methods might be necessary for the best results.
Step-by-Step Guide to Cleaning Walls with Mild Smoke Damage
Cleaning walls with mild smoke damage does not need to be a daunting task. It requires patience and the correct sequence of steps. I always approach it systematically. This method helps ensure you remove all the residue without causing new problems. Let’s walk through the process, from initial dry cleaning to the final rinse.
Initial Dry Cleaning: Removing Loose Soot
Before you introduce any liquid cleaner, you must remove loose soot and smoke particles. This prevents smearing the soot and making the problem worse. Imagine trying to wash dirt off a floor without sweeping first; it just turns into mud.
- Vacuuming: Use a vacuum cleaner with a soft brush attachment. Gently run the brush over the affected walls. Move from the top of the wall downwards. This collects loose soot and prevents it from falling onto already cleaned areas. Do not press hard. You want to lift the particles, not embed them.
- Dry Cleaning Sponges: These specialized sponges (often called “chemical sponges” or “soot sponges”) are excellent for lifting dry smoke particles. They are made of vulcanized rubber. These sponges absorb soot like a magnet. Wipe the wall with the dry sponge, moving in straight, overlapping strokes. The sponge will turn black. Cut off the dirty sections or use a new clean side as needed. These sponges are great because they work without water.
Wet Cleaning: Applying Your Chosen Solution
Once the loose soot is gone, it is time for wet cleaning. This step addresses the sticky residue and embedded stains. Remember your chosen cleaning solution from the previous section.
- Prepare Buckets: Have two buckets ready. Fill one with your selected cleaning solution (e.g., vinegar mix, diluted TSP). Fill the second bucket with plain, clean rinse water.
- Damp, Not Wet: Dip a clean microfiber cloth or sponge into the cleaning solution. Wring it out thoroughly. The cloth should be damp, not dripping. Excess water can damage drywall or leave streaks.
- Work in Sections: Clean a small section of the wall at a time, roughly a 3x3 foot area. This keeps the solution from drying on the wall before you can rinse it.
- Clean from Bottom Up: Start cleaning from the bottom of your chosen section and work your way upwards. This prevents dirty solution from running down onto uncleaned areas and creating new streaks or drip marks. When cleaning, use gentle, overlapping strokes. Avoid harsh scrubbing, which can damage the paint.
Rinsing and Drying for a Streak-Free Finish
Rinsing and drying are just as important as cleaning. They remove the cleaning solution and any remaining residue. This prevents streaking and ensures a truly clean finish.
- Rinse Immediately: After cleaning a section, immediately take a fresh, clean cloth or sponge. Dip it into the plain rinse water. Wring it out well. Wipe down the just-cleaned section to remove all traces of the cleaning solution and lifted smoke residue.
- Change Water Frequently: The rinse water will quickly become dirty. Change both your cleaning solution and rinse water frequently. Using dirty water will just redistribute grime and leave streaks. This is a common mistake I see.
- Thorough Drying: Use a clean, dry towel to thoroughly dry the section you just rinsed. Air drying can lead to streaks and watermarks, especially on painted walls. Pat the wall dry. For painted walls, I find microfibers best for avoiding streaks. They absorb water efficiently. You might find some useful tips on how to clean painted walls without leaving streaks here.
- Repeat: Continue this process – dry clean, apply solution, rinse, dry – section by section across your entire wall.
Consistency is key for a uniform, clean result. This step-by-step approach ensures you effectively clean smoke off walls. It minimizes the risk of damage.
Tackling Heavy Smoke Stains and Odors
Heavy smoke damage goes beyond simple stains. It involves significant discoloration, sticky residue, and a pervasive, deeply embedded odor. This level of cleaning requires more aggressive methods and often involves specialized treatments. I know how stubborn these issues can be. Sometimes, it feels like the smell will never leave. But there are effective strategies.
Addressing Severe Fire Damage vs. Persistent Cigarette Smoke
The approach for severe fire damage differs from long-term cigarette smoke.
Severe Fire Damage:
- Nature of Damage: Fire smoke, or soot, is usually oily, highly acidic, and can deeply penetrate porous surfaces. It often comes with structural concerns and intense odors.
- Initial Steps: Start with extensive dry cleaning using specialized soot sponges. These are crucial for removing the bulk of the dry, loose soot without smearing. You might need multiple sponges.
- Aggressive Cleaning: TSP (Tri-Sodium Phosphate) is often the go-to cleaner for fire soot. Its strong degreasing properties cut through the oily residue. Always use it with extreme caution, wearing full protective gear. For extremely heavy soot, commercial degreasers designed for fire restoration might be necessary. You can also refer to our guide on how to clean soot off walls for more detailed advice.
- Multiple Washes: Expect to wash walls multiple times. The first wash removes the bulk. Subsequent washes clean deeper layers of residue. Each wash should be followed by a thorough rinse.
Persistent Cigarette Smoke:
- Nature of Damage: This smoke leaves a yellowish, tar-like film. It builds up over years and permeates soft furnishings and structural materials. The odor is highly ingrained.
- Cleaning: White vinegar solutions are good for milder cases. For tougher yellowing and a strong smell, a stronger solution is needed. Ammonia-based cleaners or commercial smoke removers can be effective. Follow product instructions carefully. For specific advice on overall house cleanup, check out how to clean cigarette smoke from house.
- Odor focus: While cleaning removes residue, the odor might remain. This requires additional steps.
Advanced Odor Removal Strategies
Cleaning the walls helps, but smoke odor often lingers in the air and porous materials. You must address the smell directly.
- Ventilation and Air Purifiers: Continuous ventilation is fundamental. Keep windows open whenever possible. Use air purifiers with activated carbon filters. These filters are excellent at trapping odor molecules. Run them continuously for days or weeks.
- Ozone Generators (Use with Extreme Caution): Ozone generators are powerful odor eliminators. They work by producing O3 (ozone), which oxidizes odor molecules. However, ozone is a lung irritant. You must vacate the area completely when an ozone generator is running. Pets and plants must also be removed. Ventilate the space thoroughly for several hours after use before re-entry. These are best used by professionals or with strict safety protocols.
- Encapsulating Primers: For odors that refuse to leave, especially from heavy fire or cigarette smoke, an odor-blocking primer is a lifesaver. Products like Kilz or Zinsser BIN are designed to seal in odors and stains. Apply one to two coats after cleaning and drying the walls. This primer creates a barrier. It prevents the smell from seeping back through new paint. This step is often necessary before repainting heavily smoke-damaged rooms.
- Activated Charcoal: Bowls of activated charcoal can absorb odors over time. Place them around the room. This is a passive, safe method. It works slowly but continuously.
- Professional Cleaning Services: For very severe fire damage, pervasive soot, or odors that do not respond to DIY methods, hiring a professional restoration company is wise. They have industrial-grade equipment, specialized chemicals, and the expertise to handle extensive smoke damage. They can assess structural integrity and ensure thorough cleanup.
Tackling heavy smoke damage is a multi-faceted process. It combines diligent cleaning with dedicated odor elimination techniques. Be patient. The results are worth the effort.
Cleaning Different Wall Surfaces from Smoke
Walls come in many finishes, and each requires a slightly different touch when cleaning smoke. What works on a glossy painted wall might damage delicate wallpaper or flat paint. I always check the surface first. Knowing your wall material is the first step to successful cleaning without causing further damage.
Painted Walls (Flat, Semi-Gloss, Eggshell)
Painted walls are the most common type you will encounter. Different paint finishes have varying durabilities.
- Flat Paint: This finish is porous and absorbs stains easily. It is also the most delicate. You must be very gentle. Use minimal moisture. Over-scrubbing or too much water can remove the paint or leave shiny spots. For specific guidance, you can consult our article on how to clean flat paint walls. Stick to dry cleaning sponges first. If wet cleaning is necessary, use a very mild solution (like diluted white vinegar) on a barely damp cloth. Work in small sections and dry immediately. For textured surfaces, be extra careful to avoid rubbing the texture off. Our guide on how to clean matte paint walls also offers relevant advice for low-sheen paints.
- Eggshell, Satin, and Semi-Gloss Paint: These finishes are more durable and easier to clean than flat paint. Their slight sheen makes them less porous. You can use mild detergent solutions or diluted TSP for tougher stains. They tolerate more scrubbing. Still, use a damp cloth, not a soaking one. Always rinse and dry thoroughly to prevent streaks. These finishes are commonly used in kitchens and bathrooms because of their cleanability.
- Gloss Paint: This is the most durable and easiest to clean. Its hard, shiny surface repels stains. You can use stronger cleaning solutions and more pressure. Rinse and dry carefully to maintain the shine.
Wallpaper
Cleaning smoke from wallpaper is tricky. Wallpaper can be delicate, and excessive moisture can cause it to peel or tear.
- Test First: Always test your cleaning method in an inconspicuous area. Some wallpapers are washable, others are not.
- Dry Cleaning: Start with dry cleaning sponges. They are often the safest option for removing loose soot from wallpaper.
- Mild Solutions: If the wallpaper is washable, use a very mild solution of warm water and a tiny bit of dish soap. Dampen a soft cloth or sponge, wring it out almost completely, and gently blot the stained areas. Do not rub vigorously.
- Avoid Over-Wetting: Too much water will saturate the paper and loosen the adhesive. This can cause bubbling or peeling.
- Immediate Drying: Pat the area dry immediately with a clean, soft towel.
- Non-Washable Wallpaper: For non-washable wallpaper, professional cleaning might be the only option if dry cleaning sponges are not enough. Sometimes, repainting or re-papering is the best solution for heavy damage.
Textured Walls
Textured walls, like those with popcorn ceilings or stucco finishes, present a unique challenge. Smoke particles can settle deep into the textures.
- Vacuuming: Use a vacuum with a brush attachment to remove as much loose soot as possible from the crevices.
- Dry Cleaning Sponges: These sponges are excellent for textured surfaces. They conform to the bumps and ridges, picking up residue.
- Gentle Wet Cleaning: If wet cleaning, use a very soft brush (like a soft-bristled scrub brush or even a soft toothbrush for small areas) to gently work the cleaning solution into the texture. Avoid excessive rubbing, which can damage the texture.
- Rinsing: Use a clean, damp cloth or sponge to rinse, ensuring you get into the textures. Pat dry. Be prepared for this to be a more time-consuming process.
Drywall (Unpainted or Primed)
If your walls are bare drywall or just primed, they are highly porous. This means they will absorb smoke and odor deeply.
- Deep Absorption: Smoke and soot penetrate raw drywall easily. This makes full removal difficult.
- Cleaning: You can attempt cleaning with TSP or specialized smoke cleaners. However, be aware that you might not achieve a perfect clean. Stains and odors can be deeply embedded.
- Sealing and Painting: For unpainted or primed drywall with smoke damage, the most effective solution after initial cleaning is often to apply an odor-blocking and stain-killing primer (like Kilz or Zinsser B-I-N). This primer seals in residual stains and odors. Then, you can paint over it with fresh paint. This approach is often more practical than trying to achieve pristine bare drywall.
Always proceed with caution. The right approach protects your walls and ensures a successful smoke removal job.
Post-Cleaning Steps and Prevention Tips
Cleaning smoke off walls is a big step, but the job is not truly done until you have taken post-cleaning measures. These steps ensure your hard work lasts and your home stays fresh. Beyond cleaning, preventing future smoke accumulation is crucial. I always advise thinking about how to keep your walls clean in the long run.
Repainting Considerations After Smoke Damage
Even after thorough cleaning, heavily smoke-damaged walls might still have slight discoloration or faint odors. Repainting often becomes necessary for a truly fresh start.
- Assess the Need: If the smoke damage was light and your cleaning efforts were successful, repainting might not be required. However, for significant discoloration, persistent odors, or if you simply want a renewed look, repainting is the way to go.
- The Power of Primer: This is perhaps the most important step before repainting smoke-damaged walls. You cannot just paint over smoke stains. They will bleed through regular paint. You need a specialized stain-blocking and odor-sealing primer. Products like Kilz Original or Zinsser B-I-N Shellac-Base Primer are designed for this purpose.
- Apply at least two coats of this primer. Follow the manufacturer’s instructions for drying times between coats.
- These primers create a barrier that locks in remaining odors and prevents stains from resurfacing.
- This step is absolutely critical for long-lasting results. Our guide on how to clean walls before painting offers broader advice applicable here.
- Choosing Paint: Once the primer is dry, you can apply your chosen topcoat. Opt for a durable, washable paint finish like eggshell, satin, or semi-gloss. These finishes are less porous than flat paint and are easier to clean in the future.
- Ventilation During Painting: Continue to ventilate the room well during and after painting to help dissipate paint fumes and any lingering smoke smell.
Preventing Future Smoke Accumulation
An ounce of prevention is worth a pound of cure. Taking steps to minimize smoke can save you a lot of cleaning trouble later.
Control Smoke Sources:
- Smoking Indoors: The simplest solution for cigarette smoke is to discourage or prohibit indoor smoking. If someone must smoke indoors, designate a well-ventilated area, ideally near an open window or with an exhaust fan.
- Candles: Use candles sparingly. Keep wicks trimmed to 1/4 inch before each use. This reduces soot production. Place candles away from drafts. Consider battery-operated flameless candles for ambiance without the smoke.
- Fireplaces: Ensure your fireplace chimney is regularly inspected and cleaned by a professional. This prevents creosote buildup, which can cause smoke to back up into the room. Always use seasoned wood. Open the damper fully before lighting a fire.
- Cooking: Use exhaust fans above your stove when cooking, especially when frying or broiling. If your fan vents outdoors, it removes smoke and grease particles from your home.
Improve Indoor Air Quality:
- Air Purifiers: Invest in a good quality air purifier with a HEPA filter and an activated carbon filter. The HEPA filter captures airborne particles, including fine soot. The carbon filter absorbs odors. Place them in areas where smoke is most likely to occur.
- Regular Cleaning: Dust and wipe down surfaces regularly, even if you do not see visible smoke. This removes airborne particles before they can settle and build up. Focus on high surfaces like shelves, ceilings, and the tops of doors.
- Ventilation: Regularly open windows for a few minutes each day, even in winter. This fresh air exchange helps cycle out stale air and reduce odor buildup.
- HVAC Filters: Change your HVAC filters regularly (every 1-3 months, depending on usage and filter type). Higher MERV-rated filters can capture more airborne particles.
By combining proper post-cleaning steps with proactive prevention, you can ensure your walls remain clean and your home smells fresh for years to come. This complete approach takes the stress out of dealing with smoke damage.
FAQ Section
Q1: Can I paint over smoke stains without cleaning?
No, you should not paint over smoke stains without proper cleaning. Smoke residue, especially from fire or cigarettes, contains oily substances that will bleed through regular paint. You must clean the walls thoroughly first. Then, apply a high-quality stain-blocking, odor-sealing primer like Kilz or Zinsser BIN. This primer creates a barrier to prevent stains and odors from seeping through your new paint.
Q2: How long does smoke smell last in a house?
The duration of smoke smell depends on the source and severity. Light smoke from cooking might dissipate in hours or days with good ventilation. Heavy cigarette smoke or fire damage can linger for months or even years. The smell permeates porous materials like walls, furniture, carpets, and fabrics. Thorough cleaning, air purification, and sealing surfaces are essential for complete odor removal.
Q3: Is vinegar safe for all wall types?
White vinegar is generally safe for most painted walls, especially those with eggshell, satin, or semi-gloss finishes. However, it can potentially dull flat or matte paints due to their porous nature. Always test vinegar solutions in an inconspicuous area first. Avoid using vinegar on natural stone or unsealed grout,
- smoke removal
- wall cleaning
- home restoration
- soot cleanup
- odor elimination

Todd Martin
Senior Writer
With over 15 years of experience in home renovation and design, I started HEG to share what I’ve learned with homeowners who want to create spaces that are both beautiful and functional. I’ve always believed in a hands-on approach, and over the years, I’ve picked up practical solutions that actually work. Through HEG, I aim to make home improvement more approachable, sharing real tips that help you create a home you truly love.