· Todd Martin · Home Cleaning · 19 min read
How To Clean Lint Brush
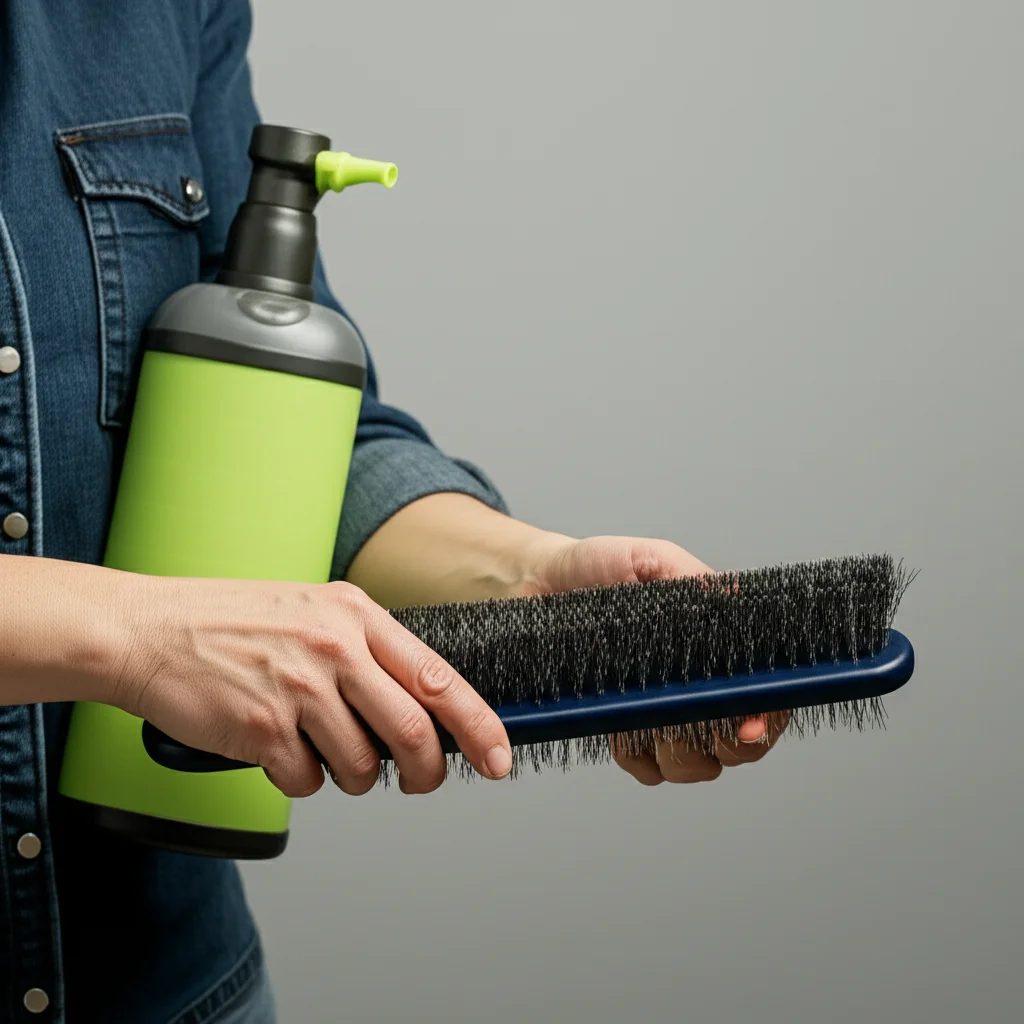
Restore Your Lint Brush: Simple Steps for Effective Cleaning
A dirty lint brush does not work well. It becomes less effective at removing fuzz and pet hair from your clothes. You might find yourself frustrated as it just pushes lint around. Knowing how to clean a lint brush is essential. Proper cleaning helps your tools do their job. It also extends the life of your favorite garment care items.
This article guides you through the process. We will explore different types of lint brushes and their specific cleaning needs. You will learn practical methods for removing trapped debris. I will share tips for maintaining your brushes. This ensures they always perform at their best.
Takeaway
- Regularly clean your lint brush to maintain its effectiveness.
- The cleaning method depends on your lint brush type (sticky roller, fabric, velvet).
- Use simple tools like combs, tape, or mild soap and water for cleaning.
To clean a lint brush, first remove large debris manually or with a comb. For sticky rollers, peel off the top layer. For fabric brushes, use tape or another comb to lift trapped lint. Wash non-adhesive brushes with mild soap and water, then air dry completely.
Understanding Your Lint Brush: Types and Their Needs
Lint brushes are helpful tools for keeping our clothes looking neat. They quickly remove lint, pet hair, and dust. Not all lint brushes are the same. Each type has a unique design. This means each type also needs a specific cleaning approach. Understanding these differences helps you clean effectively.
Sticky Lint Rollers
Sticky lint rollers are the most common type. They have a roll of adhesive paper. You roll them over fabric, and lint sticks to the paper. When a sheet gets full, you peel it off. This reveals a fresh, sticky layer underneath. These rollers are very convenient. They work well for quick touch-ups.
Cleaning these rollers usually involves just peeling off the dirty sheet. Sometimes, small bits of lint or hair can stick to the edges or the handle. You may need to wipe down the handle. Make sure no adhesive residue builds up.
Fabric Lint Brushes
Fabric lint brushes have a surface made of woven fabric. This fabric usually has a specific nap or direction. When you brush in one direction, it picks up lint. Brushing in the opposite direction cleans the brush. These brushes are reusable. They do not produce waste like disposable sticky sheets. They are great for delicate fabrics.
Cleaning a fabric lint brush involves removing the trapped fibers. The fabric surface gathers a lot of debris. This includes tiny lint particles and pet hair. You often need another tool to pull these embedded fibers out. I find these brushes effective for daily use.
Velvet Lint Brushes
Velvet lint brushes are a special type of fabric brush. They feature a velvet-like surface. This material is excellent at trapping lint and fine dust. Many velvet brushes are directional. You brush in one way to collect lint. Then you brush in the opposite way to clean the brush or release the lint into a collection chamber. They are very gentle on clothes.
Cleaning velvet brushes is similar to cleaning fabric brushes. You must remove the collected debris from the soft surface. The fibers can become deeply embedded. Regular cleaning keeps the velvet soft and effective. Neglecting this leads to a less efficient brush.
Each lint brush type serves its purpose. Knowing your brush helps you choose the right cleaning method. A clean lint brush ensures your clothes are always ready. It also makes your cleaning routine easier.
Essential Tools for Cleaning Your Lint Brush
Before you start cleaning your lint brush, gather the necessary tools. Having everything ready makes the process smoother. You probably have most of these items around your home. I always make sure I have these on hand for my cleaning tasks.
For Sticky Lint Rollers
For sticky lint rollers, the main “tool” is the roller itself.
- The roller: You simply peel off the used sheet. This is the primary way to clean this type.
- Damp cloth: Sometimes, the handle or core might get dirty. A damp cloth helps wipe away dust or grime.
- Rubbing alcohol (optional): For very sticky residue on the handle, a little rubbing alcohol on a cloth can help.
For Fabric and Velvet Lint Brushes
These brushes require a bit more effort. The lint and hair get embedded in the fabric.
- Fine-toothed comb: A comb is excellent for raking out trapped lint and hair. I prefer one with sturdy teeth. It needs to be fine enough to get into the brush fibers.
- Old toothbrush or stiff brush: These are good for scrubbing away stubborn dirt. An old toothbrush is perfect for small areas.
- Packing tape or strong adhesive tape: Tape can lift off loose lint that the comb might miss. I wrap it around my fingers with the sticky side out.
- Vacuum cleaner with an upholstery attachment: A vacuum can suck up lint quickly. This is especially good for larger lint brushes. It works wonders for quick clean-ups. You can also learn how to clean a lint filter on your vacuum if you use it frequently for lint removal.
- Mild soap or dish detergent: For wet cleaning, a gentle soap is crucial. Avoid harsh chemicals that can damage the brush fibers.
- Warm water: Water is necessary for rinsing if you are wet cleaning the brush.
- Towel: A clean towel helps absorb excess water after washing.
- Scissors (optional): Sometimes, long hairs or threads get tangled. Small scissors can carefully cut them away.
Having these tools ready makes the cleaning process quick and effective. A clean brush works much better. It helps keep your clothes looking crisp and free of debris. Regular maintenance prevents heavy buildup. This saves you time in the long run.
How to Clean a Sticky Lint Roller
Sticky lint rollers are incredibly convenient for quick lint removal. They are simple to use. Cleaning them is also straightforward. However, proper care ensures they remain effective. I often use these for my quick daily lint fixes.
Regular Cleaning: Peeling Sheets
The primary way to clean a sticky lint roller is by peeling off the top layer.
- Identify the perforation: Most sticky rollers have perforations between each sheet. Find the edge of the used sheet.
- Peel slowly: Gently peel the top sheet away from the roll. Pull it off completely.
- Discard the used sheet: Throw the used sheet, now covered in lint and hair, into the trash.
This reveals a fresh, sticky surface underneath. This method is designed for daily use. It ensures you always have maximum adhesion. When you see your roller is no longer picking up lint effectively, it is time to peel.
Addressing Residue on the Roller Core or Handle
Sometimes, adhesive residue or dirt can accumulate on the non-sticky parts. This usually happens around the edges of the roll or on the handle.
- Wipe with a damp cloth: Take a clean cloth dampened with warm water. Gently wipe down the plastic core and handle. This removes dust and light grime.
- Use rubbing alcohol for stubborn stickiness: If there is sticky residue from the adhesive, dampen a cotton ball or cloth with a small amount of rubbing alcohol. Carefully rub the affected area. Rubbing alcohol helps dissolve the adhesive.
- Dry completely: Allow the core and handle to air dry fully before using the roller again. Moisture can affect the adhesive sheets.
Extending the Life of Your Roller (Creative Tip)
While sticky rollers are mostly disposable, you can sometimes get a little more life out of a partially sticky sheet.
- Lightly tap: If a sheet is almost full but still has some stickiness, try lightly tapping it on a clean surface. This can dislodge some loose lint. It might free up a few more sticky spots.
- Rub against itself (gently): Some people gently rub two sticky sheets together. This can transfer lint from one to the other, potentially cleaning a small area. I find this less effective than just peeling, but it can work in a pinch.
Remember, the main purpose of a sticky lint roller is its adhesive quality. When it no longer picks up lint well, peeling off the used sheet is the best solution. Regular peeling keeps your clothes free of lint and looking sharp. It is also good to remember that other brushes also need similar attention, like learning how to clean a hair brush which often accumulates hair and dust.
How to Clean a Fabric or Velvet Lint Brush
Fabric and velvet lint brushes are reusable and eco-friendly. Unlike sticky rollers, they require hands-on cleaning. The fibers on these brushes trap lint, pet hair, and dust. Over time, this buildup reduces their effectiveness. I rely on my fabric lint brush for my delicate garments. It works wonders once it’s clean.
Dry Cleaning Methods
Dry cleaning methods are quick and perfect for regular maintenance. They do not involve water.
- Using a Fine-Toothed Comb:
- Preparation: Lay the lint brush on a flat surface. Hold it steady with one hand.
- Combing technique: Take a fine-toothed comb. Rake it gently across the fabric surface of the brush. Work in the opposite direction of the brush’s nap. This helps pull out embedded lint and hair.
- Repeat: Continue combing until most of the visible debris is gone. You will see lint collect on the comb. Remove the lint from the comb and discard it. This is similar to how to clean lint from a hairbrush, where a comb is also very effective.
- Using Packing Tape or Strong Adhesive Tape:
- Wrap your hand: Wrap a piece of strong packing tape around your fingers, sticky side out.
- Dab the brush: Press the tape onto the surface of the lint brush. Dab it repeatedly across the entire surface.
- Peel and repeat: The tape will pick up lint and hair. Peel off the used tape and discard it. Use fresh tape as needed until the brush is clean. This method is great for picking up finer dust particles.
- Using a Vacuum Cleaner:
- Attach upholstery tool: Attach the upholstery attachment to your vacuum cleaner.
- Vacuum the surface: Turn on the vacuum. Move the attachment slowly over the lint brush surface. The suction will pull out embedded lint and hair. This method is very effective for deep-seated debris. It is fast and efficient. This also works well for how to clean a brush roll on a Shark Navigator, which also deals with significant lint and debris accumulation.
Wet Cleaning Methods
Wet cleaning is for when your brush is very dirty or feels greasy. Do this sparingly, as excessive moisture can damage some brush types. Always check manufacturer guidelines first.
- Preparation: Fill a small basin with lukewarm water. Add a few drops of mild soap or dish detergent. Swirl to create suds.
- Gentle Washing:
- Submerge (if safe): If the brush is fully water-safe, briefly submerge the fabric part.
- Gentle scrub: Use your fingers or an old, soft toothbrush to gently scrub the fabric surface. Work in small circular motions. Focus on areas with heavy lint buildup.
- Rinse: Hold the brush under running lukewarm water. Rinse thoroughly until all soap suds are gone. Make sure no soap residue remains.
- Drying:
- Squeeze excess water: Gently squeeze any excess water from the brush fibers. Do not twist or wring the brush.
- Pat dry: Pat the brush with a clean, dry towel to absorb more moisture.
- Air dry completely: Lay the lint brush flat on a clean towel or hang it in a well-ventilated area. Allow it to air dry completely. This can take several hours. Ensure it is bone dry before storing it or using it again. Moisture can lead to mold or mildew.
Regular dry cleaning prevents the need for frequent wet cleaning. A well-maintained fabric or velvet lint brush will serve you for years. It helps keep your clothes looking their best without waste.
Deep Cleaning Your Lint Brush for Stubborn Debris
Sometimes, regular cleaning methods are not enough. Lint brushes, especially fabric or velvet types, can accumulate stubborn debris. This includes matted pet hair, sticky residues, or deeply embedded grime. When your brush feels less effective despite a quick clean, it is time for a deep clean. I perform a deep clean on my brushes every few months. This ensures they maintain peak performance.
Tackling Matted Pet Hair and Lint
Pet hair can be particularly challenging. It weaves itself deep into the brush fibers.
- Use a Sturdy Comb or Brush Cleaner:
- Aggressive raking: Take a sturdy, fine-toothed comb or a specialized brush cleaning tool. Aggressively rake it through the brush surface. Apply more pressure than you would for a regular clean. Work in multiple directions. This helps loosen deeply embedded hair and lint.
- Pull and discard: As you rake, large clumps of hair and lint will come out. Pull these off the comb or cleaner and discard them immediately. Repeat until no more significant clumps emerge. This process is very similar to how you might remove stubborn buildup on a hair brush.
- Vacuum with Strong Suction:
- High power setting: If your vacuum has adjustable power, use a higher suction setting.
- Intense vacuuming: Press the upholstery attachment firmly against the lint brush. Move it slowly over the surface. The strong suction can pull out even matted hair. This is excellent for ensuring thorough removal of all trapped debris.
Removing Sticky Residues or Greasy Buildup
Occasionally, lint brushes can pick up sticky substances or become greasy. This might come from fabric softeners, hair products, or accidental spills.
- Spot Treatment with Rubbing Alcohol:
- Dampen a cloth: Lightly dampen a clean cloth or cotton swab with rubbing alcohol.
- Gently dab: Dab the affected area on the lint brush. Do not rub vigorously, especially on velvet. Alcohol helps dissolve sticky residues.
- Air dry: Allow the area to air dry completely. Test a small, inconspicuous area first. This checks for colorfastness or material reaction.
- Mild Dish Soap and Water Soak (for fabric brushes):
- Prepare solution: Fill a small basin with lukewarm water. Add a generous amount of mild dish soap. Dish soap is excellent at cutting through grease.
- Soak (briefly): Submerge only the fabric part of the lint brush in the soapy water. Let it soak for 5-10 minutes. This helps loosen the greasy grime.
- Scrub and rinse: After soaking, use an old toothbrush or your fingers to gently scrub the surface. Rinse thoroughly under running lukewarm water. Ensure all soap residue is gone.
- Dry completely: Press out excess water with a towel. Allow the brush to air dry completely, lying flat or hanging in a well-ventilated area. Complete dryness prevents mildew.
Deep cleaning takes more time. It is vital for maintaining your lint brush’s efficiency. A deeply cleaned brush performs like new. It helps keep your clothes spotless and extends the tool’s lifespan. I find this process very satisfying, knowing my tools are in top condition.
Preventive Measures and Regular Maintenance Tips
Keeping your lint brush clean prevents heavy buildup. Regular maintenance saves you time and effort in the long run. It also ensures your brush is always ready for use. I make these habits a part of my routine. They keep my lint brushes in excellent shape.
Quick Cleans After Each Use
The best way to prevent a dirty lint brush is to clean it immediately.
- For sticky rollers: Peel off the used sheet right after you finish. Do not leave a partially used, lint-covered sheet on the roll. This exposes a fresh surface for the next use. It also keeps the overall roll cleaner.
- For fabric/velvet brushes: Give it a quick swipe with your hand or a quick comb-through. Remove any obvious clumps of lint or pet hair. This prevents them from embedding deeper. I often just run my hand over the brush to clear it quickly.
Storing Your Lint Brush Properly
Proper storage protects your lint brush from collecting dust and debris when not in use.
- Use covers or cases: Many lint rollers come with plastic covers. Keep this cover on when storing. For fabric brushes, consider a small cloth bag or a drawer. This shields the brush surface from airborne dust and dirt.
- Store upright or in a drawer: If possible, store sticky rollers upright in a holder. This prevents the sticky surface from touching other items. Fabric brushes can be stored flat in a drawer. This protects the bristles or fabric from bending or crushing.
Avoiding Common Mistakes
Certain habits can make your lint brush dirty faster or damage it.
- Do not roll on dirty surfaces: Avoid rolling your lint brush on floors, dusty tables, or very dirty clothes. This introduces more grime than necessary. Use it only on garments or clean fabrics.
- Do not use on wet items: Lint brushes work best on dry surfaces. Using them on damp clothes can transfer moisture and make lint stick more stubbornly. It can also damage the brush material over time.
- Avoid harsh chemicals: When wet cleaning, use only mild soap. Harsh detergents or abrasive cleaners can damage the adhesive on rollers or break down the fibers on fabric brushes. This shortens their lifespan.
Regular Deep Cleaning Schedule
Even with daily care, some buildup is inevitable.
- Monthly check: I recommend checking your fabric or velvet lint brush once a month. See if a deeper clean is needed. If it feels less effective or looks visibly dirty, proceed with a deep clean.
- Timely replacement of roller sheets: For sticky rollers, pay attention to the remaining sheets. Do not wait until the roll is completely depleted. Having a new refill or roller ready ensures uninterrupted lint removal.
By implementing these preventive measures and maintenance tips, your lint brush will remain a powerful tool. It will keep your clothes looking impeccable. Clean tools make cleaning tasks easier and more effective. Maintaining your brush well is an investment in your wardrobe. It is just as important as knowing how to properly care for other cleaning tools, like understanding how to clean a dish brush after use.
When to Replace Your Lint Brush
Even with the best cleaning and maintenance, lint brushes do not last forever. Knowing when to replace your lint brush is crucial. It ensures you always have an effective tool for garment care. Trying to use an overused or damaged brush is frustrating. It simply will not get the job done. I assess my lint brushes regularly. This prevents last-minute wardrobe emergencies.
Sticky Lint Rollers
Sticky lint rollers are designed for finite use.
- When the roll is empty: This is the most obvious sign. Once all the adhesive sheets have been peeled away, the roller is done. You will need a refill or a new roller.
- Loss of stickiness: Sometimes, even if sheets remain, the adhesive might lose its stickiness. This can happen if stored improperly, exposed to extreme temperatures, or if it is an older product. If new sheets do not pick up lint well, replace the entire roller or get a new refill.
- Damaged core or handle: The plastic core might crack, or the handle could break. This makes the roller difficult to use. A damaged handle means it is time for a new one.
Fabric and Velvet Lint Brushes
These reusable brushes have a longer lifespan, but they do wear out.
- Frayed or matted fabric: The most common sign of wear is when the fabric surface starts to fray, pill, or become permanently matted down. This reduces its ability to grab lint. If you cannot comb or wash it back into shape, it is time for a replacement.
- Reduced effectiveness: Even if it looks okay, if the brush no longer picks up lint efficiently after a thorough deep clean, its fibers may be worn. The directional nap might be compromised.
- Tears or holes: Any significant tears or holes in the fabric surface mean it is damaged beyond repair. This will affect its lint-collecting ability.
- Broken handle or frame: The handle might snap, or the plastic frame holding the fabric could break. A structurally damaged brush is not safe or effective to use.
General Signs for Any Lint Brush Type
Some signs apply to all types of lint brushes.
- Constant residue: If your brush consistently leaves behind sticky residue (for rollers) or small fibers (for fabric brushes) on your clothes, it is a sign of degradation.
- Unsanitary condition: Despite cleaning, if the brush retains an unpleasant odor or seems impossible to sanitize, it is best to replace it for hygiene reasons.
- Frustration during use: The simplest sign is your own frustration. If using the brush becomes a chore because it is not working well, it is time for an upgrade. A tool that does not perform its function well is a hindrance.
Replacing your lint brush when needed is a small investment. It ensures your clothes always look their best. A fresh, effective lint brush makes garment care quick and easy. Do not let an old, tired brush compromise your neat appearance.
Frequently Asked Questions About Cleaning Lint Brushes
Can I wash a sticky lint roller with water?
Generally, no. Washing a sticky lint roller with water will dissolve the adhesive. This makes the roller useless. The best way to clean a sticky roller is by peeling off the used, lint-covered sheet. If the plastic core or handle gets dirty, wipe it with a damp cloth. Make sure it is completely dry before touching the adhesive again.
How often should I clean my fabric lint brush?
You should perform a quick clean on your fabric lint brush after every use. Use a comb or your hand to remove visible lint. A deeper clean is recommended every 1-2 months, depending on how frequently you use it and how much lint it collects. If you notice a significant decrease in effectiveness, it is time for a deep clean.
What if lint is really stuck deep in my velvet brush?
For deeply stuck lint in a velvet brush, use a sturdy fine-toothed comb. Rake it firmly across the surface in the opposite direction of the nap. A strong vacuum cleaner with an upholstery attachment can also pull out stubborn debris. For sticky residues, a gentle dab with rubbing alcohol might help, followed by air drying.
Can I put my lint brush in the washing machine or dishwasher?
No, you should never put a lint brush in a washing machine or dishwasher. The harsh detergents, high temperatures, and tumbling action can severely damage the brush’s adhesive, fabric, or plastic components. This will ruin its effectiveness and lifespan. Always follow manual or gentle hand-cleaning methods.
How do I store my lint brush to keep it clean?
Store sticky lint rollers with their protective cover on. This prevents the adhesive from collecting dust. For fabric or velvet brushes, keep them in a clean drawer or a small pouch. This shields the brush surface from airborne dust and prevents accidental damage. Proper storage extends the time between deep cleans.
Conclusion
Keeping your clothes looking sharp is easier with a clean lint brush. We have explored simple yet effective methods for how to clean a lint brush. Whether you use a sticky roller, a fabric brush, or a velvet one, regular care is essential. Proper cleaning helps your tool perform its best. It also extends its usable life significantly.
Remember to choose the right cleaning method for your specific brush type. Take advantage of easy daily maintenance to prevent heavy buildup. A well-cared-for lint brush is a reliable tool. It keeps your garments free from lint and looking impeccable. Make lint brush cleaning a regular part of your home care routine. Your wardrobe will thank you.
- lint removal
- fabric care
- cleaning tips

Todd Martin
Senior Writer
With over 15 years of experience in home renovation and design, I started HEG to share what I’ve learned with homeowners who want to create spaces that are both beautiful and functional. I’ve always believed in a hands-on approach, and over the years, I’ve picked up practical solutions that actually work. Through HEG, I aim to make home improvement more approachable, sharing real tips that help you create a home you truly love.