· Todd Martin · Home Care · 19 min read
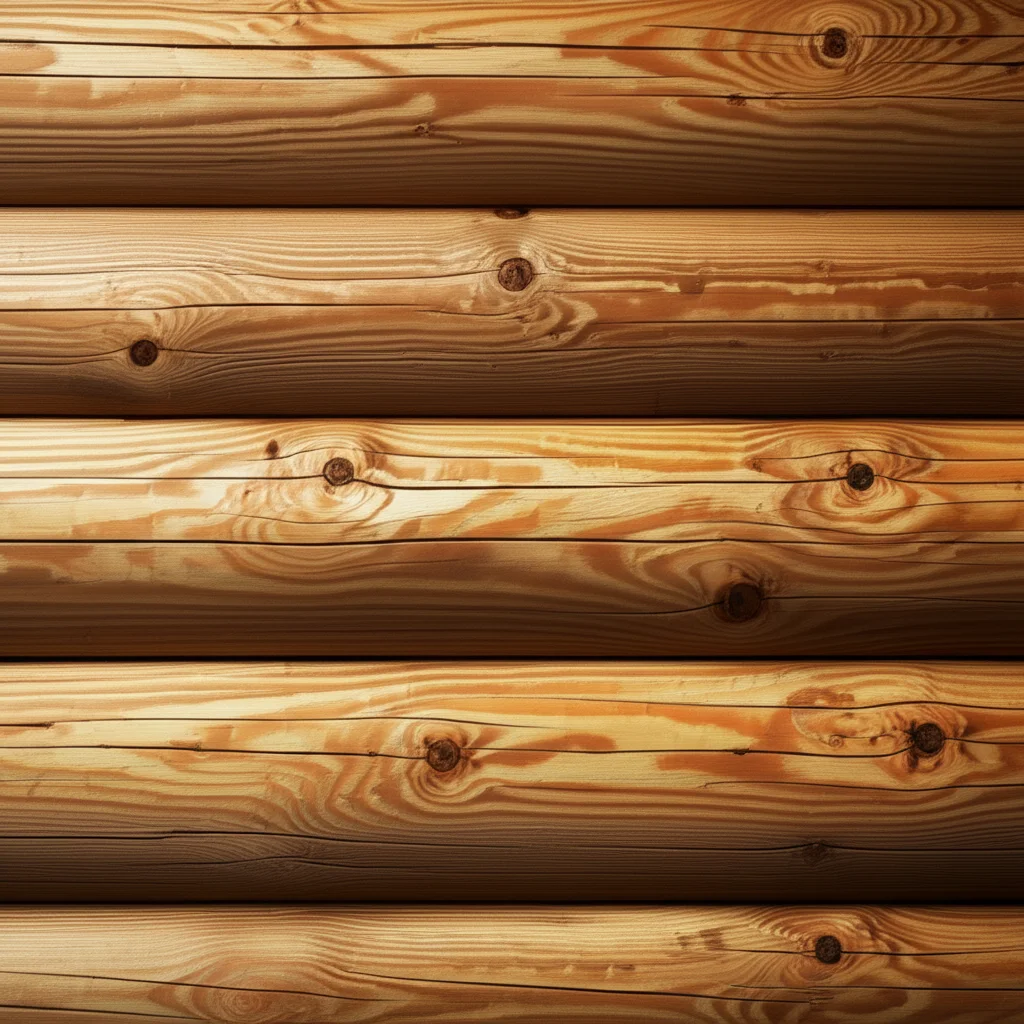
How To Clean Knotty Pine Walls
Restore Your Knotty Pine Walls: A Cleaning Guide
Knotty pine walls add a unique, rustic warmth to any home. Their natural beauty comes from the distinct knots and grain patterns. However, over time, these beautiful walls can accumulate dust, dirt, grease, or even smoke residue. Regular cleaning is important to preserve their charm and extend their life. I understand the desire to keep these features looking their best.
Cleaning knotty pine walls requires a gentle touch and the right approach. Harsh chemicals can damage the wood or its finish. This comprehensive guide will walk you through everything you need to know. We will cover preparing your space, choosing the right cleaning solutions, tackling tough stains, and maintaining your walls. By following these steps, your knotty pine walls will regain their natural glow.
Takeaway
Keeping your knotty pine walls pristine involves:
- Preparation: Clear the area and protect floors.
- Dusting: Use a soft cloth or vacuum.
- Gentle Cleaning: Use mild, wood-safe solutions.
- Targeted Stain Removal: Address specific stains carefully.
- Regular Maintenance: Keep up with routine cleaning.
To clean knotty pine walls, first dust them thoroughly to remove loose debris. Next, use a soft cloth dampened with a mild solution of warm water and a few drops of dish soap or wood cleaner. Wipe the walls gently, then rinse with a clean, damp cloth and dry immediately to prevent water damage.
Understanding Your Knotty Pine Walls
Before you start cleaning, it is essential to understand the surface of your knotty pine walls. Knotty pine is softwood, and it can be susceptible to scratches or dents. The finish on your walls also matters. Some pine walls are sealed with varnish, polyurethane, or shellac. Others might be waxed, stained, or left natural and unsealed. Knowing the finish helps you choose the safest cleaning method.
Varnished or polyurethaned walls have a protective layer. This layer makes them more resistant to moisture and stains. You can generally use slightly more moisture on these surfaces. Unsealed or waxed walls are more porous. They absorb liquids easily. This means you must be very careful with water or liquid cleaners on them. Always test any cleaning solution in an inconspicuous spot first. This step ensures it does not damage the finish or the wood itself. I find this quick test saves a lot of headaches later on. Different finishes react differently to cleaning agents.
Pine also has a natural tendency to yellow over time, especially if exposed to sunlight or smoke. This yellowing is part of its aging process. While cleaning can remove surface grime, it may not completely reverse deep discoloration. However, a good cleaning will refresh the wood and highlight its natural beauty. Understanding these characteristics helps you clean effectively without causing harm.
Essential Tools and Cleaning Solutions
Gathering the right tools and solutions is the first step to successful cleaning. Using proper equipment makes the job easier and prevents damage to your walls. You do not need many specialized items for cleaning knotty pine. Simple household items often work best.
Here is a list of what you will need:
- Soft cloths or microfiber towels: These are gentle on wood surfaces. They absorb well and do not scratch.
- Bucket: For mixing your cleaning solutions.
- Vacuum cleaner with brush attachment: For initial dust and debris removal.
- Spray bottle: For applying solutions evenly.
- Protective sheeting or old towels: To protect your floors and furniture.
- Mild dish soap: A small amount in water is a gentle cleaner.
- White vinegar: Excellent for cutting through grime and deodorizing. You can learn more about how to clean walls with vinegar.
- Warm water: The base for most cleaning solutions.
- Wood cleaner (optional): Choose one specifically formulated for natural wood.
- Mineral spirits: For stubborn grease or wax buildup on sealed wood. Use sparingly.
- Fine-grit sandpaper (optional): For very stubborn stains on unsealed wood. Use with extreme caution.
Avoid abrasive sponges or harsh chemical cleaners. These can strip the finish or damage the wood grain. I always err on the side of caution with wood. A gentle approach protects your investment in these beautiful walls. Remember, less is often more when it comes to cleaning wood surfaces.
Step-by-Step Guide to Cleaning Knotty Pine Walls
Cleaning your knotty pine walls involves a systematic approach. Following these steps ensures a thorough cleaning without damaging the wood. I like to break down tasks into manageable parts. This makes the process less daunting.
1. Prepare the Area
Before you begin, prepare your space. This protects your belongings and makes the cleaning process more efficient.
- Remove items: Take down pictures, wall hangings, and move furniture away from the walls.
- Cover floors and furniture: Lay down old sheets, towels, or plastic sheeting. This protects against drips and spills.
- Open windows: Ensure good ventilation, especially when using any cleaners.
2. Initial Dusting and Debris Removal
Dust and cobwebs accumulate quickly on walls. Removing them first prevents turning dust into muddy streaks when you apply liquid cleaners.
- Vacuum: Use a vacuum cleaner with a soft brush attachment. Start from the top of the wall and work your way down. This collects loose dust, dirt, and cobwebs effectively.
- Wipe down: For areas that cannot be vacuumed easily, use a dry, soft microfiber cloth or a feather duster. Ensure you capture all loose particles. This initial step is crucial for overall cleanliness. If you miss this, you might just spread dirt around later. You can also explore general tips on how to clean dirt off walls.
3. Gentle Cleaning Solution Application
Once dusted, it’s time to clean the surface. Always start with the mildest solution.
- Mild Soap Solution: Mix a few drops of mild dish soap into a bucket of warm water. The water should be just warm, not hot.
- Vinegar Solution (Optional): For slightly tougher grime or to neutralize odors, mix 1 part white vinegar with 2 parts warm water. This is an effective and natural cleaning agent. Many people find how to clean walls with vinegar helpful for various surfaces.
- Test: Dampen a small, clean cloth with your chosen solution. Test it on an inconspicuous area of the wall. Wait a few minutes to ensure no discoloration or damage occurs. If the area remains unchanged, proceed.
- Wipe: Dip a clean microfiber cloth into the solution. Wring it out thoroughly. The cloth should be damp, not dripping wet. Excess water can damage wood, especially unsealed pine.
- Clean in sections: Start at the top of the wall and work downwards. Wipe in small sections, following the grain of the wood. Rinse your cloth frequently in clean water to avoid spreading dirt.
- Rinse: Immediately follow with a second clean cloth dampened only with plain water. This removes any soap residue.
- Dry: Use a third clean, dry cloth to thoroughly dry the section you just cleaned. Do not let water sit on the wood. This step is critical to prevent water marks or swelling.
4. Tackling Stubborn Stains and Specific Issues
Sometimes, simple cleaning is not enough. Knotty pine walls can suffer from specific types of stains or damage. Addressing these requires a more targeted approach. I’ve found that patience and the right product make all the difference.
Grease and Grime Buildup
Kitchens often have knotty pine, and grease can accumulate. This type of grime can be sticky and hard to remove.
- For Sealed Pine: Mix a small amount of mild dish soap with warm water. You can also add a tablespoon of white vinegar for extra grease-cutting power. Dip a soft cloth, wring it out well, and gently wipe the greasy areas. For very stubborn spots, a tiny bit of mineral spirits on a cloth can work wonders on sealed wood. Always test first.
- For Unsealed Pine: Grease can penetrate unsealed wood. Try making a paste with baking soda and a small amount of water. Apply it to the grease spot, let it sit for 10-15 minutes, then gently wipe away with a damp cloth. Finish by drying the area completely.
Smoke and Soot Stains
Smoke and soot can yellow pine walls and leave a sticky residue. This is common in homes with fireplaces or where smoking occurred. Cleaning smoke off walls, particularly wood, needs care.
- Vacuuming: Begin by thoroughly vacuuming the walls with a brush attachment. This removes loose soot particles. You do not want to rub these in.
- Specialized Cleaner: For deep smoke discoloration or soot, consider a cleaner designed for smoke damage. Often, a solution of warm water and a small amount of TSP (trisodium phosphate) substitute can be effective for sealed wood. Follow product instructions carefully and ensure good ventilation. For more guidance, see articles on how to clean smoke off walls or how to clean soot off walls.
- Vinegar Solution: For light smoke residue and to neutralize odors, a 1:1 mixture of white vinegar and water can be very helpful. Apply with a damp cloth, wipe, and dry quickly. This also helps with how to clean yellow walls from smoke.
Water Stains
If water has sat on your pine walls, it can leave dark rings or spots.
- For Fresh Stains on Sealed Wood: Sometimes, a mixture of equal parts vinegar and olive oil can reduce light watermarks. Apply with a soft cloth, rub gently, and then buff dry.
- For Deep Stains: Darker water stains may require more intensive methods, possibly sanding and refinishing the affected area. This is a bigger project, so test small first.
Mold and Mildew
Mold can appear on pine walls in humid environments. It is important to address mold quickly to prevent spread and damage.
- Safety First: Wear gloves and a mask when cleaning mold.
- Mild Solution: For small, surface mold, a solution of white vinegar (undiluted or 1:1 with water) can be effective. Apply with a cloth, let it sit for a few minutes, then wipe clean. Vinegar is known for its anti-fungal properties. You can read more about how to clean mold off walls and how to clean mold with vinegar.
- Bleach (for Sealed Pine ONLY and as a last resort): For severe mold on sealed pine, a very diluted bleach solution (1 part bleach to 10 parts water) can be used. Apply sparingly with a cotton swab, let sit briefly, then wipe off and rinse with plain water. Bleach can strip finishes and lighten wood, so use with extreme caution and only if other methods fail. Never mix bleach with vinegar.
- Address Humidity: After cleaning, identify and fix the source of moisture to prevent mold from returning.
General Stains and Marks
For everyday marks or other random stains, a general approach to how to clean stains off walls can be applied to pine.
- Pencil Marks/Scuffs: A regular pencil eraser can sometimes remove light scuff marks.
- Crayon/Grease Marks: A small amount of mineral spirits on a cloth, gently rubbed, can work on sealed walls. For unsealed, a baking soda paste.
- Ink Stains: These are very tough. For sealed wood, try rubbing alcohol on a cotton swab very carefully, blotting, not rubbing. For unsealed, it might require light sanding.
Always remember to dry the area completely after treating any stain. Moisture is the enemy of wood.
Protecting and Maintaining Your Knotty Pine Walls
Cleaning is only part of the equation. Protecting your knotty pine walls and performing regular maintenance helps them stay beautiful for years. This prevents deep-seated grime and reduces the need for intensive cleaning. I always believe prevention is better than cure.
Regular Dusting
The simplest and most effective maintenance step is regular dusting.
- Weekly Dusting: Use a soft, dry microfiber cloth, a duster with an extendable handle, or a vacuum cleaner with a soft brush attachment. Dusting prevents dust and cobwebs from building up and bonding with the surface.
- High Areas: Do not forget the tops of trim, beams, and high corners where dust often settles. This keeps your overall room cleaner.
Addressing Moisture and Humidity
Pine is susceptible to moisture damage. Managing humidity levels in your home is vital.
- Dehumidifiers: In humid climates or rooms like basements (where you might also consider how to clean mold off basement walls), use a dehumidifier. This helps prevent mold and mildew growth.
- Ventilation: Ensure good ventilation, especially in kitchens and bathrooms. Use exhaust fans when cooking or showering.
Preventing Sun Damage
Prolonged exposure to direct sunlight can cause knotty pine to yellow and fade unevenly.
- Window Coverings: Use blinds, curtains, or UV-filtering window films. These protect your walls from harsh sunlight. Adjust them during peak sun hours.
- Furniture Arrangement: Arrange furniture to minimize direct sun exposure on large wall sections.
Reapplying Protective Finishes
Over time, finishes can wear down, especially in high-traffic areas. This leaves the wood vulnerable.
- Waxed Walls: If your walls are waxed, reapply a thin coat of wood wax every few years. This helps protect the wood and restores its luster.
- Varnished/Polyurethaned Walls: These finishes are very durable. They usually last many years. If you notice dullness, excessive scratches, or flaking, consider consulting a professional. They can advise on light sanding and reapplication of a clear coat.
- Unsealed Walls: For unsealed pine, a natural oil like tung oil or linseed oil can be applied periodically. This nourishes the wood and offers some protection. Always follow product directions.
By incorporating these protective and maintenance steps, your knotty pine walls will remain a charming feature of your home. It’s about consistent, gentle care.
Common Mistakes to Avoid When Cleaning Knotty Pine
Cleaning knotty pine walls incorrectly can lead to damage. Avoiding common pitfalls ensures your walls stay beautiful. I’ve seen many people make these mistakes, and the results are not pretty.
- Using Too Much Water: Wood and excessive water do not mix well. Unsealed pine can swell, warp, or develop water stains. Even sealed pine can be damaged if water penetrates the finish. Always wring out cloths until they are just damp. Immediately dry the cleaned area.
- Using Harsh Chemicals or Abrasives: Bleach, ammonia-based cleaners, and abrasive scrubbing pads can strip natural oils, dull finishes, or scratch the wood. Stick to mild soap, vinegar, or dedicated wood cleaners. For rough spots or deep stains, use fine-grit sandpaper only on unsealed wood and with extreme caution.
- Rubbing Against the Grain: Always wipe along the wood grain. Rubbing against the grain can push dirt deeper into the wood. It can also cause micro-scratches, especially on softer pine. Following the grain gives a cleaner finish.
- Skipping the Test Spot: Every wood finish is different. A cleaner that works on one type of wood might damage another. Always test any new cleaning solution on an inconspicuous area first. This small step can prevent a large, visible mistake.
- Neglecting Regular Dusting: Allowing dust and grime to build up makes deep cleaning much harder. It also creates a film that dulls the wood’s appearance. Regular, light dusting prevents this buildup.
- Not Addressing Spills Immediately: Spills, especially sticky or colored liquids, should be wiped up at once. The longer a spill sits, the more likely it is to stain or seep into the wood.
- Over-Polishing or Oiling: While some finishes benefit from occasional oiling or polishing, overdoing it can create a sticky residue. This residue attracts more dust and dirt. Follow manufacturer recommendations for your specific finish.
By being mindful of these common errors, you can clean your knotty pine walls safely and effectively. It’s all about understanding the material and being gentle.
Alternative Cleaning Solutions and Methods
While mild soap and vinegar are typically sufficient, sometimes you might want to explore other options. Some alternative solutions can be useful for specific situations or preferences. I always look for natural and effective ways to clean.
Oil-Based Cleaners and Polishes
Some cleaners contain oils that can nourish and shine wood. These are generally better for sealed or waxed pine.
- Commercial Wood Cleaners: Many brands offer specific wood cleaners that clean and condition. Look for products designed for finished wood. Always follow the instructions on the product label.
- Lemon Oil or Orange Oil: These natural oils can clean light grime and add a pleasant scent. They also give a natural shine. Apply a small amount to a soft cloth, wipe, and buff dry. Be cautious on unsealed wood, as they can darken it.
Steam Cleaning (Use with Extreme Caution)
Steam cleaning is generally not recommended for knotty pine walls, especially unsealed ones. The high heat and moisture can warp, swell, or damage the wood fibers and finish. However, if used with extreme caution and only on heavily sealed, very dirty areas, some people attempt it.
- Low Setting: If you must use steam, set your steam cleaner to the lowest possible steam output.
- Quick Passes: Move the steamer quickly over the surface. Do not let it dwell in one spot.
- Immediate Drying: Immediately wipe the area dry with a clean, dry cloth.
- Test Area: Always test in a very hidden spot first. I personally avoid steam on wood unless absolutely necessary and with professional guidance.
Borax Solution
Borax is a natural mineral cleaner that can be effective for general dirt and grime.
- Mix: Dissolve 2 tablespoons of Borax in 2 cups of warm water.
- Apply: Use a soft cloth dampened with the solution. Wipe down the walls.
- Rinse and Dry: Rinse with a clean, damp cloth and dry thoroughly. Borax is a good alternative to dish soap for general cleaning.
Rubbing Alcohol for Specific Stains
Rubbing alcohol can remove some tough marks like ink or permanent marker from sealed pine.
- Apply Sparingly: Dampen a cotton swab or the corner of a clean cloth with rubbing alcohol.
- Blot, Don’t Rub: Gently blot the stain. Do not rub vigorously, as this can spread the stain or damage the finish.
- Rinse and Dry: Immediately wipe the area with a damp cloth (plain water) and then dry. Use this method only for targeted spot treatment.
Remember, the goal is always to be gentle with knotty pine. Start with the least aggressive method and only escalate if necessary. Each wall and its finish are unique, so testing is key.
Hiring Professional Cleaners for Knotty Pine
Sometimes, the task of cleaning knotty pine walls can feel overwhelming. This is especially true for large areas, deeply ingrained dirt, or significant smoke damage. In such cases, considering professional cleaners can be a wise decision. They have the expertise and specialized equipment to handle challenging cleaning jobs.
Professional cleaners understand different wood finishes. They know how to identify the specific type of grime or damage. This allows them to choose the most effective and safest cleaning methods. They often have industrial-grade equipment. This equipment can tackle large surfaces efficiently. They also use specialized cleaning agents that might not be available to the general public. These agents are formulated for deep cleaning without harming wood.
Here are some scenarios where hiring a professional might be beneficial:
- Extensive Smoke Damage: If your walls have heavy smoke or soot residue, a professional can remove it more thoroughly. They can also often mitigate the lingering smell. This goes beyond simple surface cleaning.
- Mold Infestation: For widespread mold, a professional cleaner can safely remove it. They can also address the underlying moisture issues. This helps prevent future growth. This is important as mold can be a health hazard.
- Deep-Seated Grime: If your knotty pine hasn’t been cleaned in many years, dirt and grime might be deeply embedded. Professionals can restore the wood’s appearance without damaging its integrity.
- Time Constraints: If you lack the time or physical ability for a large cleaning project, professionals offer a convenient solution. They can complete the job efficiently.
When choosing a professional, look for companies experienced in wood cleaning and restoration. Ask for references and clarify their methods for knotty pine. A good professional will always start with a test area. They will also explain their process. Investing in professional cleaning can extend the life and beauty of your knotty pine walls. It ensures they remain a stunning feature in your home.
Frequently Asked Questions
Can I use Murphy Oil Soap on knotty pine walls?
Yes, Murphy Oil Soap is generally safe for sealed knotty pine walls. It is a gentle, oil-based cleaner designed for wood. Dilute it according to the product instructions. Apply with a damp cloth, wipe, and then dry the walls thoroughly. Always test a small, hidden area first to ensure it does not affect your specific finish.
How do I remove yellowing from knotty pine walls?
Yellowing often comes from sun exposure, age, or smoke. For surface yellowing from dirt or light smoke, a solution of white vinegar and water can help. For deeper yellowing from smoke, try a specialized smoke cleaner. Severe yellowing, especially from age or sun, may require professional treatment, like light sanding and refinishing, as it is a change in the wood itself.
Is it safe to use a magic eraser on knotty pine?
No, it is generally not recommended to use a Magic Eraser on knotty pine walls. Magic Erasers are abrasive, even though they feel soft. They can remove the finish, dull the wood, or even scratch the surface of the softer pine. Stick to soft cloths and gentle cleaning solutions to protect your walls.
How often should I clean my knotty pine walls?
For light dusting, I recommend doing it weekly or bi-weekly to prevent buildup. A more thorough cleaning with a damp cloth and mild solution can be done every few months. Deep cleaning or stain removal should be done only as needed. Regular maintenance prevents the need for frequent deep cleaning.
Can I paint over knotty pine walls after cleaning them?
Yes, you can paint over knotty pine walls after cleaning them. However, cleaning is just the first step. You will also need to lightly sand the walls, prime them with a stain-blocking primer (to prevent knots from bleeding through), and then apply your chosen paint. Cleaning ensures proper paint adhesion.
What causes knotty pine walls to get sticky?
Knotty pine walls can become sticky due to accumulated grease, smoke residue, or a buildup of cleaning products/polishes. Kitchens are prone to grease buildup. Smoke from fireplaces or cigarettes leaves a sticky film. Using too much product or not rinsing properly can also cause residue. Regular cleaning with a mild degreaser helps prevent stickiness.
Conclusion
Cleaning knotty pine walls might seem like a daunting task. However, with the right approach and a little patience, you can restore their natural beauty. My experience tells me that gentle care is always best for wood. You have learned how to prepare your space, effectively dust, and use mild solutions for general cleaning. You also now know how to tackle specific challenges like grease, smoke, and even mold.
Remember to prioritize gentle methods and always test solutions in a hidden area first. Regular maintenance, such as dusting and controlling humidity, will keep your knotty pine walls looking their best for years to come.
By following this comprehensive guide, you are well-equipped to keep your knotty pine walls clean and vibrant. Do not let dirt dull their charm; embrace the warmth and character they bring to your home with a proper cleaning routine. Your beautiful pine walls deserve the best care.
- knotty pine cleaning
- wood wall maintenance
- pine wall care

Todd Martin
Senior Writer
With over 15 years of experience in home renovation and design, I started HEG to share what I’ve learned with homeowners who want to create spaces that are both beautiful and functional. I’ve always believed in a hands-on approach, and over the years, I’ve picked up practical solutions that actually work. Through HEG, I aim to make home improvement more approachable, sharing real tips that help you create a home you truly love.