· Todd Martin · Home Maintenance, HVAC Systems · 21 min read
How To Clean Heat Exchanger
Master Your Home’s Efficiency: How To Clean Heat Exchanger
Imagine your home’s heating or cooling system working harder than it should. This often happens due to a dirty heat exchanger. This important part transfers thermal energy between fluids without them mixing. Over time, it collects grime, dust, and scale, which reduces its efficiency. Knowing how to clean a heat exchanger can save you money on energy bills and extend the life of your equipment.
Regular cleaning prevents costly breakdowns and ensures your system runs at its best. In this article, we will explore why heat exchanger cleaning is vital, discuss different types, and provide detailed steps for a thorough clean. We will also cover essential tools, safety measures, and tips for long-term maintenance. Get ready to boost your home’s comfort and energy savings.
Takeaway
Cleaning a heat exchanger helps your system run efficiently and extends its life.
- Understand your type: Different heat exchangers need specific cleaning methods.
- Prioritize safety: Always disconnect power and wear protective gear.
- Remove buildup: Use mechanical methods for loose debris and chemical solutions for stubborn scale.
- Regular maintenance: Prevent future issues with a consistent cleaning schedule.
Cleaning a heat exchanger typically involves disconnecting power, accessing the unit, removing loose debris mechanically with brushes or vacuums, and then applying a suitable chemical cleaner to dissolve stubborn scale and deposits, followed by thorough rinsing and reassembly.
Boost Efficiency: Why Clean Your Heat Exchanger?
A clean heat exchanger is crucial for any system that uses one, such as furnaces, boilers, air conditioners, or heat pumps. This component’s job is to move heat from one place to another. When it gets dirty, this transfer of heat becomes much harder. This means your furnace needs to burn more fuel or your air conditioner needs more electricity to reach the desired temperature. You pay more for less comfort.
Over time, various substances can build up on the heat exchanger’s surfaces. Dust, dirt, pet dander, and soot are common culprits on the air side. On the water or refrigerant side, mineral deposits (scale), rust, and biological growth can form. This buildup creates an insulating layer. This layer prevents heat from moving freely. Your system loses its ability to perform its basic function effectively.
Maintaining a clean heat exchanger offers many benefits. It significantly improves the system’s energy efficiency. This leads to lower utility bills each month. A clean heat exchanger also experiences less strain, reducing wear and tear on other parts. This extends the lifespan of your entire HVAC system. For example, cleaning components like heat pump coils directly impacts their efficiency and longevity. Ignoring cleaning leads to decreased performance, higher energy costs, and a greater risk of system failure.
Beyond efficiency and lifespan, a clean heat exchanger contributes to better indoor air quality. If dust and mold build up, they can spread through your home’s ventilation. A clean system circulates cleaner air, which is good for everyone. It also helps maintain consistent temperatures. You avoid hot and cold spots in your home. Regular cleaning ensures your heat exchanger works as it should, keeping your home comfortable and your energy use in check.
Different Types of Heat Exchangers and Their Cleaning Needs
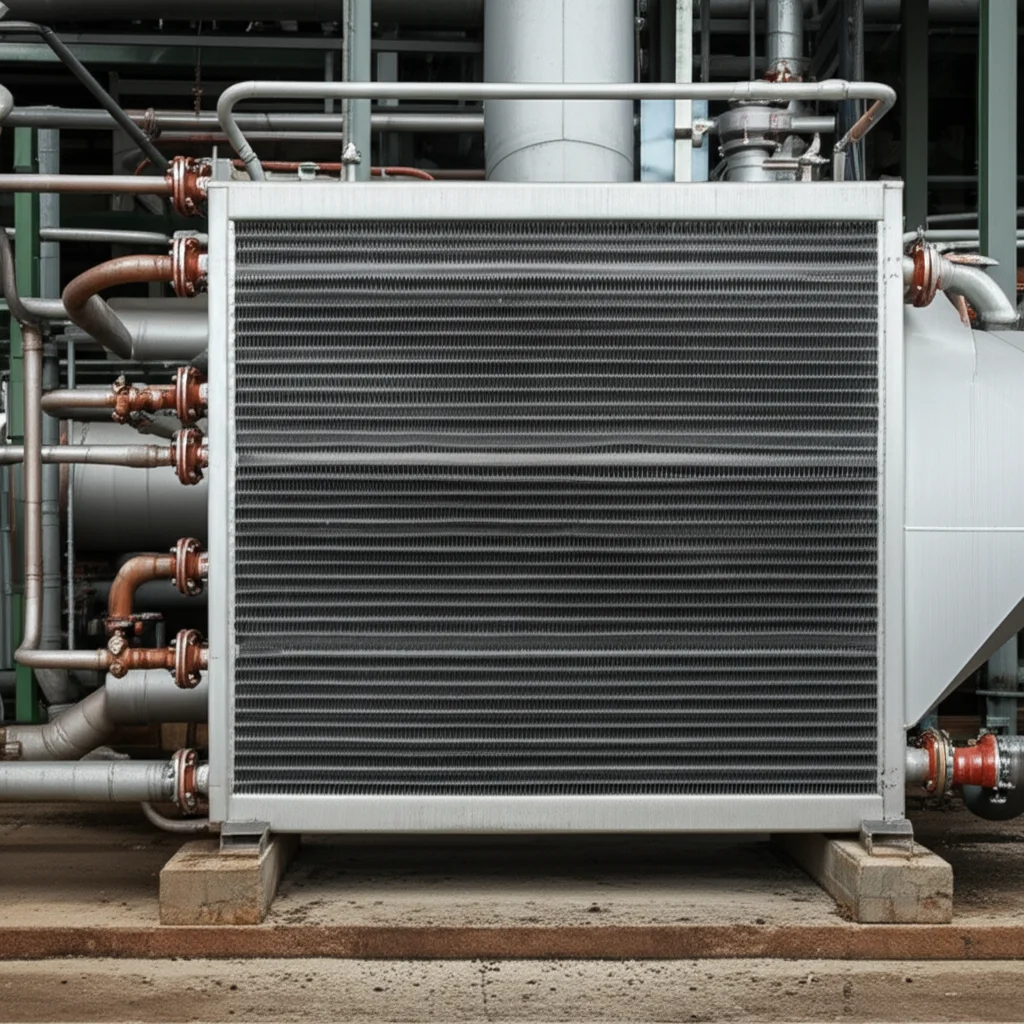
Heat exchangers come in many shapes and sizes, each designed for specific uses. Understanding the type you have helps you choose the right cleaning method. The most common types include shell and tube, plate, and finned coil heat exchangers. Each type collects different kinds of buildup and requires a tailored approach to cleaning.
Shell and tube heat exchangers are robust and found in many industrial settings, as well as some larger residential systems. They consist of a bundle of tubes inside a shell. One fluid flows through the tubes, while another flows around the tubes within the shell. Cleaning these often involves removing the tube bundle. You can then clean the tubes mechanically with brushes or by hydro-jetting. The shell side might need chemical flushing.
Plate heat exchangers use a series of thin, corrugated plates. They create channels for fluids to flow through. These are highly efficient and compact, commonly found in water heaters and boilers. Their design makes them prone to scale buildup, especially with hard water. Cleaning usually involves disassembling the unit to clean individual plates. Chemical cleaning is very effective for descaling these plates.
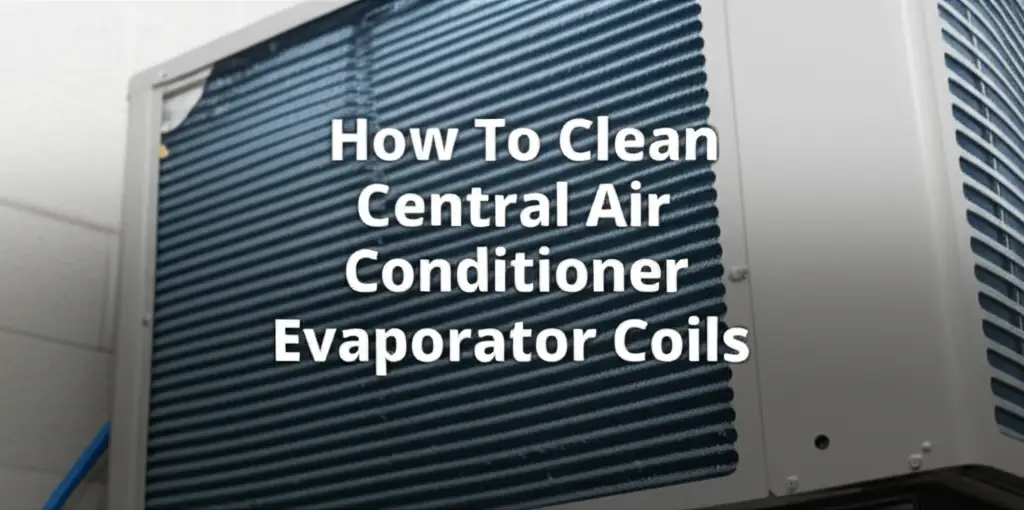
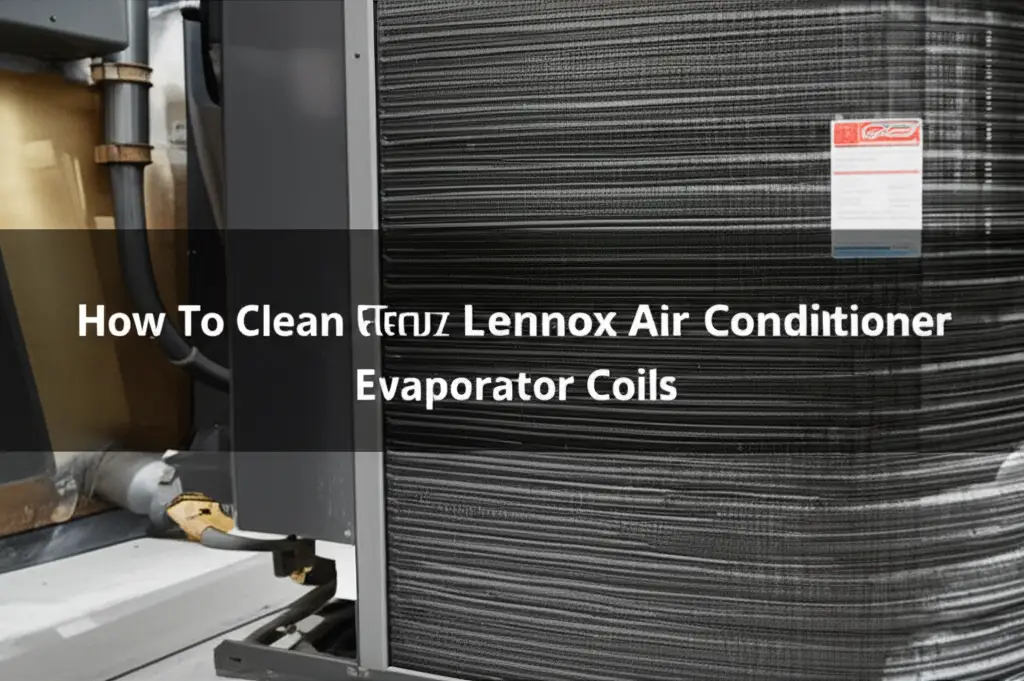
Finned coil heat exchangers are what you typically find in home furnaces, air conditioners, and heat pumps. These have tubes with thin metal fins attached. Air flows over the fins, and refrigerant or hot water flows through the tubes. Cleaning air conditioner coils, which are finned, usually involves vacuuming away loose debris and using a coil cleaner spray. This type of heat exchanger primarily accumulates dust, dirt, and pet hair on its external surfaces. For example, cleaning the coils on a heat pump or air conditioner is a common task for homeowners.
Each type has unique features that affect how you clean it. For example, accessing the inside of a shell and tube unit is different from spraying coils on an AC unit. Always identify your heat exchanger type before starting any cleaning project. This ensures you use the most effective and safest method for your specific equipment. Incorrect cleaning can damage delicate components, leading to expensive repairs.
Identifying Buildup: Common Issues in Heat Exchangers
Recognizing the type of buildup affecting your heat exchanger is the first step toward effective cleaning. Different contaminants require different removal strategies. Common issues include dust and debris, mineral scale, biological growth, and corrosion. Knowing what you are dealing with helps you select the right tools and cleaning solutions.
Dust, dirt, and pet dander are the most common culprits for finned coil heat exchangers in HVAC systems. These particles collect on the fins and between the coils. They restrict airflow and create an insulating layer. You might notice reduced airflow from vents or the system running longer to reach desired temperatures. These types of deposits are usually loose and easy to remove with mechanical methods like vacuuming or brushing. Regular filter changes can significantly reduce this kind of buildup.
Mineral scale, also known as limescale, forms in heat exchangers that handle water, especially in areas with hard water. This white, chalky substance is a result of dissolved minerals like calcium and magnesium precipitating out of the water due to heat. Scale acts as a very effective insulator, severely reducing heat transfer efficiency. Signs of scale include reduced hot water output from a boiler or a drop in heating performance. Chemical descalers are essential for removing mineral scale, as mechanical scrubbing often proves ineffective. Preventative measures like installing a water filter can help minimize scale formation.
Biological growth, such as algae, mold, or bacteria, can thrive in damp environments within heat exchangers. This is particularly true for those handling water or condensate. These growths can create slimy films that restrict flow and reduce efficiency. They also release unpleasant odors and can impact indoor air quality. You might notice a musty smell coming from your system. Biocides or specialized cleaning solutions are necessary to eliminate biological growth effectively. Regular inspection and cleaning can prevent these organisms from taking hold.
Corrosion occurs when metal surfaces react with their environment, forming rust or other corrosive compounds. While less common than other buildups, it can severely damage the heat exchanger over time. It can be caused by acidic cleaning agents, improper fluid chemistry, or exposure to certain atmospheric conditions. Corrosion reduces the structural integrity and efficiency of the heat exchanger. Cleaning methods must be gentle to avoid worsening corrosion. Prevention focuses on maintaining proper water chemistry and using compatible cleaning agents. A professional assessment is best if you suspect corrosion.
Essential Tools and Safety for Heat Exchanger Cleaning
Before you begin cleaning your heat exchanger, gather all necessary tools and prioritize safety. Working with heating or cooling systems involves electricity, moving parts, and sometimes harsh chemicals. Proper preparation protects you and prevents damage to your equipment. Always ensure you have the right gear for the job.
Your safety should always come first. Before touching any part of the heat exchanger, turn off the power to the unit. Locate the circuit breaker that controls your furnace, boiler, or AC unit and flip it to the “off” position. It is also wise to put a “DO NOT OPERATE” tag on the breaker. This prevents accidental power restoration. Wear appropriate personal protective equipment (PPE). This includes sturdy gloves to protect your hands from dirt, sharp edges, or chemicals. Safety glasses or goggles are also vital to shield your eyes from dust, debris, or chemical splashes. A dust mask or respirator is recommended to avoid inhaling airborne particles or chemical fumes, especially in confined spaces.
The tools you need will vary depending on the type of heat exchanger and the cleaning method. For mechanical cleaning, you will likely need a shop vacuum with a hose attachment and a brush. Various brushes exist, including stiff wire brushes for sturdy surfaces or soft brushes for delicate fins. A compressed air can or an air compressor with a low-pressure nozzle can help dislodge stubborn debris from tight spaces. You might also need screwdrivers, wrenches, or pliers to remove access panels or components for better access.
For chemical cleaning, you will need the specific cleaning solution recommended for your heat exchanger material and the type of buildup. Always read the product label carefully for instructions and warnings. A spray bottle can help apply liquid cleaners evenly. You will also need buckets for mixing solutions and for collecting rinse water. A stiff-bristled brush, non-abrasive scrub pads, or specialized coil cleaning brushes can help work the chemical into the surfaces. Finally, have plenty of clean rags or towels for wiping and drying. A garden hose with a spray nozzle might be useful for rinsing, especially for larger units or outdoor coils. Ensure you have good ventilation when using chemical cleaners.
Mechanical Cleaning: Removing Debris from Heat Exchangers
Mechanical cleaning focuses on physically removing loose contaminants from the heat exchanger surfaces. This method is often the first step in a thorough cleaning process, especially for finned coil and shell-and-tube heat exchangers. It is effective for removing dust, dirt, leaves, pet hair, and other visible debris that accumulates over time. Always start with mechanical cleaning before moving to chemical methods.
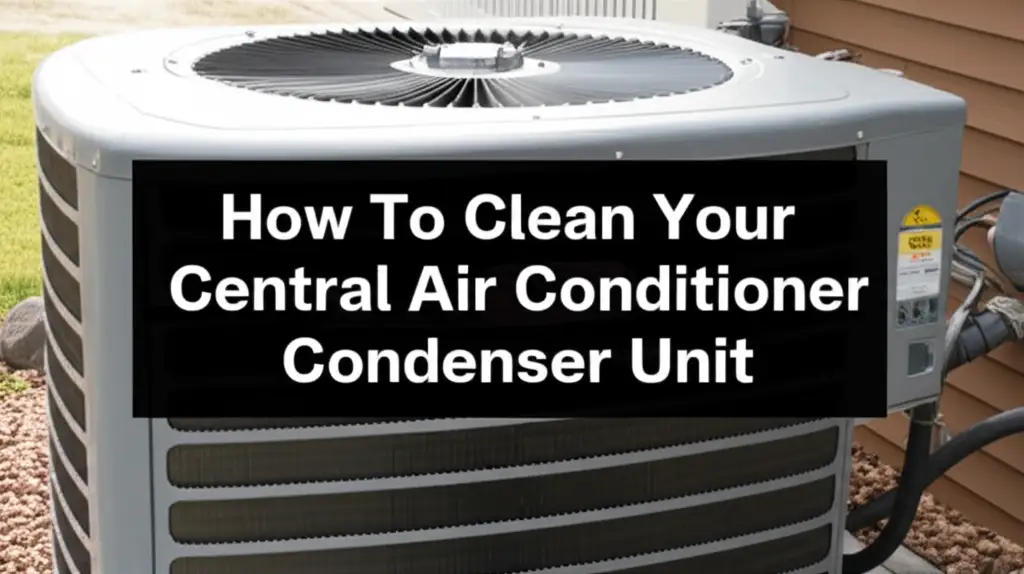
For finned coil heat exchangers, such as those found in furnaces or air conditioners, mechanical cleaning is relatively straightforward. After ensuring the power is off and wearing safety gear, use a soft-bristled brush or a vacuum cleaner with a brush attachment to gently remove dust and dirt from the coil fins. Work slowly and carefully to avoid bending the delicate fins. Bent fins restrict airflow and reduce efficiency. A specialized fin comb can help straighten any bent fins if necessary. For outdoor AC units, clear away any leaves, grass clippings, or debris that may have collected around the condenser coils. A garden hose with moderate pressure can help rinse away loose dirt from the outside of the coils, but avoid saturating electrical components.
Shell and tube heat exchangers may require a more robust mechanical approach. If the tube bundle can be removed, you can use specialized tube brushes to clean the inside of each tube. These brushes are designed to fit snugly inside the tubes and scrub away loose deposits. High-pressure water jetting, or hydro-jetting, is another powerful mechanical method for cleaning tubes. This uses a concentrated stream of water to blast away buildup. For the shell side, a brush or scraper can remove loose deposits once the tubes are out.
For plate heat exchangers, mechanical cleaning is usually performed after disassembly. Once individual plates are separated, you can gently scrape off large, loose deposits. A stiff brush can also help remove grime from the plate surfaces. Be careful not to damage the delicate gaskets between the plates. For the intricate patterns on the plates, a non-abrasive pad might be effective. However, heavy scale buildup on plate heat exchangers usually requires a chemical solution rather than purely mechanical means.
Regular mechanical cleaning prevents smaller debris from becoming embedded and harder to remove. It also prepares the surface for any subsequent chemical treatment. By getting rid of the superficial layers of dirt, you allow chemical cleaners to work more effectively on stubborn deposits like scale or corrosion. Always dispose of removed debris properly.
Chemical Cleaning: Descaling and Dissolving Deposits
Chemical cleaning is a powerful method used to dissolve stubborn deposits like mineral scale, rust, and biological growth that mechanical cleaning cannot remove. This method involves circulating a chemical solution through or over the heat exchanger. The chemical reacts with and breaks down the contaminants. Choosing the right chemical is critical to avoid damaging the heat exchanger material.
Before starting chemical cleaning, identify the material of your heat exchanger. Common materials include copper, stainless steel, and aluminum. Different chemicals are compatible with different metals. For example, strong acids can corrode aluminum but might be fine for stainless steel. Always read the cleaner’s label and ensure it is safe for your specific heat exchanger. Most residential systems will use cleaners safe for copper and aluminum coils. Common chemical cleaners include phosphoric acid-based solutions, hydrochloric acid for severe scale (industrial use), or milder alkaline detergents. For biological growth, specialized biocides are available.
For finned coil heat exchangers, chemical cleaning often involves using a coil cleaner spray. These cleaners are typically foaming agents that penetrate between the fins, dissolving dirt and light scale. After spraying, the foam lifts the grime, which can then be rinsed away with water. Many coil cleaners are “no-rinse” or “self-rinsing” formulations. They condense with the condensate water during system operation. However, a light rinse with a garden hose is often recommended for external coils to ensure all residue is gone. Always allow the cleaner to sit for the recommended time before rinsing. Ensure good ventilation in the area when working with these products.
For plate or shell and tube heat exchangers, chemical cleaning often involves circulation. You might need to set up a small pump and a reservoir to circulate the chemical solution through the heat exchanger for a specific period. This allows the chemical to fully penetrate and dissolve the deposits. For example, for scale buildup, an acid-based descaler is circulated. The solution’s strength and circulation time depend on the severity of the buildup. After circulation, the system must be thoroughly flushed with clean water to remove all chemical residues. Sometimes, a neutralizing agent is circulated after the acidic cleaner to balance the pH.
Always follow the manufacturer’s instructions for the specific chemical cleaner you are using. Pay close attention to dilution ratios, contact times, and disposal procedures. Improper use of chemicals can damage your heat exchanger or pose safety risks. For very heavy or unusual deposits, or if you are unsure about chemical compatibility, it is best to consult a professional.
Step-by-Step Guide to Cleaning Your Residential Heat Exchanger
Cleaning a residential heat exchanger, typically a finned coil type found in furnaces or air conditioners, is a manageable DIY task. This guide provides a general outline. Always refer to your specific appliance’s manual for detailed instructions. Safety first is the most important rule.
1. Prepare for Safety:
- Turn off Power: Locate the circuit breaker for your furnace, boiler, or air conditioner unit. Flip it to the “off” position. This prevents the unit from accidentally turning on while you work.
- Wear PPE: Put on heavy-duty gloves, safety glasses, and a dust mask or respirator. This protects your hands, eyes, and lungs from dirt, chemicals, and airborne particles.
2. Access the Heat Exchanger:
- Locate: For furnaces, the heat exchanger is usually inside the main cabinet, behind an access panel. For AC units, it’s the large coil unit (evaporator coil inside, condenser coil outside).
- Remove Panels: Use a screwdriver or wrench to remove any necessary access panels or covers. Take photos as you go to remember how to reassemble everything.
3. Mechanical Cleaning – Remove Loose Debris:
- Vacuum: Use a shop vacuum with a brush attachment to carefully vacuum away loose dust, dirt, pet hair, and debris from the heat exchanger fins and surrounding areas.
- Brush: Use a soft-bristled brush to gently dislodge stubborn dirt. Be very careful not to bend or damage the delicate fins.
- Straighten Fins (Optional): If you notice bent fins, use a specialized fin comb to gently straighten them. This improves airflow.
- Outdoor Coils: For outdoor AC condenser coils, remove any leaves, twigs, or larger debris. Use a garden hose with a gentle spray to rinse dirt from the outside of the coils, spraying from the inside out if possible.
4. Chemical Cleaning – Dissolve Buildup:
- Apply Cleaner: Use a specialized coil cleaner spray designed for HVAC coils. Follow the product’s instructions for dilution and application. Spray the cleaner evenly over the coil surface. Ensure it penetrates between the fins.
- Allow Dwell Time: Let the cleaner sit for the time recommended on the product label. This allows the chemicals to dissolve and lift the grime.
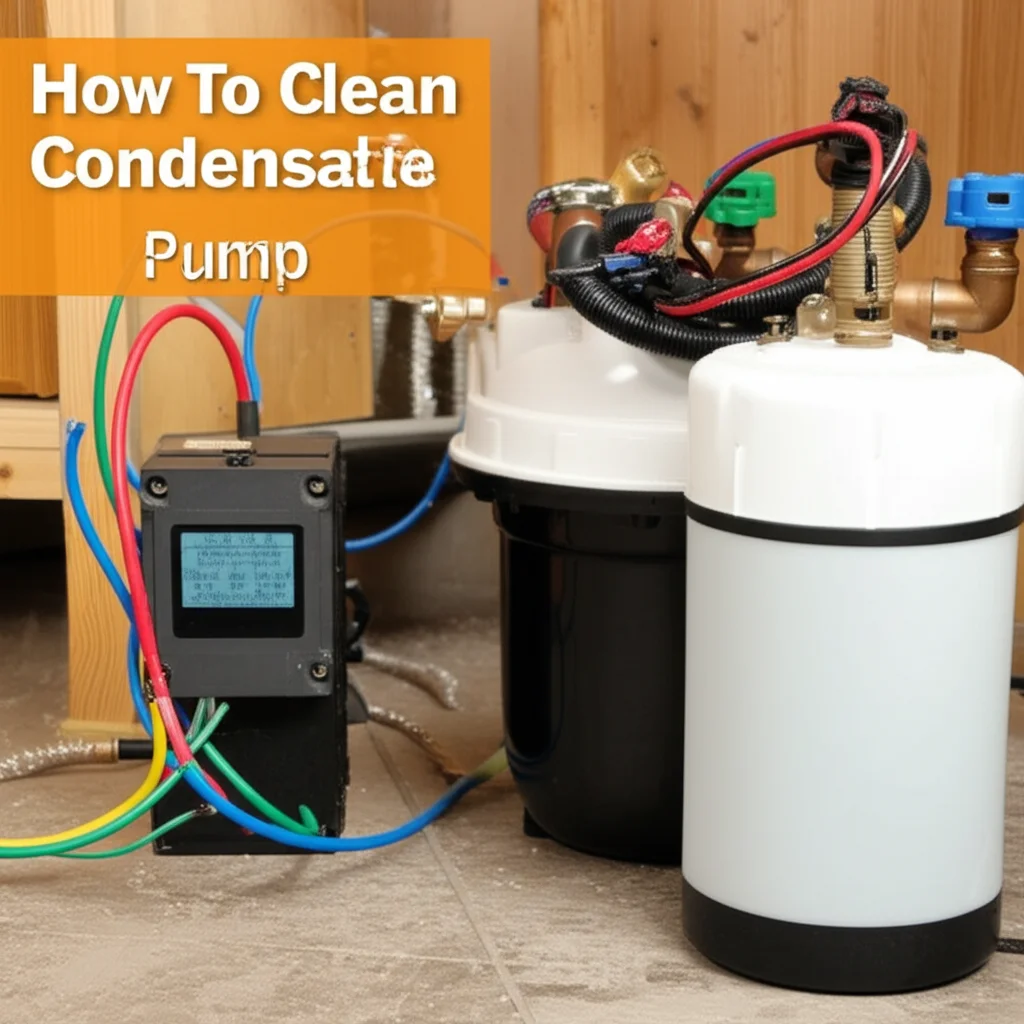
- Rinse Thoroughly: If your cleaner is not “no-rinse,” or if you prefer a more thorough clean, gently rinse the coil with clean water. For indoor coils, ensure any rinse water drains into the condensate pan and line. For outdoor coils, use a garden hose with a gentle stream.
- Clean Condensate Drain: While the unit is open, check the condensate drain pan and line for clogs or mold. You might use a brush or a mixture of bleach and water to clean it. Cleaning mold in shower or other areas often involves similar diluted bleach or vinegar solutions, but always check product compatibility for your system.
5. Reassemble and Test:
- Dry: Allow the heat exchanger to air dry completely. You can use a fan to speed up the process.
- Reassemble: Put all access panels and covers back into place. Ensure all screws are tightened properly.
- Restore Power: Go back to your circuit breaker and turn the power back on.
- Test: Turn on your furnace or AC unit to ensure it operates correctly. Listen for any unusual noises and check for proper heating or cooling.
Regularly cleaning your residential heat exchanger ensures optimal performance, lower energy bills, and a healthier indoor environment. Consider cleaning your furnace coils annually and AC coils bi-annually, especially before peak seasons.
Maintaining Performance: Prevention Tips
Regular maintenance is key to keeping your heat exchanger clean and efficient. Prevention is often easier than extensive cleaning. By taking a few proactive steps, you can significantly reduce the frequency and intensity of major cleaning efforts. This ensures long-term performance and extends the lifespan of your system.
One of the most effective preventive measures is regularly changing your air filters. For systems with finned coil heat exchangers (like furnaces and air conditioners), the air filter catches dust, dirt, pet dander, and other airborne particles before they reach the delicate coils. A dirty filter restricts airflow and allows contaminants to bypass it, settling on the heat exchanger. Check your filter monthly and change it every 1-3 months, or more often if you have pets or allergies. This simple step prevents a vast majority of external buildup.
For heat exchangers that handle water, such as those in boilers or tankless water heaters, managing water quality is crucial. Hard water, rich in minerals like calcium and magnesium, is a primary cause of scale buildup. Consider installing a whole-house water softener if you live in an area with very hard water. Regular flushing of your water heater can also help remove sediment before it hardens into scale. If your system uses a water filter, ensure you know how to clean your water filter or replace it regularly according to the manufacturer’s guidelines. This prevents mineral and particulate matter from entering the heat exchanger in the first place.
Keep the area around your outdoor heat exchanger (condenser unit) clear of debris. Trim back bushes, remove leaves, grass clippings, and any other obstructions. Ensure there is at least two feet of clear space around the unit for proper airflow. This prevents leaves and dirt from being sucked into the coils, reducing the need for frequent mechanical cleaning. Also, consider covering the outdoor unit during the off-season to protect it from harsh weather and falling debris, but ensure proper ventilation when in use.
Finally, regular professional maintenance can prevent major issues. An HVAC technician can perform a thorough inspection, identify potential problems early, and conduct deeper cleaning that might be beyond a homeowner’s capability. They can also check refrigerant levels, electrical connections, and overall system performance. Scheduling annual check-ups, especially before heating and cooling seasons, helps catch buildup or minor issues before they become expensive problems. Proactive care saves money and provides peace of mind.
Knowing When to Call a Professional
While many heat exchanger cleaning tasks are manageable for a DIY enthusiast, there are specific situations where calling a professional is the smartest and safest choice. Knowing your limits prevents potential damage to expensive equipment and ensures your system receives the correct care. Do not hesitate to seek expert help when the job seems too complex or risky.
One clear sign to call a professional is when you suspect a crack or damage to the heat exchanger itself. This is particularly critical for gas furnaces. A cracked heat exchanger can leak carbon monoxide, a colorless, odorless, and highly toxic gas, into your home. Signs of a cracked heat exchanger include a strong, unusual odor near the furnace, soot accumulation, or a flickering pilot light. If you notice any of these, shut off your furnace immediately and call an HVAC professional. This is a serious safety hazard that only a trained expert can address.
If you are dealing with a complex heat exchanger type, like a shell and tube exchanger, or if the unit is difficult to access, a professional is highly recommended. These units often require specialized tools for disassembly and cleaning, such as hydro-jetting equipment for tubes or specific pumps for chemical circulation. Professionals have the expertise and equipment to clean these units effectively without causing damage. Attempting to clean such systems without proper knowledge can lead to leaks, performance issues, or even complete system failure.
Heavy scale buildup or persistent fouling that resists common DIY methods also warrants professional intervention. Severe scale might require stronger chemical solutions or specialized descaling equipment that is not typically available to homeowners. Professionals can also perform a more thorough analysis of the buildup to determine its cause and recommend appropriate long-term solutions. They also know how to safely dispose of chemical waste, which can be an environmental concern. Some types of cleaners used by professionals for stubborn deposits, like those for cleaning stainless steel in some exchangers, require careful handling.
Finally, if you are uncomfortable with the cleaning process, or if you simply lack the time or tools, calling a professional is a wise decision. HVAC technicians are trained to work safely with various systems and can perform the cleaning efficiently and effectively. They can also inspect other components of your system, ensuring everything runs smoothly. Regular professional maintenance can save you money in the long run by preventing major breakdowns and optimizing energy efficiency. Your peace of mind and the safety of your home are worth the investment in expert service.
FAQ Section
How often should I clean my heat exchanger?
The cleaning frequency depends on the heat exchanger type and usage. For residential furnace and AC coils, aim for a professional check-up annually and a light DIY cleaning every 6-12 months. Systems in dusty environments or with pets may need more frequent attention, perhaps every 3-6 months. For water-based heat exchangers, follow manufacturer guidelines, often every 1-5 years for descaling, depending on water hardness.
What are the signs of a dirty heat exchanger?
Signs include reduced heating or cooling performance, higher energy bills, a system running longer cycles, unusual odors (musty or burning), and visible dust or grime on the coils. For water-based systems, reduced hot water flow or efficiency can indicate scale buildup. In extreme cases, strange noises or system shutdowns can point to severe blockage.
Can I clean a heat exchanger with vinegar?
For very light mineral scale or biological growth, a diluted vinegar solution can work for some heat exchanger types, particularly those with water contact or accessible surfaces. However, vinegar is generally too weak for heavy scale and can be corrosive to certain metals if left too long. Always test on an inconspicuous area first and ensure thorough rinsing. For more robust cleaning, use specialized coil or descaling cleaners.
Is cleaning a heat exchanger dangerous?
Cleaning a heat exchanger can be dangerous if proper safety precautions are not followed. Electrical shock is a risk if power is not disconnected. Chemicals can cause skin or eye irritation and respiratory problems without proper PPE and ventilation. Also, damaging the unit can lead to costly repairs or, in the case of a furnace, dangerous carbon monoxide leaks. Always prioritize safety.
- heat exchanger maintenance
- HVAC cleaning
- furnace care

Todd Martin
Senior Writer
With over 15 years of experience in home renovation and design, I started HEG to share what I’ve learned with homeowners who want to create spaces that are both beautiful and functional. I’ve always believed in a hands-on approach, and over the years, I’ve picked up practical solutions that actually work. Through HEG, I aim to make home improvement more approachable, sharing real tips that help you create a home you truly love.