· Todd Martin · HVAC Maintenance · 21 min read
How To Clean Condensate Pump
Clean Your Condensate Pump: A Step-by-Step Guide
Your home’s heating, ventilation, and air conditioning (HVAC) system works hard to keep your indoor environment comfortable. A small but vital component in many of these systems is the condensate pump. This pump collects and removes excess moisture, or condensate, produced by air conditioners, furnaces, or dehumidifiers. When this condensate pump gets dirty, it can cause big problems for your entire system. Keeping it clean is not just good practice; it is essential for peak performance and preventing water damage.
Many homeowners overlook condensate pump maintenance. This oversight leads to clogs, overflows, and system failures. You do not want a puddle in your basement or a broken AC unit on a hot day. This article guides you through the process to clean your condensate pump. We will cover why cleaning is important, the tools you need, and easy steps to get the job done. You will also learn about routine maintenance and when to seek professional help. Let us keep your home dry and comfortable.
Takeaway
- Regularly clean your condensate pump to prevent clogs and system failures.
- Always disconnect power before beginning any cleaning.
- Use a mild detergent and vinegar solution for effective cleaning.
- Inspect and clear the pump’s reservoir, float switch, and drain lines.
- Perform preventative maintenance to extend your pump’s lifespan.
How do you clean a condensate pump?
Clean a condensate pump by disconnecting power, emptying the reservoir, and scrubbing the inside with a brush and mild detergent. Flush the drain line with a vinegar-water solution to remove mold and slime, ensuring efficient operation and preventing overflows. Regular cleaning stops clogs and maintains system efficiency.
Why Cleaning Your Condensate Pump Matters
Your condensate pump plays a critical role in your home’s comfort system. It collects water that forms as a byproduct of your air conditioner, high-efficiency furnace, or dehumidifier. This water, known as condensate, needs to be safely removed from your living space. If not, it can cause significant issues. Understanding the importance of cleaning helps you appreciate this small but powerful device.
Over time, condensate water can carry airborne dust, dirt, and mold spores. This mixture settles inside the pump’s reservoir. It creates a slimy buildup. This sludge can block the pump’s intake, clog the drain line, or interfere with the float switch. When the float switch cannot rise properly, the pump fails to activate. This leads to water backing up.
A clogged or malfunctioning condensate pump causes several problems. First, it can lead to water overflow. This means water spills out of the pump and onto your floor or into your basement. Water damage is costly to repair. It also creates an environment for mold and mildew growth. Mold poses health risks and can spread quickly in damp areas. I know I do not want mold anywhere near my home.
Second, a faulty condensate pump can shut down your entire HVAC system. Many systems have safety switches. These switches detect when the condensate pan is full. If the pump fails, the pan fills, and the safety switch turns off the unit. This protects your home from water damage. However, it leaves you without heating or cooling until the issue is fixed. Regular cleaning prevents these inconvenient shutdowns. It ensures your system runs smoothly and efficiently.
Essential Tools and Safety for Condensate Pump Cleaning
Before you start any cleaning project, gathering the right tools is important. This ensures a smooth and efficient process. For cleaning your condensate pump, you do not need many specialized items. Most are likely already in your home. Preparing your workspace and having everything at hand saves time and effort.
Safety is paramount when working with electrical appliances and water. Always prioritize your safety and the safety of your home. Electrical shocks are a serious risk if you do not take proper precautions. Water can also create slip hazards. Being mindful of your surroundings helps prevent accidents.
Here is a list of the tools you will need:
- Bucket or Wet/Dry Vacuum: This collects the wastewater from the pump. A wet/dry vacuum is especially useful for quickly emptying the reservoir.
- Gloves: Protect your hands from grime, mold, and cleaning solutions.
- Safety Glasses: Prevent splashes of dirty water or cleaning solutions from getting into your eyes.
- Old Towels or Rags: These are useful for wiping up spills and drying components.
- Soft Brush or Scrub Brush: A small brush helps scrub away slime and buildup inside the pump. An old toothbrush can also work well for tight spots.
- Mild Dish Soap or All-Purpose Cleaner: A gentle cleaner helps break down grime.
- White Vinegar: White vinegar is excellent for dissolving mineral deposits and killing mold and mildew. Many people use vinegar for cleaning tasks around the house, like cleaning their shower with vinegar or tackling mold with vinegar.
- Warm Water: For mixing with soap and vinegar to create cleaning solutions.
- Pliers (Optional): Sometimes useful for disconnecting tubing if it is tight.
Now, for the critical safety steps:
- Disconnect Power: This is the most important step. Locate the power switch for your HVAC unit or furnace. Turn it off at the thermostat or, even better, at the circuit breaker. This cuts power to the entire system, including the condensate pump. Never work on an electrical appliance without confirming the power is off. I always double-check this step.
- Wear Protective Gear: Put on your gloves and safety glasses. This protects your skin from the dirty water and potential chemicals.
- Prepare for Spills: Place old towels or a bucket directly under the condensate pump before you start disconnecting anything. This catches any water that might spill during the process. Having a wet/dry vacuum nearby is also a good idea for quick cleanup.
By following these simple preparation and safety guidelines, you set yourself up for a safe and effective cleaning experience.
Step-by-Step Guide to Cleaning Your Condensate Pump
Now that you have your tools ready and safety measures in place, it is time to clean your condensate pump. This process involves a few straightforward steps. Follow them carefully to ensure a thorough cleaning. Taking your time with each step will yield the best results.
1. Disconnect and Access the Pump
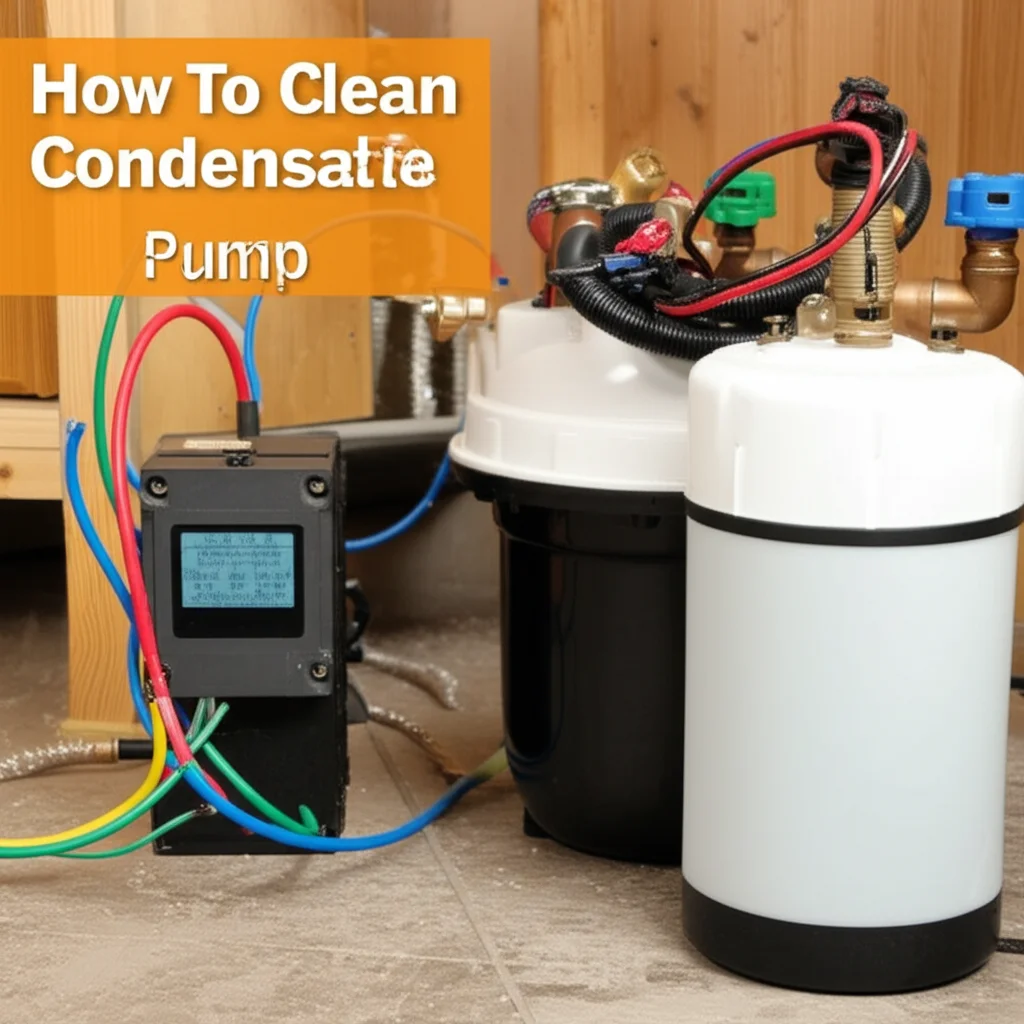
First, make sure the power to your HVAC unit is off. I cannot stress this enough. Locate the condensate pump. It is usually a small, plastic box near your furnace, air handler, or dehumidifier. It will have several tubes connected to it.
- Disconnect the Intake Tube: This tube brings water from the HVAC unit to the pump. Gently pull it off the pump’s intake port. Be ready for some water to drip out.
- Disconnect the Discharge Tube: This is the tube that carries water away from the pump. It usually leads to a drain or outside. Disconnect it from the pump’s outlet.
- Unplug the Pump: Unplug the power cord from the electrical outlet.
- Remove the Pump: Most pumps are not fixed in place. You can simply lift and remove it. Some might have a mounting bracket. If so, unclip it or unscrew it to fully remove the pump.
2. Empty and Rinse the Reservoir
Once the pump is disconnected, you can empty its contents.
- Pour Out Water: Carry the pump to a utility sink or outside. Carefully invert the pump to pour out any remaining water from the reservoir. This water will likely be dark and slimy.
- Initial Rinse: Rinse the inside of the reservoir with warm water. This helps remove loose debris and sludge.
3. Clean the Pump’s Interior and Components
This is where the real cleaning happens. The goal is to remove all the slime, mold, and mineral buildup.
- Open the Reservoir: Most condensate pumps have a removable lid or top cover. Gently unclip or unscrew it to access the internal components.
- Remove the Float Switch: Inside, you will see a float switch. This is a small component that moves up and down with the water level. It tells the pump when to turn on. Carefully lift it out. Clean any slime or debris off the float itself and its housing. This is a common place for buildup to stop the pump from working.
- Clean the Reservoir Interior: Use your soft brush, warm water, and mild dish soap. Scrub the inside surfaces of the reservoir. Pay attention to corners and crevices where gunk tends to accumulate.
- Inspect and Clean the Impeller (if accessible): Some pumps allow access to the impeller, the part that spins to push water. If you can see it, use a small brush or old toothbrush to clean any debris from the impeller blades. This is similar to how you might clean an above-ground pool pump impeller if you have one.
- Vinegar Soak (Optional but Recommended): For stubborn buildup or significant mold, mix a solution of equal parts white vinegar and warm water. Pour this into the reservoir and let it sit for 20-30 minutes. Vinegar is excellent for dissolving mineral deposits and killing mold. You might use vinegar for tackling mold under your sink or other mold issues in your home. After soaking, scrub again and rinse thoroughly with clean water.
4. Reassemble and Reconnect the Pump
Once all components are clean, dry them with a clean rag.
- Reinstall Float Switch: Carefully place the float switch back into its correct position. Make sure it moves freely up and down without sticking.
- Close the Reservoir: Securely reattach the lid or top cover of the pump.
- Place the Pump Back: Position the pump in its original spot. If it has a mounting bracket, secure it.
- Reconnect Tubes: Reconnect the intake tube and the discharge tube. Ensure they are firmly attached to prevent leaks.
- Plug in the Power: Plug the pump’s power cord back into the electrical outlet.
- Restore Power: Turn the power back on to your HVAC system at the circuit breaker or thermostat.
Flushing the Condensate Drain Line
Cleaning the condensate pump itself is only half the battle. The condensate drain line, which carries water away from the pump, is also prone to clogs. It gathers the same kind of slimy buildup as the pump’s reservoir. A blocked drain line can cause water to back up into the pump, leading to overflows even if the pump itself is clean. This step is crucial for complete system maintenance.
The drain line is usually a small PVC or vinyl tube. It connects from the pump’s discharge port and typically runs to a floor drain, a utility sink, or outside. Over time, algae, mold, and mineral deposits accumulate inside this narrow tube. This reduces the flow of water and can eventually create a complete blockage. If you have ever had a slow drain in your home, you understand how frustrating and messy a blockage can be.
Here is how to effectively flush your condensate drain line:
- Prepare a Cleaning Solution: The best solution for clearing condensate lines is a mixture of distilled white vinegar and warm water. A common ratio is one part vinegar to one part water. You can also use undiluted white vinegar for tougher clogs. Avoid using harsh chemical drain cleaners. These can damage the plastic tubing or the pump itself. Vinegar is a natural and safe alternative. Many people use it to clean various components, including their dishwasher pump or even their furnace condensate drain line directly.
- Access the Drain Line Opening: After you have reconnected the pump and turned on the power, you need to pour the solution into the system. You can do this in a few ways.
- Through the Pump’s Inlet: If your condensate pump has an accessible inlet or overflow port on top, you can slowly pour the vinegar solution directly into this opening. This allows the solution to flow through the pump and then into the drain line.
- Directly into the Drain Line: If you disconnected the discharge tube earlier, you could pour the solution directly into the tube before reconnecting it to the pump. Make sure the other end of the drain line is positioned over a bucket or drain to catch the solution as it flushes through.
- Through the HVAC Unit’s Condensate Pan: For central air conditioners or furnaces, the condensate pan usually has an access point where you can pour the solution. This method flushes the pan, the pump, and the drain line all at once.
- Slowly Pour the Solution: Pour the vinegar solution slowly into the chosen access point. Allow it to sit in the line for about 15-30 minutes. This gives the vinegar time to break down any slime, mold, or mineral deposits.
- Flush with Water: After the soaking period, follow up by pouring several cups of clean, warm water through the same access point. This flushes out the loosened debris and the remaining vinegar solution. You should see clear water coming out of the end of the drain line. If the water still looks dirty or flows slowly, repeat the vinegar flush process.
By regularly flushing your condensate drain line, you prevent common issues like overflows and system shutdowns. This simple step complements cleaning the pump itself, ensuring your condensate removal system works perfectly year-round.
Troubleshooting Common Condensate Pump Issues After Cleaning
Even after a thorough cleaning, sometimes issues persist or new ones arise. It can be frustrating when your condensate pump does not work as expected. Most problems are minor and easy to fix. Understanding what to look for helps you quickly diagnose and resolve these common issues. I find that a systematic approach works best for troubleshooting.
Here are some common problems you might encounter and how to address them:
1. Pump Not Turning On
If the pump is not turning on, it is a critical issue that can lead to immediate overflow.
- Check Power: First, verify the pump is plugged in and the power to the HVAC system is on at the circuit breaker. Sometimes, a loose plug is the culprit.
- Inspect the Float Switch: This is the most common reason for a pump not activating. The float switch inside the reservoir might be stuck. This happens if there is still some stubborn slime or debris preventing it from moving freely.
- Action: Disconnect power again. Open the pump reservoir. Manually lift the float switch. It should move smoothly without resistance. If it sticks, remove it and clean its housing and pivot points again with a small brush and vinegar solution. Ensure nothing obstructs its path.
- Test the Safety Switch: Some HVAC systems have a separate safety switch on the condensate pan. If the pan fills due to a pump failure, this switch turns off the entire unit. If your AC or furnace is not running, check this switch. It might need resetting after clearing the water.
2. Pump Running Continuously
A pump running non-stop indicates a different problem. This wastes energy and wears out the pump motor faster.
- Blocked Discharge Line: The most likely cause is a clog in the discharge line. The pump runs but cannot push water out.
- Action: Disconnect power. Disconnect the discharge line from the pump. Try to blow air through it. If it is blocked, re-flush the line with vinegar and water as described in the previous section. You might need to use a wet/dry vacuum to suction out the clog from the line if flushing does not work.
- Check Valve Failure: Some pumps have a check valve at the discharge port. This valve prevents water from flowing back into the pump. If it is stuck open, water can continuously cycle, making the pump run without effectively draining.
- Action: If accessible, inspect the check valve for debris. Clean or replace it if faulty.
- Float Switch Malfunction: The float switch might be stuck in the “on” position, signalling the pump to run even when the water level is low.
- Action: Disconnect power. Clean and re-inspect the float switch to ensure it drops freely when the water level is low.
3. Pump Making Unusual Noises
Strange noises often point to mechanical issues or obstructions.
- Debris in Impeller: Small pieces of debris like rust flakes, mold clumps, or even insects can get into the impeller area. This causes grinding or rattling noises.
- Action: Disconnect power. Open the reservoir and, if accessible, inspect the impeller for obstructions. Carefully remove any debris with tweezers or a small tool.
- Worn Bearings: Over time, the motor bearings can wear out. This creates a high-pitched whine or squeal.
- Action: If you suspect worn bearings, the pump might be nearing the end of its lifespan. Replacement is often more cost-effective than repair in this case.
4. Leaking Around the Pump
Leaks are a clear sign of a problem and can cause water damage.
- Loose Connections: The most common cause is a loose or improperly connected intake or discharge tube.
- Action: Ensure all tubes are securely fitted onto their respective ports. Use hose clamps if the connections feel loose.
- Cracked Reservoir: A crack in the plastic reservoir itself can cause leaks. This often happens due to impact or extreme temperature changes.
- Action: Inspect the reservoir for visible cracks. If found, the pump needs replacement.
- Damaged Seal: The seal around the lid or other openings might be damaged or improperly seated.
- Action: Check the integrity of all seals. Re-seat them properly or replace if damaged.
By systematically going through these troubleshooting steps, you can often pinpoint and fix minor issues with your condensate pump. If the problem persists after these attempts, it might be time to consider professional help or pump replacement.
Preventative Maintenance for Your Condensate Pump
Cleaning your condensate pump is a reactive measure, but preventing problems in the first place is even better. Regular preventative maintenance extends the life of your pump and reduces the likelihood of unexpected breakdowns. Think of it like taking care of your car; small, consistent efforts prevent major repairs. I have learned that a little maintenance goes a long way.
Here are some key preventative measures you can adopt:
1. Establish a Cleaning Schedule
Consistency is key. The frequency of cleaning depends on how much your HVAC system runs and the air quality in your home.
- Seasonal Cleaning: For most homeowners, cleaning the condensate pump at least once per heating and cooling season is a good rule. If your air conditioner runs heavily in the summer, clean it before summer starts and after it ends. If you have a high-efficiency furnace, clean it before winter.
- High-Usage Areas: If your HVAC system runs almost continuously, or if your home is particularly dusty, consider cleaning the pump every 2-3 months.
- Visual Inspection: Make it a habit to quickly check the pump’s reservoir visually every month or so. If you see a buildup of slime or dark water, it is time for a cleaning, regardless of the schedule. This is similar to how you might check your water filter regularly.
2. Regularly Flush the Drain Line
As discussed, the drain line is just as important as the pump itself.
- Monthly Flush: Even if you do not do a full pump cleaning, flush the drain line with a cup of white vinegar followed by warm water every month. This helps prevent slime and algae from building up in the first place. You can pour the vinegar into the pump’s inlet or the access port on your HVAC unit’s condensate pan. This is an easy task that takes just a few minutes.
- Prevention is Key: This simple step helps prevent clogs that lead to overflows and pump strain. It is a proactive way to avoid issues.
3. Improve Air Filtration
Dust and airborne particles contribute to the slime buildup inside the condensate pump.
- Change Air Filters Regularly: Your HVAC air filter traps these particles before they enter your system. Changing your air filter according to the manufacturer’s recommendations (usually every 1-3 months) greatly reduces the amount of debris reaching the condensate pan and pump. A cleaner filter means cleaner condensate.
- Higher MERV Filters: Consider using higher MERV (Minimum Efficiency Reporting Value) filters. These filters capture smaller particles more effectively. This reduces the amount of contaminants that end up in your condensate water.
4. Check for Proper Drainage Slope
The condensate drain line relies on gravity to carry water away, even with a pump.
- Inspect Slope: Ensure the discharge tube from the pump has a continuous downward slope to its discharge point. If there are sags or uphill sections, water can sit and encourage algae growth, leading to clogs.
- Clear Obstructions: Make sure the discharge point (e.g., a floor drain, outside) is clear and not blocked by debris.
5. Monitor Pump Performance
Pay attention to how your pump sounds and operates.
- Listen for Changes: Unusual noises, the pump running more frequently than normal, or extended run times are all signs that something might be wrong.
- Observe Water Level: If the water level in the reservoir seems to stay high for a long time after the pump runs, it could indicate a partial clog.
By implementing these preventative maintenance tips, you can significantly extend the life of your condensate pump. You also ensure your HVAC system continues to operate efficiently. This proactive approach saves you time, money, and hassle in the long run.
When to Call a Professional for Condensate Pump Issues
While cleaning your condensate pump is a DIY-friendly task, there are times when professional help is needed. Knowing when to call an HVAC technician can save you from further damage or costly repairs. It is important to recognize your limits and when a problem requires specialized expertise. I believe it is always better to be safe than sorry when it comes to home systems.
Here are situations where you should definitely contact a professional:
1. Persistent Malfunctions After Cleaning
You have followed all the cleaning steps and troubleshooting tips. You have cleaned the reservoir, flushed the lines, and checked the float switch. Despite your efforts, the pump still does not work correctly.
- Pump Fails to Activate: If the pump does not turn on at all, and you have confirmed power and float switch movement, there might be an internal electrical or motor issue.
- Pump Runs Continuously with No Water Flow: If the pump hums and runs but does not move water, the impeller could be broken or the motor might be faulty.
- Repeated Clogging: If your pump or drain line clogs very quickly after cleaning, it could indicate a more severe issue within the HVAC unit causing excessive debris or unusual condensate composition.
2. Visible Damage or Unusual Wear
Sometimes, a problem is beyond simple cleaning or repair.
- Cracked Housing: If the plastic housing of the condensate pump is cracked, it will leak continuously. This cannot be fixed with cleaning. The entire pump needs replacement.
- Melted or Burned Components: Any sign of melting plastic, burning smells, or charred wires indicates a severe electrical fault. Do not attempt to fix this yourself. It is a fire hazard.
- Excessive Noise or Vibration: While some noise is normal, if the pump is suddenly very loud, vibrates excessively, or makes grinding noises after cleaning the impeller, it might have worn-out motor bearings or other internal damage.
3. Issues with the HVAC Unit Itself
Sometimes, the pump’s problem is a symptom of a larger issue within your HVAC system.
- Condensate Pan Overflowing Continuously: If the condensate pan under your furnace or air handler overflows frequently, even with a clean pump and drain line, the issue might be with the HVAC unit’s drainage system or even refrigerant levels. A professional can diagnose if the unit is producing an abnormal amount of condensate.
- Refrigerant Leaks: In air conditioners, a low refrigerant level can sometimes cause the evaporator coil to freeze. When it thaws, it produces a large amount of water, overwhelming the condensate pump. A technician can check refrigerant levels and fix leaks, similar to how they would check your heat pump coils for other issues.
4. Lack of Confidence or Time
Not everyone is comfortable working with appliances or has the time to dedicate to maintenance.
- Uncertainty: If you are unsure about any step, or if you feel uncomfortable disconnecting components, it is safer to call a professional.
- Time Constraints: Life gets busy. If you simply do not have the time to perform the cleaning and troubleshooting yourself, a professional service is a valuable option.
An HVAC technician has the tools, experience, and knowledge to properly diagnose and fix complex condensate pump issues or related HVAC problems. They can also ensure your system runs safely and efficiently. Do not hesitate to call them when these situations arise.
Conclusion
Keeping your condensate pump clean is a vital part of maintaining your home’s comfort system. It ensures your air conditioner, furnace, or dehumidifier operates without interruption. We have walked through the entire process, from understanding why cleaning is important to performing the step-by-step cleaning, flushing the drain line, and troubleshooting common issues. I hope this guide gives you the confidence to tackle this important home maintenance task.
Regular cleaning prevents costly water damage and system breakdowns. Remember to always prioritize safety by disconnecting power first. Simple tools and a little time are all you need to maintain this essential appliance. By following a consistent preventative maintenance schedule, you can extend the life of your pump and avoid unexpected problems. Your home will remain dry and comfortable, and your HVAC system will run efficiently.
Do not wait until a puddle appears or your system shuts down. Take action today to clean your condensate pump. A well-maintained pump ensures smooth operation for years to come.
- clean condensate pump
- condensate pump maintenance
- HVAC cleaning
- pump care
- preventative maintenance
- home essentials
- appliance cleaning

Todd Martin
Senior Writer
With over 15 years of experience in home renovation and design, I started HEG to share what I’ve learned with homeowners who want to create spaces that are both beautiful and functional. I’ve always believed in a hands-on approach, and over the years, I’ve picked up practical solutions that actually work. Through HEG, I aim to make home improvement more approachable, sharing real tips that help you create a home you truly love.