· Todd Martin · Motorcycle Maintenance · 18 min read
How To Clean Harley Air Filter
Mastering Harley Air Filter Cleaning for Peak Performance
There is nothing quite like the rumble of a Harley Davidson engine. As a Harley owner, you understand the passion behind these machines. To keep that iconic performance, routine maintenance is key. One vital task is keeping your Harley air filter clean. A dirty air filter starves your engine of clean air. This reduces horsepower and wastes fuel. Learning how to clean Harley air filter properly ensures your bike runs its best. In this article, we will explore the importance of a clean filter. We will also guide you through the step-by-step cleaning process for both oiled and dry filters. Get ready to give your Harley the clean air it deserves.
Takeaway
Keeping your Harley’s air filter clean is crucial for engine health and performance.
- Identify your filter type: oiled or dry. This determines the cleaning method.
- Use specific cleaning products for each filter type. Never use harsh chemicals or gasoline.
- Dry filters need gentle tapping or vacuuming, never water or oil.
- Oiled filters require specific cleaning solution, rinsing, thorough drying, and re-oiling.
- Always ensure the filter is completely dry before re-oiling and reinstallation.
- Regular inspection helps decide when to clean or replace the filter.
A clean Harley air filter improves engine efficiency. It also extends the life of your motorcycle.
How do I clean my Harley air filter?
To clean your Harley air filter, first identify if it is an oiled or dry type. Oiled filters require a special cleaning solution, rinsing with water, thorough drying, and re-oiling. Dry filters should only be gently tapped, vacuumed, or blown with low-pressure compressed air from the inside out to remove debris, never washed or oiled.
Why Your Harley Air Filter is Crucial for Engine Health
Your Harley Davidson is more than just a motorcycle. It is a powerful machine built for the open road. At its heart lies the engine, which needs clean air to run efficiently. This is where your Harley air filter comes in. It acts as the engine’s lungs, filtering out harmful contaminants. These contaminants include dirt, dust, bugs, and road debris. Without a functioning filter, these particles would enter your engine. This causes wear and tear on internal components.
A clean air filter allows a steady flow of clean, unrestricted air into the combustion chamber. This clean air mixes with fuel, creating the perfect environment for combustion. When the air filter becomes clogged with dirt, this airflow is restricted. The engine then struggles to breathe. This leads to a noticeable drop in performance. You might experience reduced horsepower and sluggish acceleration. Fuel efficiency also suffers. Your bike may run richer, meaning it uses more fuel than needed. Over time, a dirty filter can even cause engine damage. The small particles can scratch cylinder walls or clog fuel injectors. Therefore, regular air filter cleaning is not just about performance. It is about preserving the life of your Harley’s engine. It also saves you money on fuel and potential repairs. Proper air filter maintenance is a simple task that yields big benefits. It helps your beloved bike roar down the highway with power and reliability. Many motorcycle owners find it similar to cleaning other vehicle filters. For more general advice on maintaining your bike’s breathing system, learn how to clean an air filter on a motorcycle.
Identifying Your Harley Air Filter Type: Oiled vs. Dry
Before you start cleaning, you must know what type of air filter your Harley Davidson uses. Harley air filters generally come in two main types: oiled filters and dry filters. The cleaning method for each type is very different. Using the wrong method can damage the filter. It can also harm your engine. You need to identify your filter correctly.
Oiled air filters, like those often made by K&N or Screamin’ Eagle, are typically made of cotton gauze. This gauze is treated with a special oil. The oil helps trap even very fine dust particles. These filters often have a slightly tacky feel. They may also appear colored, usually red or blue, from the oil. When new or freshly cleaned, they feel slightly damp or oily to the touch. You might see a faint sheen on the material. These filters are designed to be washable and reusable.
Dry air filters are usually made of pleated paper or synthetic non-woven material. They do not use oil to trap particles. Instead, they rely on the density of the material. These filters feel dry to the touch. They often look white, off-white, or sometimes black if heavily soiled. Many stock Harley Davidson air filters are dry-type. Dry filters are generally not washable with water or cleaners. Trying to wash a dry paper filter will ruin it. It will also destroy its filtering ability. Knowing your filter type ensures you use the correct cleaning process. This protects your engine and saves you from buying a new filter unnecessarily. Some other vehicle filters, like those found in power equipment, also come in various types. For example, understanding how to clean a foam air filter is specific to its material, much like Harley’s distinct filter types.
Essential Tools and Supplies for Cleaning Harley Air Filters
Having the right tools and supplies makes your Harley air filter cleaning job easy and effective. Preparing everything beforehand saves you time and prevents frustration. The specific items you need will depend on your filter type, as discussed earlier. However, some basic tools are universal for removing the filter.
For both oiled and dry filters, you will likely need:
- Screwdrivers or Allen wrenches: To remove the air cleaner cover and housing. The size will depend on your Harley model.
- Gloves: To keep your hands clean from dirt and cleaning solutions.
- Shop rags or old towels: For wiping up spills and protecting your workspace.
- Work area: A clean, well-ventilated space, preferably outdoors or in a garage with good airflow.
If you have an oiled air filter, you will need additional specific supplies:
- Air filter cleaning solution: This is a specialized degreaser designed to break down dirt and old oil. Brands like K&N offer complete cleaning kits.
- Water source: A hose with a gentle spray nozzle or a sink for rinsing the filter.
- Clean air filter oil: This is crucial for re-oiling the filter after it dries. Do not use motor oil or other lubricants. Use only dedicated air filter oil.
- Large bucket or basin: For soaking the filter if the cleaning kit recommends it.
If you have a dry air filter, your additional supplies are different:
- Soft brush or vacuum cleaner with a brush attachment: For gently removing surface dirt.
- Low-pressure compressed air (optional): Use with extreme caution. Blow air from the inside out to push dirt away from the filtering media. High pressure can damage the paper pleats.
- New dry air filter (optional but recommended): If your filter is heavily soiled or damaged, replacement is the best option. Dry filters are generally not designed for extensive cleaning like oiled ones.
Gathering these items before you begin ensures a smooth cleaning process. It helps you avoid interruptions. Using the right products protects your filter and your engine. This small investment in proper supplies pays off in the long run. Quality tools make the job simple. This helps you keep your Harley running strong. Specific filter brands like Spectre air filters or AEM air filters often sell their own cleaning kits designed for their oiled filters, which are ideal to use.
Step-by-Step Guide: Cleaning an Oiled Harley Air Filter
Cleaning an oiled Harley air filter is a straightforward process. It requires patience and proper steps. Follow these instructions carefully to ensure your filter is clean and ready for re-oiling. This method applies to cotton gauze, reusable filters.
Step 1: Remove the Air Filter First, you need to access your air filter. Your Harley Davidson service manual provides exact instructions for your model. Generally, you will remove the outer air cleaner cover. Then, unbolt or unclip the filter element. Be careful not to drop any screws or small parts. Place them in a safe spot.
Step 2: Apply Air Filter Cleaner Once removed, take your air filter cleaning solution. Spray it generously over the entire surface of the filter. Make sure to cover all pleats. Allow the cleaner to soak into the filter material for 10-15 minutes. This solution helps loosen and dissolve trapped dirt and old oil. Do not let the cleaner dry on the filter.
Step 3: Rinse the Filter After the soaking time, rinse the filter. Use low-pressure water. Rinse from the inside of the filter outwards. This pushes dirt out from the same direction it entered. Continue rinsing until the water runs clear. You will see dirt and grime washing away. Avoid using high-pressure water, as it can damage the delicate filter pleats. Do not use a pressure washer.
Step 4: Dry the Filter Thoroughly This is a critical step. The filter must be completely dry before you re-oil it. Gently shake off excess water. Then, let the filter air dry naturally. Place it in a clean, dry, well-ventilated area. Drying can take several hours, or even overnight, depending on humidity. Do not use heat sources like a hairdryer or heat gun. This can warp the filter material. Patience here prevents future problems.
Step 5: Re-oil the Filter Once completely dry, it’s time to re-oil. Use only specialized air filter oil. Apply a thin, even coat of oil to each pleat. Work your way around the filter. You can also spray it or squeeze it from a bottle, depending on the oil type. The goal is to make the filter a uniform color, usually red or blue, without excessive dripping. Let the oil wick into the material for about 20 minutes. If there are any white spots, apply a little more oil. An over-oiled filter can restrict airflow and potentially foul sensors. A correctly oiled filter ensures maximum filtration.
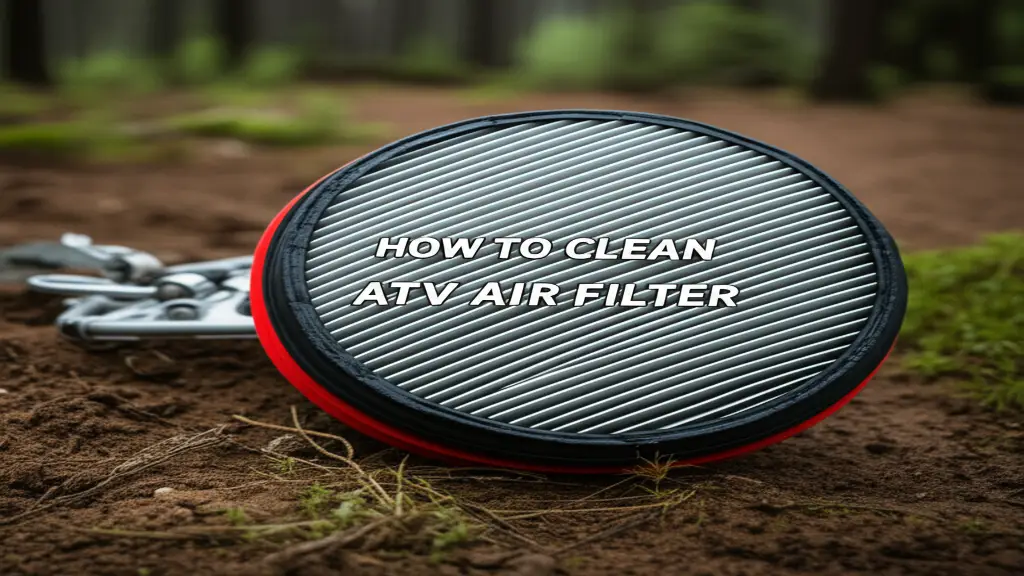
Step 6: Reinstall the Filter Finally, carefully reinstall the cleaned and oiled air filter. Make sure it seats properly in its housing. Reattach the air cleaner cover. Secure all bolts and clips. Double-check that everything is tight and correctly assembled. Your Harley is now ready to breathe clean air. This boosts its performance and extends its life. The process is similar to cleaning other types of vehicle filters. For example, some ATV owners learn how to clean an ATV air filter using similar principles for oiled filters.
Step-by-Step Guide: Cleaning a Dry Harley Air Filter
Cleaning a dry Harley air filter is different from cleaning an oiled one. Dry filters are typically made of paper or synthetic material. They are not designed to be washed with water or cleaners. Attempting to do so will destroy the filter’s integrity and filtering capabilities. The goal here is to remove loose debris without damaging the filter media.
Step 1: Remove the Air Filter Just like with oiled filters, the first step is to remove the air cleaner cover. Locate the filter element. Unclip or unbolt it from the airbox. Handle the filter carefully to avoid further damage. Place any removed hardware in a secure spot.
Step 2: Tap Out Loose Debris Once the filter is removed, gently tap it against a hard surface. Do this outside or over a trash can. The goal is to shake loose any large dirt particles, bugs, or leaves trapped in the pleats. Tap lightly and evenly around the filter’s perimeter. Do not beat it harshly.
Step 3: Gentle Vacuuming (Optional) For more stubborn dirt, you can use a vacuum cleaner. Attach a brush attachment to the vacuum hose. Gently vacuum the outer surface of the filter pleats. Move the brush along the pleats. This carefully lifts away embedded dust without tearing the paper. Be very careful not to apply too much pressure.
Step 4: Use Low-Pressure Compressed Air (Optional, with Caution) If you have access to compressed air, you can use it. This method requires extreme caution. Set your air compressor to a very low-pressure setting. Blow air through the filter from the inside out. This pushes dirt away from the filtering surface. Hold the nozzle several inches away from the filter. Keep the air moving. Never use high-pressure air directly on the pleats. High pressure can blow holes in the paper. These holes would allow unfiltered air into your engine. Always wear eye protection when using compressed air.
Step 5: Inspect for Damage After cleaning, hold the dry filter up to a light source. Look for any holes, tears, or damage in the filter material. Pay close attention to the pleats. If you see any light coming through a damaged area, the filter is compromised. It must be replaced. A damaged dry filter cannot adequately protect your engine.
Step 6: Reinstall the Filter If the filter passes inspection, carefully reinstall it into the airbox. Ensure it sits correctly and forms a tight seal. Reattach the air cleaner cover and secure all bolts or clips. A properly installed filter prevents air leaks. Air leaks bypass the filter. Your Harley is now ready to ride with a cleaner air supply. This method is similar for other dry filters, like those found in small engines. For example, knowing how to clean an AFE dry filter uses a similar set of careful, non-wet cleaning steps.
Proper Drying and Re-oiling: Ensuring Optimal Filtration
After washing your oiled Harley air filter, proper drying is the most crucial step before re-oiling. If the filter is not completely dry, the new oil will not adhere correctly. This can lead to uneven oil distribution or reduced filtration efficiency. Furthermore, any remaining water droplets could potentially enter the engine, which is harmful.
For oiled filters:
- Air Dry Only: After rinsing, gently shake off excess water. Place the filter on a clean, dry surface, ideally elevated slightly to allow air circulation. A wire rack works well. Let it air dry completely. This process can take several hours, or even overnight, depending on ambient temperature and humidity. Patience is key.
- Avoid Heat: Never use heat sources like a hairdryer, heat gun, or direct sunlight to speed up drying. High heat can warp or degrade the cotton gauze material and the rubber seals. This can compromise the filter’s seal and filtering ability.
- Confirm Dryness: Before re-oiling, feel the filter to ensure it is bone dry. There should be no dampness or coolness from evaporation. You can gently squeeze the material in a few spots to check for moisture.
Once the oiled filter is completely dry, you can proceed with re-oiling. This step restores the filter’s ability to trap fine particles.
- Use Specific Filter Oil: Only use air filter oil designed for your specific filter type, usually provided in a cleaning kit. This oil has the correct viscosity and tackiness.
- Apply Evenly: For squeeze bottles, apply a bead of oil along each pleat. For spray cans, hold the can about 6 inches away and spray a light, even coat over the entire surface.
- Allow Wicking: After applying oil, let the filter sit for 15-20 minutes. The oil will “wick” or spread through the cotton gauze. This ensures even saturation.
- Inspect and Touch Up: Hold the filter up to a light. Look for any light spots or areas that appear dry. Apply a small amount of oil to these areas.
- Avoid Over-oiling: Do not saturate the filter to the point where oil drips from it. Excess oil can restrict airflow. It can also contaminate sensors or get into the engine. A properly oiled filter will have a uniform color. It will not be dripping wet.
For dry filters, drying is simpler as they are not washed. After gently removing debris:
- Air Dry After Compressed Air (if used): If you used compressed air, simply allow any residual moisture from the air line (if present) to evaporate. This usually takes only a few minutes.
- Ensure No Moisture: Verify the filter is dry and free of any dampness before reinstallation.
Proper drying and re-oiling are critical for the filter to perform its job effectively. It ensures your Harley’s engine breathes clean air and maintains peak performance.
When to Clean and When to Replace Your Harley Air Filter
Understanding when to clean your Harley air filter versus when to replace it is crucial for optimal motorcycle performance and engine longevity. Cleaning extends the life of reusable filters, but even they have a finite lifespan. Dry, disposable filters often require replacement rather than extensive cleaning.
When to Clean Your Harley Air Filter:
- Routine Maintenance: Harley Davidson recommends checking your air filter at regular service intervals. Consult your owner’s manual for specific mileage recommendations.
- Riding Conditions: If you frequently ride in dusty environments, off-road, or in heavy traffic, your filter will get dirty faster. More frequent cleaning is necessary under these conditions.
- Visible Dirt: When you remove the air filter, if it shows visible signs of dirt, dust, or debris accumulation but is otherwise intact, it’s a good candidate for cleaning (if it’s an oiled, reusable type).
- Reusable Filters (Oiled): Oiled cotton gauze filters are designed to be cleaned and re-oiled multiple times. Cleaning them regularly saves money over buying new ones.
When to Replace Your Harley Air Filter:
- Damaged Filter Media: If you find tears, holes, or significant damage to the filter material (pleats, gauze), it must be replaced. A damaged filter allows unfiltered air directly into your engine.
- Compromised Seals/Gaskets: Inspect the rubber or foam seals around the filter’s edges. If they are cracked, brittle, or no longer seal properly, the filter should be replaced. A poor seal allows dirty air to bypass the filter.
- Irreparable Soiling (Dry Filters): Dry paper or synthetic filters cannot be effectively cleaned once heavily saturated with dirt or oil. Attempting to wash them will destroy their filtering properties. A heavily clogged dry filter means it’s time for a new one.
- Excessive Oil (Oiled Filters): If your oiled filter sheds excessive oil even after proper re-oiling, or if the material seems degraded, consider replacing it.
- Age and Mileage: Even if a reusable filter seems okay, its filtering efficiency can decrease over a very long period or many cleaning cycles. After many years or very high mileage, replacement is a good idea.
- Performance Issues persist: If your Harley continues to run poorly, even after a thorough air filter cleaning, the filter may be compromised. Replacing it is a good diagnostic step.
Always check your Harley’s service manual for manufacturer-specific recommendations. A visual inspection is your best guide. When in doubt, replacing the filter is a safer choice than risking engine damage from a faulty one. Regular attention to your air filter ensures your Harley continues to perform at its best. This proactive care extends the lifespan of your engine. For context, keeping other engine filters clean, such as knowing how to clean a chainsaw air filter, also highlights the importance of timely cleaning or replacement for engine health.
FAQ Section
How often should I clean my Harley air filter?
The frequency depends on your riding conditions and the filter type. For most riders, inspecting the filter every 5,000 miles is a good practice. If you ride in very dusty areas or off-road, you may need to clean it more often, perhaps every 2,500-3,000 miles. Always check your Harley owner’s manual for specific recommendations.
Can I use soap and water to clean my Harley air filter?
For oiled cotton gauze filters, you must use a specialized air filter cleaning solution, followed by a water rinse. Regular soap and water are not effective at removing specialized filter oil and trapped dirt. For dry paper or synthetic filters, never use soap and water, as it will ruin the filter.
What happens if I don’t clean my Harley air filter?
If you neglect to clean your Harley air filter, your engine will suffer. A dirty filter restricts airflow, leading to reduced horsepower, decreased fuel efficiency, and a richer fuel mixture. Over time, it can cause engine wear from dirt particles entering the combustion chamber, potentially leading to costly repairs.
Should I replace or clean my Harley air filter?
Reusable oiled filters are designed for cleaning. Disposable dry filters are generally replaced when heavily soiled or damaged. Always inspect the filter for tears, holes, or degraded seals. If any damage exists, or if a dry filter is excessively dirty, replacement is necessary. Cleaning extends the life of reusable filters, but replacement is vital when the filter is compromised.
How long does it take to clean a Harley air filter?
The hands-on cleaning time for a Harley air filter is relatively short, about 15-30 minutes. However, the most time-consuming part is the drying process for oiled filters, which can take several hours or even overnight. This passive drying time is crucial for proper re-oiling and effective filtration.
Is filter oil necessary for oiled filters?
Yes, filter oil is absolutely necessary for oiled cotton gauze filters. The oil is the key component that traps fine dust particles. Without proper re-oiling after cleaning, an oiled filter will not function correctly. It will allow harmful contaminants to pass directly into your engine, causing significant damage.
Conclusion
Keeping your Harley Davidson’s air filter clean is a simple yet critical task. It directly impacts your bike’s performance, fuel efficiency, and engine longevity. By understanding the difference between oiled and dry filters and following the correct cleaning procedures, you ensure your engine breathes only clean, unrestricted air. This routine maintenance is an investment in your Harley’s health. You prevent costly repairs and enjoy a more responsive ride. We explored why a clean filter is crucial. We also provided step-by-step guides for both filter types. Remember to inspect your filter regularly. Always use the right tools and products for the job.
So, take pride in maintaining your machine. Dedicate some time to properly clean Harley air filter. A well-maintained air filter means more power and more freedom on the open road. Give your Harley the care it deserves. It will reward you with countless miles of exhilarating rides. Keep your Harley running strong and clean!
- Harley Davidson
- air filter cleaning
- motorcycle maintenance
- bike care
- engine performance
- routine service


