· Todd Martin · ATV Maintenance · 20 min read
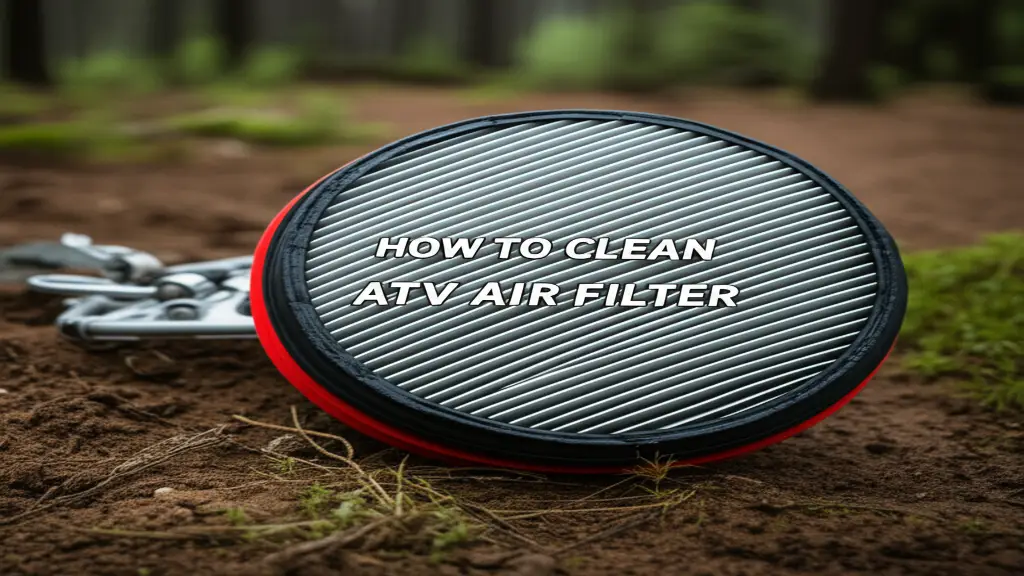
How To Clean Atv Air Filter
Mastering ATV Air Filter Cleaning: Boost Performance
Your All-Terrain Vehicle (ATV) takes you on exciting adventures. It tackles dirt, mud, and dust with ease. Yet, all that fun means your ATV’s air filter works hard. A clean air filter is vital for your ATV’s engine health and optimal performance. Neglecting this simple task can lead to power loss, poor fuel economy, and expensive engine damage.
This article shows you exactly how to clean ATV air filter types. We cover everything from gathering your tools to the final reinstallation. You will understand why filter cleaning is important. We will also look at different filter types and their specific cleaning needs. Learn how to keep your ATV running strong and smooth.
Takeaway
Keeping your ATV air filter clean ensures peak engine performance and extends its life.
- Always remove the filter carefully to prevent dirt from entering the engine.
- Use the correct cleaning solution for your filter type.
- Allow the filter to dry completely before oiling.
- Apply filter oil evenly to trap dirt effectively.
- Regular maintenance saves you money and trouble in the long run.
How to Clean ATV Air Filter: A Quick Answer
To clean an ATV air filter, first remove it from the airbox. For foam filters, wash with a specialized cleaner or mild soap, rinse thoroughly, and let it air dry completely. Then, apply new air filter oil evenly. For paper filters, gently tap out loose dirt or use low-pressure compressed air from the inside out; replace if heavily soiled.
Why Your ATV Air Filter Needs Regular Cleaning
A clean ATV air filter is the engine’s first line of defense. It stops dirt, dust, and debris from entering the engine’s internal components. Without this barrier, harmful particles can scratch cylinders, damage pistons, and clog carburetor jets or fuel injectors. This leads to severe wear and eventual engine failure.
Think of your engine as needing to breathe clean air. When the air filter gets dirty, it restricts airflow to the engine. This makes the engine work harder to draw in air, reducing its power output. You might notice your ATV feels sluggish or does not accelerate as quickly. It struggles to perform at its best.
A dirty filter also affects fuel efficiency. When airflow is restricted, the engine’s air-to-fuel ratio becomes unbalanced. This causes the engine to run “rich,” meaning it uses more fuel than necessary for the amount of air it gets. You will burn through gas faster, costing you more money. Regular cleaning prevents this waste. I always make sure my ATV’s filter is spotless. It saves me headaches and money in the long run.
The conditions you ride in greatly impact how often you need to clean your filter. Riding in dusty, dry areas means you will need to clean the filter more frequently. Muddy trails can also clog filters quickly. Even riding in seemingly clean conditions can still lead to dust buildup over time. It is a good practice to inspect your filter after every few rides, especially if you push your ATV hard.
Proper filter maintenance prevents minor issues from becoming major problems. It keeps your ATV running smoothly and efficiently. This extends the life of your engine. It also maintains your ATV’s resale value. Keeping the air filter clean is a simple, yet critical, part of ATV ownership. Just like keeping your home’s air conditioner filter clean ensures good air quality, a clean ATV filter ensures your engine breathes pure air.
Understanding ATV Air Filter Types
ATVs typically use one of three main air filter types: foam, paper, or cotton gauze. Each type has its own design and requires a specific cleaning approach. Knowing your filter type helps you choose the correct cleaning method and products. This prevents damage to the filter and ensures proper filtration.
Foam filters are the most common type found in ATVs. They consist of one or more layers of open-cell foam. This foam is designed to be oiled. The oil traps tiny dirt particles as air passes through. Foam filters are durable and reusable. They can withstand harsh riding conditions. Cleaning them involves washing and then re-oiling.
Paper filters, also known as pleated filters, are less common on high-performance ATVs but are found on some utility models. These filters look similar to car engine air filters. They have accordion-like folds made of paper or synthetic material. Most paper filters are disposable. They are designed to be replaced once dirty. Some specialty paper filters can be gently cleaned with compressed air, but water and oil will damage them.
Cotton gauze filters are often aftermarket performance filters, like those made by K&N. They use multiple layers of cotton gauze fabric sandwiched between two wire mesh screens. These filters are also designed to be oiled. They offer excellent airflow while still providing good filtration. Cotton gauze filters are reusable and require specific cleaning and oiling kits. I find these filters offer a good balance of performance and reusability.
Understanding the differences between these types is crucial. Cleaning a foam filter with methods meant for a paper filter will destroy it. Applying oil to a paper filter will clog it instantly. Always check your ATV’s owner’s manual if you are unsure about your filter type. This simple step saves you from costly mistakes. My lawn mower also uses a similar filter concept, and knowing its type helps with proper maintenance. For more on similar filtration, you can check out how to clean an air filter on a lawn mower.
Gathering Your ATV Air Filter Cleaning Supplies
Before you start the cleaning process, you need the right tools and products. Using the correct supplies makes the job easier and ensures your filter is cleaned properly. It also protects your hands and the filter material. I always make sure I have everything laid out before I begin.
Here is a list of essential items you will need:
- ATV Air Filter Cleaner: This is a specialized solvent designed to break down filter oil and dirt. Many brands offer their own cleaning solutions. Do not substitute with harsh household cleaners that might damage the foam or cotton.
- ATV Air Filter Oil: After cleaning, you must re-oil your filter. Choose the correct type of oil for your filter. Foam filters use specific foam filter oil, while cotton gauze filters use cotton filter oil. This oil comes in liquid form (for dipping/squeezing) or aerosol spray.
- Rubber Gloves or Nitrile Gloves: Filter oil and cleaner can be messy and irritating to skin. Gloves protect your hands. I always wear them.
- Two Large Buckets or Plastic Tubs: One bucket is for cleaning, the other for rinsing. Using separate containers prevents re-contaminating the filter.
- Shop Rags or Old Towels: These are useful for wiping away excess cleaner, oil, and general cleanup.
- Safety Glasses: Protect your eyes from splashes of cleaner or oil.
- Mild Dish Soap (optional, for some foam filters): Some riders prefer to follow the specialized cleaner with a wash in warm, soapy water to remove residues. This is only for foam filters.
- Water Source: A garden hose or faucet for rinsing.
- Compressor with Air Nozzle (for paper filters only, with caution): If you have a paper filter, low-pressure compressed air can help, but use it carefully.
- Plastic Baggies or Storage Container (optional): For storing a freshly oiled spare filter.
Having these supplies ready before you start saves time and frustration. It allows you to move smoothly through each step of the cleaning process. Good preparation makes the entire task much more manageable.
Step-by-Step Guide: Cleaning a Foam ATV Air Filter
Cleaning a foam ATV air filter is a straightforward process when you follow the steps. This is the most common type, so knowing this procedure is very useful. I have done this many times, and it gets easier each time. Pay attention to each phase to ensure a completely clean and effective filter.
Removal and Initial Inspection
First, locate your ATV’s airbox. It is usually under the seat or behind a side panel. Carefully open the airbox cover. Most covers are secured with clips or bolts. Once open, you will see the air filter inside. Look for any loose dirt or debris around the filter. Take care not to let this dirt fall into the intake tract.
Gently remove the air filter from its housing. Some filters slide out, while others might be held by a cage or wing nut. Pay attention to how it sits. This helps with proper reinstallation later. Once the filter is out, inspect it for any tears, holes, or damage. A damaged filter cannot protect your engine. If you find any damage, replace the filter. Do not try to repair it. While the filter is out, wipe the inside of the airbox clean with a damp rag. Remove any accumulated dust or debris. This stops new dirt from immediately contaminating your freshly cleaned filter.
The Cleaning Process
Now, put on your gloves and safety glasses. Take your first bucket or tub. Pour in the specialized ATV air filter cleaner. Submerge the foam filter completely in the cleaner. Begin to gently knead and squeeze the filter. This helps the cleaner penetrate the foam and loosen trapped dirt and old oil. You will see the cleaner turn dark as dirt is released. Continue kneading until the filter looks visibly cleaner.
Once the filter appears clean, move it to the second bucket. Fill this bucket with warm, clean water. Rinse the filter by kneading and squeezing it under the water. Continue rinsing until the water squeezed from the filter runs clear. Some people prefer to use a mild dish soap and warm water for a final wash after the specialized cleaner. If you do this, make sure to rinse all soap residue thoroughly. Soap left in the filter can interfere with the new filter oil. This cleaning process is similar to how you would clean a foam air filter from other machines.
Thorough Drying Techniques
Drying is a critical step. An improperly dried filter will not hold oil correctly, or it can even promote mold growth. After rinsing, gently squeeze out as much excess water as possible from the foam. Do not twist or wring the filter aggressively. This can damage the foam structure.
Lay the filter on a clean shop rag or hang it in a well-ventilated area. Allow it to air dry completely. This can take several hours, or even overnight, depending on humidity and temperature. Patience is key here. Never use heat sources like a hairdryer, heat gun, or direct sunlight to speed up drying. High heat can melt or degrade the foam material. I usually clean my filters the night before I plan to ride again, giving them ample time to dry naturally. Ensure the filter feels completely dry to the touch, both inside and out, before moving to the oiling step.
Oiling Your ATV Air Filter Correctly
Oiling your ATV air filter is as important as cleaning it. The oil is what truly traps the fine dust and dirt particles. Without proper oiling, your filter is essentially just a foam barrier. It will not provide adequate protection for your engine. I learned this the hard way once, and my engine paid the price.
There are two main types of air filter oil application: liquid oil and aerosol spray oil. Both work well, but they have different application methods.
- Liquid Filter Oil: Pour a small amount of liquid filter oil into a clean plastic bag or shallow pan. Place the completely dry foam filter into the bag or pan. Begin to work the oil into the foam by gently kneading and squeezing the filter. Ensure the oil spreads evenly throughout all the foam layers. You want the filter to be thoroughly saturated but not dripping wet. The goal is an even, consistent coating. If you use a bag, you can move the filter around in the bag to distribute the oil.
- Aerosol Spray Filter Oil: Hold the aerosol can a few inches from the filter. Spray a light, even coat over the entire surface of the foam, both inside and out. Do not over-saturate. Once sprayed, gently knead the filter with your hands. This helps to distribute the oil evenly into the foam cells. You might need to apply a second light coat if you find dry spots after kneading.
After applying the oil, give the filter a few minutes to “tack up.” This means the oil becomes slightly sticky. This stickiness is what traps the dirt. You should be able to touch the filter and feel a slight tackiness. Hold the filter up to a light source. You should see an even color across the entire filter. There should be no dry spots (lighter color) or excessively wet spots (darker color, dripping). If you see excess oil dripping, gently squeeze the filter to remove it. Too much oil can restrict airflow, making your engine run rich. Too little oil means dirt will pass through. Proper oiling creates an effective barrier for your engine.
Cleaning Other ATV Air Filter Types (Paper & Cotton Gauze)
While foam filters are common, you might encounter paper or cotton gauze filters. Each type needs a unique cleaning approach. Misapplying a cleaning method can damage these filters. Understanding these differences is key to proper ATV maintenance.
Cleaning Paper Air Filters
Most paper air filters for ATVs are not designed for cleaning. They are meant for replacement when dirty. Attempting to wash a paper filter with water or chemicals will ruin its filtration capabilities. The paper material absorbs water and can swell or tear. This breaks down the filter’s structure.
However, if your paper filter is only lightly dusty, you can try to extend its life slightly. Remove the filter carefully. Tap the filter gently against a hard surface to dislodge loose dirt. This works for surface dust. You can also use low-pressure compressed air. Always blow the compressed air from the inside of the filter outwards. Blowing from the outside in will push dirt deeper into the filter’s pleats, making it worse. Keep the air nozzle a few inches away and move it systematically across the pleats. Never use high-pressure air, as it can tear the paper elements. Inspect the filter thoroughly for any tears or damage after this process. If it looks discolored, or if you can see light through it unevenly, it is time for a new one. Remember, most paper filters are disposable for a reason.
Cleaning Cotton Gauze Air Filters
Cotton gauze filters, like those from K&N, are durable and reusable. They require specialized cleaning and oiling kits. These kits typically include a cleaning solution and a re-oiling agent.
First, remove the cotton gauze filter from your ATV. Shake off any loose dirt. Apply the designated filter cleaner liberally to both sides of the filter. Allow the cleaner to soak into the cotton for about 10-15 minutes. This helps to dissolve old oil and trapped dirt. Do not let the cleaner dry on the filter.
After soaking, rinse the filter thoroughly with low-pressure water. Always rinse from the clean side (inside) outwards. This washes the dirt out of the filter media, rather than pushing it further in. Continue rinsing until the water runs clear. Once rinsed, gently shake off excess water. Allow the filter to air dry completely. Again, do not use heat or compressed air for drying. Cotton gauze filters need to be fully dry before oiling.
Once dry, apply the specific cotton gauze filter oil. These oils often come in aerosol spray or squeeze bottles. Apply an even, light coat to the outside pleats of the filter. Do not over-saturate. The oil will wick into the cotton. Wait about 20 minutes for the oil to spread. If you see any dry spots (lighter color), apply a small amount more. The goal is an even, reddish or bluish tint (depending on the oil color) across all pleats. Never use foam filter oil on a cotton gauze filter, or vice versa. These filters are designed for specific oil types.
Reinstallation and Post-Cleaning Checks
After all the cleaning and oiling, the final step is to put everything back together. Proper reinstallation is as important as proper cleaning. If the filter is not seated correctly, dirt can bypass it, leading to engine damage. I always double-check everything at this stage.
Start by ensuring your airbox is clean inside. You wiped it down during removal, but give it a quick check. Make sure there are no loose debris or forgotten rags. Your freshly cleaned and oiled air filter is now ready. Carefully place the filter back into the airbox housing. Ensure it sits perfectly flat and forms a tight seal. Some filters have a specific orientation or a cage that holds them in place. Make sure any clamps, bolts, or clips that secure the filter are fastened properly.
Once the filter is in place, reattach the airbox cover. Ensure all clips are latched or all bolts are tightened securely. The airbox must be sealed to prevent dirty air from bypassing the filter. A loose cover or clamp is an open invitation for dust to enter your engine. Check the air intake tube connected to the airbox. Make sure it is secure and free of cracks or damage. Any leak in the intake system means unfiltered air can reach the engine.
After everything is reassembled, start your ATV. Listen for any unusual sounds. The engine should idle smoothly. You might notice a slight difference in engine sound or response due to the increased airflow from the clean filter. Take your ATV for a short, gentle ride. Pay attention to how it performs. You should feel an improvement in throttle response and overall power. If you experience any issues, immediately shut down the engine and re-check your filter installation. This ensures that the idle air control valve receives clean air, supporting proper engine function. Problems with idle can sometimes stem from dirty air going through the system. For more on air flow control systems, you might consider how to clean an idle air control valve. Regular inspection of the airbox and filter seals should become part of your routine ATV maintenance.
Pro Tips for ATV Air Filter Maintenance
Beyond the basic cleaning steps, a few pro tips can help you maintain your ATV’s air filter system even better. These insights come from years of riding and wrenching. They help prolong your engine’s life and ensure peak performance.
- Carry a Spare Oiled Filter: This is perhaps the best tip for serious riders. If you are on a multi-day trip or riding in extremely dusty conditions, a filter can get dirty fast. Having a pre-oiled, ready-to-install spare means you can quickly swap it out on the trail. This prevents riding with a choked engine or risking damage. I always keep one in my gear bag.
- Inspect Your Airbox Frequently: Even if you do not plan to clean the filter, regularly open your airbox and check for dirt. Look for signs of dirt ingress around the filter seal. If you find a lot of dust inside the airbox, it means your filter or its seal is failing. Address this immediately.
- Use Quality Cleaning Products: Do not skimp on filter cleaner and oil. Cheap products might not clean effectively or protect your foam properly. Stick to reputable brands recommended by your ATV manufacturer or experienced riders. These products are formulated to work with your specific filter materials.
- Consider a Pre-Filter: A pre-filter is a coarse foam sleeve that goes over your main air filter. It catches larger debris and heavy dust before it reaches the primary filter. This extends the time between major cleanings for your main filter. Pre-filters are easy to clean. Many riders in dusty environments swear by them.
- Keep Maintenance Logs: Track when you clean and oil your filter. Note down the conditions you rode in. This helps you establish a regular maintenance schedule tailored to your riding habits. If you rode in heavy dust, you know to clean it sooner. A log provides a clear history.
- Check Your ATV’s Air-Cooled Engine Fins: While not directly related to the air filter, your ATV’s engine fins also need to be clean to help cool the engine. A clean air filter helps with air intake, but overall engine health depends on heat dissipation too. If your ATV has an air-cooled engine, ensure the fins are clear of mud and debris. You can learn more about how to clean air-cooled engine fins for comprehensive engine care.
- Seal Your Airbox Properly: Always ensure the airbox lid and any clamps are sealed tightly. A common mistake is not fully securing the airbox. This allows dirty air to bypass the filter. A thin layer of grease around the airbox lip can help create a better seal on some models.
Implementing these tips will not only keep your air filter in top condition but also contribute to the overall health and longevity of your ATV. Regular, thorough maintenance is the best investment you can make for your machine.
Frequently Asked Questions
How often should I clean my ATV air filter?
The frequency depends on your riding conditions. For very dusty or muddy rides, clean it after every ride. For light trail riding, clean it every 10-15 hours of use. Always inspect it before each ride. A quick visual check helps you decide if it needs cleaning.
Can I use dish soap to clean my ATV foam air filter?
Yes, you can use mild dish soap and warm water as a secondary wash for foam filters, especially after using a specialized cleaner. However, make sure to rinse all soap residue thoroughly. Dish soap alone might not effectively break down specialized filter oil. Always let the filter dry completely.
What happens if I do not oil my foam air filter?
If you do not oil your foam air filter, it will not effectively trap fine dust particles. The foam itself acts as a coarse barrier, but the oil is crucial for catching microscopic dirt. Un-oiled filters allow fine abrasive particles to enter the engine, leading to premature wear and potential engine damage.
Can I use compressed air on all ATV air filter types?
No, you should only use low-pressure compressed air on paper filters, blowing from the inside out. Never use compressed air on foam or cotton gauze filters. High pressure can tear the delicate foam cells or push dirt deeper into cotton fibers, destroying their filtration capacity.
How do I know if my ATV air filter is properly oiled?
A properly oiled foam filter will feel slightly tacky to the touch and have an even color throughout when held up to a light source. There should be no dry spots (lighter color) or areas dripping with excess oil. For cotton gauze filters, look for a uniform tint (red or blue, depending on the oil) across all pleats.
Is replacing better than cleaning an ATV air filter?
For paper filters, replacement is generally better than cleaning, as they are often designed to be disposable. For foam and cotton gauze filters, cleaning is highly effective and cost-efficient. Regular cleaning and proper re-oiling can make these filters last for many years, saving you money on replacements.
Conclusion
Keeping your ATV’s air filter clean is a simple yet critical task. It directly impacts your machine’s performance, fuel efficiency, and engine longevity. Neglecting this maintenance item can lead to costly repairs and a less enjoyable riding experience. By following the steps outlined in this guide, you equip yourself with the knowledge to properly clean ATV air filter types, whether it is a foam, paper, or cotton gauze element.
Remember to always use the right cleaning products and techniques for your specific filter. Allow adequate drying time, and oil your filter thoroughly for maximum protection. Regular inspection and consistent maintenance will ensure your ATV runs smoothly and reliably for years to come. Do not let a dirty filter shorten your adventures. Make ATV air filter cleaning a regular part of your maintenance routine. Your engine will thank you.
- ATV maintenance
- air filter cleaning
- engine performance
- off-road vehicle
- foam filter
- oiling air filter

Todd Martin
Senior Writer
With over 15 years of experience in home renovation and design, I started HEG to share what I’ve learned with homeowners who want to create spaces that are both beautiful and functional. I’ve always believed in a hands-on approach, and over the years, I’ve picked up practical solutions that actually work. Through HEG, I aim to make home improvement more approachable, sharing real tips that help you create a home you truly love.