· Davia Murnell · Home Improvement · 17 min read
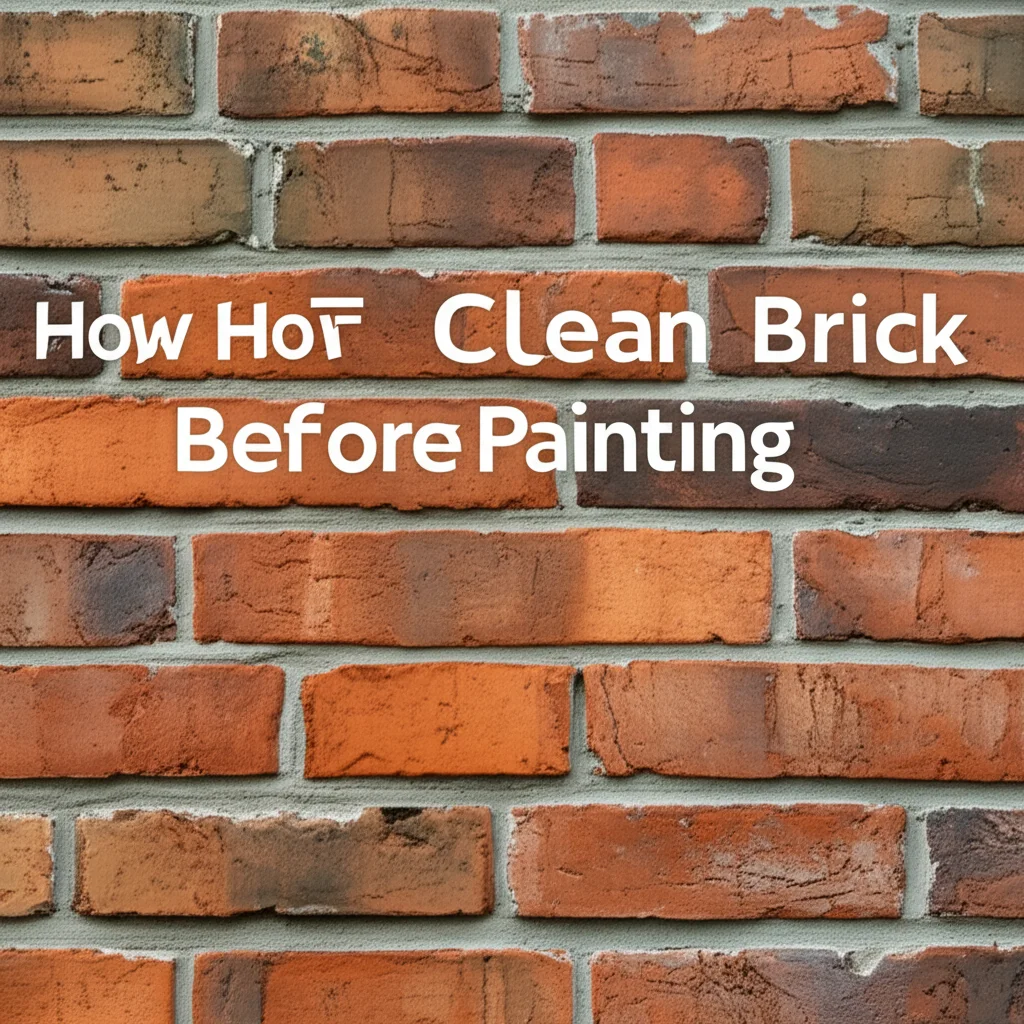
How To Clean Brick Before Painting

How To Clean Brick Before Painting: A Complete Guide
Giving brick a fresh coat of paint transforms its look. However, success depends on thorough preparation. I know the feeling of wanting a new look for my brick walls. Painting brick requires careful cleaning beforehand. This step ensures the paint sticks well and lasts long. Skipping proper cleaning leads to peeling paint and wasted effort.
This comprehensive guide shows you exactly how to clean brick before painting. I will explain why cleaning is vital. We will cover how to assess your brick, gather tools, and handle various types of dirt and stains. You will learn about general cleaning methods and specific solutions for stubborn issues like mold, efflorescence, and soot. Finally, I will discuss repairs and drying, setting the stage for a flawless paint job.
Takeaway:
- Inspect Thoroughly: Check for dirt, mold, efflorescence, loose mortar, and damage.
- Gather Supplies: Have brushes, cleaners, safety gear, and repair materials ready.
- Clean Systematically: Start with general cleaning, then address specific stains.
- Address Repairs: Patch cracks and crumbling mortar before priming.
- Allow Drying Time: Ensure the brick is completely dry for best paint adhesion.
To clean brick before painting, you must remove all dirt, mold, efflorescence, and loose debris. This prepares the porous surface, allowing paint to adhere properly. Neglecting this crucial step results in poor paint adhesion, leading to bubbling, cracking, and premature paint failure.
Why Proper Cleaning Matters Before Painting Brick
Preparing a surface correctly makes a huge difference in any painting project. When you paint brick, this truth becomes even more important. Brick is a porous material. It easily absorbs moisture, dirt, and contaminants. These substances prevent paint from bonding properly.
A clean surface means the paint forms a strong bond. This bond ensures your paint job looks good and lasts for years. Paint applied to dirty or compromised brick will likely peel, chip, or flake prematurely. Imagine putting a new sticker on a dusty wall; it just won’t stick. The same applies to paint on brick.
Moreover, moisture trapped in the brick can cause problems. If you paint over damp brick, the moisture tries to escape. This action creates bubbles or blisters in your new paint. Cleaning also helps you spot problems like crumbling mortar or cracks. You fix these issues before painting. This proactive approach saves you time and money in the long run. Proper cleaning sets the foundation for a beautiful and durable finish.
Assessing Your Brick Surface: The First Critical Step
Before any cleaning begins, I always take a good look at the brick. Understanding the condition of your brick surface helps you choose the right cleaning method. Different types of dirt and damage need different solutions. This assessment phase is crucial for effective cleaning.
Start by examining the entire area you plan to paint. Look closely for visible dirt, grime, and debris. Pay attention to corners and shaded areas. These spots often collect more dirt and may hide other issues. You might find cobwebs, insect nests, or general dust.
Next, identify any specific problems. Is there green or black growth? That indicates mold or mildew. White, powdery residue suggests efflorescence. Efflorescence is a mineral deposit that occurs when water moves through the brick. It leaves salts on the surface. Check for loose or crumbling mortar joints. These sections need repair. Look for cracks in the brick itself. Each of these issues requires a targeted approach for proper cleaning and repair. Knowing what you are up against helps you prepare fully. You can then choose the right cleaners and tools.
Essential Tools and Safety Gear for Brick Cleaning
You need the right equipment to clean brick effectively and safely. Gathering your tools beforehand makes the job smoother. Safety is also paramount, especially when using strong cleaning solutions. I always make sure I have everything I need before I start.
Here is a list of essential items:
- Stiff-bristle brushes: These brushes help scrub away dirt and grime. Avoid wire brushes on softer brick, as they can cause damage.
- Hose with good water pressure: For rinsing and initial wet-down.
- Buckets: Two buckets are helpful, one for cleaning solution and one for rinse water.
- Cleaning solutions: This varies based on the type of dirt. Options include:
- Mild detergent or soap
- Trisodium Phosphate (TSP) substitute
- Bleach for mold
- Muriatic acid for severe stains (use with extreme caution)
- Specialized efflorescence removers
- Putty knife or scraper: For removing loose paint or stubborn debris.
- Drop cloths or plastic sheeting: To protect surrounding areas.
- Ladder: If cleaning higher sections of brick.
Safety gear is non-negotiable when working with chemicals or pressure washers:
- Safety glasses or goggles: Protect your eyes from splashes and debris.
- Gloves: Chemical-resistant gloves are essential for protecting your hands.
- Long-sleeved shirt and pants: Cover your skin to prevent contact with cleaners.
- Respirator or face mask: If using strong chemicals or working in a dusty environment.
- Work boots: Provide good grip and protect your feet.
Having these items ready ensures you can clean the brick safely and efficiently. You will be prepared for any challenge the brick presents.
General Cleaning Methods for Brick Surfaces
Once you have assessed your brick and gathered your tools, begin with general cleaning. This step removes most surface dirt and loose debris. It prepares the brick for more specific treatments if needed. I find that a thorough initial clean makes a big difference.
Start by sweeping or brushing the brick surface. Use a stiff-bristle brush to remove loose dirt, cobwebs, and any flaking material. This mechanical removal prevents these particles from turning into muddy streaks when wet. It also helps expose underlying issues.
Next, wet the entire brick surface with water from a garden hose. This step helps loosen dirt and prevents cleaning solutions from absorbing too quickly into the porous brick. Make sure the brick is thoroughly saturated. Then, prepare your general cleaning solution. For most standard dirt and grime, a simple solution of mild detergent and water works well. You can also use a TSP substitute mixed according to the product instructions. Always test any cleaner in an inconspicuous area first. This test ensures the solution does not damage or discolor the brick.
Apply the cleaning solution to the brick using a brush or a garden sprayer. Let the solution sit for a few minutes. Do not let it dry. Then, scrub the brick vigorously with a stiff-bristle brush. Work in small sections to ensure thorough cleaning. Rinse each section completely with clean water from your hose. Ensure all cleaning solution is gone. Residual cleaner can interfere with paint adhesion. Repeat this process until the brick looks clean.
Pressure Washing Brick
Pressure washing can be an effective way to clean brick, but it needs careful use. The high pressure can damage mortar joints or even the brick itself if misused. I always approach pressure washing with caution.
- Test a small area: Always start with a low-pressure setting (around 1200-1500 PSI for most residential use) in an inconspicuous spot.
- Maintain distance: Keep the nozzle at least 12-18 inches from the brick surface. Moving closer increases the pressure.
- Even strokes: Use wide, overlapping strokes to avoid creating lines or concentrated pressure points.
- Angle the spray: Angle the spray downwards to help water run off and prevent it from forcing into mortar joints.
- Rinse thoroughly: Ensure all dirt and cleaning solution are washed away.
For basic dirt, a pressure washer can save time. However, for mold, efflorescence, or other tough stains, specific cleaning solutions are still necessary, even with a pressure washer. Always follow the pressure washer’s instructions.
Removing Specific Stains from Brick
General cleaning takes care of basic dirt. But brick often suffers from more specific and stubborn stains. These require targeted treatments. Addressing these stains is critical for a uniform and durable paint finish. I have dealt with all of these before, and each needs a specific plan.
Tackling Efflorescence on Brick
Efflorescence appears as a white, powdery, or crystalline deposit on the brick surface. It forms when water in the brick evaporates, leaving behind mineral salts. It looks unattractive and can prevent paint from sticking. Learning how to clean efflorescence off brick is a common challenge for brick maintenance.
- Dry brushing: Start by dry brushing the efflorescence with a stiff-bristle brush. This removes the loose surface deposits. Do this on a dry day.
- Water rinse: Rinse the area with clean water. Sometimes, light efflorescence washes away with just water.
- Acidic cleaner: For stubborn efflorescence, a diluted acid solution is often necessary. A common solution is a mix of white vinegar and water (1:1 ratio). For severe cases, a specialized efflorescence cleaner or diluted muriatic acid is used. How to clean brick with muriatic acid involves strict safety protocols. Always pre-wet the brick, apply the acid, let it sit briefly, then scrub and rinse thoroughly. Always wear full personal protective equipment.
- Prevention: After cleaning, identify and fix the source of moisture. This might include repairing gutters, improving drainage, or sealing cracks. Preventing water intrusion stops efflorescence from returning.
Eliminating Mold and Mildew from Brick
Mold and mildew appear as green, black, or even pinkish growth on brick. They thrive in damp, shaded areas. These fungi are not just unsightly; they compromise air quality and affect paint adhesion. Cleaning mold off brick is similar to how to clean mold off walls.
- Protective gear: Always wear gloves, eye protection, and a respirator before dealing with mold.
- Scrubbing: Begin by scrubbing the moldy areas with a stiff brush and warm water. This removes some of the surface growth.
- Bleach solution: Mix one part household bleach with three parts water. For a natural alternative, how to clean mold with vinegar is effective. Apply the solution to the moldy areas. Let it sit for 15-20 minutes.
- Scrub and rinse: Vigorously scrub the affected areas with a brush. Then, rinse thoroughly with clean water. Ensure no bleach residue remains.
- Ensure dryness: Make sure the brick dries completely. Address any underlying moisture issues that cause mold growth.
Cleaning Soot, Grease, and Oil Stains
Soot, grease, or oil stains on brick are common, especially near fireplaces, BBQs, or driveways. These oily residues are difficult to remove but must go for paint to stick. I have used specific methods for these tough stains. Knowing how to clean soot off brick is crucial for a clean finish.
- Absorb excess: For fresh grease or oil, absorb as much as possible with cat litter, sawdust, or paper towels.
- Degreaser: Apply a heavy-duty degreaser or a strong TSP solution. Follow the product instructions. Let it penetrate the stain.
- Scrubbing: Use a stiff brush to scrub the stained area. Work the cleaner into the brick pores.
- Hot water rinse: Rinse thoroughly with hot water. Hot water helps dissolve and flush away the oily residue. You might need to repeat this process several times for stubborn stains.
- Poultice method (for deep stains): For very deep oil stains, a poultice might be necessary. Mix an absorbent material (like fuller’s earth or talc) with a strong solvent (like mineral spirits) to form a paste. Apply the paste to the stain, cover with plastic, and let it dry completely. The poultice will draw the oil out of the brick. Scrape it off once dry.
Removing Mortar Smudges or Residue
New brickwork or previous repair jobs sometimes leave mortar smudges. These need removal before painting. They create an uneven surface and do not hold paint well. Knowing how to clean mortar off brick is a skill that saves future headaches.
- Mechanical removal: For dry, loose mortar, gently scrape it off with a putty knife or chisel. Be careful not to damage the brick surface.
- Stiff brush: Use a stiff-bristle brush to scrub away smaller bits and dust.
- Acidic cleaners: If the mortar is strongly adhered, a diluted acidic cleaner (like muriatic acid solution, following extreme safety precautions) may be required. Apply carefully, scrub, and rinse immediately.
- Thorough rinse: Ensure all acid residue is completely washed away. Residual acid can react with paint components.
By specifically treating each type of stain, you ensure the brick is as clean as possible. This meticulous work pays off with a superior paint job.
Repairing and Preparing the Brick Surface
Cleaning gets rid of surface contaminants. But brick also needs structural preparation. Addressing cracks, crumbling mortar, and uneven surfaces ensures a smooth, lasting paint job. This is not just about aesthetics; it is about protecting your home. I always make sure these steps are done right.
Inspecting and Repairing Mortar Joints
Mortar holds your brickwork together. Damaged mortar joints allow moisture to penetrate, which can lead to more serious issues. They also create an uneven surface for painting.
- Identify damage: Look for any mortar that is crumbling, cracked, or missing. Use a putty knife or screwdriver to test its integrity.
- Remove old mortar: Carefully rake out any loose or damaged mortar to a depth of about 1/2 to 1 inch. Use a cold chisel and hammer for stubborn sections. Be gentle to avoid damaging the bricks.
- Clean the joints: Brush out all dust and debris from the empty joints. Rinse them with water to ensure they are clean.
- Apply new mortar: Mix new mortar according to the manufacturer’s instructions. Use a tuckpointing trowel to carefully press the fresh mortar into the joints. Fill them completely.
- Tool the joints: Use a jointing tool to shape and smooth the new mortar. This creates a neat, professional look and helps shed water.
- Cure time: Allow the new mortar to cure fully. This can take several days or even weeks, depending on the product and weather conditions. Follow the manufacturer’s recommendations. Painting over uncured mortar can lead to problems.
Patching Cracks and Spalls in Brick
Cracks in brick can indicate structural movement or just minor surface damage. Spalling refers to bricks flaking or breaking apart. Both need repair before painting.
- Clean cracks: Use a wire brush or scraper to clean out any loose debris from cracks. Vacuum out dust.
- Fill small cracks: For hairline cracks, a masonry crack filler or caulk designed for brick can work. Apply it evenly and smooth it with a putty knife.
- Repair larger cracks/spalls: For larger cracks or spalled areas, a patching compound or epoxy specifically for masonry is needed. Mix and apply according to instructions. Build up the repair in layers if necessary.
- Feather edges: Smooth the edges of the patch so it blends seamlessly with the surrounding brick.
- Cure time: Let the patching material cure completely. This ensures maximum strength and adhesion.
Priming the Cleaned and Repaired Brick
Priming is an essential step after cleaning and repairing brick, especially when painting. Primer acts as a sealant and bonding agent. It creates a consistent surface for your topcoat.
- Choose the right primer: Use a high-quality, 100% acrylic latex primer specifically designed for masonry. These primers penetrate the porous brick and provide excellent adhesion. Look for primers that are “alkali-resistant” if your brick is new or prone to efflorescence.
- Apply primer: Apply the primer evenly using a roller for large areas and a brush for mortar joints and tight spots. Ensure full coverage.
- Two coats recommended: For very porous brick or dark brick, apply two coats of primer. Allow the first coat to dry completely before applying the second. This maximizes the primer’s sealing and bonding properties.
- Check for evenness: Look for any missed spots or uneven application. The primer should create a uniform base.
By diligently performing these repair and priming steps, you ensure the brick surface is structurally sound and perfectly prepared. This foundation leads to a superior, long-lasting paint finish.
Final Inspection and Drying Time
You have put in hard work cleaning and repairing your brick. Now, before you even think about opening a paint can, two final steps are crucial: a thorough inspection and ample drying time. These steps ensure your efforts pay off with a beautiful, lasting paint job. I never rush this part.
The Importance of a Final Inspection
A final inspection catches any missed spots or lingering issues. It is your last chance to ensure the brick is truly ready.
- Visual check: Walk around the entire cleaned and repaired brick surface. Look at it from different angles and in varying light conditions. This helps reveal any missed dirt, grease spots, or residue.
- Feel the surface: Run your hand over the brick. It should feel smooth and uniform, free from grit or loose particles. If it feels rough or powdery, it might need more rinsing or brushing.
- Check repairs: Confirm that all mortar repairs and patched cracks are solid, smooth, and fully cured. There should be no crumbling or soft spots.
- Look for residue: Ensure there is no white film (efflorescence returning) or cleaning solution residue. These can prevent paint adhesion. If you find any, re-clean the specific area.
This meticulous inspection helps prevent issues after the paint is applied. It is a small step that yields big results.
Ensuring Complete Drying Time
Brick is a porous material. It absorbs and holds moisture. Painting over damp brick is one of the biggest mistakes you can make. The moisture will try to escape, causing blisters, bubbles, and paint failure. I always emphasize patience here.
- Patience is key: The general rule of thumb is to allow at least 2-3 sunny, dry days for the brick to dry completely after cleaning. If you used significant amounts of water or if the weather is humid, extend this time.
- Test for dryness: You can use a simple test. Tape a 1-foot square piece of clear plastic sheeting to the brick. Seal all four edges with painter’s tape. Leave it in place for 24 hours. If moisture condenses under the plastic, the brick is still wet. Wait longer and retest.
- Humidity and temperature: Drying time depends heavily on humidity and temperature. Brick dries slower in high humidity or cool conditions. Ideal conditions are warm, sunny, and low-humidity days.
- Ventilation: For interior brick, ensure good ventilation to help dissipate moisture. Use fans if necessary.
Do not guess if the brick is dry. Be absolutely certain. Painting a dry, clean, and prepared brick surface ensures optimal paint adhesion and a durable, beautiful finish for your home. Your hard work in cleaning will be truly rewarded.
FAQ Section
How long should brick dry before painting?
Brick needs to dry completely before painting. This usually takes at least 2-3 sunny, dry days after cleaning. In humid conditions or after heavy washing, it may need a week or more. Perform a moisture test by taping plastic to the brick; if condensation appears after 24 hours, wait longer.
Can I paint brick without cleaning it first?
No, you should never paint brick without proper cleaning. Dirt, grime, mold, efflorescence, and loose debris will prevent paint from adhering correctly. This leads to cracking, peeling, and a short-lived paint job. Cleaning is a vital step for paint durability.
What is the best cleaner for brick before painting?
The best cleaner depends on the type of dirt. For general dirt, a mild detergent or TSP substitute works. For mold, use a bleach and water solution. For efflorescence or tough stains, a diluted acid cleaner or specialized brick cleaner might be needed. Always test in an inconspicuous area first.
Do I need to prime brick after cleaning and before painting?
Yes, priming brick after cleaning and before painting is highly recommended. Primer seals the porous surface, provides a uniform base, and promotes strong adhesion for the topcoat. Use a high-quality 100% acrylic latex masonry primer for best results.
How do I remove efflorescence from brick?
Remove efflorescence by first dry brushing. Then, wash with a mixture of white vinegar and water (1:1). For severe cases, use a specialized efflorescence cleaner or diluted muriatic acid, always following safety precautions. Rinse thoroughly. Address the moisture source to prevent its return.
Can I use a pressure washer to clean brick?
Yes, you can use a pressure washer, but with caution. Use a low-pressure setting (1200-1500 PSI) and keep the nozzle at least 12-18 inches from the brick. High pressure can damage mortar and brick. Always test in a small, hidden area first to ensure it does not harm the surface.
Conclusion
Cleaning brick before painting is not merely an optional step; it is the absolute foundation for a successful and lasting paint job. I have learned this through experience. You have learned how critical this preparation is, from initial inspection to final drying. You now understand how to tackle general dirt, tough stains like mold and efflorescence, and even perform necessary repairs.
A clean, properly prepared brick surface accepts paint beautifully. It resists peeling, bubbling, and premature wear. Taking the time for thorough cleaning ensures your efforts result in a durable and visually appealing finish. Do not rush this vital stage. Invest your time and effort in proper preparation. Your freshly painted brick will thank you with years of vibrant, protective beauty. Get ready to transform your space with confidence!
- brick cleaning
- painting preparation
- exterior painting
- interior brick
- surface preparation


