· Todd Martin · Kitchen Maintenance · 21 min read
How To Clean Black Cabinets
Keeping Your Black Cabinets Spotless: A Comprehensive Guide
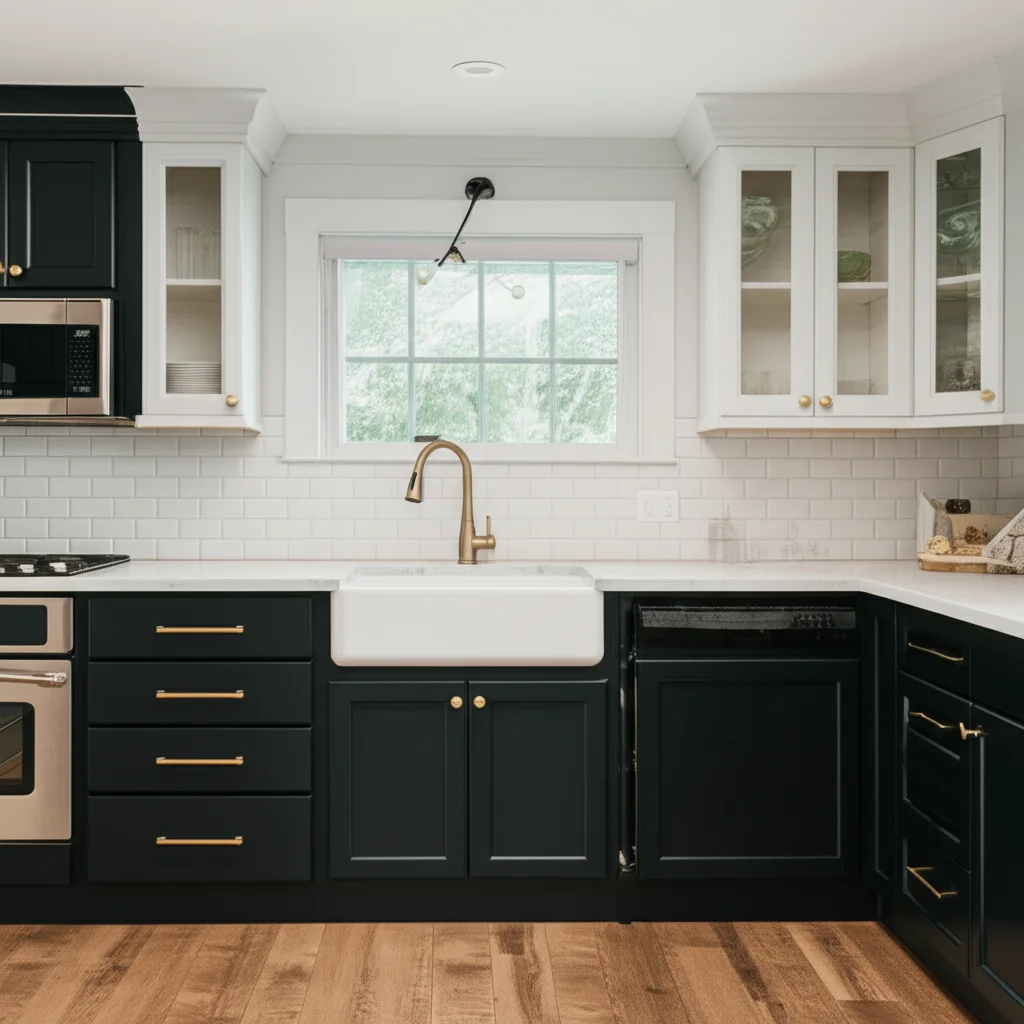
Black cabinets bring a sleek, modern touch to any kitchen or room. They offer a striking contrast and sophisticated look. However, these beautiful dark surfaces also show every fingerprint, dust particle, and splatter. This can make keeping them clean seem like a constant battle. I know the feeling of wiping them down only to see streaks appear right after.
Learning how to clean black cabinets effectively is crucial for maintaining their elegant appearance. This guide will walk you through everything you need to know. We will cover daily cleaning tips, how to tackle tough grease, and specific care for different finishes. You will discover the right tools and techniques to keep your black cabinets looking pristine.
Takeaway:
- Use gentle cleaners and soft cloths for routine cleaning.
- Address spills and splatters immediately to prevent stains.
- Choose cleaning methods based on your cabinet’s finish (matte, gloss, wood).
- Avoid harsh chemicals and abrasive tools to protect surfaces.
- Implement a consistent cleaning schedule for lasting shine.
To clean black cabinets, gently wipe surfaces with a damp microfiber cloth and a mild soap solution. Follow with a clean, damp cloth to remove any residue. Finish by drying immediately with a separate, dry microfiber cloth to prevent streaks and water spots. This method ensures a pristine finish without damage.
The Allure and Challenge of Black Cabinets
Black cabinets are a popular design choice. They add depth and sophistication to any space. Many homeowners love their bold statement and modern appeal. I often find myself admiring kitchens with these dramatic features.
However, their dark color also highlights dust, smudges, and grease. Every fingerprint seems to stand out on black surfaces. This can be frustrating when you want a clean, polished look. Understanding these challenges helps us prepare for effective cleaning. We can then choose the right methods to keep them looking their best.
These cabinets are worth the effort. They provide a stunning backdrop for other kitchen elements. A little knowledge makes maintaining their beauty much easier. Let’s explore how to overcome these cleaning hurdles together.
Essential Tools and Cleaning Solutions for Black Cabinets
Choosing the right supplies is the first step in cleaning black cabinets. You need items that clean effectively without causing damage. I always make sure I have these on hand before I start. Using the wrong products can leave streaks or harm the finish.
Here are the essential tools and safe cleaning solutions:
- Microfiber Cloths: These are your best friend for black cabinets. They are soft, highly absorbent, and lint-free. This helps prevent streaks. Always have several clean ones ready.
- Mild Dish Soap: A few drops mixed with warm water create an effective, gentle cleaning solution. This is safe for most cabinet finishes. It helps break down light grease and grime.
- Warm Water: Use warm water for mixing with soap and for rinsing. It helps dissolve dirt more effectively than cold water.
- Spray Bottle: A spray bottle allows for even application of your cleaning solution. This prevents oversaturation of the cabinet surfaces.
- Bucket: Use a bucket for mixing your cleaning solution. You will also need one for clean rinse water.
For tougher spots, consider these specialized solutions:
- White Vinegar Solution (diluted): Mix equal parts white vinegar and water. This is excellent for cutting through grease and removing streaks. Be careful with high-gloss or natural wood finishes, as vinegar can be too strong if not properly diluted or if used too often. For more general advice on how to clean kitchen cabinets without removing finish, ensure you test any solution first.
- Rubbing Alcohol (diluted): For stubborn fingerprints or greasy marks, a solution of 70% rubbing alcohol diluted with water can work wonders. Apply it sparingly to a microfiber cloth, not directly to the cabinet.
- Commercial Cabinet Cleaner (pH-neutral): Look for cleaners specifically designed for kitchen cabinets. Ensure they are pH-neutral and safe for your specific cabinet material. Always check the product label for compatibility.
Always test any new cleaning solution on an inconspicuous area first. This prevents potential damage to your cabinet’s finish. A small test spot will show you how the cabinet reacts. This step is important for long-term care.
Step-by-Step Guide to Daily and Weekly Black Cabinet Cleaning
Maintaining black cabinets requires a consistent cleaning routine. Daily and weekly care prevents dirt buildup and keeps them looking their best. I find that a little effort each day saves a lot of work later. This routine helps prevent tough stains from setting in.
Here is a step-by-step guide for regular cleaning:
Daily Quick Clean:
- Wipe Down Spills Immediately: If you spill anything on your cabinets, wipe it up at once. Use a soft, damp cloth. Immediate action prevents stains and stickiness.
- Dust Regularly: Use a dry, clean microfiber cloth to quickly dust the surfaces. Dust shows easily on black cabinets. A quick daily wipe keeps them looking fresh. This is especially important in high-traffic kitchen areas.
Weekly Deep Clean:
- Prepare Your Solution: Mix a few drops of mild dish soap with warm water in a spray bottle. You can also use a bucket if you prefer. Avoid too much soap, as it can leave residue.
- Lightly Dampen a Cloth: Spray your solution onto a clean microfiber cloth. Do not spray directly onto the cabinets. This prevents excess moisture from damaging the cabinet material. For tips on handling sticky surfaces, you might find useful information on how to clean sticky kitchen cabinets.
- Wipe Down Surfaces: Starting from the top, gently wipe all cabinet surfaces. Pay attention to areas around handles and knobs, where fingerprints gather. Use light, even strokes.
- Rinse with Clean Water: Dip a separate clean microfiber cloth into plain warm water. Wring it out thoroughly until it is just damp. Wipe down the cabinets again to remove all soap residue. This step is critical for preventing streaks.
- Dry Immediately: Use a third, dry, clean microfiber cloth to thoroughly dry the cabinets. Do not let water air dry on black surfaces. This is the most important step to prevent water spots and streaks. Work quickly and efficiently.
Special Attention to Details:
- Handles and Knobs: These areas get touched often. Clean them thoroughly with your solution. They can harbor dirt and grease.
- Cabinet Edges and Corners: Dust and grime can collect in these less visible spots. Give them a quick wipe.
- Inside Cabinets (Optional): Once a month, quickly wipe the inside of your cabinets. This maintains overall cleanliness.
By following this routine, your black cabinets will maintain their beautiful, streak-free appearance. It makes a big difference in how your kitchen looks and feels.
Tackling Stubborn Stains and Grease on Black Cabinets
Stubborn stains and grease buildup are common challenges, especially in the kitchen. Black cabinets, unfortunately, tend to highlight these issues. But don’t worry, there are effective ways to tackle them without harming your finish. I’ve faced these battles myself and found what works best. The key is to act quickly and use the right approach.
Here’s how to handle different types of tough messes:
For Greasy Buildup:
Kitchen cabinets, particularly those near the stove, often accumulate a layer of grease mixed with dust. This creates a sticky film.
- Mild Dish Soap Paste: Mix a small amount of mild dish soap with just enough warm water to form a paste. Apply this paste directly to the greasy spots using a soft cloth or sponge. Let it sit for a few minutes to break down the grease. This is a very effective method for how to clean grease from kitchen cabinets.
- White Vinegar Solution (for resilient grease): For tougher grease, mix equal parts white vinegar and warm water in a spray bottle. Spray the solution onto a clean microfiber cloth, not directly onto the cabinet. Wipe the greasy area. Vinegar is acidic and helps cut through grease. Always follow up with a plain water rinse and immediate drying. Be cautious with this on very delicate finishes.
- Baking Soda Paste: For extremely stubborn, sticky grease, create a paste using baking soda and a little water. Apply it to the affected area. Gently rub with a soft cloth or your fingers. Baking soda is a mild abrasive that can help lift the grime. Rinse thoroughly afterward.
For Fingerprints and Smudges:
Fingerprints are a constant on black cabinets, especially on high-gloss finishes.
- Damp Microfiber Cloth: For fresh fingerprints, a slightly damp microfiber cloth often does the trick. Wipe gently.
- Rubbing Alcohol Solution: For persistent smudges and fingerprints that seem to resist water, dilute rubbing alcohol (70%) with an equal part of water. Dampen a microfiber cloth with this solution and gently wipe the affected areas. Rubbing alcohol evaporates quickly, helping to prevent streaks. Always dry immediately with a clean, dry cloth.
For Food Splatters and Sticky Residue:
Dried food splatters can be hard to remove.
- Warm, Damp Cloth Compression: Place a warm, wet microfiber cloth over the dried splatter for a few minutes. This softens the residue, making it easier to wipe away.
- Gentle Scraping (if necessary): For very stubborn, hardened bits, use a plastic scraper or your fingernail. Be extremely careful not to scratch the cabinet surface. Follow up with a damp cloth and mild cleaner.
Always remember to wipe gently and avoid harsh scrubbing motions. Excessive force can damage the cabinet finish. After treating any stain, always wipe down the area with a clean, damp cloth to rinse, and then immediately dry it with a separate, dry microfiber cloth to ensure no streaks or water spots are left behind. Regular cleaning helps prevent these tough situations from becoming a major issue.
Cleaning Different Finishes: Matte, Gloss, and Wood Grain Black Cabinets
Black cabinets come in various finishes, and each requires a slightly different approach to cleaning. What works for a high-gloss finish might streak a matte one, and vice versa. Knowing your cabinet’s finish is key to proper care. I’ve learned this through trial and error with different types of black surfaces.
1. Cleaning Matte Black Cabinets
Matte finishes are very popular for their sleek, non-reflective look. They hide minor imperfections better than gloss, but they can show oil marks and fingerprints more readily. The biggest challenge is avoiding shiny spots or streaks.
- Gentle Cleaning: Always use the mildest possible solution. A simple mix of warm water and a few drops of mild dish soap is usually best.
- Application: Dampen a soft microfiber cloth with the solution. Wipe down the cabinets in straight lines, not circles. This helps prevent streaking.
- Rinsing and Drying: Rinse with a clean, damp cloth to remove all soap residue. Immediately dry with a fresh, completely dry microfiber cloth. This is critical. Air drying will almost certainly leave water spots or streaks.
- Avoid: Do not use abrasive cleaners, wax-based products, or polishing sprays. These can create shiny spots on the matte finish, ruining its uniform appearance. Oils from your hands can also leave shiny marks, so be mindful when handling them.
2. Cleaning High-Gloss Black Cabinets
High-gloss black cabinets are stunning. They reflect light and make a space feel larger. However, they are a magnet for fingerprints and show every single streak. They require careful handling to maintain their reflective shine.
- Streak Prevention is Key: The goal here is a streak-free shine. Use a very dilute solution of mild dish soap and warm water. Alternatively, a 50/50 mix of distilled water and white vinegar works wonders for many. For cleaning other surfaces like how to clean black appliances or how to clean black glass stove top without streaks, a similar method can often be applied.
- Application: Spray your chosen solution onto a clean microfiber cloth, never directly onto the cabinet. Wipe down the surface gently.
- Two-Cloth Method: Use one damp cloth to clean, and a second, separate dry microfiber cloth to polish immediately. Work in small sections. Buff gently until the surface is completely dry and shiny. This ensures no water marks or streaks are left behind.
- Avoid: Steer clear of paper towels or rough sponges, as they can scratch the high-gloss surface. Ammonia-based cleaners can also be too harsh and may dull the finish over time.
3. Cleaning Black Wood Grain Cabinets (Painted or Stained Wood)
Black cabinets can also be made of wood, either painted black or stained a very dark color. These require consideration for the underlying wood material. Many of the principles for how to clean wood cabinets apply here.
- Gentle Cleaners: Use mild dish soap and warm water. Avoid strong chemicals, abrasive cleaners, or excessive moisture. Wood can swell or warp with too much water.
- Wiping Direction: Always wipe along the grain of the wood. This helps to lift dirt from the grain and prevents streaks.
- Immediate Drying: As with other finishes, prompt drying with a soft, clean cloth is essential. This protects the wood from water damage and prevents water spots.
- Polishing (Optional): For painted wood, you might use a non-wax furniture polish designed for painted surfaces to enhance shine. For stained wood, a wood conditioner can help keep the wood nourished, but ensure it’s compatible with the dark stain and won’t leave a greasy residue. Test in an inconspicuous area first.
- Avoid: Do not use harsh scrubbing pads or steel wool, as they will scratch the wood and its finish. Also, be mindful of excessive moisture sitting on the wood.
By tailoring your cleaning method to the specific finish of your black cabinets, you can ensure they remain beautiful and well-maintained for years to come.
Maintaining the Luster: Tips for Long-Term Black Cabinet Care
Keeping your black cabinets looking fantastic isn’t just about cleaning; it’s also about ongoing maintenance and protective habits. With black surfaces, every bit of dust and every tiny scratch is more visible. I have found that a proactive approach significantly extends their pristine appearance. These long-term care tips will help preserve their luster and reduce the need for intensive cleaning.
Here are my top tips for maintaining the beauty of your black cabinets:
- Regular Dusting is Non-Negotiable: Black surfaces act like a spotlight for dust. Make dusting a daily or every-other-day habit, especially in dry environments. Use a soft, dry microfiber cloth or a feather duster. This prevents dust accumulation that can become harder to remove.
- Address Spills and Splatters Immediately: This is the golden rule for all kitchen surfaces. Acidic foods, oils, or even plain water can leave marks if left too long. Wipe them up immediately with a soft, damp cloth. Follow with a dry cloth.
- Use Proper Ventilation: When cooking, especially frying or boiling, turn on your range hood. This helps to remove airborne grease and moisture before it settles on your cabinets. Less grease in the air means less grease accumulating on your cabinets.
- Protect from Heat and Moisture: Avoid placing hot appliances like coffee makers or toaster ovens directly under or too close to black cabinets without proper ventilation. The heat and steam can damage the finish over time. Similarly, wipe up any condensation from cold drinks.
- Use Gentle Cleaning Products: Stick to mild dish soap and water for routine cleaning. Avoid harsh chemicals, abrasive cleaners, or scrub pads. These can dull the finish, cause scratches, or even strip the protective layer. Even if you are tackling a tough job, like preparing cabinets for a new look, consider methods outlined in how to clean cabinets before painting, but adapt for a gentle approach.
- Avoid Wax or Silicone-Based Polishes (Unless Specific for Finish): While some specific products are designed for black finishes, general furniture polishes containing wax or silicone can build up. They may leave a hazy film or attract more dust over time on black surfaces. If you want to enhance shine, ensure the product is explicitly safe for your cabinet’s finish.
- Be Mindful of Abrasions: Black surfaces show scratches easily. Avoid dragging rough objects across them. Use soft cloths for cleaning and handling. If you have objects on display, place felt pads underneath them.
- Consistent Drying: After any cleaning, drying your black cabinets immediately and thoroughly is the most important step for preventing streaks and water spots. This simple step preserves the shine.
By integrating these habits into your routine, you can significantly reduce the effort needed for deep cleaning. Your black cabinets will continue to be a striking and beautiful feature in your home for many years.
Common Mistakes to Avoid When Cleaning Black Cabinets
Cleaning black cabinets requires a delicate touch. Making common mistakes can easily lead to streaks, dullness, or even permanent damage. I’ve made some of these errors myself when I first started cleaning these types of surfaces. Learning what not to do is just as important as knowing what to do.
Here are the most common pitfalls to avoid:
Using Abrasive Cleaners or Tools:
- Mistake: Using scour pads, steel wool, harsh scrub brushes, or powdered abrasive cleaners.
- Why it’s wrong: These tools and cleaners will scratch and dull the finish of your black cabinets, especially high-gloss or matte surfaces. Scratches are very noticeable on dark colors.
- Solution: Stick to soft microfiber cloths and gentle sponges.
Applying Cleaner Directly to Cabinets:
- Mistake: Spraying cleaning solutions directly onto the cabinet surface.
- Why it’s wrong: This can lead to oversaturation, especially on wood-based cabinets, potentially causing swelling or warping. It also makes it harder to control the amount of product and can leave drips and streaks.
- Solution: Always spray your cleaning solution onto a clean microfiber cloth first, then wipe the cabinet.
Not Rinsing or Drying Thoroughly:
- Mistake: Leaving soap residue on the cabinets or allowing them to air dry.
- Why it’s wrong: Soap residue leaves a sticky film that attracts dust and grime. Air drying, especially with hard water, will result in unsightly water spots and streaks, which are highly visible on black.
- Solution: Always use a separate, clean, damp cloth to rinse after cleaning, then immediately dry with a third dry microfiber cloth. Work quickly and efficiently.
Using Harsh Chemical Cleaners:
- Mistake: Opting for strong multi-surface cleaners, ammonia-based products, or bleach.
- Why it’s wrong: These chemicals can strip the finish, cause discoloration, or leave a dull, hazy appearance over time. They are too aggressive for most cabinet finishes.
- Solution: Rely on mild dish soap and water, or a diluted vinegar solution. Always check the manufacturer’s recommendations for your specific cabinet type.
Ignoring Spills and Splatters:
- Mistake: Letting spills, especially greasy or acidic ones, sit on the cabinet surface.
- Why it’s wrong: Spills dry and harden, becoming much harder to remove. Acidic liquids can etch the finish, and oils can leave stubborn stains.
- Solution: Wipe up spills as soon as they happen. Immediate action prevents stains and long-term damage.
Using Dirty or Lint-Producing Cloths:
- Mistake: Reusing dirty cloths or using cloths that shed lint.
- Why it’s wrong: Dirty cloths will just spread grime around, and lint will cling to the black surface, making your efforts useless.
- Solution: Always use clean, lint-free microfiber cloths. Have several on hand so you can switch them out as they get dirty.
By being aware of these common mistakes, you can avoid frustrating outcomes and ensure your black cabinets remain pristine and beautiful for years. Consistency and using the right techniques are key to their longevity and aesthetic appeal.
Advanced Cleaning Techniques for Specific Black Cabinet Issues
Sometimes, regular cleaning isn’t enough. Black cabinets can face specific issues that require a more targeted approach. These advanced techniques help address particular problems that might appear over time. I’ve found these methods useful for those tricky situations.
Removing Scuff Marks:
Black cabinets can easily show light scuff marks, especially in high-traffic areas.
- Pencil Eraser: For minor scuffs, gently rub the mark with a clean, white pencil eraser. Test this in an inconspicuous spot first to ensure it doesn’t leave a residue or lighten the finish.
- Baking Soda Paste (mild abrasive): Mix a small amount of baking soda with water to create a paste. Apply it to the scuff mark with a soft cloth. Gently rub in a circular motion. Baking soda acts as a very mild abrasive. Rinse thoroughly and dry immediately.
Restoring Shine to Dull Areas (Glossy Finishes):
Over time, even glossy black cabinets can lose some of their luster.
- Distilled Water & Microfiber: Often, dullness comes from residue. Wipe down the dull area with a cloth dampened with distilled water. Distilled water contains no minerals, which can cause streaks and haziness.
- Specialized Polish: If the dullness persists, look for a non-abrasive cabinet polish specifically designed for black or dark finishes. Ensure it’s safe for your cabinet material (e.g., painted wood, laminate). Apply sparingly with a clean microfiber cloth and buff to a shine. Always follow product instructions.
Dealing with Water Rings or Etching:
Water rings can be particularly noticeable on black surfaces, especially if water is left to sit.
- Mayonnaise (for wood finishes): For water rings on black wood cabinets, a dab of mayonnaise can sometimes work wonders. Apply a small amount to the ring and let it sit for several hours or even overnight. The oil in the mayonnaise can help draw out the moisture. Wipe away and buff clean. This method is best for how to clean stains on wood.
- Vinegar & Olive Oil (for wood finishes): Mix equal parts white vinegar and olive oil. Apply with a soft cloth and rub gently along the grain. The vinegar helps to remove the mark, and the olive oil helps to condition the wood. This is strictly for wood cabinets, not laminates or painted finishes.
- Professional Help: For severe etching (where the finish is actually damaged), professional repair or refinishing might be the only solution.
Removing Adhesive Residue:
If you have sticky residue from tape or labels, approach it carefully.
- Warm, Soapy Water: First, try softening the adhesive with a cloth soaked in warm, mild soapy water. Let it sit for a few minutes.
- Rubbing Alcohol: If that doesn’t work, dampen a corner of a microfiber cloth with rubbing alcohol (70% isopropyl alcohol). Gently dab and rub the adhesive. Alcohol helps dissolve many types of glue. Test first in an hidden area, as alcohol can affect some finishes.
- Oil-Based Product: For very stubborn residues, a tiny amount of olive oil or mineral oil on a cloth can sometimes help. The oil helps to break down the adhesive. Wipe thoroughly with a clean, damp cloth and then dry immediately to remove all oil residue.
These advanced techniques should be used sparingly and always with caution. A small test patch in an inconspicuous area is always a smart first step before applying any new solution to a larger surface.
When to Call a Professional for Your Black Cabinets
While most cleaning issues for black cabinets are manageable with DIY methods, there are times when professional help is the best course of action. Recognizing these situations can save you time, money, and further damage. I’ve learned that some jobs are simply beyond standard home care.
Here are scenarios where consulting a professional is recommended:
- Deep Scratches or Gouges: If your black cabinets have deep scratches or gouges that penetrate the finish and expose the underlying material, a professional can often repair or blend the damage. DIY attempts might make the damage more noticeable or cause further harm.
- Significant Water Damage: If wood black cabinets have been exposed to prolonged moisture, leading to swelling, warping, or bubbling of the finish, these issues require professional restoration. This is especially true for laminate black cabinets where the laminate layers are separating.
- Extensive Discoloration or Fading: Over time, areas of black cabinets, especially those exposed to sunlight or harsh cleaning products, might fade or discolor unevenly. A professional can assess whether refinishing or repainting is needed to restore a uniform color.
- Mold or Mildew Infestation: While surface mold can be tackled with diluted vinegar (as explored in guides like how to clean mold with vinegar), persistent mold growth, particularly inside cabinets or in areas with poor ventilation, may indicate a larger moisture problem. A professional can identify the source and properly remediate the mold without damaging the cabinet structure.
- Dullness that Won’t Polish Out: If your glossy black cabinets have lost their sheen despite proper cleaning and attempts to polish, it might indicate that the top protective layer is worn. A professional can assess if a new clear coat or a complete refinishing is necessary.
- Paint or Stain Stripping: If you are trying to change the color of your black cabinets, or if the existing paint/stain is peeling badly, a professional painter or cabinet refinisher can strip the old finish properly. This ensures a smooth, durable base for a new look. Doing this improperly can damage the wood beneath.
- Major Structural Damage: If cabinet doors are sagging, hinges are broken, or the cabinet box itself is damaged, a handyman or cabinet repair specialist is needed. Cleaning alone cannot fix these structural problems.
A professional has the expertise, specialized tools, and materials to handle complex cabinet issues. They can also provide advice on preventative measures for the future. Don’t hesitate to seek their help when the problem is beyond a simple clean. It ensures the longevity and beauty of your black cabinets.
Frequently Asked Questions About Cleaning Black Cabinets
How often should I clean black kitchen cabinets?
Daily quick dusting and wiping of spills are ideal. A thorough wipe-down with a mild soap solution should happen weekly. Areas around the stove or sink may need more frequent spot cleaning. This consistent routine prevents stubborn grime buildup, keeping your black cabinets looking fresh and clean.
What is the best cleaner for black cabinets?
The best cleaner is often the simplest: a few drops of mild dish soap mixed with warm water. For streak-free results, use clean microfiber cloths. For tougher grease, a diluted white vinegar solution (50/50 water and vinegar) can be effective. Always test any new cleaner in an inconspicuous spot first.
How do I remove streaks from black cabinets?
Streaks usually occur from soap residue or improper drying. To remove them, wipe the streaky area with a clean, damp microfiber cloth moistened with plain water. Immediately follow with a completely dry microfiber cloth, buffing until all moisture is gone. Quick,
- black cabinets
- cabinet cleaning
- kitchen cleaning
- home maintenance
- streak-free cleaning

Todd Martin
Senior Writer
With over 15 years of experience in home renovation and design, I started HEG to share what I’ve learned with homeowners who want to create spaces that are both beautiful and functional. I’ve always believed in a hands-on approach, and over the years, I’ve picked up practical solutions that actually work. Through HEG, I aim to make home improvement more approachable, sharing real tips that help you create a home you truly love.