· Todd Martin · Automotive Maintenance · 14 min read
How To Clean Aluminum Head Gasket Surface
Clean Your Aluminum Head Gasket Surface Safely
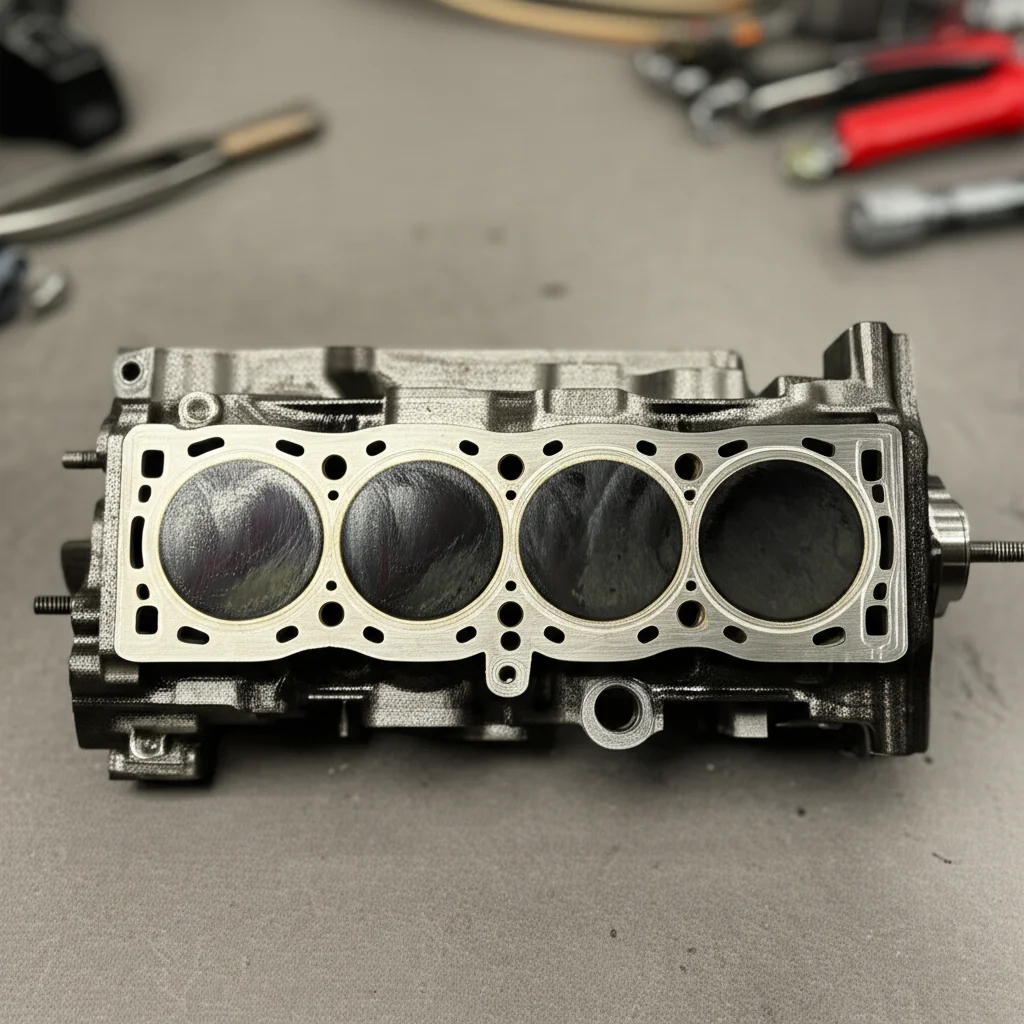
Replacing a head gasket is a critical task in automotive repair. A successful repair depends heavily on one vital step: preparing the mating surfaces. When you work with an aluminum head, this preparation becomes even more important. Aluminum is softer than cast iron, so it requires gentle handling. Knowing how to properly clean aluminum head gasket surface ensures a leak-free seal and long-term engine health.
Many people overlook this step, leading to future gasket failures. I have seen countless engine problems traced back to poor surface preparation. This guide will walk you through the precise steps to clean your aluminum cylinder head gasket surface. We will cover necessary tools, safe cleaning methods, and essential inspection tips. Let us prepare your engine for a perfect seal.
Takeaway
Properly cleaning an aluminum head gasket surface is crucial for engine longevity.
- Always use non-abrasive tools to protect the softer aluminum.
- Remove all old gasket material and carbon deposits thoroughly.
- Inspect the surface for scratches or imperfections before reassembly.
Answer
To properly clean an aluminum head gasket surface, carefully scrape off old gasket material with a plastic or brass scraper. Use a dedicated gasket remover chemical and a soft abrasive pad (like Scotch-Brite) to clean residual deposits. Always ensure the surface is smooth, clean, and free of scratches for a perfect seal.
Why Cleaning Your Engine’s Gasket Surface Matters
Cleaning the gasket surface of an engine’s cylinder head is not just a suggestion; it is a requirement. This step directly impacts the integrity of your new head gasket. A clean surface ensures a perfect seal between the cylinder head and the engine block. Any leftover gasket material, carbon deposits, or corrosion can create high spots. These high spots prevent the new gasket from seating correctly.
An uneven surface can lead to leaks. Engine oil, coolant, or combustion gases can escape. This causes engine overheating, loss of power, or catastrophic engine damage. I have seen engines fail prematurely simply because someone skipped this vital cleaning step. Taking the time to clean the surface properly saves you headaches and money down the road.
Furthermore, aluminum heads are prone to corrosion if coolant leaks occur. The corrosion can embed into the surface. Standard cleaning methods might not remove it. You need specific techniques to handle these tough residues without damaging the aluminum. Proper cleaning extends the life of your engine and ensures peak performance. Ignoring this step is an expensive mistake in the automotive world.
Essential Tools and Materials for Head Gasket Surface Cleaning
Gathering the right tools and materials is the first step in cleaning an aluminum head gasket surface. Using incorrect tools can damage the delicate aluminum. You want to choose tools that are firm enough to remove old gasket material but soft enough not to scratch the metal. My toolkit for this job always includes specific items.
First, you need protective gear. Safety glasses and gloves are non-negotiable. Chemical cleaners can irritate skin and eyes. Next, select your scraping tools. Plastic or brass scrapers are ideal for aluminum. Avoid steel scrapers, as they will scratch the softer aluminum surface. A razor blade held at a low angle can be used with extreme caution for very stubborn spots, but I prefer less aggressive options first.
For cleaning agents, a dedicated gasket remover spray works wonders. These chemicals break down old gasket material. Mineral spirits or brake cleaner can also help degrease the surface after scraping. Some people use a light abrasive pad, like a grey or white Scotch-Brite pad, with the chemical cleaner. Never use aggressive abrasives like sandpaper or wire brushes directly on aluminum. These will alter the surface finish and prevent a good seal.
Finally, you will need clean rags or lint-free cloths. These are for wiping away debris and applying cleaners. Compressed air is also helpful for blowing away loose particles from bolt holes and passages. Ensure you have all these items ready before you begin the cleaning process. Having everything at hand makes the job smoother and safer.
Step-by-Step Gasket Removal from Aluminum Heads
Removing the old gasket material is the most crucial part of preparing an aluminum head gasket surface. You must do this carefully to avoid damaging the cylinder head. I always start with a thorough visual inspection of the area. This helps me identify any heavily stuck areas or significant corrosion.
First, ensure the cylinder head is cool. Working on hot metal can be risky and less effective. Use your plastic or brass scraper to gently push along the surface. Hold the scraper at a very low angle, almost flat against the aluminum. This technique helps lift the old gasket without gouging the softer metal. Apply consistent, light pressure. Do not try to force off large chunks. Take your time and work slowly across the entire surface.
For stubborn sections, spray a gasket remover chemical directly onto the old material. Let it sit for the recommended time, usually 5-10 minutes. The chemical will soften the gasket residue. After soaking, re-scrape the area with your plastic or brass scraper. You will notice the material comes off much easier. I sometimes use a soft nylon brush to agitate the softened material gently.
After scraping, wipe the surface clean with a lint-free cloth. Inspect closely for any remaining bits. Pay extra attention to bolt holes and water/oil passages. Any loose debris here can enter the engine. A vacuum cleaner or compressed air can help remove these small particles from the passages. Remember, thoroughness now saves you from future headaches.
Safe Cleaning Techniques for Aluminum Head Surfaces
Cleaning an aluminum head gasket surface requires specific techniques to maintain its integrity. Aluminum is softer than steel, so harsh methods can easily scratch or gouge it. These imperfections compromise the new gasket’s seal. I always prioritize methods that clean effectively without causing damage.
After removing the bulk of the old gasket material, you will likely have residual stains or small specks. This is where chemical cleaners shine. Apply a dedicated gasket remover spray. Let it dwell for the time specified by the manufacturer. This allows the chemicals to dissolve the remaining deposits. After the dwell time, gently scrub the surface with a non-abrasive pad. A grey or white Scotch-Brite pad is perfect for this. These pads are less aggressive than green or red ones.
You can also use mineral spirits or brake cleaner for degreasing and removing light residue. Spray it onto a clean, lint-free cloth and wipe the surface. This step helps remove any oily film left behind by the gasket remover. Ensure complete evaporation before the next step. For general aluminum cleaning, understanding how to handle its unique properties is helpful. You can learn more about general aluminum cleaning with household products here: how to clean aluminum rims with household products.
Another effective method involves specific cleaning tools that spin. These are often called “abrasive discs” or “gasket removal wheels.” They attach to a drill. It is important to use the correct type for aluminum, which will be labeled “non-abrasive” or “for aluminum.” These discs have a very fine grit and are designed to polish the surface rather than remove metal. Use them at low speeds with very light pressure. Move the tool consistently across the surface. This prevents creating low spots. Always follow the manufacturer’s instructions for these tools.
Dealing with Stubborn Residue and Corrosion on Aluminum
Sometimes, you encounter truly stubborn residues or corrosion on an aluminum head gasket surface. This requires more focused attention. Never resort to aggressive methods like coarse sandpaper or grinding discs. These will permanently damage the delicate aluminum surface. The goal is always to clean, not to remove metal.
For deeply embedded old gasket material or hard carbon deposits, you might need a specialized carbon scraper. These are designed to be sharp but less likely to gouge than a steel scraper. Hold it at a very shallow angle. Work slowly, applying consistent, light pressure. Repeated applications of gasket remover spray combined with careful scraping often do the trick. You can also try using a small, stiff nylon brush with the chemical for agitation.
Corrosion, especially from coolant leaks, can be tricky. Aluminum oxides form a tough, white, powdery layer. A dilute acid solution, like a specialized aluminum cleaner, can sometimes help dissolve this. However, use these products with extreme caution. Always test on an inconspicuous area first. Neutralize and rinse thoroughly afterward to prevent further corrosion. For very light corrosion, a fine abrasive pad with mineral spirits might be enough.
In extreme cases of deep corrosion or pitting, the cylinder head might require professional machining. This process, called “resurfacing” or “decking,” shaves a tiny layer of metal off the surface. It creates a perfectly flat and smooth finish. This is a last resort. It ensures the gasket has an ideal mating surface. If your cylinder head has significant damage, professional help is the best option.
Inspecting the Gasket Surface for Perfect Flatness
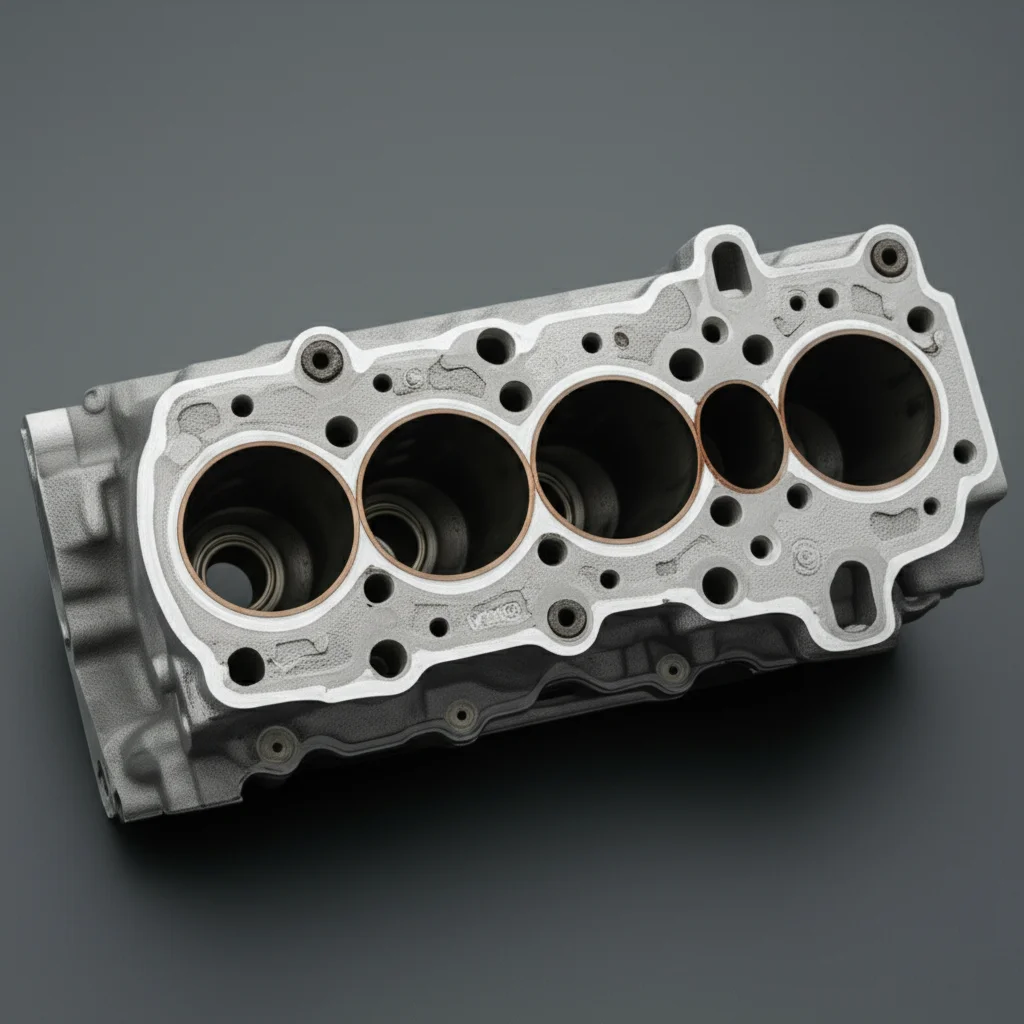
After you finish cleaning the aluminum head gasket surface, a critical inspection step follows. This determines if the surface is truly ready for a new gasket. Even minor imperfections can lead to gasket failure. My inspection process is meticulous; I leave no stone unturned.
First, visually inspect the entire surface under good lighting. Look for any remaining bits of gasket, carbon, or corrosion. Use a magnifying glass if necessary. Pay close attention to the areas around the combustion chambers and coolant passages. These are high-stress areas. Ensure all bolt holes are clean and free of debris. Any small particle here could prevent a bolt from torquing correctly.
Next, you must check for flatness. This is paramount for a proper seal. Use a precision straightedge and feeler gauges. Place the straightedge across the cylinder head surface in multiple directions.
- Place it lengthwise, both straight and diagonally.
- Place it widthwise.
- Place it across cylinder bores.
After placing the straightedge, try to slide a feeler gauge underneath it. Consult your engine’s service manual for the acceptable flatness tolerance. Typically, this is a very small measurement, like 0.002 to 0.004 inches. If a feeler gauge thicker than the specified tolerance slides under the straightedge, the head is warped. If you need to clean the head without removing other components, similar precision is required. You can find more details on cleaning cylinder heads without removing valves here: how to clean cylinder head without removing valves.
Any visible scratches, nicks, or pits also require attention. Even minor scratches can create leak paths. If you find deep scratches, the head may need professional resurfacing. Do not skip this flatness check. It is the definitive test for readiness. A perfectly flat and clean surface is the foundation for a successful head gasket replacement.
Common Mistakes to Avoid When Cleaning Aluminum Heads
Cleaning an aluminum head gasket surface can seem straightforward, but common mistakes lead to costly engine problems. I always advise caution and patience. Rushing this step is a recipe for disaster. Knowing what to avoid is as important as knowing what to do.
One of the most frequent mistakes is using abrasive tools. Steel wire brushes, coarse sandpaper, or aggressive grinding discs are absolute no-gos for aluminum. They will scratch, gouge, and remove material from the head. This changes the surface finish and can even cause the head to warp due to uneven material removal. Always stick to plastic or brass scrapers and fine non-abrasive pads designed for aluminum.
Another error is failing to remove all old gasket material. Tiny bits left behind, even seemingly insignificant ones, create high spots. When you torque down the new head gasket, these high spots prevent uniform pressure. This leads to leaks. Take your time with scraping and chemical cleaning. Use bright lighting and inspect closely.
Not checking for flatness is also a major oversight. As I mentioned, even a slightly warped head will not seal correctly, regardless of how clean the surface is. Always use a straightedge and feeler gauges. Skipping this step means you might assemble everything only to find you still have a leak. This forces you to redo the entire job.
Finally, do not get cleaning chemicals into engine passages. While cleaning the surface, use rags to block open ports like oil drains or coolant passages. Flush bolt holes with compressed air after cleaning to ensure no debris remains. Contaminants can damage sensitive engine components. Avoiding these common pitfalls ensures a successful and lasting repair.
Final Preparation Before Gasket Installation
Once you have meticulously cleaned and inspected your aluminum head gasket surface, you are almost ready for installation. This final preparation step is simple but crucial. It ensures the surface is pristine and ready to form a perfect seal with the new gasket. Do not overlook this last bit of care.
First, give the entire surface one final wipe-down. Use a clean, lint-free cloth dampened with brake cleaner or mineral spirits. This removes any final dust, fingerprints, or residual oils that might have settled on the surface. Allow the cleaning agent to evaporate completely. The surface must be bone-dry and perfectly clean.
Next, ensure all bolt holes are clean and dry. Use compressed air to blow out any lingering debris. Some mechanics like to run a tap into the bolt holes. This is called “chasing the threads.” This process cleans out any rust or old thread locker. It ensures the head bolts thread in smoothly and achieve proper torque. However, be careful not to remove any material from the threads. Just clean them.
Finally, prepare your new head gasket. Some gaskets require a light coating of sealer, while others are designed for dry installation. Always consult your new gasket’s instructions. Applying an incorrect sealer or too much sealer can prevent a proper seal. Handle the gasket carefully by its edges. Avoid touching the sealing surfaces with your bare hands to prevent transferring oils. With these final preparations complete, your aluminum head gasket surface is ready for the new gasket and reassembly.
Frequently Asked Questions
Can I use a wire brush on an aluminum head gasket surface?
No, never use a wire brush on an aluminum head gasket surface. Aluminum is a soft metal. A wire brush, even a brass one, can scratch, gouge, or remove material from the surface. This damage prevents the new gasket from sealing properly, leading to leaks.
What is the best chemical to clean an aluminum head gasket surface?
A dedicated automotive gasket remover spray is the best chemical for cleaning an aluminum head gasket surface. These products are formulated to dissolve old gasket material without harming the aluminum. Mineral spirits or brake cleaner can be used for final degreasing and wiping down the surface.
How do I check if an aluminum head is warped after cleaning?
To check if an aluminum head is warped after cleaning, use a precision straightedge and feeler gauges. Place the straightedge across the head in multiple directions (lengthwise, widthwise, diagonally). Slide feeler gauges under the straightedge to measure any gaps. Compare the measurements to your engine’s service manual specifications.
Can I reuse an old head gasket if it looks clean?
No, you should never reuse an old head gasket, even if it looks clean. Head gaskets are designed to compress and conform to the mating surfaces once. Reusing an old gasket means it has already been compressed. It cannot provide the same sealing ability or proper torque retention, almost guaranteeing a leak.
What happens if I don’t clean the gasket surface properly?
If you do not clean the gasket surface properly, residual material or an uneven surface will prevent the new head gasket from sealing correctly. This leads to leaks of oil, coolant, or combustion gases. These leaks can cause engine overheating, loss of power, or serious internal engine damage over time.
Is it necessary to resurface an aluminum head after cleaning?
Resurfacing an aluminum head is necessary only if it is warped beyond specification, deeply scratched, or severely pitted after cleaning. If the head is flat and free of damage after proper cleaning, resurfacing is not required. Always check flatness with a straightedge before deciding.
Conclusion
Cleaning an aluminum head gasket surface is a detailed but essential step in any head gasket replacement. It is not just about removing old material; it is about preparing a perfect foundation for a new, leak-free seal. We covered the importance of proper cleaning, selecting the right gentle tools, and using safe techniques for aluminum. We also discussed how to tackle stubborn residues and the critical inspection for flatness.
Remember, patience and precision are your best friends in this process. Avoiding common mistakes like using abrasive tools or skipping the flatness check will save you from future headaches and costly repairs. Taking the time to properly clean aluminum head gasket surface ensures your engine runs smoothly and reliably for years to come. Your engine deserves this careful attention. By following these steps, you set yourself up for a successful repair and the satisfaction of a job well done.
- aluminum head gasket
- engine repair
- gasket surface cleaning
- cylinder head preparation
- automotive cleaning

Todd Martin
Senior Writer
With over 15 years of experience in home renovation and design, I started HEG to share what I’ve learned with homeowners who want to create spaces that are both beautiful and functional. I’ve always believed in a hands-on approach, and over the years, I’ve picked up practical solutions that actually work. Through HEG, I aim to make home improvement more approachable, sharing real tips that help you create a home you truly love.