· Todd Martin · Automotive Maintenance · 19 min read
How To Clean Oil Off Engine

Restore Your Ride: How to Clean Oil Off Engine Safely
Have you ever noticed unsightly oil residue building up on your car’s engine? It can look messy and even hide more serious problems. Learning how to clean oil off engine parts is an essential skill for any car owner. A clean engine not only looks better but also runs more efficiently and helps you spot potential issues early. This guide will walk you through the process, from understanding why oil builds up to the step-by-step cleaning methods. We will also cover safety precautions, essential tools, and tips for preventing future oil accumulation. Get ready to give your engine the thorough cleaning it deserves.
Takeaway
Cleaning oil off your engine safely and effectively is crucial for performance and spotting issues.
- Always prioritize safety by allowing the engine to cool and protecting sensitive electrical components.
- Use a high-quality engine degreaser and various brushes for thorough cleaning.
- Rinse carefully and ensure the engine is completely dry before starting it.
- Regularly inspect your engine to prevent future oil buildup and address leaks quickly.
To clean oil off your engine, first ensure the engine is cool and all electrical components are covered. Apply a specialized engine degreaser, allowing it to penetrate the oil and grime. Use brushes to scrub away stubborn residue. Finally, rinse the engine thoroughly with a gentle stream of water and allow it to air dry completely before reconnecting anything or starting the vehicle.
Understanding Engine Oil Leaks and Their Impact
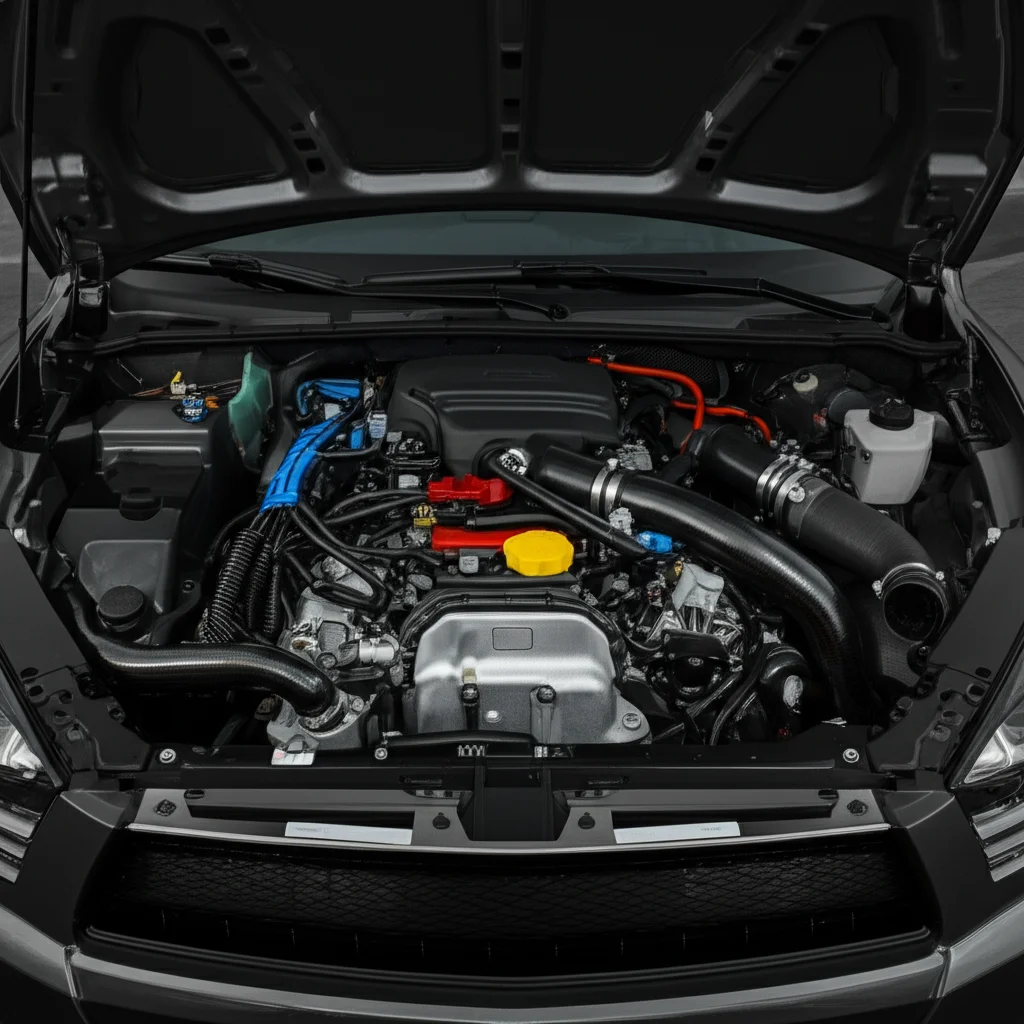
An engine is a complex system, and sometimes, oil can escape its intended path. You might see oil spots on your garage floor or notice a greasy film on engine parts. This oil buildup is not just an aesthetic issue; it points to a potential leak. Identifying and addressing these leaks promptly is key to maintaining your vehicle. Ignoring them can lead to various problems over time.
Common Causes of Engine Oil Leaks
Engine oil can escape for several reasons. Gaskets and seals are common culprits; they can dry out, crack, or become brittle with age. For instance, a worn valve cover gasket often allows oil to seep onto the top of the engine. The oil pan gasket, located at the bottom, can also fail and cause leaks. Other common leak points include the front or rear main seals, the oil filter housing, or even loose oil drain plugs. It’s important to locate the source of the leak before cleaning, as simply cleaning the oil away won’t solve the underlying problem. A small leak can often be an early warning sign.
Risks of Ignoring Oil Buildup
Ignoring oil buildup on your engine can have several negative consequences. First, accumulated oil can attract dirt and debris, forming a thick, grimy layer. This layer acts as an insulator, trapping heat and potentially causing the engine to run hotter than it should. Second, oil is corrosive over time. It can degrade rubber hoses and plastic components within the engine bay, leading to further failures. Third, a significant oil leak can pose a fire hazard if the oil drips onto hot exhaust components. Finally, a dirty engine makes it much harder to spot new leaks or other mechanical issues, delaying necessary repairs. Cleaning the oil off helps you keep an eye on your engine’s health.
Essential Tools and Materials for Engine Cleaning
Before you begin the process of cleaning oil off your engine, gathering the right tools and materials is important. Using the correct items ensures a safe and effective cleaning job. You do not want to start only to realize you are missing a crucial piece of equipment. Preparedness makes the task smoother and helps you achieve the best results.
Safety Gear First
Your safety is paramount when working with automotive chemicals and water around electrical components. Always wear protective eyewear to shield your eyes from splashes of degreaser or dirt. Chemical-resistant gloves are also a must; they protect your hands from harsh degreasers and prevent contact with hot engine parts. A face mask might also be helpful if you are working in a confined space or with strong fumes. I always put on my gloves and safety glasses before I even open the hood.
Choosing the Right Degreaser
Selecting an appropriate engine degreaser is vital. Look for products specifically designed for automotive engines. Many options exist, including aerosol sprays, liquid concentrates, and foam degreasers. Biodegradable and non-toxic formulas are often a good choice, as they are safer for you and the environment. Avoid harsh solvents that can damage rubber or plastic components. Some popular choices include Simple Green, Gunk, or specific automotive engine degreasers found at auto parts stores. Read the product label carefully for instructions and warnings.
Cleaning Brushes and Tools
You will need various brushes to reach all the nooks and crannies of your engine. A stiff-bristled brush is excellent for general scrubbing and removing heavy grime. Smaller, softer brushes, like detail brushes or old toothbrushes, are perfect for tight spots and sensitive areas. You might also want a long-handled brush for deeper reach. Additionally, a bucket of water, a spray bottle for rinsing (if not using a hose), and several clean microfiber towels are essential for wiping and drying. Having a roll of paper towels handy for initial messy cleanups is also a good idea. Consider using a drip pan or old cardboard underneath the engine to catch runoff and protect your driveway. This will help you manage any how to clean up spilled oil more easily.
Safety First: Preparing Your Engine for Cleaning
Before you even think about applying any liquids to your engine, proper preparation is non-negotiable. This step ensures your safety and prevents damage to your vehicle’s sensitive electrical components. Rushing this part can lead to costly repairs or even personal injury. Take your time with these initial steps.
Disconnecting Power and Protecting Components
Electricity and water do not mix, especially around delicate engine electronics. Start by disconnecting the negative terminal of your car battery. This cuts power to the entire vehicle, reducing the risk of electrical shorts. Next, use plastic bags or aluminum foil to cover sensitive electrical components. These include your alternator, distributor, spark plug wires, fuse box, and any exposed electrical connectors. Secure these covers with rubber bands or tape to prevent water intrusion. This protective layer is crucial for keeping your car’s brain dry and functional.
Allowing Engine to Cool
A hot engine can be dangerous to work on and can cause cleaning products to evaporate too quickly. Always ensure your engine is completely cool before you begin cleaning. Give it at least an hour or two after driving, or even longer if it has been running for an extended period. A cool engine prevents burns from hot surfaces and allows cleaning agents to work effectively without instantly drying. I usually let my car sit overnight if I plan a thorough engine cleaning for the next morning. Patience here pays off.
Working in a Well-Ventilated Area
Engine degreasers and cleaning agents often emit fumes. Working in a well-ventilated area is crucial to avoid inhaling these chemicals. Outdoors is ideal, but if you must work in a garage, ensure the garage door is open. Using a fan to circulate air can also help. Good ventilation dissipates fumes and makes the cleaning process more comfortable and safer for your respiratory system. Always read the safety instructions on your degreaser product. You should also have good lighting so you can see all the areas you are cleaning.
Step-by-Step Guide to Cleaning Oil Off Engine Surfaces
Once you have prepared your engine and gathered your tools, it is time for the hands-on cleaning process. This section breaks down the steps to effectively remove oil and grime from your engine’s exterior. Following these steps ensures a thorough clean without damaging components. Take your time with each stage to achieve the best results.
Initial Rinse and Degreaser Application
Start by giving the engine a light rinse with a garden hose. Use a gentle spray, avoiding direct high-pressure streams on electrical components, even those you have covered. This initial rinse helps remove loose dirt and prepares the surface for the degreaser. Next, apply your chosen engine degreaser liberally over all oil-affected areas. Focus on the greasy spots and buildup. Allow the degreaser to sit for the recommended time, usually 5-15 minutes, as specified on the product label. This allows the chemicals to penetrate and break down the oil and grease. Do not let the degreaser dry on the engine.
Scrubbing and Agitation Techniques
After the degreaser has had time to work, it is time to scrub. Use your stiff-bristled brush for general areas with heavy oil accumulation. For tighter spots, around hoses, or near delicate wiring, switch to a smaller, softer brush or an old toothbrush. Work the brush into the grime, agitating the oil and lifting it from the surface. Be thorough, but gentle, avoiding excessive force that could damage components. Pay attention to areas where oil might have dripped and accumulated, like the engine block, valve covers, and the area around the oil pan. This scrubbing action is crucial for loosening stubborn oil residue.
Thorough Rinsing and Drying
Once you have scrubbed all affected areas, it is time to rinse the degreaser and loosened oil away. Use your garden hose with a gentle spray setting. Start from the top of the engine and work your way down, allowing the water to carry the degreaser and dirt away. Again, avoid directing strong streams of water at sensitive electrical parts. Rinse until the water running off the engine is clear and free of suds or oil residue.
After rinsing, the drying process is critical. You can let the engine air dry, which might take several hours, or you can speed up the process. An air compressor or even a leaf blower set to a low power can help blow water out of crevices. Use clean microfiber towels to wipe down accessible surfaces. Ensure the engine is completely dry before reconnecting the battery or attempting to start the car. Any residual moisture can cause electrical issues.
Targeting Stubborn Oil Stains and Grease Buildup
Sometimes, basic cleaning is not enough. Baked-on oil and long-standing grease buildup require a more focused approach. These tough stains can be challenging but are not impossible to remove. Knowing specific techniques and products for these areas makes a big difference. It helps you achieve a truly clean engine.
Dealing with Baked-On Oil
Baked-on oil is particularly stubborn because heat has essentially hardened it onto the engine surface. For these areas, a stronger concentration of your engine degreaser might be needed. Apply the degreaser and let it soak for a longer period, perhaps 20-30 minutes, keeping an eye that it does not dry. You might also need a stiffer brush or even a plastic scraper for extreme cases. For metal surfaces, a brass wire brush can be effective, but use it carefully to avoid scratching softer metals or painted parts. Repeat the application and scrubbing process if necessary. Patience is key when tackling these tough spots.
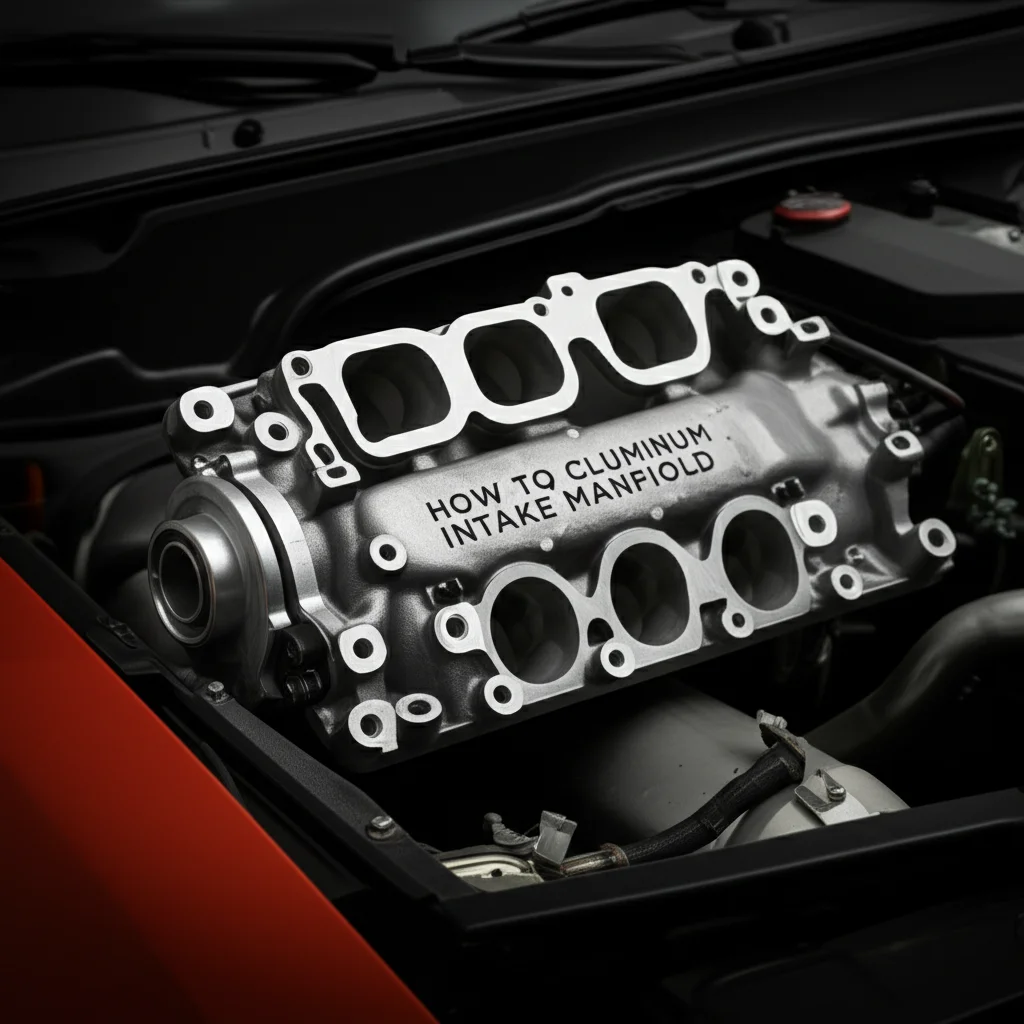
Specific Cleaning for Aluminum Engine Parts
Aluminum engine parts, like cylinder heads or intake manifolds, require a specific cleaning approach. Aluminum can discolor or pit if exposed to overly harsh or acidic cleaners. Always choose a degreaser labeled as safe for aluminum. Avoid highly alkaline degreasers, which can cause dulling or staining. When scrubbing aluminum, use softer brushes or non-abrasive pads to prevent scratching. If you have particularly how to clean aluminum engine parts, consider a dedicated aluminum cleaner or polish after degreasing to restore their shine. Gently wipe and rinse these components to preserve their finish.
Addressing Oil Sludge Inside the Engine
While this article focuses on cleaning oil off the exterior of the engine, it is important to mention internal oil sludge. Exterior oil stains often indicate an internal problem, such as excessive blow-by or neglected oil changes, leading to sludge formation. Oil sludge is a thick, jelly-like substance that can clog oil passages and starve engine components of lubrication. Cleaning external oil does not fix internal sludge. If you suspect your engine has internal oil sludge, special engine flush products are available. These are added to the old oil before an oil change. They circulate, dissolving the sludge, which then drains out with the old oil. Consult your mechanic if you are unsure about internal sludge, or refer to guides on how to clean engine oil sludge for more detailed steps. Addressing both external and internal issues gives you a truly clean and healthy engine.
Preventative Measures and Routine Maintenance
Cleaning oil off your engine is satisfying, but preventing future buildup is even better. Regular maintenance and a proactive approach can significantly reduce the chances of extensive oil accumulation. A clean engine bay is a sign of a well-maintained vehicle. It also makes future cleaning jobs much easier. These simple practices can save you time and money.
Regular Inspections for Leaks
Make it a habit to regularly inspect your engine bay. Look for any signs of fresh oil, even small drips or a greasy film. Check around valve covers, the oil pan, the oil filter, and any seals or gaskets. Early detection of a leak allows for a quick and often less expensive repair. A small drip can become a significant leak if ignored. You can also place cardboard under your parked car overnight to check for drips on the ground. Addressing issues quickly helps prevent large messes on your engine and on your driveway. This also links to how to clean engine oil off concrete if you do have a spill.
Proper Oil Changes and Filter Replacement
Adhering to your vehicle’s recommended oil change schedule is crucial. Fresh oil has the correct viscosity and additives to protect your engine. Old, degraded oil can break down and contribute to sludge formation. Always use the correct type and weight of oil specified in your owner’s manual. Replacing your oil filter with every oil change is equally important. A clogged filter restricts oil flow and can cause pressure buildup, potentially leading to leaks. Proper oil maintenance helps keep the engine’s internal components clean and reduces external spills.
Keeping Engine Compartment Clean
Beyond addressing specific leaks, a general commitment to cleanliness in the engine bay helps. Periodically, you can wipe down accessible surfaces with a damp cloth to remove dust and light grime. This prevents small amounts of oil mist or dust from accumulating and forming thick layers. If you notice minor oil film from normal engine operation, wipe it away promptly. Consider using an engine dressing or protectant after a thorough cleaning. These products help repel dust and grime, making future cleanings easier. A well-maintained engine compartment simply looks better and runs more smoothly.
Special Considerations for Different Engine Types
Not all engines are built the same, and their cleaning needs can vary. While the general principles of cleaning oil off an engine remain, some engine types have specific characteristics that require adjusted approaches. Understanding these differences helps you clean effectively and avoid unintended damage. Always consider your specific engine’s design.
Air-Cooled Engines and Fins
Air-cooled engines, common in motorcycles, lawnmowers, and classic cars, rely on fins to dissipate heat. These fins can trap oil, dirt, and debris, hindering their cooling efficiency. When cleaning oil off air-cooled engines, pay special attention to thoroughly cleaning between these fins. A compressed air nozzle can help blow out loose debris before applying degreaser. Use a dedicated fin comb or a stiff brush to clean accumulated grime from within the fins. Be careful not to bend or damage the delicate fins. For detailed steps, consider reading about how to clean air-cooled engine fins to ensure proper maintenance. A clean set of fins means better cooling for your engine.
Small Engines and Carburetors
Small engines, found in generators, lawnmowers, and pressure washers, can also suffer from oil buildup. Their compact size means components are often tightly packed. When cleaning these engines, you might need smaller brushes and more precise application of degreaser. The carburetor, a vital component, is particularly sensitive. While you might clean oil off its exterior, internal carburetor cleaning is a different process. If you notice performance issues due to a dirty carburetor, consider a separate cleaning procedure. Detailed instructions on how to clean small engine carburetor can guide you through that specific task. Always be gentle around fuel lines and delicate small engine parts.
Turbocharged and Performance Engines
Turbocharged and high-performance engines often run hotter and have more complex plumbing. Oil leaks in these engines might be more critical due to higher pressures and temperatures. When cleaning, ensure all intercooler pipes and vacuum lines are securely attached and protected. These engines also often have more sensitive sensors and electrical connections. Exercise extra caution with water and cleaning solutions around these components. Some performance car owners opt for professional detailing or specific non-water-based cleaning methods to ensure no damage occurs. Always check your car’s manual for any specific cleaning recommendations for high-performance setups.
Post-Cleaning Care and Inspection
You have just finished cleaning oil off your engine, and it looks sparkling clean. However, the job is not completely done until you complete some crucial post-cleaning steps. These steps ensure everything is reconnected properly and that your hard work truly pays off. A final inspection can confirm the success of your cleaning efforts and identify any new issues.
Reconnecting Components
After ensuring the engine is completely dry, you can begin to remove all the protective covers. Carefully take off the plastic bags or foil from your alternator, distributor, fuse box, and any other electrical components you covered. Double-check that no moisture remains trapped underneath. Once everything is uncovered, reconnect the negative terminal of your car battery. Ensure the connection is tight and secure. Take a moment to visually inspect all hoses and wires to make sure nothing was accidentally dislodged during the cleaning process.
Checking for New Leaks
A clean engine provides a perfect canvas for spotting new or lingering leaks. After reconnecting the battery, start your engine and let it run for a few minutes. While it is running, visually inspect the engine bay again for any fresh oil drips or seeping. Look closely at areas where you previously saw leaks. If you detect new leaks, it means the underlying issue causing the oil to escape has not been fully resolved. This immediate check helps you address problems before they become bigger. Sometimes, a leak becomes more apparent once the surrounding grime is gone.
Protecting Cleaned Surfaces
To maintain your engine’s fresh look and make future cleanings easier, consider applying an engine dressing. These products are often silicone-based or water-based formulas that provide a protective layer. They can make plastic and rubber components look new, add a slight sheen, and help repel dust and dirt. Spray the dressing evenly over clean, dry surfaces, avoiding belts and pulleys. Then, wipe away any excess with a clean microfiber cloth. This step is optional but can significantly enhance the longevity of your cleaning efforts and keep your engine bay looking sharp. A well-maintained engine looks good and works well.
FAQ Section
How often should I clean oil off my engine?
The frequency depends on how quickly oil accumulates. If you have an active leak, you should clean it as needed and address the leak promptly. For general maintenance, cleaning your engine once or twice a year can help keep it in good condition. This prevents heavy buildup of oil and grime, which can otherwise hide problems and cause issues.
Can I use a pressure washer to clean my engine?
Using a pressure washer is risky. The high pressure can force water into sensitive electrical connections, damage sensors, or strip paint. A garden hose with a gentle spray nozzle is much safer for most engine cleaning tasks. If you use a pressure washer, keep the nozzle far from the engine and use the widest spray setting.
What if I can’t reach all the oil?
Sometimes, oil gets into very tight or hidden areas. For these spots, use a long-handled detail brush or an old toothbrush. You can also try using compressed air to blow out loose debris before scrubbing. If the area is completely inaccessible, focus on the reachable parts and consider professional help for deeply embedded grime.
Is engine degreaser safe for all engine parts?
Most quality engine degreasers are formulated to be safe for typical engine materials like metal, rubber hoses, and plastics. However, always check the product label for specific warnings, especially regarding aluminum or painted surfaces. Avoid highly acidic or alkaline degreasers unless specified as safe for all parts.
What are signs of an oil leak?
Common signs of an oil leak include dark spots or puddles under your parked car, a burning oil smell (especially after driving), or visible oil residue on engine components. Your engine’s oil level might also drop more quickly than expected. Early detection helps you resolve the leak before it causes bigger problems.
Can professional engine cleaning damage my car?
Professional engine cleaning done by experienced technicians is generally safe. They use specialized equipment and knowledge to protect sensitive parts. However, a poor job by an inexperienced cleaner could cause damage. Always choose a reputable shop and ask about their methods to ensure your car is in good hands.
Conclusion
Cleaning oil off your engine is more than just making it look nice; it is a vital part of proper vehicle maintenance. You now know the necessary steps, from preparing the engine safely to thoroughly scrubbing and rinsing away stubborn oil and grime. We covered how to choose the right tools and why protecting electrical components is essential. Remember that a clean engine helps you spot new leaks, run more efficiently, and potentially prevents costly repairs down the line.
By regularly inspecting your engine and addressing any leaks promptly, you can keep oil buildup at bay. This proactive approach saves you time and effort in the long run. So, next time you pop your hood, take a moment to assess your engine’s cleanliness. With the right approach, you can maintain a pristine engine that performs at its best. Take action today and give your engine the cleaning it deserves.
- engine cleaning
- oil removal
- car maintenance
- engine degreaser
- automotive care
- oil leaks
- DIY car repair
- engine cleanliness

Todd Martin
Senior Writer
With over 15 years of experience in home renovation and design, I started HEG to share what I’ve learned with homeowners who want to create spaces that are both beautiful and functional. I’ve always believed in a hands-on approach, and over the years, I’ve picked up practical solutions that actually work. Through HEG, I aim to make home improvement more approachable, sharing real tips that help you create a home you truly love.