· Todd Martin · DIY & Furniture · 23 min read
How To Attach Wood Table Top To Metal Frame
Securely Attach a Wood Table Top to a Metal Frame
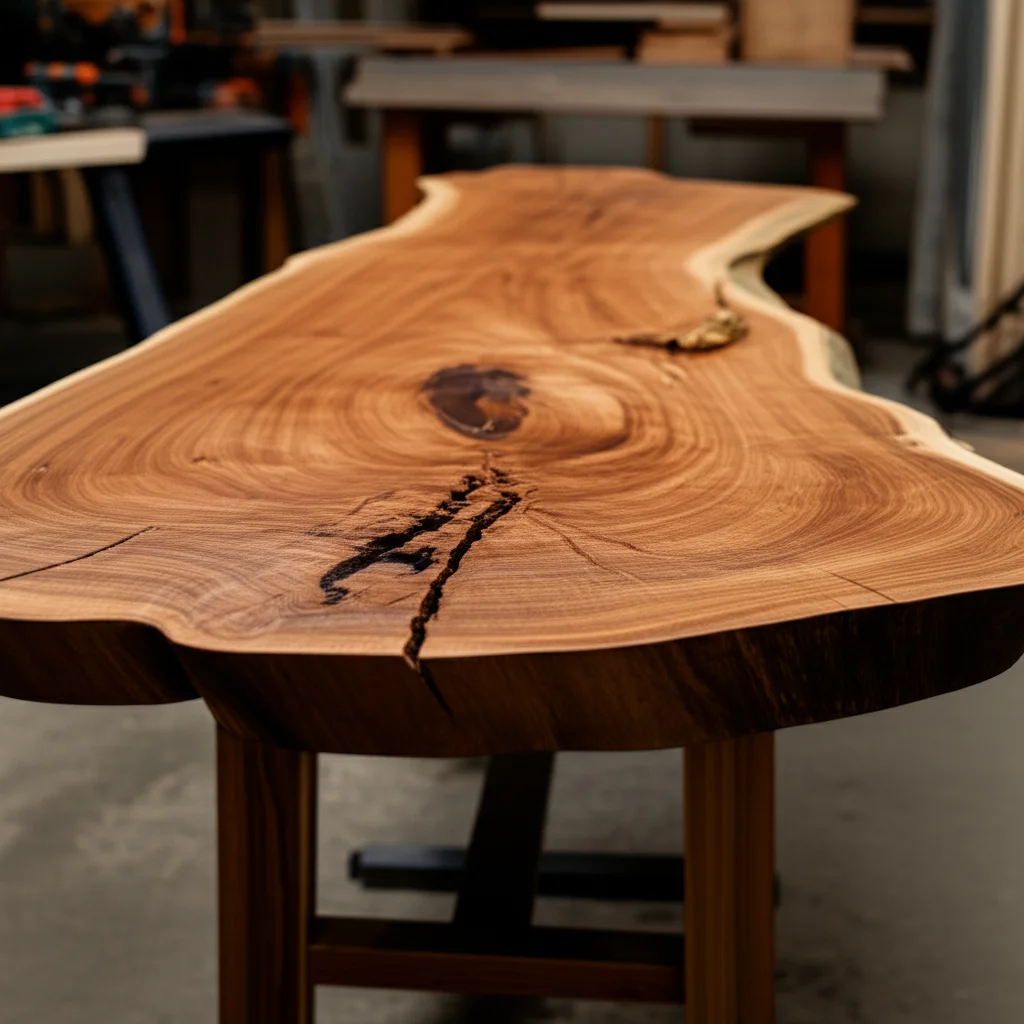
Building or refurbishing a table often involves combining different materials. One popular and visually appealing choice is to attach a wood table top to a metal frame. This combination offers both durability and a modern aesthetic. I find this process rewarding, as it allows for custom designs and robust furniture.
Attaching a wood table top to a metal frame requires careful planning and the right techniques. You want a secure connection that handles daily use and accounts for the wood’s natural properties. This guide will walk you through the necessary steps. We will cover choosing materials, preparing surfaces, and applying various attachment methods. By the end, you will confidently create a stable and beautiful table.
Takeaway
- Select Proper Hardware: Use appropriate screws, clips, or threaded inserts designed for wood and metal.
- Account for Wood Movement: Allow for natural expansion and contraction of wood by using slotted holes or Z-clips.
- Prepare Surfaces: Ensure both wood and metal are clean, pre-drilled, and ready for secure attachment.
- Choose the Right Method: Decide between direct fastening, Z-clips, L-brackets, or adhesives based on your frame design.
- Prioritize Stability: Test the table’s stability after attachment to ensure a safe and durable piece of furniture.
To attach a wood table top to a metal frame, you typically use methods like Z-clips, L-brackets, or screws through pre-drilled holes in the metal frame. The goal is to secure the wood top while allowing for its natural expansion and contraction. This ensures a stable and long-lasting connection for your table.
Understanding Your Materials: Wood and Metal Properties
Before you attach a wood table top to a metal frame, understanding your materials is crucial. Wood is a natural material. It expands and contracts with changes in humidity and temperature. This movement, if not accounted for, can lead to cracking or warping of the wood top. Metal frames, on the other hand, are generally stable. They do not significantly change size with environmental shifts.
The type of wood you select also plays a role. Hardwoods like oak or maple are dense and durable. They make excellent table tops. Softwoods such as pine are lighter and easier to work with. However, they may be more prone to denting. The finish on your wood top also impacts its stability. A good finish helps to seal the wood. It reduces moisture absorption and movement.
Metal frames come in various forms and materials. Steel is common due to its strength and affordability. Aluminum is lighter and corrosion-resistant. The design of your metal frame is also important. Some frames have pre-drilled tabs or crossbars for attachment. Others might require you to drill new holes. Knowing these properties helps you choose the best attachment method. It ensures a long-lasting and stable table.
Selecting the Right Wood for Your Table Top
Choosing the correct wood is important for a durable table top. Different woods offer varying levels of hardness, grain patterns, and cost. For instance, hardwoods like walnut or cherry provide excellent longevity and a rich appearance. They are ideal for high-traffic tables. Softwoods such as Douglas fir might be more budget-friendly. However, they are more susceptible to damage from daily use.
Consider the environment where your table will reside. A table in a humid environment needs wood less prone to warping. Quarter-sawn lumber is more stable than plain-sawn. It exhibits less movement across its width. Always allow new wood to acclimate to your home’s humidity for several days before assembly. This reduces potential issues after attachment.
Preparing Your Metal Frame for Attachment
The metal frame forms the foundation of your table. Proper preparation of the frame is just as important as preparing the wood. Begin by ensuring the metal frame is clean and free of rust or debris. You may need to clean any old metal if your frame is repurposed. A clean surface promotes better adhesion for any protective coatings or paint.
Inspect the frame for existing attachment points. Many metal frames have pre-drilled holes or flanges. These are designed for securing a top. If your frame lacks these, you will need to drill new holes. Plan their placement carefully to distribute the load evenly. Ensure these holes are correctly sized for your chosen fasteners. This step creates a strong and reliable connection. If you need to prepare the surface for painting later, you might want to learn how to clean metal before painting.
Common Methods to Attach a Wood Table Top
There are several effective methods to attach a wood table top to a metal frame. The best choice depends on your specific frame design, the wood’s thickness, and how much wood movement you need to accommodate. Each method offers different benefits regarding strength, appearance, and ease of installation. I always assess these factors to pick the ideal approach.
One common method involves using screws directly through the metal frame into the wood. This works well if your metal frame has flat surfaces where the wood top will rest. Another popular method uses Z-clips, also known as table top fasteners. These clips allow the wood to expand and contract freely. This prevents stress on the wood. L-brackets offer another robust solution. They provide strong support and can often be hidden from view.
For a completely hidden attachment, threaded inserts in the wood can be paired with machine screws through the metal frame. Adhesives are also an option for certain applications, especially if combined with mechanical fasteners for added security. Choosing the right method ensures both stability and longevity for your table.
Using Z-Clips (Table Top Fasteners)
Z-clips are a popular and effective solution for attaching wood table tops. They are small, Z-shaped metal clips. One end slides into a slot routed into the underside of the wood top. The other end screws into the metal frame. This design allows the wood to move independently from the metal frame.
This method is excellent for accommodating the natural expansion and contraction of wood. It prevents the wood from cracking or warping over time. You will need a router to create the necessary slots in the wood. Space the clips evenly around the perimeter of the table. Usually, you place them every 6-8 inches. This ensures uniform support and flexibility.
Z-clips keep the wood top securely in place. They prevent it from sliding while allowing it to breathe. I highly recommend them for their ability to manage wood movement. This makes them a durable choice for your project.
L-Brackets and Corner Braces
L-brackets and corner braces offer another robust way to attach your wood table top. These are metal brackets shaped like an “L.” They secure the wood top to the metal frame. You screw one side of the “L” into the underside of the wood top. The other side screws into the metal frame.
Like Z-clips, L-brackets can be installed to allow for wood movement. You can elongate the screw holes in the bracket itself. This creates a slot. This slot lets the wood expand and contract without putting undue stress on the fasteners. This is a crucial consideration for long-term stability. You can also attach L-brackets more rigidly if wood movement is less of a concern or if your wood is very stable.
These brackets are particularly useful for frames that have flat surfaces or inner lips. They provide strong, direct support. Space them strategically around the table’s perimeter. This distributes the load and ensures the table top remains flat and secure.
Direct Screwing Through the Frame
Direct screwing is the simplest method if your metal frame design allows it. This involves drilling holes directly through the metal frame’s top rails or support bars. Then, you drive screws up into the underside of the wood table top. This method creates a very rigid connection. It is suitable for smaller tables or very stable wood types.
When using this method, consider the thickness of your wood. Ensure the screws are long enough for a secure bite. However, they should not be so long that they poke through the top. Pilot holes are essential in both the metal and the wood. This prevents splitting the wood and ensures straight screw insertion. If your metal frame is thick, you might need specific drill bits.
I usually choose this method for applications where wood movement is minimal or less critical. Examples include smaller accent tables. This method provides a very direct and secure attachment point. It is straightforward and requires minimal specialized tools.
Preparing Your Wood Table Top and Metal Frame
Proper preparation is essential before you attach a wood table top to a metal frame. This includes ensuring both surfaces are clean, smooth, and ready for connection. Skipping these steps can lead to an unstable table or damage over time. I always take the time to prepare thoroughly; it saves headaches later.
For the wood table top, this means sanding and applying any desired finish. Sanding creates a smooth surface for attachment and for the final finish. Finishing protects the wood from moisture and wear. For the metal frame, preparation might involve cleaning, rust removal, and potentially painting. If your metal frame is old or corroded, you may need to learn how to clean corroded metal before proceeding. It also involves drilling precise pilot holes for your chosen fasteners. This dual preparation ensures a strong and lasting bond.
Finishing Your Wood Table Top
Before attaching, properly finishing your wood table top is important. A good finish protects the wood from spills, scratches, and moisture. This moisture protection is critical, as it helps to stabilize the wood. It reduces its tendency to expand and contract. There are many types of finishes available. They include varnishes, polyurethanes, oils, and waxes. Each offers different levels of protection and aesthetic appeal.
I recommend applying several thin coats of your chosen finish. Ensure you follow the manufacturer’s drying times between coats. Lightly sand between coats for a smoother result. A well-finished top will not only look great but also last longer. It resists everyday wear and tear. This preparation step protects your investment. It ensures the table remains beautiful for years to come. For ongoing care, you can also learn how to clean a wood table properly.
Drilling Pilot Holes in the Metal Frame
Drilling accurate pilot holes in your metal frame is a critical step for secure attachment. These holes guide your screws and prevent damage to both the screws and the frame. Use a drill bit designed for metal, matching the diameter of your screws. Make sure the bit is slightly smaller than the screw’s major diameter. This ensures the threads can properly bite into the wood.
Measure and mark the hole locations precisely. Ensure they align with where you want to attach the wood top. Use a center punch to create an indentation. This prevents the drill bit from wandering. Apply steady pressure while drilling and use cutting oil if working with thick steel. This lubricates the bit and extends its life. Accurate pilot holes guarantee a strong and straight connection to the wood.
Prepping the Wood for Fasteners
Prepping the wood for fasteners involves marking and drilling pilot holes. This prevents the wood from splitting when you drive screws. The size of the pilot hole depends on the screw’s diameter and the type of wood. For hardwoods, a pilot hole slightly smaller than the screw’s core diameter is best. For softer woods, you might use a slightly smaller bit.
Measure and mark the exact locations where the screws will enter the wood. If using Z-clips, you will need to route slots. This requires a router and a straight bit. Ensure the depth and width of the routed slots match the dimensions of your Z-clips. Precision in these steps ensures a flush and strong connection. It minimizes the risk of damage to your table top.
Step-by-Step Guide: Attaching with Fasteners
Now that your materials are prepared, it’s time to attach the wood table top to the metal frame. This section focuses on methods using mechanical fasteners. These include screws, Z-clips, and L-brackets. The process is straightforward, but precision is key for a stable result. I find following these steps systematically ensures a strong and lasting bond.
Always begin by carefully positioning the wood top on the metal frame. Ensure it is centered and aligned exactly as you want it. Once positioned, you can proceed with the chosen attachment method. Remember to consider wood movement throughout the process. This will prevent future issues like cracking or warping.
Positioning the Wood Top
The first step in attaching your table top is accurate positioning. Carefully lift the wood top and center it on the metal frame. Check all sides to ensure an even overhang if your design requires it. Use a tape measure to verify distances from the edge of the wood to the frame. This ensures a balanced and professional appearance.
Once the top is in place, you can use clamps to temporarily secure it. This prevents the top from shifting while you mark and drill. If clamps are not feasible, have someone help you hold the top steady. Precise positioning is fundamental to a well-built table. It ensures all subsequent attachment steps are accurate.
Installing Z-Clips (Detail)
To install Z-clips, you first need to route slots into the underside of your wood table top. The slots should be deep enough for the “Z” portion of the clip to sit flush. Ensure the slots are wide enough for the clip to slide in easily but not too loose. I use a straight router bit with a depth guide for consistent results.
Space the slots evenly, typically 6-8 inches apart, along the edges of the wood that will sit on the metal frame. Once the slots are routed, insert the Z-clips. Then, align the metal frame. Mark the screw holes through the Z-clips onto the metal frame. Drill pilot holes into the metal frame. Finally, secure the Z-clips to the metal frame using appropriate screws. This allows the wood to expand and contract freely.
Installing L-Brackets (Detail)
To install L-brackets, begin by positioning them along the inner edges of your metal frame. Ensure the vertical leg of the “L” aligns with the underside of your wood top. Mark the screw holes on both the metal frame and the wood. For the metal frame, drill pilot holes with a bit suitable for metal. For the wood, use a smaller pilot bit to prevent splitting.
If you want to allow for wood movement, you can slightly elongate the holes on the horizontal leg of the L-bracket that attaches to the wood. This creates a “slot.” As the wood expands or contracts, the screws can slide within this slot. Secure the L-brackets to the metal frame first. Then, place the wood top and attach it to the vertical leg of the L-brackets. Use screws of appropriate length.
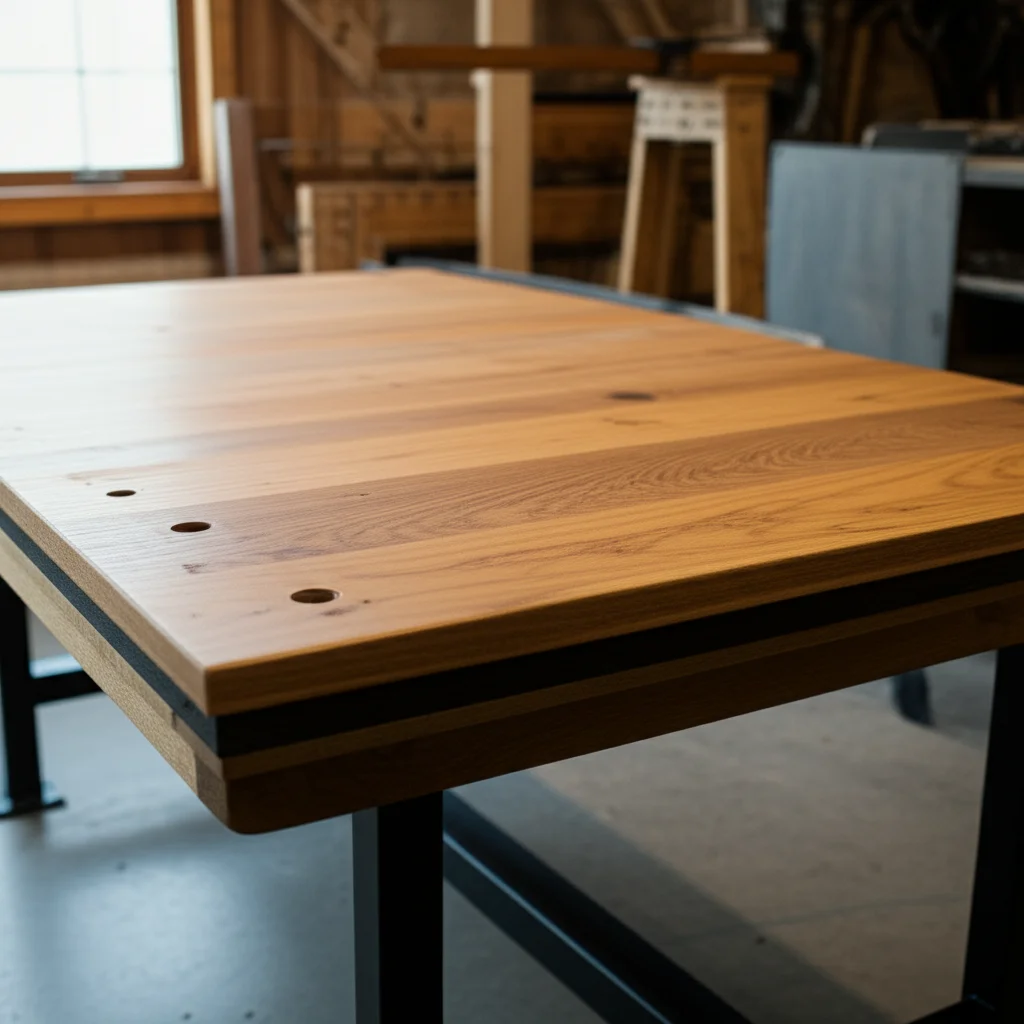
Fastening with Screws (Detail)
For direct screwing, carefully align your pre-drilled holes in the metal frame with the underside of your wood table top. Use a pencil to mark the exact screw locations on the wood through the metal’s pilot holes. Then, remove the wood top and drill pilot holes into the wood at your marked spots. Ensure the wood pilot holes are slightly smaller than your screws to get a good bite.
Place the wood top back onto the metal frame. Align the holes precisely. Insert your chosen screws through the metal frame and into the wood. Drive them until they are snug but do not overtighten. Overtightening can strip the wood or damage the screws. This method provides a very rigid connection. It works best for smaller tops or those with minimal wood movement concerns.
Considering Wood Movement and Stability
Understanding and accommodating wood movement is one of the most critical aspects when you attach a wood table top to a metal frame. Wood is a hygroscopic material. This means it absorbs and releases moisture from the air. As it does, it expands and contracts, primarily across its grain. If this movement is restricted, the wood can crack, cup, or warp. This compromises the stability and appearance of your table.
Proper design and attachment methods prevent these issues. For example, using Z-clips or elongated holes in L-brackets allows the wood to move freely. This prevents stress build-up. Neglecting wood movement can lead to a ruined table top in a surprisingly short time. Stability is also about ensuring the table does not wobble. This means your frame must be sturdy and your attachment points secure.
The Science of Wood Expansion and Contraction
Wood movement is a natural phenomenon driven by changes in moisture content. When humidity increases, wood absorbs moisture and swells. When humidity decreases, it releases moisture and shrinks. This expansion and contraction occur mainly across the grain, not along its length. The amount of movement varies by wood species. It also depends on how the wood was cut from the log.
Ignoring this movement can cause significant problems. If the wood is rigidly fixed to a stable frame, internal stresses build up. These stresses can lead to cracks, splits, or severe warping of the table top. Imagine trying to hold a balloon steady while it inflates; eventually, it will burst. Similarly, restricting wood causes it to break under pressure. Understanding this science helps you select the correct attachment method. It ensures your table remains stable and beautiful for years.
Methods to Allow for Wood Movement
Several methods effectively allow for wood movement when attaching a table top. Z-clips, as discussed earlier, are an excellent solution. They secure the top while letting it float slightly. Another common approach involves using elongated or slotted holes. You drill these slots in the metal frame or the L-brackets. The screws then pass through these slots into the wood. As the wood expands or contracts, the screws can slide within the slots.
Another method is using figure-eight fasteners. These are small, flat metal discs. They have a hole for a screw on each side. One side screws into the wood, the other into the metal frame. The rotational movement of the figure-eight allows for some wood expansion and contraction. Regardless of the method, the goal is to prevent a rigid, immovable connection. This foresight protects your table top from future damage.
Ensuring Overall Table Stability
Beyond the wood-to-metal connection, the overall stability of your table is paramount. This means evaluating the metal frame itself. Is it designed to support the weight of the wood top and the intended use? Wobbly frames will lead to an unstable table, regardless of how well the top is attached. Ensure all frame joints are strong and tightly secured.
Consider adding cross-bracing if your metal frame feels less rigid. This significantly improves stability. Once the table top is attached, test the table by gently pushing on it from different directions. There should be no noticeable wobble. A stable table is not only safer but also more pleasant to use. Taking these extra steps ensures a truly robust piece of furniture.
Alternative Attachment Solutions
While screws, clips, and brackets are primary methods, other solutions can also attach a wood table top to a metal frame. These alternatives might be suitable for specific frame designs or aesthetic preferences. Sometimes, you might even combine these with mechanical fasteners for extra security. I always consider all options to find the best fit for each unique project.
Adhesives offer a strong bond, particularly if the surfaces are well-prepared. Magnetic attachments provide flexibility and easy removal. While less common for full-sized tables, they can be useful for smaller tops or specific applications. Each alternative has its own strengths and limitations. Understanding these helps you make an informed decision.
Using Adhesives for a Strong Bond
Adhesives can provide a very strong bond between wood and metal. However, they should be used with caution, especially when wood movement is a concern. Polyurethane-based construction adhesives or epoxy resins are typically strong enough for this application. Ensure both the wood and metal surfaces are clean and free of dust or grease for optimal adhesion. You may even need to learn how to clean metal before painting or applying adhesive.
Apply the adhesive sparingly to the contact points on the metal frame. Then, carefully position the wood top. Clamp the top in place while the adhesive cures. This ensures maximum contact and bond strength. For large table tops, I generally do not rely solely on adhesives. Combining them with a few mechanical fasteners offers superior long-term stability and accounts for wood movement.
Magnetic Attachment Systems
Magnetic attachment systems offer a less common but innovative way to secure a table top. This method involves embedding strong magnets into the underside of the wood top. Corresponding metal plates or magnets are then attached to the top of the metal frame. When the wood top is placed on the frame, the magnets attract, holding it in place.
This method allows for very easy removal of the table top. It is useful for modular furniture or designs that require frequent disassembly. However, magnetic systems may not provide the same rigid stability as mechanical fasteners. They are generally better suited for smaller, lighter table tops or decorative applications. For heavy-duty tables, they might serve as an alignment guide rather than the sole attachment.
Weld-On Tabs or Brackets
For custom metal frames, weld-on tabs or brackets offer a highly integrated solution. This involves welding small metal tabs or custom brackets directly onto the frame. These tabs or brackets then have pre-drilled holes. You can then screw the wood table top into these holes. This method creates a very strong and seamless connection.
Welding requires specialized equipment and skills. It is typically done by metal fabricators. The advantage is a clean look with no visible external fasteners. This allows for precise positioning of attachment points. The welded tabs can also be designed to accommodate wood movement by incorporating slotted holes. This provides a robust and aesthetically pleasing attachment.
Testing and Finishing Touches
After you attach a wood table top to a metal frame, the job is not quite done. It’s important to perform some final checks and apply any necessary finishing touches. This ensures your table is not only stable but also looks its best. These last steps guarantee a professional and durable outcome for your DIY project. I always emphasize testing to catch any potential issues early.
First, test the table’s stability. Gently push on the table from various angles to check for any wobbling or shifting. If you used methods allowing for wood movement, ensure the top is secure but still has slight give. Then, address any aesthetic details. This might include touching up paint, filling screw holes, or cleaning the entire assembly. These finishing touches elevate your work.
Stability and Wobble Testing
Once the wood table top is securely attached, thoroughly test the table for stability. Place the table on a flat, level surface. Apply gentle pressure from different directions on the table top. Push down, push from the sides, and gently shake it. The table should feel solid and exhibit no noticeable wobble.
If you detect any instability, revisit your attachment points. Check if all screws are tight. Ensure brackets or clips are fully engaged. Sometimes, an uneven floor can cause perceived wobbles. Try moving the table to another spot. If the wobble persists, it might indicate an issue with the frame itself or the attachment method. Addressing wobbles early prevents potential hazards and extends the table’s life.
Final Aesthetic Touches
The final aesthetic touches bring your project to completion. Begin by cleaning the entire table. Remove any sawdust, fingerprints, or adhesive residue. For the wood top, you may want to apply a final coat of polish or wax. This enhances its luster and provides additional protection. If you need to remove stubborn marks, consider how to get super glue off of a wood table if it got stuck there by accident.
If any screw heads are visible, you can use wood filler or decorative caps to hide them. Ensure the metal frame is clean. Touch up any paint chips or scuffs. Inspect all joints and connections one last time. These small details make a big difference in the overall appearance and professionalism of your finished table. It is the final polish on your hard work.
Long-Term Care and Maintenance
Proper long-term care and maintenance ensure your table remains beautiful and functional. For the wood table top, regularly clean it with appropriate wood cleaners. Avoid harsh chemicals that can strip the finish. Protect the surface from heat and moisture using coasters and placemats. Periodically reapply a wood polish or protective oil.
For the metal frame, wipe it down to prevent dust and grime buildup. If the frame is painted, touch up any areas where paint has chipped to prevent rust. If it’s raw metal, consider a clear coat to protect against corrosion. Regularly check the attachment points. Tighten any screws that may have loosened over time. Following these simple steps will extend the life of your table for many years.
FAQ Section
How do I prevent wood from cracking when attaching it to metal?
To prevent wood from cracking, allow for its natural movement. Use fasteners like Z-clips or L-brackets with elongated holes. Drill pilot holes slightly smaller than your screws to guide them properly. Avoid overtightening fasteners, as this can create stress points.
What type of screws should I use for wood to metal?
Use screws designed for both materials. Self-tapping metal screws can work for the metal frame if it’s thin enough. For attaching to wood, use wood screws. Ensure they are long enough for a secure bite but not so long they protrude. Galvanized or stainless steel screws resist corrosion.
Can I glue wood to a metal frame?
Yes, you can use strong construction adhesives or epoxy to glue wood to metal. However, relying solely on glue is not recommended for large table tops due to wood movement. Always combine adhesives with mechanical fasteners like screws or clips for long-term stability.
How do I hide the fasteners for a clean look?
To hide fasteners, use Z-clips or figure-eight fasteners routed into the underside of the wood. For direct screwing, you can countersink screws and fill the holes with wood plugs or filler. Weld-on tabs or brackets on the metal frame also offer a very clean, hidden attachment.
How much overhang should my wood table top have?
The ideal overhang depends on your aesthetic preference and table size. A common overhang is 1 to 2 inches beyond the metal frame on all sides. For dining tables, consider comfortable legroom. Measure carefully to ensure an even overhang around the entire perimeter.
What tools do I need for this project?
You will need a drill, drill bits (for both wood and metal), a screwdriver (or drill driver), a tape measure, and a pencil. Depending on your chosen method, you might also need a router for Z-clips, clamps, or a center punch. Safety glasses are always a must.
Conclusion
Successfully attaching a wood table top to a metal frame transforms raw materials into a beautiful, functional piece of furniture. We have explored the crucial steps, from understanding wood movement to selecting the right attachment methods. By carefully preparing your materials and employing appropriate fasteners like Z-clips or L-brackets, you ensure a strong and lasting connection. I have found that attention to detail in each stage makes all the difference.
Remember, accounting for wood’s natural expansion and contraction is paramount for the table’s longevity. Whether you choose direct screwing, Z-clips, or L-brackets, precision in drilling pilot holes and securing connections will result in a stable and reliable table. Now, with this knowledge, you are ready to confidently attach your wood table top to a metal frame. Start your project today and enjoy the satisfaction of creating a durable and stylish addition to your home.
- wood table top
- metal frame
- table attachment
- DIY furniture
- woodworking

Todd Martin
Senior Writer
With over 15 years of experience in home renovation and design, I started HEG to share what I’ve learned with homeowners who want to create spaces that are both beautiful and functional. I’ve always believed in a hands-on approach, and over the years, I’ve picked up practical solutions that actually work. Through HEG, I aim to make home improvement more approachable, sharing real tips that help you create a home you truly love.