· Todd Martin · Outdoor Power Tools · 19 min read
Why Does My Ryobi Leaf Blower Not Start
Get Your Ryobi Leaf Blower Starting Again
There is nothing quite like firing up your leaf blower to clear your yard. Then, you pull the cord, and nothing happens. If your Ryobi leaf blower does not start, it can be frustrating. I have been there myself, staring at a pile of leaves and a silent machine. This guide will help you understand the common reasons why a Ryobi leaf blower might refuse to start. We will cover everything from basic checks to deeper engine problems. You will learn how to diagnose issues and perform simple fixes. Our goal is to help you get your blower running smoothly once more.
Takeaway
To fix a Ryobi leaf blower that does not start:
- Check fuel quality and levels.
- Verify the choke and on/off switch settings.
- Inspect and clean the spark plug.
- Ensure the air filter and fuel filter are clear.
- Examine the carburetor for clogs.
- Test the primer bulb and fuel lines.
- Consider issues with the ignition coil or starter assembly.
A Ryobi leaf blower that does not start often has a problem with fuel delivery, spark ignition, or air intake. Check the fuel for freshness and proper mixture. Ensure the spark plug is clean and firing. Make sure the air filter is clear. Fixing these common issues often brings your blower back to life.
Basic Checks for a Non-Starting Ryobi Leaf Blower
When your Ryobi leaf blower does not start, begin with the simplest checks. These initial steps can save you time and effort. Many starting problems come from small oversights. Always ensure the machine is on a flat surface before starting any checks. Safety is important when working with power tools.
Fuel Level and Quality
The most common reason a Ryobi leaf blower does not start is bad fuel. Small engines are sensitive to fuel quality. If the fuel is old, it can break down and cause problems. Fuel sitting for more than 30 days can degrade. Ethanol in gasoline also causes issues. It attracts water and can corrode fuel system parts.
- Check Fuel Level: Make sure the fuel tank has enough fuel. It sounds simple, but it is often overlooked.
- Drain Old Fuel: If the fuel is old, drain it completely. You can use a siphon pump for this. Dispose of old fuel properly.
- Add Fresh Fuel: Fill the tank with a fresh fuel-oil mixture. Ryobi two-cycle engines need specific oil ratios. Refer to your owner’s manual for the correct mix. Using the wrong ratio can damage the engine. Add fuel stabilizer to fresh fuel for longer storage. This helps prevent future fuel issues.
Choke Position
The choke helps start a cold engine. It limits air intake, making the fuel mixture richer. This helps the engine fire up quickly. If the choke setting is wrong, the Ryobi leaf blower will not start.
- Cold Start: Move the choke lever to the “Full Choke” position. This is usually marked with an icon.
- Warm Start: If the engine is already warm, you might not need the choke. Or, you might use a “Half Choke” position. Trying to start a warm engine on full choke can flood it. Flooding means too much fuel enters the cylinder.
- After First Pulses: Once the engine gives a few coughs or tries to start, move the choke to the “Half Choke” or “Run” position. This prevents flooding. Pulling the cord many times on full choke can flood the engine.
On/Off Switch
This is another simple but critical check. Sometimes, the kill switch is accidentally left in the “Off” position. You might pull the cord many times before realizing this.
- Verify Switch Position: Locate the On/Off switch on your Ryobi leaf blower. Make sure it is set to the “On” or “Run” position. This switch cuts the ignition system. If it is off, no spark will reach the engine. Always check this switch first. It is a quick fix if it is the problem.
Addressing Fuel System Issues
If basic checks do not fix the problem, look at the fuel system. Fuel problems are very common with small engines. Your Ryobi leaf blower needs clean fuel flowing freely to start. Issues here can prevent fuel from reaching the carburetor.
Old or Bad Fuel
As mentioned, old fuel is a common culprit. Ethanol-blended gasoline can attract moisture. This leads to water contamination in the fuel. Water does not burn, and it can cause corrosion. Over time, fuel breaks down and forms varnish. This varnish can clog small fuel passages.
- Symptoms: Your Ryobi leaf blower might crank but not fire. It might try to start then immediately die.
- Solution: Drain all old fuel from the tank. You can use a fuel siphon or tilt the blower. Clean out any residue in the tank. Refill with fresh, high-octane gasoline mixed with the correct two-cycle oil. Use a fuel stabilizer if you plan to store the blower for more than a few weeks. This will prevent fuel degradation. If your blower won’t stay running, bad fuel could also be the cause. Find more information on this issue here: Why Does My Ryobi Leaf Blower Won’t Stay Running.
Clogged Fuel Filter
A small fuel filter sits inside the fuel tank. It cleans the fuel before it reaches the carburetor. Over time, debris or degraded fuel can clog this filter. A clogged filter restricts fuel flow. This means the engine does not get enough fuel to start.
- Locating the Filter: Use a hook or thin wire to carefully pull the fuel line out of the tank opening. The filter is on the end of this line.
- Inspection: Check the filter for dirt, debris, or discoloration. A clean filter looks white or clear. A dirty one looks brown or black.
- Replacement: Replace a clogged fuel filter. They are inexpensive and easy to install. Simply pull the old one off the fuel line. Push the new one on securely. This ensures proper fuel delivery to the engine.
Damaged Fuel Lines
The fuel lines carry fuel from the tank to the carburetor. They are made of rubber or plastic. Over time, these lines can crack, become brittle, or even melt. This happens due to age, heat, or exposure to ethanol fuel. Damaged fuel lines can leak air into the fuel system. They can also leak fuel, which is a safety hazard. Air in the fuel line stops fuel from getting to the engine.
- Visual Check: Inspect all fuel lines for cracks, kinks, or leaks. Look where lines connect to the tank, primer bulb, and carburetor.
- Flexibility Test: Gently bend the lines. If they feel stiff or crack easily, they need replacement.
- Replacement: Replacing fuel lines can be a bit tricky. You need specific sizes of fuel line tubing. Always use fuel-resistant lines. Cut new lines to the correct length. Secure them with small clamps if needed. For a detailed guide, consider this resource: How to Replace Fuel Line on Ryobi Leaf Blower.
Primer Bulb Problems
The primer bulb helps draw fuel into the carburetor. When you press it, you should see fuel move through the lines. If the primer bulb is cracked, hard, or not moving fuel, it is faulty. It cannot create the suction needed to prime the carburetor.
- Symptoms: The primer bulb may not fill with fuel, or it may collapse when pressed. You might not see fuel moving in the lines.
- Inspection: Look for cracks in the bulb itself. Feel if it is flexible. Press it several times and watch for fuel flow.
- Replacement: Primer bulbs are usually simple to replace. They often pop into place. Remove the old one carefully. Push the new one in until it snaps. Ensure the small fuel lines are connected correctly to the new bulb.
Spark Plug Diagnostics
A healthy spark plug is essential for any engine to start. It creates the spark that ignites the fuel-air mixture. If your Ryobi leaf blower does not start, the spark plug is a prime suspect. It can get fouled, damaged, or simply wear out.
Checking the Spark Plug
Before you do anything, disconnect the spark plug wire. This prevents accidental starting. Use a spark plug wrench to remove the plug from the engine cylinder.
- Visual Inspection: Look at the tip of the spark plug.
- Black, Sooty: A black, sooty appearance means a rich fuel mixture or a dirty air filter.
- Wet with Fuel: A wet plug means the engine is flooded with fuel. This happens from too many choke pulls or incorrect starting procedures.
- White, Ashy: A white or ashy appearance indicates a lean fuel mixture or engine overheating.
- Damaged Electrode: Look for a bent or broken electrode. This will prevent a proper spark.
- Cleaning: If the plug is just dirty, clean it. Use a wire brush or sandpaper to remove carbon deposits. Ensure the electrode and ceramic insulator are free of grime.
- Drying: If the plug is wet, dry it completely. You can use a clean rag or let it air dry. If the engine is flooded, you may also need to dry the cylinder by pulling the rope a few times with the plug out and throttle wide open.
Cleaning or Replacing the Spark Plug
Even a visually good spark plug can fail under pressure. It is often best to replace it if it looks old or dirty. Spark plugs are inexpensive.
- Cleaning Process:
- Use a wire brush to remove carbon from the electrode and ceramic.
- Use a soft cloth to wipe away any oil or fuel.
- Check the gap.
- Replacement Process:
- Purchase the correct spark plug type for your Ryobi leaf blower. Check your manual for the exact model number.
- Gap the new plug if needed.
- Carefully thread the new spark plug by hand. Do not overtighten. Overtightening can damage the engine head.
- Tighten with a wrench a quarter turn past finger-tight.
- Reattach the spark plug wire firmly.
Spark Plug Gap
The gap is the distance between the center electrode and the ground electrode. This gap must be precise for a strong spark. If the gap is too wide or too narrow, the spark will be weak or absent.
- Checking the Gap: Use a spark plug gapping tool. This is a small, inexpensive tool. Slide the correct feeler gauge between the electrodes.
- Adjusting the Gap: If the gap is incorrect, carefully bend the ground electrode. Use the gapping tool to bend it. Do not touch the center electrode. Refer to your Ryobi owner’s manual for the exact gap specification. It is usually around 0.025 inches.
Air Filter and Carburetor Maintenance
Proper airflow is as important as proper fuel flow for an engine to start. A blocked air filter starves the engine of air. A dirty carburetor cannot mix fuel and air correctly. Both issues will prevent your Ryobi leaf blower from starting.
Dirty Air Filter
The air filter prevents dirt and debris from entering the engine. Over time, it collects dust and restricts airflow. A restricted air filter makes the fuel-air mixture too rich. This makes the engine hard to start or prevents it from starting at all.
- Locating the Filter: The air filter is usually in a plastic housing on the side of the engine. It is held in place by clips or screws.
- Inspection: Remove the air filter. Hold it up to a light source. If you cannot see light through it, the filter is dirty.
- Cleaning:
- Foam Filters: Wash foam filters with warm, soapy water. Rinse thoroughly. Let them air dry completely. Apply a few drops of clean engine oil and squeeze out the excess.
- Paper Filters: Paper filters cannot be washed. Tap them gently to remove loose dirt. If a paper filter is very dirty, replace it. Do not use compressed air on paper filters, as it can damage the fibers.
- Replacement: If the filter is torn, damaged, or cannot be cleaned, replace it with a new one. A clean air filter helps your engine breathe better.
Clogged Carburetor
The carburetor mixes fuel and air in the correct ratio for combustion. Small passages inside the carburetor can become clogged. This happens when old, stale fuel leaves varnish or residue. A clogged carburetor prevents fuel from reaching the engine. This is a common reason why a Ryobi leaf blower might not start.
- Symptoms: The engine cranks but does not fire. It might try to start with choke on but dies when moved to run. This symptom also occurs if your leaf blower only runs with the choke on. You can read more about this problem here: Why Does My Leaf Blower Only Run With The Choke On.
- Cleaning:
- Remove the Carburetor: This can be complex. You will need to disconnect fuel lines and linkage. Take photos as you go to remember how to reassemble.
- Disassemble: Carefully take the carburetor apart. Pay attention to all small parts, gaskets, and diaphragms.
- Clean Passages: Spray carburetor cleaner into all small holes and passages. Use a fine wire or compressed air to clear stubborn clogs. Pay special attention to the main jet and idle jet.
- Inspect Gaskets: Check all gaskets and diaphragms for damage. Replace any that are stiff, torn, or cracked.
- Reassemble: Put the carburetor back together with new gaskets if needed.
- Carburetor Kit: If cleaning does not work, consider installing a carburetor rebuild kit. This kit includes new gaskets, diaphragms, and sometimes new jets. It is often more cost-effective than a new carburetor.
- Replacement Carburetor: If cleaning and a rebuild kit fail, replace the entire carburetor. New carburetors are available for most Ryobi models. This often solves persistent fuel delivery problems.
Ignition System and Starter Rope Faults
Even with perfect fuel and air, an engine needs spark and a way to turn over. Problems with the ignition coil or the starter assembly can prevent your Ryobi leaf blower from starting. These issues are less common but still happen.
Ignition Coil Problems
The ignition coil creates the high voltage needed for the spark plug. It takes low voltage from the flywheel and turns it into thousands of volts. If the ignition coil is faulty, it will not send power to the spark plug. This means no spark, and no starting.
- Symptoms: The engine does not get a spark, even with a good spark plug. You can test this using a spark tester.
- Testing:
- Connect a spark tester between the spark plug boot and the spark plug.
- Pull the starter rope rapidly.
- Look for a spark in the tester. No spark means a problem with the coil or related components.
- Coil Gap: The gap between the ignition coil and the flywheel magnets is important. If it is too wide, the coil will not generate enough voltage. Use a business card or feeler gauge to set the correct gap. It is usually around 0.010-0.014 inches.
- Replacement: If the coil is confirmed bad, replace it. It is usually mounted with two bolts. Disconnect the kill switch wire before removing. Install the new coil, ensuring proper gap to the flywheel.
Starter Rope and Pulley
The starter rope and pulley system turn the engine over. This movement compresses the fuel-air mixture and generates a spark. If the starter rope is broken or the recoil spring is faulty, you cannot pull the engine. Your Ryobi leaf blower will not start.
- Broken Rope: If the starter rope is frayed or broken, it needs replacement. You can usually feed a new rope through the handle and around the pulley.
- Recoil Spring: The recoil spring pulls the rope back into the housing. If the rope does not retract, the spring might be broken or dislodged. This requires opening the starter housing.
- Replacing Starter Assembly: For a broken spring or more complex issues, replacing the entire starter assembly is often easiest. These are sold as complete units. You simply unbolt the old one and bolt on the new one. Ensure the new assembly matches your Ryobi model.
Exhaust System and Engine Compression
Less common, but serious issues, involve the exhaust system or engine compression. These problems can also prevent your Ryobi leaf blower from starting. Understanding them can help in diagnosing more stubborn cases.
Clogged Spark Arrestor
The spark arrestor is a small screen in the muffler. It prevents hot carbon particles from exiting the exhaust and causing fires. Over time, carbon builds up on this screen, clogging it. A clogged spark arrestor restricts exhaust flow. This creates back pressure and can prevent the engine from starting or running properly.
- Symptoms: The engine might try to start but quickly die. It might lack power or sputter.
- Location: The spark arrestor is usually a small screen inside or attached to the muffler. You may need to remove the muffler to access it.
- Cleaning: Remove the spark arrestor screen. Use a wire brush to clean off carbon deposits. You can also burn off carbon with a propane torch, but be careful not to damage the screen. Make sure the screen is completely clear before reinstallation.
- Replacement: If the screen is damaged or cannot be cleaned, replace it. A clean spark arrestor allows the engine to breathe freely.
Low Compression
Engine compression is crucial for starting and running. The piston compresses the fuel-air mixture in the cylinder. This compression creates the heat needed for ignition. If the engine has low compression, it cannot build enough pressure. This means it will not start, or it will be very hard to start.
- Symptoms: The starter rope feels very easy to pull. There is little resistance. The engine might crank but never fire.
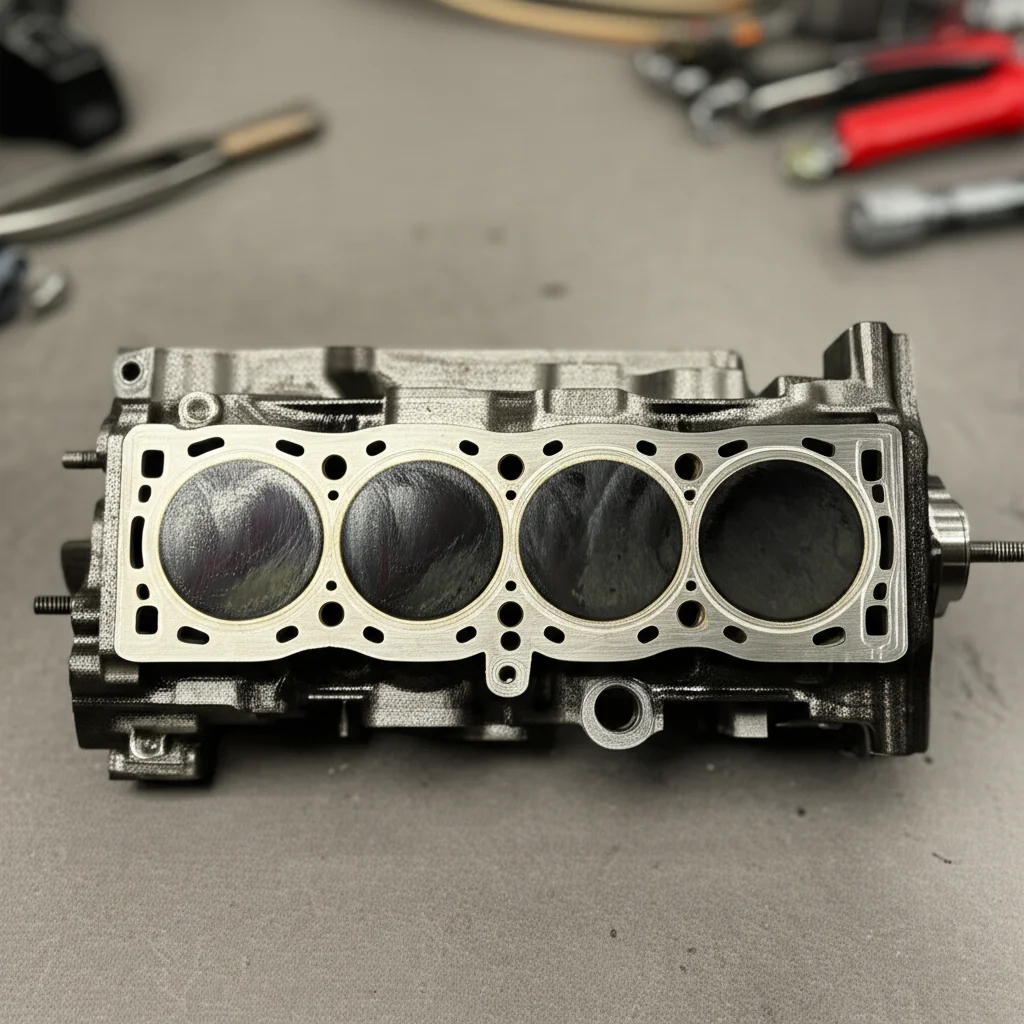
- Causes: Low compression can result from worn piston rings, a damaged cylinder wall, a loose spark plug, or a leaking head gasket. A bent crankshaft or broken connecting rod can also cause low compression.
- Testing: Use a compression tester tool. Remove the spark plug. Screw the compression tester into the spark plug hole. Pull the starter rope several times. Read the gauge. Compare the reading to your Ryobi blower’s specifications (check the manual). Typically, a two-stroke engine needs at least 90-100 psi to start.
- Solutions:
- Loose Spark Plug: Ensure the spark plug is tightened correctly.
- Minor Fixes: Check for external leaks around the cylinder head.
- Major Repair: If compression is very low, it indicates internal engine wear. This usually means the engine needs a rebuild or replacement. For many, this might be a sign to buy a new leaf blower.
Professional Help and Prevention
Sometimes, despite your best efforts, your Ryobi leaf blower still does not start. Knowing when to call a professional can save you time and further damage. Also, preventative maintenance can avoid many starting problems in the first place.
When to Seek Expert Help
DIY repairs are satisfying, but some issues are beyond simple fixes. If you have gone through all the troubleshooting steps and your Ryobi leaf blower does not start, it might be time for a professional.
- Complex Internal Issues: If you suspect problems with the crankshaft, connecting rod, or piston, a professional mechanic is needed. These repairs require special tools and expertise.
- Lack of Tools or Experience: If you do not have the right tools (like a compression tester or spark tester), or if you are not comfortable disassembling engine parts, do not force it. You might cause more damage.
- Time vs. Cost: Weigh the cost of repair against the cost of a new leaf blower. For very old or heavily used blowers, a new unit might be more economical than a costly repair.
- Safety Concerns: If you are unsure about any step or feel unsafe, stop. Power tools can be dangerous if not handled correctly. A professional ensures safety during repair.
Preventative Maintenance Tips
Regular maintenance prevents most Ryobi leaf blower starting problems. A little care goes a long way in extending your tool’s life.
- Use Fresh Fuel: Always use fresh gasoline mixed with the correct two-cycle oil. Purchase fuel in small quantities. Use it within 30 days.
- Add Fuel Stabilizer: For any fuel stored longer than a month, use a quality fuel stabilizer. This prevents fuel breakdown and gumming.
- Store Properly: When storing your Ryobi leaf blower for the off-season, run the fuel tank dry. Or, drain the fuel and run the engine until it stops. This prevents fuel from degrading in the carburetor.
- Clean/Replace Air Filter Regularly: Check the air filter before each use, especially if working in dusty conditions. Clean or replace it as needed. A clean filter ensures proper airflow and protects the engine.
- Inspect Spark Plug: Check the spark plug annually or every 25 hours of use. Clean or replace it to ensure a strong spark.
- Check Fuel Filter and Lines: Periodically inspect the fuel filter and fuel lines for clogs or damage. Replace them if necessary.
- Keep Blower Clean: Wipe down your leaf blower after each use. Remove any debris from air intakes and cooling fins. A clean blower runs cooler and lasts longer.
FAQ Section
Q1: Why does my Ryobi leaf blower click but not start?
A1: If your Ryobi leaf blower clicks but does not start, it typically points to a problem with the starter mechanism or a seized engine. Check if the starter rope pulls freely. If it pulls easily but the engine does not turn over, the recoil spring might be broken. If the rope is stuck, the engine might be seized due to lack of oil or damage.
Q2: What if my Ryobi leaf blower starts but immediately dies?
A2: If your Ryobi leaf blower starts then dies, common culprits include a clogged fuel filter, old fuel, or a dirty carburetor. The engine gets enough fuel to briefly fire but not enough to sustain operation. Clean or replace the fuel filter and ensure you have fresh fuel. Carburetor cleaning is often needed for this issue. This issue is very similar to why a Ryobi leaf blower keeps shutting off, which you can learn more about here: Why Does My Ryobi Leaf Blower Keep Shutting Off.
Q3: Can a dirty spark plug prevent my Ryobi leaf blower from starting?
A3: Yes, a dirty spark plug can absolutely prevent your Ryobi leaf blower from starting. Carbon buildup on the electrode can prevent a strong spark from forming. Fuel, oil, or carbon deposits can foul the plug, making it unable to ignite the fuel-air mixture. Cleaning or replacing a dirty spark plug often solves starting issues.
Q4: How often should I change the fuel in my Ryobi leaf blower?
A4: You should use fresh fuel for your Ryobi leaf blower every time you use it. Do not use fuel older than 30 days. If you store your blower for longer periods, drain the fuel tank completely. Alternatively, use a high-quality fuel stabilizer in your fuel mixture. This prevents fuel degradation and carburetor clogging.
Q5: What if my Ryobi leaf blower has compression but no spark?
A5: If your Ryobi leaf blower has good compression but no spark, the issue is likely with the ignition system. The most common causes are a faulty spark plug, a damaged spark plug wire, or a bad ignition coil. First, replace the spark plug. If that does not work, test the ignition coil.
Conclusion
It is frustrating when your Ryobi leaf blower does not start. However, many common issues have simple solutions. By systematically checking the fuel system, spark plug, air filter, and carburetor, you can diagnose most problems. I have personally fixed many stubborn leaf blowers by following these steps. Remember to always use fresh fuel and perform regular maintenance. This helps keep your Ryobi leaf blower running well for seasons to come. Do not let a non-starting blower spoil your yard work. Take action today and get your Ryobi leaf blower back in working order.
- Ryobi leaf blower
- leaf blower troubleshooting
- outdoor tools
- engine repair
- starting issues

Todd Martin
Senior Writer
With over 15 years of experience in home renovation and design, I started HEG to share what I’ve learned with homeowners who want to create spaces that are both beautiful and functional. I’ve always believed in a hands-on approach, and over the years, I’ve picked up practical solutions that actually work. Through HEG, I aim to make home improvement more approachable, sharing real tips that help you create a home you truly love.