· Katria Melrose · Kitchen Appliances · 19 min read
How To Use Whirlpool Oven For The First Time
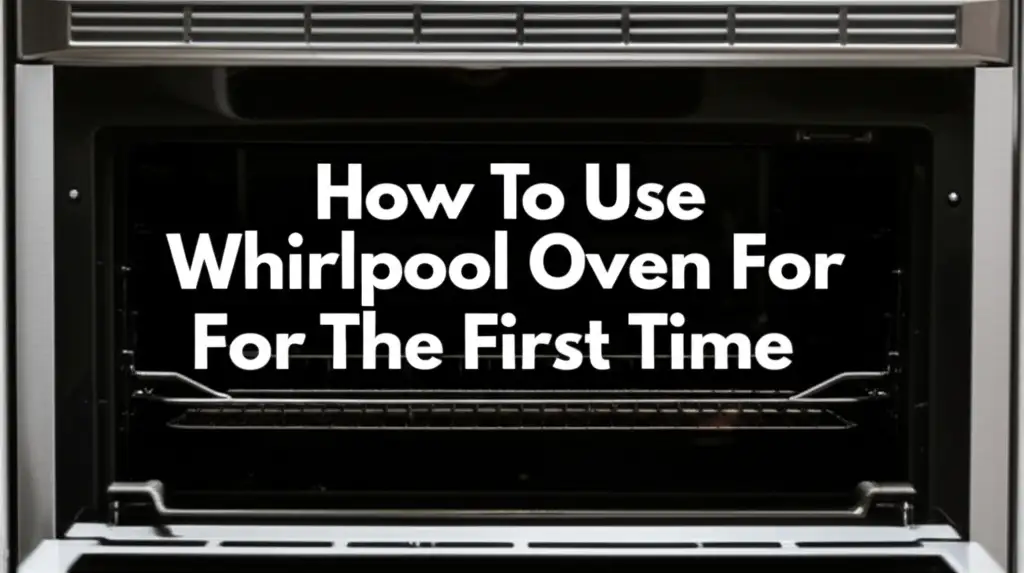
Mastering Your Whirlpool Oven: First-Time Use Guide
Bringing a new Whirlpool oven into your home is an exciting step. You get ready to bake delicious meals and create new memories. But setting up and using a new appliance, especially an oven, for the first time can seem a bit daunting. I understand that feeling of uncertainty.
Many people wonder about the initial steps, important safety checks, and how to operate the various features. This guide will walk you through everything you need to know about how to use your Whirlpool oven for the first time. We will cover the setup, understanding the control panel, initial burn-off, essential cooking functions, safety tips, and basic cleaning. My goal is to make your first cooking experience with your new Whirlpool oven smooth and enjoyable. You will feel confident using your new appliance.
Takeaway
Using your Whirlpool oven for the first time involves several key steps. Follow these simple guidelines for a safe and effective start:
- Complete all unboxing and installation checks thoroughly.
- Understand each button and setting on your oven’s control panel.
- Perform the essential initial burn-off cycle to remove manufacturing odors.
- Learn how to use basic functions like Bake, Broil, and Convection.
- Always practice important oven safety rules during use.
- Keep your oven clean with regular maintenance.
- Know how to troubleshoot common minor issues.
To use a Whirlpool oven for the first time, you must first ensure correct installation and remove all packing materials. Next, perform an initial burn-off cycle to eliminate factory odors. Then, become familiar with the control panel to set cooking modes like bake or broil and adjust temperatures. Always refer to your user manual for specific model instructions and safety guidelines.
First Steps: Unpacking and Installation Checks
Your new Whirlpool oven arrives ready for its place in your kitchen. Before you even think about cooking, you must complete a few important first steps. These steps ensure your oven is safe and ready to operate. I want to make sure you start off on the right foot.
Unboxing Your New Appliance
The first thing to do is carefully unbox your Whirlpool oven. Take your time during this process. You want to make sure you do not damage the appliance or yourself. Remove all tape, protective films, and foam packaging. Open the oven door and check inside. Ensure no cardboard or plastic remains.
Sometimes, small pieces of packing material can hide in unexpected places. Check around the racks and heating elements. Manufacturers often use extra packing to keep parts secure during shipping. A quick check prevents these materials from burning when you first turn on the oven. This step is very important for safety and proper function.
Power Connection and Placement
Ensure your Whirlpool oven is connected to the correct power source. Most Whirlpool ovens are electric. They require a specific voltage and dedicated circuit. Check your home’s electrical system and the oven’s power cord. If you are unsure, consult a qualified electrician. Improper connection can damage the oven or pose a fire risk.
Make sure the oven sits level in its cabinet or freestanding space. Use the adjustable feet at the bottom of the oven to level it. A level oven ensures even cooking results. It also prevents grease from pooling in one area. Proper placement is key for both performance and safety.
Removing Packaging and Accessories
Inside your new Whirlpool oven, you will find the oven racks, user manual, and possibly other accessories like a broiler pan. Remove all these items. Do not leave the user manual inside the oven. It is important to keep the manual handy. You will refer to it often for specific instructions.
Wash the oven racks and any accessories with warm, soapy water. Rinse them well and dry them completely. This removes any manufacturing residues. Once clean, you can place the racks back into the oven. Make sure they slide in smoothly. Your oven is now ready for the next phase.
Understanding Your Whirlpool Oven’s Control Panel
Your Whirlpool oven’s control panel is the heart of its operation. It allows you to select cooking functions, set temperatures, and manage various settings. Learning to use it helps you cook with confidence. I will walk you through the common buttons and their uses.
Digital Displays and Buttons
Most modern Whirlpool ovens feature a digital display and touch-sensitive buttons or knobs. The display shows the time, temperature, and selected function. You will see buttons for common cooking modes. Look for “Bake,” “Broil,” “Convection Bake,” “Roast,” and “Warm.” Some models also have specialized functions like “Proof” or “Delay Start.”
You will also find buttons for “Start,” “Cancel,” “Timer,” and “Clock.” The “Start” button begins any chosen cooking cycle. The “Cancel” button stops it. The “Timer” counts down for cooking, while the ” “Clock” button sets the current time. Familiarize yourself with the layout. This makes using your oven intuitive.
Setting Temperature and Time
Setting the temperature on your Whirlpool oven is straightforward. Press the “Bake” button. Then, use the number pad or the ”+” and ”-” buttons to enter your desired temperature. For example, press “Bake,” then “3,” “5,” “0” for 350 degrees Fahrenheit. Press “Start” to begin preheating. The oven will beep when it reaches the set temperature.
If you need to change the temperature unit from Celsius to Fahrenheit, or vice versa, your Whirlpool oven offers this option. This is a common feature. Adjusting this setting ensures you cook at the correct temperature for your recipes. You can learn more about this specific adjustment in this guide: How to Change Whirlpool Oven from C to F. Setting the timer is also easy. Press the “Timer” button, enter the desired time using the number pad, and press “Start.” The timer will count down and beep when it finishes. This helps you keep track of cooking progress.
Utilizing Special Features
Many Whirlpool ovens come with special features. “Convection Bake” uses a fan to circulate hot air, cooking food more evenly and often faster. “Broil” uses intense heat from the top element for browning or searing. Some models have a “Self-Clean” cycle. This feature cleans the oven automatically by burning off food residue at high temperatures. Understanding these features helps you get the most out of your oven. I recommend checking your specific model’s manual for all available functions.
The Initial Burn-Off: What to Expect
Before you cook your first meal, your new Whirlpool oven needs a crucial step: the initial burn-off. This process removes manufacturing oils and residues from the oven’s interior. It prepares your oven for safe and odor-free cooking. Skipping this step can lead to unpleasant smells and even affect the taste of your food during early uses.
Why a Burn-Off is Necessary
New appliances, including ovens, often come with a protective coating or residual oils from the manufacturing process. When you heat the oven for the first time, these materials burn off. This is perfectly normal. The burn-off process helps to eliminate any factory odors. It also prevents these odors from transferring to your food. Think of it as seasoning your new oven.
This initial heating ensures a clean start for your cooking adventures. It also helps to solidify internal components that might emit slight fumes initially. I always recommend this step to anyone using a new oven. It makes a big difference in your first cooking experiences.
Steps for a Proper Burn-Off
Performing the burn-off is simple. First, ensure your kitchen is well-ventilated. Open windows and turn on your range hood. The process will create some smoke and odor. Removing all oven racks and accessories is a good idea. This allows the oven interior to heat evenly.
Set your oven to a high temperature, typically 350-400 degrees Fahrenheit (175-200 degrees Celsius). Let it run for at least 30 minutes to an hour. Some manuals suggest even longer, up to an hour and a half. During this time, you will notice a distinct smell, similar to burning plastic or oil. This is normal. It is the manufacturing residues burning away. Stay nearby to monitor the situation. Ensure your home remains ventilated until the smell clears completely.
What to Expect During the Process
You will definitely smell something during the burn-off. Do not be alarmed by the odor. It is a sign the process is working as intended. You might also see a small amount of smoke. This is also normal. The smell and smoke should lessen over time. Once the burn-off cycle completes and the oven cools, the odors will dissipate.
After the burn-off, your oven is ready for food. You can now use it without worrying about strange smells affecting your meals. This simple step ensures a fresh start for your new Whirlpool appliance. I believe this initial preparation makes all the difference for a positive first experience.
Essential Oven Functions: Bake, Broil, and Convection
Your Whirlpool oven comes with several key functions designed for different cooking methods. Understanding these essential modes—Bake, Broil, and Convection—will help you cook a wide range of dishes. Each function uses heat in a specific way to achieve different results. I will explain how each works and when to use them.
Baking Basics
Baking is the most common oven function. It uses dry heat that comes from both the top and bottom heating elements. The heat circulates evenly throughout the oven cavity. This gentle, consistent heat is perfect for cooking cakes, cookies, casseroles, roasts, and bread. You set a specific temperature, and the oven maintains it.
To bake, simply press the “Bake” button on your control panel. Then, enter your desired temperature using the number pad. Press “Start.” The oven will preheat to that temperature. Always wait for the oven to finish preheating before placing your food inside. Preheating ensures the oven reaches the correct temperature. This prevents uneven cooking. Place your food on the oven rack, typically in the middle, for best results.
Broiling for Crispy Results
Broiling uses intense, direct heat from the top heating element only. This method is great for browning, searing, or crisping the surface of food. Think about melting cheese on nachos, caramelizing a crème brûlée, or crisping chicken skin. Broiling cooks food quickly. It is not for cooking food all the way through.
To use the broiler, press the “Broil” button. You might have options for “High” or “Low” broil. Select the desired setting. Place your food on a broiler pan, which helps drain fat, and position it on an upper oven rack. Keep a close eye on your food when broiling. It can burn very quickly due to the high heat. Some foods may benefit from an Air Fryer Basket in the Oven when using the broil function or even for convection baking, to allow better air circulation and crisping.
Understanding Convection Cooking
Convection cooking adds a fan to the traditional baking process. This fan circulates hot air throughout the oven cavity. This results in more even cooking and faster cooking times. Convection is great for roasting meats, baking multiple trays of cookies, or anything that benefits from uniform heat distribution. Food gets a crispier exterior and cooks thoroughly.
To use convection, press the “Convection Bake” or “Convect Roast” button. Some Whirlpool ovens automatically reduce the temperature by 25 degrees Fahrenheit (15 degrees Celsius) when you select convection. This is because the circulating air cooks food more efficiently. Always check your recipe or your oven manual for specific temperature adjustments. Convection helps food cook consistently. It reduces hot spots.
Safety Measures and Best Practices for First-Time Use
Using your new Whirlpool oven is exciting, but safety must always come first. Accidents can happen quickly if you are not careful. I want to share essential safety measures and best practices to keep you and your home safe. Following these tips will help you avoid common hazards and enjoy your oven confidently.
Always Use Oven Mitts
This seems obvious, but it is the most basic rule. Oven mitts or heat-resistant gloves are essential. Always wear them when reaching into a hot oven or handling hot bakeware. Even a brief touch can cause a severe burn. Keep your mitts handy near the oven. Replace them if they become worn or lose their heat resistance.
Never use wet cloths or towels to handle hot items. Water conducts heat. A wet cloth can transfer heat quickly to your hands. Use dry, thick oven mitts designed for high temperatures. This simple habit keeps your hands protected.
Proper Cookware and Placement
Always use oven-safe cookware. Glass, ceramic, cast iron, and metal pans designed for oven use are suitable. Avoid using plastic or non-oven-safe containers. They can melt, release harmful fumes, or even catch fire. Check the bottom of your cookware if you are unsure.
When placing dishes in the oven, use the correct rack position. Generally, the middle rack is best for most baking. This provides even heat distribution. For broiling, place food on an upper rack, closer to the top element. Ensure dishes do not touch the oven walls or heating elements. This prevents charring and allows proper air circulation. Never place aluminum foil on the bottom of the oven. It can trap heat, damage the oven’s finish, or interfere with temperature sensors. If you need to catch drips, place foil on a lower rack, under the dish.
Keep the Area Clear and Ventilated
Maintain a clear area around your oven. Do not store flammable items like dish towels, paper towels, or plastic bags near the appliance. Keep children and pets away from a hot oven. The exterior surfaces, including the door, can become very hot during operation. Use your range hood or open a window during cooking. This improves air circulation and removes cooking odors. It is especially important during the initial burn-off or when broiling, as these can produce more smoke.
Never use your oven to heat your home. Ovens are not designed for space heating. This can lead to carbon monoxide buildup or fire hazards. Use your oven only for cooking food. Following these safety guidelines helps ensure every cooking experience is safe and enjoyable.
Cleaning and Basic Maintenance Tips
Keeping your Whirlpool oven clean is vital for its performance and longevity. Regular cleaning prevents built-up grease and food spills from becoming hard to remove. It also helps your oven run efficiently. I will guide you through simple cleaning methods and how to use the self-clean feature.
Spot Cleaning and Spills
It is best to clean spills as soon as the oven cools down. Fresh spills are much easier to remove than baked-on ones. For minor spills, use a damp cloth and mild dish soap. Wipe the interior surfaces. Avoid abrasive cleaners or scouring pads. They can scratch the oven’s enamel finish. For stubborn spots, make a paste of baking soda and water. Apply it to the spill, let it sit for 20-30 minutes, then wipe it away.
Remove and clean the oven racks separately. Soak them in warm, soapy water in a sink or bathtub. This loosens baked-on residue. Use a non-abrasive brush to scrub them clean. Rinse thoroughly and dry before returning them to the oven. You should regularly wipe down the oven door and control panel with a soft, damp cloth. This keeps your oven looking good.
If you have a particularly stubborn spill on the bottom of your oven, there are specific techniques that can help. For detailed advice on this, I recommend reading How to Clean Bottom of Oven. It offers focused methods to tackle tough residues in that area.
Utilizing the Self-Clean Feature
Many Whirlpool ovens come with a self-clean feature. This function heats the oven to extremely high temperatures (around 800-900 degrees Fahrenheit or 425-480 degrees Celsius). At these temperatures, food residue turns into a fine ash. This makes cleaning much easier. To use self-clean, remove all oven racks and accessories. These items are not designed for the high heat of a self-clean cycle. Wipe out any large spills or loose debris beforehand.
Ensure your kitchen is well-ventilated by opening windows and turning on your range hood. The self-clean cycle can produce smoke and a strong odor as food burns off. The cycle typically lasts from 2 to 4 hours, depending on your model and the chosen cleaning level. Once the cycle finishes and the oven cools down completely, simply wipe away the ash with a damp cloth. Never try to open the oven door during a self-clean cycle. The door locks automatically for safety. Use this feature only when truly needed, as it uses a lot of energy.
Regular Exterior Care
Do not forget the exterior of your Whirlpool oven. Wipe down the control panel and door handles daily or weekly with a soft cloth and a gentle cleaner. For stainless steel finishes, use a specialized stainless steel cleaner to avoid streaks and fingerprints. Always spray the cleaner onto the cloth, not directly onto the oven. This prevents cleaner from seeping into electronic components. Regular exterior care keeps your oven looking new and clean. It also helps preserve its appearance over time.
Troubleshooting Common First-Time Issues
When you use your Whirlpool oven for the first time, you might encounter a few minor issues. Most of these are easily fixable. Knowing what to do can save you frustration and a call to a technician. I will address some common problems and their solutions.
Oven Not Heating Up
This is a common concern for new oven owners. If your Whirlpool oven does not heat up at all, first check the power supply. Ensure the oven is plugged in correctly. If it is hardwired, check your home’s circuit breaker. A tripped breaker can cut power to the oven. Reset the breaker if it is tripped. Sometimes, a new oven needs its initial power connection to settle.
If the power is fine, check the oven settings. Make sure you pressed “Start” after selecting your desired temperature. Some ovens have a demo mode. Ensure your oven is not stuck in this mode. Your user manual will explain how to exit it. If your oven is a gas model, ensure the gas supply valve is open. For more specific issues about heating, you can also consult guides like Why is my Whirlpool Oven Not Getting Up To Temperature. This article offers detailed insights into the causes and solutions for temperature problems.
Uneven Cooking
If your food cooks unevenly, with some parts burning and others undercooked, several factors might be at play. First, ensure your oven is level. An unlevel oven can cause heat to distribute unevenly. Adjust the leveling feet if needed. Next, avoid overcrowding the oven. Too many dishes or large pans can block airflow, creating hot and cold spots. Use only one or two racks at a time for best results.
Also, consider the type of bakeware you are using. Dark, heavy pans absorb more heat and can cause faster browning. Lighter, reflective pans might cook more slowly. Adjust cooking times or temperatures based on your cookware. Finally, make sure the oven door is sealing properly. A faulty seal can let heat escape, leading to inconsistent temperatures. If your Whirlpool oven takes a long time to preheat or cook, you might find valuable information in Why Does My Whirlpool Oven Take Forever To Heat Up. This guide provides solutions for slow heating issues.
Strange Noises or Smells (Beyond Burn-Off)
During the initial burn-off, smells and some minor noises are normal. However, if you notice persistent strange smells (like burning rubber or electrical odors) or loud, unusual noises during regular operation, investigate immediately. Unpleasant smells could indicate something left inside the oven that is not supposed to be there. This could be plastic, paper, or cleaning residues. Turn off the oven, let it cool, and inspect the interior carefully.
Loud noises might indicate a problem with the convection fan or other internal components. If the noise is constant and not a simple click of a thermostat, it could be a mechanical issue. In such cases, it is best to stop using the oven and contact Whirlpool customer support or a qualified appliance technician. Do not attempt to fix complex internal issues yourself. Safety is paramount when dealing with electrical appliances.
FAQ Section
How long does the initial burn-off take for a Whirlpool oven?
The initial burn-off for a Whirlpool oven typically takes between 30 minutes to 1.5 hours. This process helps eliminate manufacturing oils and odors. Ensure proper ventilation by opening windows and turning on your range hood. The exact duration can vary slightly by model, so always check your specific oven’s user manual for precise instructions.
Can I use aluminum foil on the bottom of my Whirlpool oven?
No, you should not use aluminum foil directly on the bottom of your Whirlpool oven. Foil can trap heat, which may damage the oven’s interior finish or the heating elements. It can also interfere with temperature sensors, leading to uneven cooking. If you need to catch drips, place foil on a lower oven rack, not directly on the oven floor.
Why does my new Whirlpool oven smell like burning plastic?
A new Whirlpool oven smelling like burning plastic or oil during its first few uses is normal. This odor comes from the manufacturing oils, protective coatings, and insulation burning off when the oven heats up. This is why the initial burn-off cycle is crucial. Ensure good ventilation until the smell dissipates completely.
How do I set the clock on my Whirlpool oven?
Setting the clock on your Whirlpool oven is usually simple. Press the “Clock” button on your control panel. Use the number pad to enter the current time. Then, press the “Start” or “Clock” button again to confirm. If your model has a digital display, the time should now appear. Consult your user manual for exact steps as button names may vary slightly.
What is the difference between bake and convection bake on a Whirlpool oven?
“Bake” uses heat from the top and bottom elements to cook food. Heat rises, leading to potential hot spots. “Convection Bake” adds a fan that circulates hot air evenly throughout the oven. This results in faster, more even cooking and often crispier exteriors. Convection may require a slight temperature reduction compared to conventional baking.
How often should I clean my Whirlpool oven?
The frequency of cleaning your Whirlpool oven depends on your usage. For light use, a quick wipe-down every few weeks and using the self-clean feature every few months might suffice. If you cook frequently or have large spills, clean them immediately after the oven cools. This prevents food from baking onto surfaces and becoming harder to remove.
Conclusion
Using your Whirlpool oven for the first time is a milestone for any home cook. We covered everything from initial setup to understanding its core functions and vital safety measures. You now have the knowledge to confidently use your new Whirlpool oven. Remember, starting with proper unboxing and an essential burn-off ensures a clean, odor-free beginning.
Familiarize yourself with your oven’s control panel. Learn how to use
- Whirlpool oven
- oven use
- first time oven
- kitchen appliances
- cooking guide
- oven safety


