· Todd Martin · Furniture Care · 15 min read
How To Use Antique Wax

Learn How To Use Antique Wax Effectively
Do you own a beautiful piece of antique furniture? Perhaps it looks dull, dry, or simply lacks its original luster. Antique wax offers a wonderful solution. It helps to nourish the wood and create a protective barrier. Applying wax correctly brings out the wood’s natural grain and richness. This process also adds a subtle sheen, making your cherished pieces look vibrant again.
Antique wax is not just a cleaner; it is a restorer and a protector. It helps preserve the historical integrity of your furniture. Many people find the idea of waxing antiques daunting. However, the process is simple with the right knowledge. This article guides you through every step. We will cover choosing the right wax, preparing your furniture, and applying the wax for a flawless finish. I will also share tips for maintenance and troubleshooting. By the end, you will feel confident to bring your antique furniture back to life.
Takeaway
- Choose the Right Wax: Select natural waxes like beeswax or carnauba for best results.
- Prepare the Surface: Clean and repair furniture before applying wax for a smooth finish.
- Apply Thin, Even Coats: Use a soft cloth to spread wax sparingly.
- Buff Thoroughly: Achieve a deep shine by buffing with a clean cloth.
- Maintain Regularly: Dust often and reapply wax as needed to protect wood.
Using antique wax properly involves selecting the correct type of wax, ensuring the furniture surface is clean and prepared, applying the wax in thin, even layers, and then buffing to a desirable sheen. This process protects the wood, enhances its natural beauty, and extends the life of your antique pieces.
Understanding Antique Wax Types
When you decide to restore an antique piece, choosing the right wax is the first step. Different types of antique wax offer varied benefits. Knowing these differences helps you pick the best product for your furniture. I often find people use just any wax, but specific waxes work better for certain finishes and wood types. This section explains the most common wax types available.
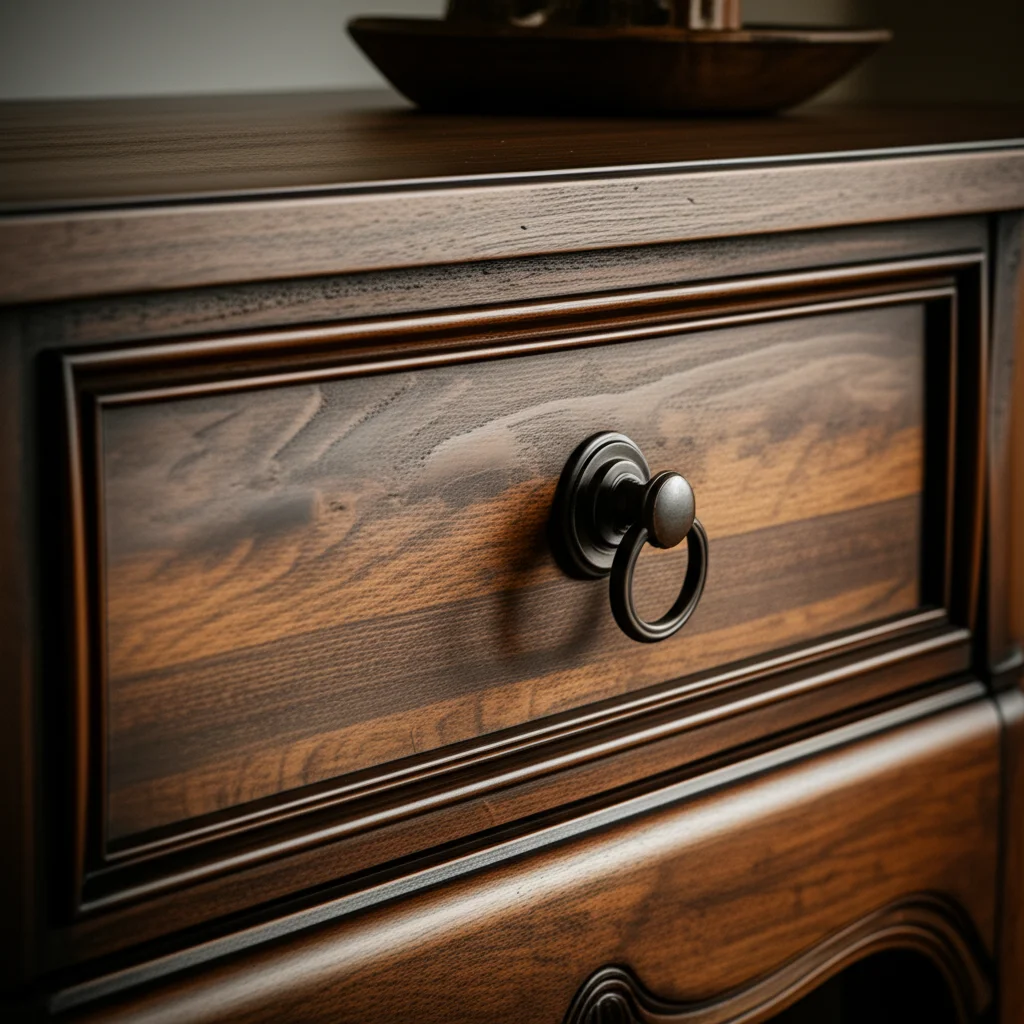
Beeswax is a popular choice for antique furniture. It provides a soft, natural sheen. Beeswax also offers good protection against moisture and dust. It is easy to apply and buffs to a warm glow. Many people prefer beeswax for its natural properties. It also gives a pleasant, subtle scent.
Carnauba wax comes from the leaves of a Brazilian palm tree. This wax is much harder than beeswax. It offers a more durable and harder finish. Carnauba wax provides excellent water resistance. It also gives a higher, glossier shine. Often, manufacturers blend carnauba wax with beeswax. This blend combines the best qualities of both waxes.
Blended waxes are common and combine several types of waxes. These often include beeswax, carnauba, and sometimes other natural oils or resins. Blended waxes aim for a balance of easy application, good protection, and a beautiful finish. Some blends also contain solvents to help with application. I prefer using a quality blended wax for most antique furniture projects. They offer versatility and reliable performance. You can also find tinted waxes. How to darken wood furniture with wax explains how these can change the wood’s color.
Some waxes might have specific uses, like white wax. How to use white wax on furniture provides more detail on its application. Always read the product label carefully. This ensures the wax matches your furniture’s needs. A good wax choice sets the foundation for a stunning finish.
Preparing Your Antique Furniture for Waxing
Before you apply any antique wax, proper preparation is essential. Skipping this step can lead to a patchy or dull finish. The surface must be clean and free of old dirt, grime, and previous polishes. I always dedicate time to this crucial stage. It ensures the wax adheres correctly and provides maximum protection.
Start by thoroughly cleaning the furniture. Use a soft, lint-free cloth dampened with a mild cleaner. You can use a mixture of warm water and a small amount of dish soap. Wipe down all surfaces gently. Pay attention to carvings, crevices, and areas that collect dust. For stubborn grime, specialized furniture cleaners might be necessary. Avoid harsh chemicals or abrasive materials. They can damage the antique finish.
After cleaning, let the furniture dry completely. Any moisture can prevent the wax from bonding properly. Once dry, inspect the surface for existing wax buildup. Old wax layers can accumulate dirt and become cloudy. If you notice significant buildup, you may need to remove it. A gentle wax remover or mineral spirits can help. Apply sparingly to a small area first to test. Then, wipe off the dissolved wax with a clean cloth.
Address any minor imperfections next. Small scratches or dents might be less noticeable after waxing. However, deeper damage may require repair before waxing. How to repair water damaged antique furniture offers guidance on more severe issues. If the furniture has mildew, clean it before waxing. How to clean mildew off antique wood furniture can help you with that. The goal is to provide a smooth, clean canvas for the new wax application. This preparation makes a big difference in the final look and longevity of your waxed finish.
Step-by-Step Guide to Applying Antique Wax
Applying antique wax is a rewarding process. It reveals the true beauty of your furniture. Once your piece is clean and ready, you can begin the application. I find that patience and a light touch are key here. Rushing the process often leads to uneven results. Follow these steps for a beautiful, lasting finish.
First, gather your materials. You will need your chosen antique wax, a soft, lint-free applicator cloth (like an old cotton t-shirt), and a separate clean buffing cloth. Ensure the room is well-ventilated. Apply the wax in a circular motion. Pick up a small amount of wax with your applicator cloth. A little goes a long way. Work in small sections, not the entire piece at once. This approach helps control the application.
Apply the wax to the wood surface in a thin, even layer. Use gentle, circular motions. Think of it like moisturizing your skin. You want to rub it in thoroughly. Make sure to cover all areas evenly. Avoid applying too much wax at once. Excess wax can become gummy or sticky. It can also be difficult to buff later. For carved areas or intricate details, use a soft brush or cotton swab to work the wax into crevices.
Allow the wax to haze or dry slightly. This usually takes 5 to 20 minutes, depending on the wax type and humidity. You will see a slight dulling as it dries. Do not let it dry completely hard. Once it has hazed, take your clean buffing cloth. Buff the waxed area vigorously. Use firm, circular motions. You will notice a shine emerging as you buff. Continue buffing until the surface feels smooth and has the desired sheen. Rotate your cloth frequently to use clean sections. This prevents spreading excess wax around.
If you desire a deeper shine or more protection, you can apply a second thin coat. Wait several hours, or even overnight, before applying the next layer. Repeat the application and buffing process. Multiple thin coats generally provide better protection and a richer luster than one thick coat. Remember, it’s about building layers.
Maintaining Waxed Antique Furniture
Once you have waxed your antique furniture, proper maintenance keeps it looking its best. Wax provides a protective layer, but it is not permanent. Regular care helps preserve the finish and extends the time between major re-waxing. I have found that a simple routine makes a big difference. It helps my pieces retain their glow for years.
Daily dusting is important. Use a soft, dry, lint-free cloth. Dust can be abrasive, especially if it builds up. Regular dusting prevents scratches and keeps the surface clean. Avoid using feather dusters; they only move dust around. A microfiber cloth works very well. For light cleaning, a slightly damp cloth can be used. Be sure to dry the surface immediately afterwards. Do not use spray polishes or silicone-based products on waxed furniture. These can build up over time. They can also create a sticky film or dull the wax finish.
Reapplication frequency depends on use and environment. High-traffic pieces, like a dining table, may need re-waxing more often. A decorative cabinet might need it less frequently. Generally, I recommend re-waxing every six months to a year. You will notice when the finish starts to look dull or dry. It might also feel less smooth to the touch. These are signs it is time for a new coat. You do not need to strip the old wax every time. Simply clean the surface as before. Then apply a new thin layer and buff it.
For specific wax issues, like cleaning up spills, you might need different methods. How to clean melted wax gives good general advice for spills. If you have any stubborn spots or marks, try using a slightly damp cloth. Then, gently rub the area with a small amount of wax. Buff it immediately with a clean cloth. This helps to blend the new wax into the existing finish. Consistent care ensures your antique furniture remains a beautiful highlight in your home.
Common Mistakes and Troubleshooting Wax Application
Even with careful application, sometimes things go wrong. Knowing how to identify and fix common mistakes is essential. I have certainly made a few errors myself over the years. The good news is most waxing issues are easily fixable. Do not get discouraged if your first attempt is not perfect. Understanding troubleshooting steps helps you achieve a professional finish.
One common issue is applying too much wax. This results in a sticky or gummy surface. It can also leave streaks or a cloudy appearance. If you notice this, do not panic. Take a clean, lint-free cloth slightly dampened with mineral spirits. Gently wipe the affected area. The mineral spirits will dissolve the excess wax. Work in small sections. Then, buff with a dry, clean cloth immediately. This removes the excess and restores the clarity. How to remove wax from chalk painted furniture offers similar advice for specific painted surfaces.
Another problem is a dull or uneven finish. This usually happens from insufficient buffing. If your furniture looks dull after waxing, it simply needs more buffing. Grab a fresh, clean buffing cloth. Put some elbow grease into it. Buff the surface vigorously in circular motions. The friction from buffing creates the shine. Make sure your cloth is clean and dry. A dirty cloth can redistribute wax and grime. Continue buffing until you achieve the desired luster.
Sometimes, white streaks or spots appear. This often indicates moisture or cleaner residue trapped under the wax. To fix this, you might need to re-clean the area. Use a very light amount of mineral spirits to strip the wax from the affected spot. Ensure the surface is completely dry. Then reapply a very thin layer of wax and buff well. If you encounter hard or dry wax that’s difficult to buff, warming the wax slightly before application can help. How to clean hard wax has tips that might be helpful. Remember, practice makes perfect. Each piece of furniture is different, and you will learn best by doing.
When Not to Use Antique Wax (and Alternatives)
Antique wax is wonderful for many pieces, but it is not always the best choice. Knowing when to use an alternative finish is important. Applying wax to the wrong surface can lead to problems. It might not offer enough protection. Or it could even damage the existing finish. I always assess the furniture before deciding on wax. This section guides you on when to consider other options.
Do not use antique wax on surfaces that need heavy-duty protection. Kitchen countertops or dining tables that experience frequent spills and heat are examples. Wax provides a good barrier, but it is not as durable as a polyurethane or varnish finish. Hot dishes or spilled liquids can easily penetrate wax. They can leave rings or stains. For these high-use areas, a more robust topcoat is usually better.
Avoid using wax on furniture with a factory-applied lacquer or varnish that is in good condition. These finishes are typically more durable than wax. Applying wax over them can sometimes dull their shine. It can also create a cloudy appearance over time. If the existing finish is already protecting the wood well, leave it alone. Simply clean it as needed.
Also, do not use antique wax on outdoor furniture. Wax is not designed for exposure to elements like rain, sun, and extreme temperatures. It will break down quickly. Outdoor furniture requires specific weather-resistant finishes. These include outdoor stains, oils, or polyurethane designed for exterior use.
Sometimes, you might need to consider stripping the furniture. If the existing finish is heavily damaged, flaky, or deeply discolored, stripping might be necessary before any new finish. How to strip antique furniture provides a comprehensive guide. This step allows you to start fresh with a new finish, whether it is wax or something else. Ultimately, choose the finish that best suits the furniture’s use and condition.
Enhancing Aesthetics with Tinted Antique Waxes
Tinted antique waxes offer a fantastic way to enhance your furniture’s appearance. They do more than just protect and shine. These waxes can deepen the color of the wood. They can also create an aged or ‘antiqued’ look on painted surfaces. I love using tinted waxes to add character and depth to a piece. It is a simple way to achieve a custom finish.
Tinted waxes come in various shades. Common colors include dark brown, black, and even white. Dark waxes are excellent for emphasizing wood grain. They fill the pores and carvings, making details stand out. This gives an instant aged look. For example, a dark brown wax on oak furniture makes the grain pop. It creates a rich, deep finish. How to darken wood furniture with wax explains this process in detail.
When using tinted wax on wood, apply it sparingly. Work it into the grain. Then, wipe off the excess. Buff for a subtle tint and shine. The more you leave on, the darker the effect. Always test on an inconspicuous area first. This helps you determine the desired level of tint.
Tinted waxes are also perfect for distressing or antiquing painted furniture. You can apply a dark wax over chalk paint or milk paint. This settles into crevices and brushstrokes. It creates shadows and a worn appearance. For instance, black wax over a light-colored painted piece gives a grimy, old-world look. How to antique chalk painted furniture details this technique.
White wax can achieve a limed or bleached effect. This works well on open-grained woods. It settles into the grain, giving a light, airy look. White wax is also useful for creating a ‘shabby chic’ style on painted pieces. Experiment with different colors and techniques. Tinted waxes provide a versatile tool for customization. They let you personalize your antique pieces.
FAQ Section
Q1: How often should I apply antique wax to my furniture?
You should typically reapply antique wax every six months to a year. However, this depends on how much the furniture is used. High-traffic items like tables may need more frequent waxing. Decorative pieces in less active areas might only need it once a year. Look for signs of dullness or dryness. This indicates it is time for a new coat.
Q2: Can antique wax protect furniture from water damage?
Antique wax provides some protection against moisture. It creates a barrier that can repel small spills. However, it is not waterproof. Prolonged exposure to water or standing liquids can still damage the wood. For high-risk areas, consider a more durable, waterproof finish. Wipe up spills immediately to prevent issues.
Q3: What is the difference between antique wax and furniture polish?
Antique wax offers a deeper, more lasting protection and sheen. It penetrates the wood slightly and forms a solid protective layer. Furniture polish often contains silicones or oils. These can sit on the surface and attract dust over time. Polishes are usually for quick cleaning and shine, while wax is for conditioning and long-term protection.
Q4: Can I use antique wax on painted furniture?
Yes, you can use antique wax on painted furniture. It is especially popular for enhancing chalk-painted or milk-painted pieces. Wax adds a protective layer and a beautiful, soft sheen. Tinted waxes can also create an antique or distressed look on painted surfaces. Always ensure the paint is fully cured before applying wax.
Q5: How do I remove old wax buildup from antique furniture?
To remove old wax buildup, use mineral spirits. Apply a small amount to a clean, lint-free cloth. Gently rub the affected area in small sections. The mineral spirits will dissolve the old wax. Wipe off the dissolved wax immediately with another clean cloth. Repeat if necessary, then allow the furniture to dry completely before re-waxing.
Q6: Is antique wax suitable for all types of wood?
Antique wax is suitable for most types of finished wood. It works well on solid wood, veneers, and previously waxed or oiled surfaces. However, it is not ideal for heavily lacquered or varnished pieces that are in good condition. Always test wax on an inconspicuous area first. This checks for compatibility and desired finish.
Conclusion
Learning how to use antique wax properly transforms your cherished furniture. It brings out the natural beauty of the wood. You protect these valuable pieces for future generations. The process is straightforward. It begins with selecting the right wax, preparing the surface meticulously, and applying thin, even coats. Finally, buffing brings out that beautiful, lasting shine.
Maintaining your waxed furniture requires simple, consistent care. Regular dusting and timely reapplication keep the finish vibrant. Do not be afraid of common issues; they are easy to fix. Understanding when to use wax and when to choose alternatives ensures the best outcome for your furniture. I encourage you to try waxing your antique pieces. You will find immense satisfaction in restoring their former glory. Give your antique furniture the care it deserves with proper antique wax application. Your efforts will surely shine through.

Todd Martin
Senior Writer
With over 15 years of experience in home renovation and design, I started HEG to share what I’ve learned with homeowners who want to create spaces that are both beautiful and functional. I’ve always believed in a hands-on approach, and over the years, I’ve picked up practical solutions that actually work. Through HEG, I aim to make home improvement more approachable, sharing real tips that help you create a home you truly love.