· Katria Melrose · Outdoor Cooking · 14 min read
How To Use An Outdoor Pizza Oven For The First Time
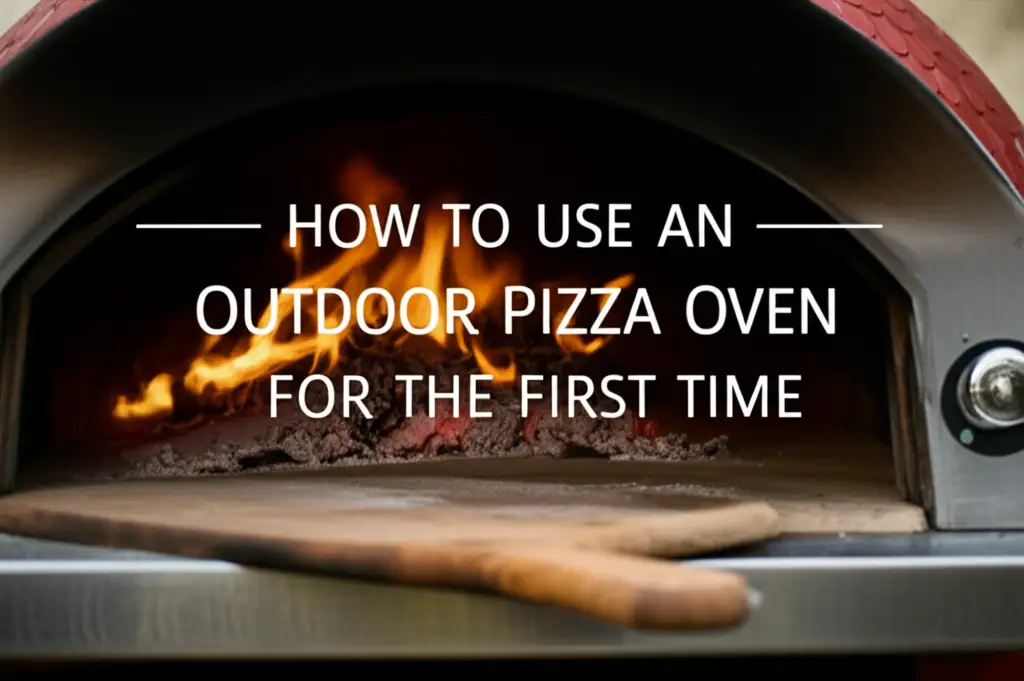
How To Use Your Outdoor Pizza Oven For The First Time
Imagine crisp crusts, bubbly cheese, and perfectly charred edges on your homemade pizza. This dream becomes a reality with an outdoor pizza oven. Many people feel unsure about using an outdoor pizza oven for the first time. It is a new experience, different from standard kitchen ovens.
This guide helps you understand each step. We will cover safe setup, the important curing process, and how to fuel your oven. You will learn temperature control for perfect cooking. We also share tips for your first pizza and essential tools. Prepare to master outdoor pizza making with confidence.
Takeaway
- Choose a Safe Location: Place your oven on a stable, non-combustible surface with proper clearance.
- Complete the Curing Process: Perform initial low-heat burns to remove moisture and strengthen the oven’s materials.
- Learn Your Fuel: Understand how to properly load wood or connect gas for efficient heat.
- Master Temperature Control: Use an infrared thermometer to ensure the oven and stone reach optimal heat.
- Practice Launching: Develop your technique for sliding pizzas into and out of the hot oven.
- Maintain Regularly: Clean your oven after it cools down and protect it from weather elements.
Using an outdoor pizza oven for the first time involves careful setup, a critical curing process, and learning to manage high heat. You preheat the oven to a very high temperature, launch your pizza quickly with a peel, rotate it for even cooking, and remove it when the crust is bubbly and charred, typically within minutes.
Setting Up Your Outdoor Pizza Oven Safely
Placing your outdoor pizza oven in the right spot is the first step to successful and safe pizza making. I remember my first time setting up, I wanted to ensure everything was perfect. A good location ensures safety and ease of use. It makes your pizza cooking experience much more enjoyable.
Choose a flat, stable, and non-combustible surface. Concrete or paving stones are good options. Keep the oven away from flammable materials like wooden fences, shrubs, or overhanging trees. You need proper clearance around the oven for ventilation and safety. This protects both your property and everyone around the oven.
Choosing the Right Location
Think about where the oven will live permanently. You want a spot that is easy to access. Make sure you have enough space to work around the oven. This includes room for preparing pizzas and handling hot tools. The area should also be clear of overhead obstructions.
Consider wind direction when placing your oven. Strong winds can affect how your oven heats up. They can also blow embers or smoke. Placing your oven where it gets some protection from direct wind is a smart move. This helps maintain consistent heat inside the oven.
Assembling Your Oven
Most outdoor pizza ovens come with clear assembly instructions. Read these instructions carefully before you start. Gather all the necessary tools mentioned in the manual. Follow each step precisely to ensure a secure build. A correctly assembled oven works safely and efficiently.
Some ovens require a dedicated base or stand. You might even consider building a custom setup. Creating a sturdy base is essential. For those who enjoy DIY projects, learning how to make an outdoor table top can provide an excellent foundation for your oven. Ensure the base can support the oven’s weight. This prevents wobbling or tipping during use. Always double-check all connections and bolts before lighting the oven.
Curing Your New Outdoor Pizza Oven
Curing your outdoor pizza oven is a crucial initial step. It prepares the oven for high-temperature cooking. Many people skip this part, but I strongly advise against it. Curing helps prevent cracks and extends the life of your oven. It removes residual moisture from the materials.
The curing process involves a series of low-temperature burns. These burns gradually increase the oven’s internal temperature. This allows the materials to expand and contract slowly. It also helps to fully dry out any remaining water. A properly cured oven performs better and lasts longer.
For wood-fired ovens, start with a small, gentle fire. Use only a few pieces of wood. Maintain a low flame for a few hours. Let the oven cool completely. Repeat this process, gradually increasing the fire size and temperature over several sessions. This slow, controlled heating prevents thermal shock.
If you have a gas-fired outdoor pizza oven, the curing process is similar. Turn the gas burner to its lowest setting. Let it run for a period, typically an hour or two. Turn it off and allow the oven to cool down completely. Repeat this process, increasing the heat setting slightly with each subsequent cure. Always follow your oven manufacturer’s specific curing instructions. They provide the most accurate guidance for your model.
This initial conditioning ensures your oven’s structure is ready. It prepares the pizza stone inside for cooking as well. A well-cured oven provides consistent heat distribution. This leads to perfectly cooked pizzas every time. Do not rush this step; patience now ensures better results later.
Fueling and Firing Up Your Outdoor Pizza Oven
Getting your outdoor pizza oven to the right temperature is an art. It takes some practice, but it is achievable. Knowing your fuel source is key to successful pizza making. Whether you use wood or gas, understanding how to manage the flame is important.
For wood-fired ovens, the choice of wood matters. Hardwoods burn hotter and longer. Oak, maple, hickory, or fruitwoods like apple and cherry are good choices. Avoid softwoods like pine, which produce more creosote and lower heat. Ensure your wood is well-seasoned and dry. Wet wood produces too much smoke and little heat.
Start with small pieces of kindling and fire starters. Build a small fire directly on the oven floor, usually at the back or side. Once the kindling catches, add slightly larger pieces of wood. Allow the flame to grow steadily. You want a bright, roaring flame that reaches the top of the oven. This flame heats the oven dome.
For gas-fired outdoor pizza ovens, connect your propane tank securely. Open the gas valve on the tank. Turn the control knob on the oven to the ignition setting. Push it in and turn to light the burner. Adjust the flame size with the control knob. Gas ovens offer precise temperature control, which is a great advantage for beginners. They heat up quickly and maintain a consistent temperature with ease.
Monitor the oven temperature as it heats. Use an infrared thermometer to measure the temperature of the pizza stone. Aim for 750-900°F (400-480°C) for most Neapolitan-style pizzas. This high heat cooks pizzas very fast, usually in 60-90 seconds. Be patient during preheating. It can take 30-60 minutes, depending on your oven model and fuel type, to reach the desired temperature.
Mastering Pizza Oven Temperature Control
Controlling the temperature in your outdoor pizza oven is critical for perfect results. The intense heat cooks pizzas quickly. Learning to manage this heat ensures even cooking and ideal crust development. My first few pizzas were either undercooked or overly charred until I learned this.
An infrared thermometer is an essential tool. This device reads the surface temperature of your pizza stone and oven walls. It gives you an accurate measurement of the cooking surface. Aim for your pizza stone to be between 750-900°F (400-480°C). This high temperature creates the signature crispy crust and airy crumb.
For wood-fired ovens, maintaining the flame is key. You need a consistent flame licking the roof of the oven. Add small pieces of wood regularly to keep the fire going strong. If the temperature drops, add more fuel. If it gets too hot, let the flame die down slightly before adding more wood. Move the hot embers to the side of the oven to create a consistent heat source.
Gas ovens offer more precise control. You adjust the temperature simply by turning a knob. Start with a high setting to reach the desired temperature quickly. Once it is hot, you might lower the flame slightly to maintain a steady temperature. This allows for easier adjustments between pizzas.
Heat distribution is also important. The heat radiates from the flame and the hot dome of the oven. The pizza stone absorbs this heat, cooking the base of your pizza. A clean pizza stone is important for even heat transfer. Make sure your stone is free of debris. Rotate your pizza regularly inside the oven. This ensures even cooking on all sides. Different parts of the oven can be hotter than others. Turning the pizza prevents one side from burning while the other remains raw.
Cooking Your First Pizza in the Outdoor Oven
The moment has arrived: cooking your first pizza! This part is exciting and a bit fast-paced. High heat means quick cooking times, often under two minutes. Having everything ready beforehand is very important. I always prepare my ingredients and tools first.
Start with a well-floured pizza peel. Sprinkle a generous amount of semolina flour or regular flour on the peel. This prevents the dough from sticking. Prepare your pizza directly on the peel. Work quickly but carefully. Once the toppings are on, give the peel a gentle shake to ensure the pizza slides freely. If it sticks, lift a bit and add more flour underneath.
When the oven and stone are at optimal temperature, it’s time to launch. Open the oven door. Aim the edge of the pizza at the back of the stone. With a swift, confident forward motion, slide the peel out from under the pizza. This takes practice. Do not hesitate. A slow launch makes the pizza stick.
Once inside, monitor your pizza closely. It will cook very quickly. The crust will puff up, and the cheese will bubble. After about 30-45 seconds, use a turning peel. Gently lift and rotate the pizza 90 or 180 degrees. This ensures even cooking on all sides. The area closest to the flame cooks faster. Repeat the turning process as needed until the pizza is golden brown with leopard spots (charred bubbles) on the crust.
Recognize when your pizza is done. The crust should be crispy and firm. The toppings should be cooked through. The cheese should be melted and lightly browned. Use your turning peel to slide the cooked pizza onto the serving peel. Carefully remove it from the oven. Let it cool for a minute before slicing and serving. Enjoy the reward of your efforts!
Essential Tools and Accessories for Outdoor Pizza Ovens
Having the right tools makes a big difference in your outdoor pizza oven experience. They make the process smoother, safer, and more enjoyable. When I first started, I quickly realized some items are absolute must-haves. These tools help you achieve perfect pizzas every time.
First, you need a high-quality pizza peel. There are two main types: a launching peel and a turning peel. The launching peel is larger. It is usually made of wood or metal. You use it to slide your uncooked pizza into the hot oven. A metal peel often has a thinner edge, which helps with a smooth launch. For durability and stability, consider a metal peel with a sturdy handle.
A turning peel is smaller, often round, and made of metal. This tool helps you rotate your pizza inside the blazing hot oven. It lets you adjust the pizza’s position without removing it completely. This is critical for even cooking and preventing burnt spots. It allows you to check doneness and move the pizza efficiently.
An infrared thermometer is incredibly useful. This non-contact thermometer measures the surface temperature of your pizza stone. It tells you if the stone is hot enough for cooking. You point it at the stone, and it gives an instant reading. This tool takes the guesswork out of preheating. It helps you ensure consistent results.
For wood-fired ovens, you will need fireproof gloves. These protect your hands when adding wood or moving embers. A pizza oven brush with a long handle is also essential. You use it to sweep ashes and debris off the pizza stone after cooking. A small metal shovel or rake helps manage the wood and embers inside the oven.
Finally, consider an oven cover. This protects your outdoor pizza oven from weather elements. Rain, snow, and excessive sun can damage the oven over time. A cover helps extend its lifespan and keeps it looking new. Some people also set their ovens up on sturdy tables, and ensuring your table is waterproof for outdoor use provides extra protection for your setup. These tools are an investment, but they enhance your pizza-making journey significantly.
Maintaining and Storing Your Outdoor Pizza Oven
Proper maintenance and storage ensure your outdoor pizza oven stays in top condition. Neglecting these steps can shorten its lifespan. After enjoying delicious pizzas, think about the cleaning process. This helps prepare the oven for your next cooking session.
Allow your oven to cool down completely after each use. Never try to clean a hot oven. This can cause damage to the materials. Once the oven is cool, use a long-handled brush to sweep out any ashes or debris from the cooking surface. For wood-fired ovens, remove cooled ash from the firebox. A small dustpan can help with this.
The pizza stone usually cleans itself at high temperatures. Any food residue on the stone will burn off during heating. If you see stubborn marks, you can gently scrape them off with a metal spatula once the oven is cold. Avoid using soap or harsh chemicals on the stone. These can be absorbed and affect the taste of future pizzas. Water is usually enough for general cleaning, but avoid soaking the stone.
Inspect the oven for any signs of wear or damage. Check the chimney or exhaust vent for blockages. Keep the exterior of your oven clean. Wipe it down with a damp cloth to remove soot or dust. For metal parts, ensure they are dry to prevent rust.
When not in use, protect your outdoor pizza oven from the elements. This is especially important if you live in an area with harsh weather. A custom-fit cover is the best option. It shields the oven from rain, snow, and strong sunlight. If your oven is on a table, make sure the outdoor table itself is also protected. Regular protection prevents corrosion and extends the life of your oven. Store wood or propane tanks away from the oven. This prevents fire hazards. Proper care means many years of amazing pizzas from your outdoor oven.
FAQ Section
How long does it take to preheat an outdoor pizza oven?
Preheating an outdoor pizza oven typically takes 30 to 60 minutes. This time depends on the oven model, fuel type (wood or gas), and ambient temperature. You aim for the pizza stone to reach 750-900°F (400-480°C). Use an infrared thermometer to get an accurate reading. Patience during preheating ensures the best cooking results.
What kind of wood should I use for a wood-fired pizza oven?
Use seasoned hardwoods like oak, maple, hickory, or fruitwoods such as apple and cherry. These woods burn hot and clean, producing minimal smoke and ash. Avoid softwoods like pine or fir, as they burn quickly and produce more creosote, which can affect flavor and oven cleanliness. Ensure the wood is completely dry.
Can I cook other foods in my outdoor pizza oven?
Yes, you can cook many other foods in an outdoor pizza oven. The high heat is excellent for baking bread, roasting vegetables, cooking fish, or searing meats. You can also bake desserts like cookies or fruit crisps. Adjust the oven temperature and cooking time based on the food type. Experiment to discover new favorites.
How often should I clean my pizza oven?
Clean your pizza oven after every few uses or as needed. Sweep out ashes and debris from the cooking surface after each use once the oven is cool. The high heat generally sanitizes the pizza stone. Perform a deeper clean, like wiping down the exterior and checking for structural integrity, every few months.
What temperature is best for cooking pizza?
The ideal temperature for cooking traditional Neapolitan-style pizza in an outdoor oven is between 750-900°F (400-480°C). This high heat cooks pizzas in 60-90 seconds, creating a crispy crust with bubbly, charred spots. For other pizza styles, you might use a slightly lower temperature, around 600-700°F (315-370°C).
Conclusion
Congratulations! You now have a clear path to confidently using an outdoor pizza oven for the first time. We covered choosing a safe location and the important curing process. You learned how to fuel your oven, control its high temperatures, and successfully cook your initial pizzas. Remember, practice makes perfect. Each time you use your oven, you will become more skilled at managing the heat and perfecting your technique.
Embrace the journey of outdoor pizza making. It offers a unique culinary experience. With the right setup, knowledge, and tools, you are ready to create delicious, restaurant-quality pizzas in your own backyard. Get ready to impress your family and friends. Enjoy the amazing taste of homemade pizza, cooked to perfection in your new outdoor oven. Let the pizza parties begin!
- outdoor pizza oven
- first time use
- pizza oven tips
- wood fired pizza
- gas pizza oven
- outdoor cooking

Katria Melrose
Cleaning Specialist
With over 12 years of experience in commercial cleaning and a certification in workplace ergonomics, I’ve developed a deep understanding of what makes a workspace truly productive. At HEG, I specialize in helping people transform their home offices into clean, efficient, and comfortable environments. Through smart cleaning routines and strategic organization solutions, I empower readers to create spaces that support focus, comfort, and success—one well-organized desk at a time.