· Todd Martin · Furniture Restoration · 21 min read
How To Sand Chair Spindles
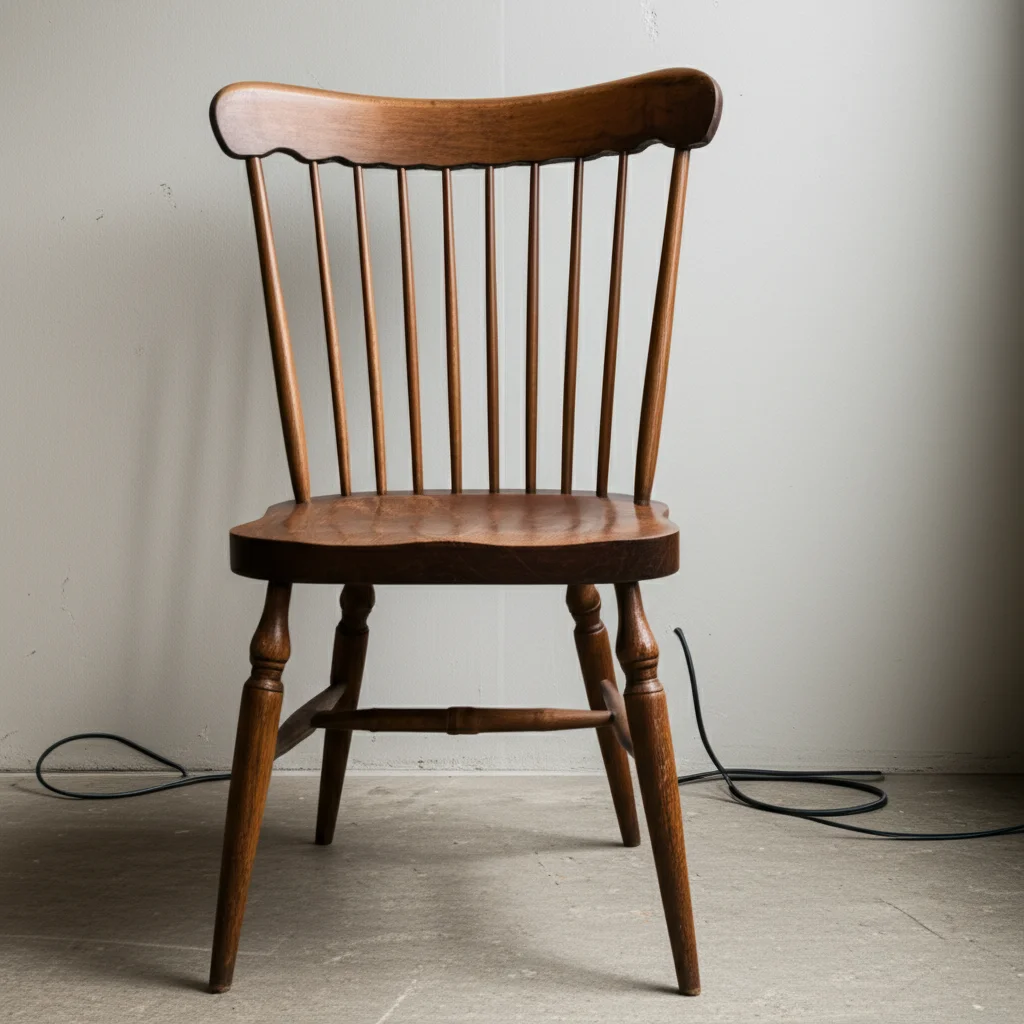
Master the Art: How To Sand Chair Spindles
Have you ever looked at an old wooden chair and wished you could bring it back to life? Often, the most challenging part of refinishing a chair is dealing with its intricate spindles. These slender, often decorative, components can feel impossible to sand properly. But with the right approach, you can achieve a flawless surface on every curve and crevice.
This guide will show you exactly how to sand chair spindles. We will cover the essential tools you need and the best techniques for both hand sanding and power sanding. You will learn how to prepare your chair, work through different grit levels, and ensure a perfectly smooth finish. Get ready to transform your chairs with confidence.
Takeaway:
- Use specific tools like sanding cords, foam blocks, or rotary tools for intricate spindles.
- Always start with a coarser grit and move to finer grits for a smooth finish.
- Clean the spindles thoroughly before and after sanding to remove dust and debris.
- Protect surrounding areas from sanding dust and accidental damage.
- Patience and precision are key when working with delicate spindle shapes.
To sand chair spindles effectively, prepare the surface by cleaning it thoroughly. Use specialized tools like sanding cords, strips, or flexible foam blocks to navigate curves and tight spaces. Always progress through various sandpaper grits, from coarse to fine, to achieve a smooth, even finish.
Why Proper Sanding of Chair Spindles Matters
Sanding chair spindles prepares the wood surface for a new finish. It removes old paint, varnish, or stains, creating a clean base. Proper sanding also smooths out imperfections, scratches, and rough spots. This step is critical for ensuring that your new stain or paint adheres evenly.
A well-sanded surface allows finishes to penetrate deeply and evenly. This leads to a more durable and beautiful result. Skipping or rushing this process can leave uneven areas, visible marks, or patchy finishes. Spindles are often touched, so a smooth feel is also important.
Chair spindles, due to their shape, collect dirt and old finish. Sanding them meticulously ensures no old residue remains. This means your new finish will look fresh and professional. It also extends the life of your furniture.
Essential Tools and Materials for Sanding Spindles
Before you begin to sand chair spindles, gather the right tools. Having everything ready saves time and frustration. The proper equipment makes the job much easier and more effective. Different tools work best for various spindle shapes.
Hand Sanding Supplies
Hand sanding is often the best approach for delicate spindles. It gives you maximum control. You can reach all the intricate details this way.
- Sandpaper Sheets: Buy assorted grits from 80-grit (coarse) to 220-grit (fine). You may need 100-grit, 120-grit, and 150-grit in between.
- Sanding Strips/Cords: These are thin strips or cords coated with abrasive material. They wrap around spindles and fit into grooves. They are excellent for sanding tight spots and round surfaces.
- Sanding Sponges/Foam Blocks: These flexible blocks conform to curves. They are great for general spindle shapes. Different densities offer varied firmness.
- Contour Sanding Grips: These are specialized rubber or plastic blocks with various shapes. They mimic common spindle profiles. Using these helps maintain the original shape while sanding.
- Wood Files/Rasps (Optional): For removing heavy buildup or reshaping badly damaged areas. Use these with extreme care.
Power Sanding Aids (Use with Caution)
Power tools can speed up the process on less intricate spindles. However, they can quickly remove too much material. Practice on scrap wood first if you are new to power sanding delicate parts.
- Rotary Tool (e.g., Dremel): A versatile tool with many attachments. Small sanding drums, flap wheels, or abrasive brushes can sand tight areas. These are ideal for detailed work but require a steady hand.
- Detail Sander: A small, compact sander with a triangular pad. It can reach some flat or slightly curved areas on spindles. It is less effective on truly round or deeply carved parts.
- Small Orbital Sander (with extreme caution): Only for larger, less complex spindle surfaces. Do not use on delicate or carved sections. It can quickly flatten curves. For larger flat surfaces, consider how to sand a table with an electric sander.
- Vacuum Cleaner with Hose Attachment: Essential for dust collection. Sanding produces a lot of fine dust. This dust can ruin a new finish if not removed.
- Air Compressor/Canned Air: For blowing dust out of crevices. This helps ensure a clean surface.
Safety Gear and Cleaning Supplies
Always protect yourself and your workspace. Sanding dust is harmful to breathe. It also makes a mess.
- Dust Mask/Respirator: Crucial for protecting your lungs from fine wood dust and old finish particles.
- Safety Glasses: Protect your eyes from flying debris.
- Gloves: Protect your hands from splinters and reduce friction.
- Shop Rags/Microfiber Cloths: For wiping down surfaces.
- Tack Cloth: A sticky cloth for picking up fine dust particles before finishing.
- Drop Cloths/Plastic Sheeting: To protect your floor and surrounding areas.
- Painter’s Tape: To mask off areas you do not want to sand.
Having these items ready ensures a smooth and safe sanding experience. Remember, quality tools make a difference in the final outcome. Investing in good sanding cords or a reliable rotary tool pays off.
Preparing Chair Spindles for Sanding
Proper preparation is key to a successful sanding job. Do not skip these steps. They ensure the best possible surface for your new finish. A clean spindle sands more effectively.
Cleaning the Chair
Start by thoroughly cleaning the entire chair. Old furniture often has layers of grime, grease, and dirt. Sanding over dirt pushes it into the wood, causing stains or uneven sanding.
- Remove Loose Debris: Use a brush or vacuum to remove loose dust, cobwebs, and crumbs.
- Degrease and Clean: Mix a mild detergent (like dish soap) with warm water. Dampen a cloth and wipe down all chair surfaces. For stubborn grease, use a wood cleaner or mineral spirits. Wipe the spindles thoroughly, paying attention to grooves and corners.
- Rinse and Dry: Wipe the chair with a clean, damp cloth to remove soap residue. Let the chair dry completely, ideally for several hours or overnight. Moisture can swell wood and affect sanding.
Inspecting and Repairing Damage
After cleaning, inspect the spindles for damage. Addressing these issues now saves work later. Sanding cannot fix deep damage.
- Tighten Joints: Check if any spindles are loose. If so, apply wood glue to the joints and clamp them until dry. This prevents movement during sanding.
- Fill Gouges and Holes: Use wood filler for any deep scratches, gouges, or small holes. Apply the filler, let it dry, and then sand it flush with the surrounding wood. Choose a filler that accepts stain if you plan to stain the chair.
- Repair Splinters: Glue down any loose splinters. If a piece is missing, you might need to use wood epoxy or reconstruct the area.
- Remove Old Hardware: Take off any existing hardware, like glides or decorative elements, if they obstruct sanding. Store them safely for reinstallation.
Protecting Your Workspace and Other Chair Parts
Sanding creates a lot of fine dust. Protect your surroundings. Also, protect chair parts you do not want to sand.
- Lay Down Drop Cloths: Cover your floor and nearby furniture with drop cloths or plastic sheeting. This makes cleanup much easier.
- Ventilate the Area: Work in a well-ventilated area. Open windows and doors, or use fans. If working indoors, consider a portable air purifier.
- Mask Off Areas: If you are only sanding the spindles and want to preserve other parts (e.g., upholstery, intact paint on legs), use painter’s tape to mask them off. This prevents accidental sanding and dust accumulation.
- Elevate the Chair: Place the chair on sawhorses or a workbench. This makes it easier to access all sides of the spindles. Ensure the chair is stable and will not tip during sanding.
Taking these preparatory steps ensures a smoother, more efficient, and safer sanding process. You are now ready to tackle the spindles themselves.
Hand Sanding Techniques for Intricate Spindles
Hand sanding is often the best method for chair spindles. It offers precise control, which is essential for preserving the unique shapes of turned wood. This method prevents you from removing too much material too quickly. When learning how to sand grooves in furniture or curved parts, hand sanding is your best friend.
Choosing the Right Sandpaper Grit
Start with a coarser grit and gradually move to finer grits. The initial grit depends on the condition of the old finish.
- Coarse Grit (80-100 grit): Use this if the old finish is thick, peeling, or heavily damaged. It removes material quickly. Be gentle, as it can leave deep scratches if you apply too much pressure.
- Medium Grit (120-150 grit): This is often a good starting point for most refinishing projects. It removes lighter finishes and smooths out scratches from coarser grits.
- Fine Grit (180-220 grit): This grit prepares the wood for staining or painting. It smooths the surface for a silky feel. Use it for the final sanding pass. For very smooth finishes, some people go up to 320-grit.
Techniques for Curved and Round Spindles
Sanding a round spindle is different from sanding a flat surface. You need tools that conform to the shape.
Sanding Strips/Cords:
- Tear a long, narrow strip from a sandpaper sheet (about 1 inch wide).
- Wrap the strip around the spindle, holding both ends.
- Pull the strip back and forth, moving it along the length of the spindle. This method acts like a shoelace. It allows the abrasive to conform to the curves.
- For deep grooves, use sanding cords. These are thin, abrasive cords designed to fit into very tight spaces.
Sanding Sponges/Foam Blocks:
- These are flexible and can be wrapped around a spindle.
- Press the sponge firmly against the spindle and move it along the length.
- The sponge’s flexibility allows it to conform to curves and convex shapes.
- Use a firmer sponge for more aggressive sanding or a softer one for delicate curves.
Using Your Fingers:
- For very small or intricate details, wrap a small piece of sandpaper around your finger.
- Carefully sand the tiny areas. This gives you direct tactile feedback.
- Be cautious not to over-sand or alter the original shape.
Sanding Progression and Dust Removal
Always work through the grits systematically. Do not skip grits, especially if you started with a coarse one.
- Start with Coarse Grit: Begin with your chosen coarse or medium grit (e.g., 100 or 120-grit). Sand the entire spindle evenly. Apply moderate, consistent pressure. Ensure all old finish is removed.
- Move to Medium Grit: Once the coarser grit has done its job, switch to the next finer grit (e.g., 150-grit). This step removes the scratches left by the previous grit. Sand the entire spindle again.
- Finish with Fine Grit: For the final pass, use a fine grit (e.g., 220-grit). This smooths the wood fibers, preparing it for finishing. Sand gently.
- Dust Removal Between Grits: After each grit level, thoroughly remove all sanding dust. Use a vacuum with a brush attachment or an air compressor. This prevents coarser dust particles from scratching the surface when you switch to finer grits. A tack cloth is excellent for picking up fine dust right before the final finish.
Hand sanding takes time and patience, but it produces superior results on delicate chair spindles. You can achieve a professional finish this way. For larger, less intricate parts like round table legs, some of these hand techniques still apply, but power tools might be more efficient for primary sanding. You can read more about how to sand round table legs for more ideas.
Power Sanding Options for Chair Spindles
While hand sanding offers maximum control, power tools can significantly speed up the process on certain types of chair spindles. They are especially useful for spindles with larger, more uniform curves. However, use them with extreme caution. They can quickly remove too much material.
Rotary Tool (Dremel) with Sanding Attachments
A rotary tool is a handheld device with a high-speed rotating tip. It is excellent for detailed work on spindles. It offers a variety of attachments for different needs.
- Sanding Drums: Small, cylindrical attachments with abrasive bands. They fit into concave curves and can sand the broader parts of spindles. Choose the right size drum for the curve you are sanding.
- Flap Wheels: These have multiple layers of abrasive material. They conform well to irregular shapes and provide a smooth finish. They are good for finishing passes.
- Abrasive Brushes: Nylon or wire brushes embedded with abrasive grit. They clean and sand intricate details without altering the wood’s shape too much. They are effective for removing old finish from carvings or deep grooves.
- Technique: Hold the rotary tool firmly. Use light, consistent pressure. Keep the tool moving to prevent burning the wood. Work in sections. Change attachments as needed for different parts of the spindle. Practice on scrap wood first to get a feel for the tool’s power.
Detail Sanders for Accessible Areas
Detail sanders are small, often triangular, power sanders. They are designed for tight corners and smaller flat areas. They can be useful for certain spindle designs.
- Application: Use a detail sander on any relatively flat or gently curved part of a spindle. They are not effective on deeply rounded or highly intricate sections.
- Advantages: They remove material faster than hand sanding. Their small size allows them to fit into spaces larger orbital sanders cannot.
- Limitations: They can still be too aggressive for very delicate or thin spindles. They also struggle with truly round surfaces.
Other Power Tool Considerations (Use with Extreme Care)
- Sanding Sleeves on a Drill Press: For perfect cylindrical spindles, you might attach a sanding sleeve to a drill press. This spins the abrasive against the spindle. This method requires a steady jig to hold the spindle. It is usually for specific, uniform spindle designs.
- Oscillating Spindle Sander (OSS): This is a specialized stationary tool. It has a vertical spindle that oscillates (moves up and down) and rotates. You press the workpiece against it. While excellent for shaping new spindles, it can be tricky to use for refinishing existing ones on a chair due to the chair’s bulk. It is ideal if you have removed the spindles.
- Avoid Large Orbital Sanders: Standard orbital or random orbital sanders are generally too large and aggressive for chair spindles. They will quickly flatten curves and remove detail. Use them only for large, flat surfaces on the chair, like the seat. If you’re working on larger flat surfaces, consider how to sand a table with an electric sander.
Safety and Control
When using power tools:
- Wear Safety Gear: Always use safety glasses and a dust mask.
- Light Pressure: Apply very light pressure. Let the tool do the work.
- Keep Moving: Do not let the tool sit in one spot, even for a second. This causes gouges or burns.
- Dust Collection: Attach your vacuum cleaner to any power tool with a dust port. This keeps your workspace cleaner and reduces airborne dust.
- Slow and Steady: Work slowly and observe the wood. Power tools remove material quickly. It is better to make multiple light passes than one aggressive one.
Power sanding can save you time, but it demands skill and precision. Combine it with hand sanding for the best results on complex chair spindles. Some tasks, like sanding cabinets by hand, require similar attention to detail. You can learn more about how to sand cabinets by hand for additional hand-sanding tips.
Achieving a Smooth Finish on Spindles
Achieving a perfectly smooth finish on chair spindles is the goal. This takes patience and attention to detail. The final surface determines how well your new finish looks and feels. A truly smooth spindle feels good to the touch.
Gradual Grit Progression
The most important rule for smoothness is to progress through sandpaper grits systematically. Never skip a grit. Each successive grit removes the sanding marks left by the previous, coarser grit.
- Initial Sanding (e.g., 100-120 grit): This step removes the old finish and significant imperfections. It creates a uniformly sanded surface, even if it feels a bit rough.
- Intermediate Sanding (e.g., 150-180 grit): This grit refines the surface. It removes the scratches from the initial sanding. Spend enough time here to ensure all coarse marks are gone. Feel the surface with your fingertips; you should notice a definite improvement in smoothness.
- Final Sanding (e.g., 220 grit): This is the last sanding pass. It closes the wood pores and prepares the surface for finishing. Sand gently until the wood feels silky smooth. For a stained finish, 220 grit is usually sufficient. For a super smooth painted finish, you might go up to 320 grit.
The “Feel” Test and Lighting
Your fingers are your best tools for detecting imperfections.
- Run Your Hand Over the Surface: After each sanding stage, close your eyes and run your fingertips over the entire spindle. You will feel any remaining rough spots or unevenness. Your fingers can detect imperfections that your eyes might miss.
- Use Oblique Lighting: Shine a bright light across the surface of the spindle at a low angle. This “raking light” will highlight any scratches, swirls, or uneven areas that still need attention. Address these before moving to the next grit.
Dealing with Remaining Imperfections
Even with careful sanding, sometimes stubborn spots remain.
- Deep Scratches: If you find deep scratches after moving to a finer grit, you might need to go back to a slightly coarser grit (e.g., 150-grit) just for that specific area. Then, re-sand with the finer grits. Do not try to remove deep scratches with fine sandpaper; it will take forever.
- Grain Raising: When applying a water-based stain or topcoat, the water can cause the wood fibers to swell and stand up, making the surface feel rough again. This is called “grain raising.” To avoid this, after your final sanding (e.g., 220-grit), dampen the wood with a clean, damp cloth. Let it dry completely. The raised grain will now feel rough. Lightly sand the entire spindle again with your final grit (e.g., 220-grit). This extra step flattens the raised grain, ensuring a truly smooth finish after applying your actual product.
Dust Removal is Crucial
Dust is the enemy of a smooth finish. Tiny dust particles can embed in your new finish, creating bumps and a gritty texture.
- Vacuum Thoroughly: After each grit progression, use a vacuum cleaner with a brush attachment to remove all sanding dust from the spindles and surrounding areas.
- Blow with Air: Use an air compressor or canned air to blow dust out of any crevices or carved details on the spindles.
- Wipe with Tack Cloth: Before applying any finish, wipe down every part of the spindle with a tack cloth. These sticky cloths are designed to pick up the finest dust particles. Work carefully, especially on intricate parts.
By following these steps, your chair spindles will be perfectly smooth and ready for the next stage of your furniture restoration project. This meticulous preparation is what sets a professional-looking finish apart from an amateur one. For similar challenges on rocking chairs, these techniques are also highly relevant. You can read more about how to sand a rocking chair for broader application of these sanding principles.
Post-Sanding Care and Finishing Your Spindles
After all your hard work sanding chair spindles, the next steps are crucial. Proper post-sanding care and timely finishing protect the wood. It also ensures your project looks its best and lasts a long time. Do not let dust or delays compromise your effort.
Final Dust Removal and Inspection
Even after the final sanding, tiny dust particles can remain. These particles can ruin your new finish.
- Thorough Vacuuming: Use a shop vacuum with a brush attachment to meticulously vacuum every surface of the chair, especially the spindles. Pay extra attention to corners and crevices.
- Compressed Air: Use an air compressor or canned air to blow dust out of any hard-to-reach areas on the spindles. Follow this with another vacuuming pass to capture the blown-out dust.
- Tack Cloth Wipe: The most important step for final dust removal is wiping with a tack cloth. A tack cloth is a cheesecloth treated with a sticky resin. Gently wipe down all the spindles, working from top to bottom. The tack cloth will pick up any remaining fine dust without leaving residue. Ensure you cover every part of the spindle. Discard the tack cloth once it is heavily loaded with dust.
- Final Visual and Tactile Inspection: Before applying any finish, give the spindles one last thorough inspection. Use strong, raking light to spot any missed spots or remaining scratches. Run your hand over every curve. The surface should feel perfectly smooth and ready.
Choosing and Applying Your Finish
The type of finish you choose depends on the desired look and durability. Common options include stain, paint, varnish, or oil.
- Stain: If you want to enhance the natural wood grain, choose a wood stain. Apply stain with a brush or cloth, following the wood grain. Wipe off excess stain according to product instructions. For spindles, a small foam brush or a folded cloth can work well. Apply in thin, even coats.
- Paint: For a solid color, prime the sanded spindles first. Use a good quality wood primer. Then, apply thin, even coats of paint. For spindles, spray paint can provide an incredibly smooth, even finish, especially on intricate shapes. If brushing, use a small, good-quality brush and avoid heavy brush strokes. Multiple thin coats are better than one thick coat.
- Varnish/Polyurethane: These clear topcoats protect the wood. Apply with a brush, foam applicator, or spray. For spindles, a foam brush helps avoid drips. For spray application, ensure good ventilation. Apply several thin coats, allowing each coat to dry completely. Lightly sand with 320-400 grit sandpaper between coats for extra smoothness, especially on the final layers. Always wipe with a tack cloth after sanding between coats.
- Oil Finish: Penetrating oil finishes (like tung oil or Danish oil) soak into the wood, creating a natural, warm look. Apply with a cloth, let it soak, then wipe off the excess. Build up layers over time. Oil finishes are easy to repair but offer less protection against spills than varnish.
Drying and Curing Time
Patience is key after applying the finish.
- Follow Product Instructions: Always adhere to the manufacturer’s drying and curing times. Drying time is when the surface is dry to the touch. Curing time is when the finish has fully hardened.
- Proper Ventilation: Ensure good airflow during drying and curing. This helps solvents evaporate and the finish harden properly.
- Avoid Handling: Do not handle the chair or apply pressure to the spindles until the finish is fully cured. This prevents marks or damage to the fresh finish.
Refinishing chair spindles is a rewarding project. By dedicating time to proper sanding and careful finishing, you can transform an old, tired chair into a beautiful piece of furniture. Your attention to detail will shine through in the final result.
FAQs About Sanding Chair Spindles
What is the best way to sand very thin chair spindles?
For very thin chair spindles, hand sanding is often the best. Use thin strips of sandpaper (about 1 inch wide) or sanding cords. Wrap the strip around the spindle and pull it back and forth. You can also wrap sandpaper around your finger for small, delicate areas. This prevents damage and helps maintain the original shape.
Can I use a power sander on chair spindles?
Yes, but use caution. A rotary tool (like a Dremel) with small sanding drums or abrasive brushes works well for some spindle shapes. Detail sanders can handle slightly flatter sections. Avoid large orbital sanders, as they are too aggressive and will flatten the curves. Always use light pressure and keep the tool moving to prevent damage.
What sandpaper grit should I start with for chair spindles?
Start with a medium grit like 100-grit or 120-grit if the old finish is moderately thick. If the finish is very old and peeling, begin with 80-grit. Always progress to finer grits (150-grit, then 220-grit) to remove scratches and achieve a smooth finish. Skipping grits can leave visible marks.
How do I remove old paint from intricate spindle carvings?
To remove old paint from intricate carvings, use a small wire brush attachment on a rotary tool. Abrasive brushes also work well. For very stubborn spots, try a chemical stripper designed for wood. Apply it carefully with a small brush, let it work, then gently scrape with a plastic scraper or an old toothbrush. Always follow safety precautions.
How do I prevent damaging the spindle’s shape while sanding?
To prevent damaging the shape, use tools that conform to the spindle’s curves, like sanding sponges, strips, or cords. Avoid excessive pressure, especially with power tools. Sand evenly around the entire circumference. Check your progress frequently by feel and sight. For complex shapes, a contour sanding grip can help maintain the original profile.
Do I need to remove all the old finish before applying a new one?
Yes, it is best to remove all the old finish. This ensures proper adhesion of the new finish. It also allows the wood grain to show through evenly if you are staining. Any old finish left behind can cause peeling, uneven color, or a patchy appearance. A clean, bare wood surface provides the best foundation.
Conclusion: Transform Your Chair Spindles with Skill
Sanding chair spindles can seem like a daunting task at first. Yet, with the right tools and techniques, it is a rewarding part of any furniture restoration project. We have covered everything from gathering your essential supplies to mastering hand sanding and knowing when to carefully use power tools. Remember, patience and attention to detail are your best allies in achieving a professional-looking finish.
By meticulously preparing the surface, gradually progressing through sandpaper grits, and thoroughly removing dust, you ensure a smooth, beautiful foundation. This detailed effort transforms worn-out chair spindles into pieces ready for a fresh, durable finish. Now you have the knowledge and steps to confidently sand chair spindles. Go ahead, bring new life to your cherished furniture, one perfectly sanded spindle at a time. Your revitalized chair will be a testament to your craft and care.

Todd Martin
Senior Writer
With over 15 years of experience in home renovation and design, I started HEG to share what I’ve learned with homeowners who want to create spaces that are both beautiful and functional. I’ve always believed in a hands-on approach, and over the years, I’ve picked up practical solutions that actually work. Through HEG, I aim to make home improvement more approachable, sharing real tips that help you create a home you truly love.