· Todd Martin · Home Appliance Repair · 20 min read
How To Replace Ge Washing Machine Lid Lock

Replace Your GE Washing Machine Lid Lock
Is your GE washing machine refusing to start a cycle? Does its lid stay unlocked during operation? A faulty lid lock often causes these problems. It prevents the washer from working properly. Learning how to replace a GE washing machine lid lock is a valuable skill. It saves you money on service calls. I will guide you through each step of this repair. You can fix your appliance with confidence.
This article covers everything you need to know. We will discuss diagnosing the issue, gathering tools, and the step-by-step replacement process. I will also share tips for maintaining your washer. My goal is to help you restore your GE washing machine to full function. You can enjoy clean clothes again.
Takeaway
- Diagnose: Confirm the lid lock is the problem.
- Safety First: Disconnect power before any work.
- Tools: Gather necessary screwdrivers, nut drivers, and pliers.
- Access: Open the washer cabinet to reach the lock.
- Replace: Disconnect wires, unmount the old lock, install the new one.
- Test: Run a diagnostic cycle to ensure proper function.
Your GE washing machine lid lock replacement involves specific steps. First, unplug the appliance. Then, access the old lock mechanism. Disconnect the wiring and mounting screws. Install the new lid lock assembly. Finally, reconnect wires and secure the new lock. Test the washer to confirm the repair.
Understanding Your GE Washing Machine Lid Lock
The lid lock on your GE washing machine is a critical safety component. It ensures the washer lid stays closed during cycles. This prevents water spills and keeps hands safe from moving parts. The lock sends a signal to the washer’s control board. This signal tells the machine the lid is secure. Only then does the wash cycle begin. Without this signal, your washer will not agitate or spin.
Modern GE washing machines use a sophisticated lid lock system. This system acts as a safety switch. It detects if the lid is fully closed and latched. If the lock mechanism fails, your washer receives an incorrect signal. This causes the washer to pause or refuse to start. The lid lock is often a common point of failure. Regular use causes wear and tear on its internal parts. Understanding its function helps you diagnose problems quickly.
Some models might have a simple mechanical latch. Others use an electronic solenoid or a wax motor. This article focuses on top-loader GE washing machines. These models typically have their lid lock mounted near the lid opening. Knowing where your specific model’s lid lock is helps. You can find this information in your appliance manual.
A broken lid lock can show several symptoms. Your washer might not fill with water. It might not agitate. The spin cycle may not engage. Sometimes, an error code appears on the display. These codes often point to a lid lock issue. For example, a “Lid” or “dL” error code often means a faulty lid lock. It is important to confirm the issue. This prevents unnecessary repairs.
Why Your GE Washing Machine Lid Lock Fails
Many reasons cause a GE washing machine lid lock to fail. Understanding these reasons helps with proper diagnosis. It also helps prevent future issues. The lid lock is a mechanical and electrical part. Both aspects can break down over time.
One common reason for failure is mechanical wear. Repeated opening and closing of the lid stresses the lock mechanism. Plastic components can wear out or break. Springs can lose tension. The latch hook might bend or snap. These physical damages stop the lock from engaging properly. This sends an incorrect signal to the washer’s control board. The machine thinks the lid is open even when it is closed.
Electrical issues are another major cause. The lid lock contains a small switch or solenoid. This part sends the “lid closed” signal. Wires inside the lock can fray or disconnect. The switch itself might fail. Sometimes, the solenoid burns out. Power surges or old age can cause these electrical failures. When the electrical signal is faulty, the washer does not start. For more information on why a GE washing machine lid might not lock, you can visit Why Is My GE Washing Machine Lid Not Locking. This resource offers deeper insights into common lid lock issues.
Sometimes, foreign objects get stuck in the lock mechanism. Small clothing items, coins, or lint can wedge inside. This prevents the lock from engaging fully. Always check for obstructions before assuming a part is broken. A simple cleaning might fix the problem. This saves you the trouble of replacing the part.
Overloading the washing machine can also stress the lid lock. Heavy loads can cause the washer to vibrate excessively. This vibration can loosen connections or damage the lock assembly. Always follow the manufacturer’s guidelines for load size. This helps extend the life of your appliance parts. Proper maintenance also plays a role in preventing early failure. Regular checks can catch small issues before they become major problems.
Safety First: Before You Start the Repair
Safety is paramount before you begin any appliance repair. Working with electrical appliances carries risks. Always take the necessary precautions. This protects you from injury and prevents further damage to your washing machine. I always follow these steps myself.
First and most importantly, disconnect the power supply. Do not just turn off the washer. You must unplug the washing machine from the wall outlet. If your washer is hard-wired, turn off the circuit breaker that controls the laundry area. This step removes all electrical power from the appliance. It prevents electric shock. This is the single most important safety measure for any DIY appliance repair.
Next, ensure the water supply is off. Turn off the hot and cold water valves behind the washing machine. This prevents water leaks during the repair process. You do not want water spilling onto electrical components. A wet floor also creates a slip hazard. If you are comfortable with DIY projects around your home, this task is manageable. Many homeowners prefer to do their own appliance repairs. For more general advice on tackling repairs yourself, check out Do It Yourself Washing Machine.
Wear appropriate safety gear. This includes work gloves. Gloves protect your hands from sharp edges or small cuts. Safety glasses are also wise. They shield your eyes from dust or small debris. Appliance repair can involve tight spaces. You might bump into something or dislodge a part. Eye protection is cheap and vital.
Clear your work area. Remove any clutter around the washing machine. You need enough space to move freely and safely. Ensure good lighting. A headlamp or a bright work light helps you see small components clearly. Good lighting reduces the risk of making mistakes or damaging other parts. Take your time. Do not rush the repair process. Rushing increases the chance of accidents. Following these safety steps makes your lid lock replacement a safer and smoother experience.
Gathering Your Tools and Replacement Parts
Before you start the GE washing machine lid lock replacement, gather all necessary tools and the correct replacement part. Having everything ready saves time and frustration during the repair. A well-prepared workspace makes the job much easier.
First, you need standard hand tools. Most lid lock replacements require a few basic items:
- Screwdrivers: You will likely need a Phillips head screwdriver. Some models might also require a flat-head screwdriver. These are for removing access panels and mounting screws.
- Nut Drivers or Socket Set: Depending on your GE model, the lid lock might be secured with bolts. A set of nut drivers or a small socket wrench kit will be useful.
- Pliers: Needle-nose pliers can help with disconnecting electrical connectors or routing wires.
- Putty Knife or Flat Blade Tool: This tool helps gently pry open control panels or clips without causing damage.
Next, and most important, is the replacement GE washing machine lid lock assembly. You must get the exact part for your specific GE washer model. Appliance parts are model-specific. A wrong part will not fit or function correctly.
How to find the correct part:
- Locate Your Model Number: The model number is usually on a sticker inside the lid, on the back of the washer, or on the control panel.
- Search for the Part: Use your washer’s full model number to search online appliance parts retailers. Many websites have diagrams and parts lists for your specific model.
- Confirm the Part Number: Double-check the part number of the new lid lock matches the one recommended for your model. Pictures also help confirm it looks like your old part.
While not always strictly necessary, I recommend having a multimeter. A multimeter helps test electrical continuity. It confirms if the old lid lock is truly faulty. It also helps check connections before final assembly. This can save you from replacing a part that was not broken. You can also get a small container for screws. This prevents losing small hardware during the repair. Being organized keeps your workspace tidy.
Step-by-Step: Accessing the GE Lid Lock
Accessing the GE washing machine lid lock is the first physical step of the repair. The method varies slightly based on your specific GE top-loader model. However, the general approach involves removing parts of the washer’s cabinet. Remember, safety first: always ensure the washer is unplugged and water supply is off.
Most GE top-loader washing machines require you to tilt the control panel back. Look for two screws at the very back of the control panel. These screws usually hold the panel to the rear of the washer cabinet. Use your Phillips head screwdriver to remove them. Once these screws are out, you can gently tilt the control panel upwards and back. It will hinge on the front clips. Some models might have clips instead of screws at the back. Use a putty knife to carefully release these clips. Do not pull too hard, as wires are still connected to the panel.
With the control panel tilted, you can usually see two or three clips at the front of the top panel. These clips secure the top of the washer cabinet to the main frame. Use your flat-head screwdriver or a putty knife to release these clips. You might need to press them inward or lift them. Be careful not to scratch the paint. Once released, the entire top panel, including the lid, can be lifted and propped open. Use a sturdy piece of wood or a broom handle to hold the top panel up. This provides clear access to the inside of the washer tub area.
For some GE models, the lid lock might be accessible from the front without tilting the whole top. You might need to remove a small access panel near the lid opening. Check your washer’s service manual or an online diagram for your specific model. This ensures you do not force anything or damage components.
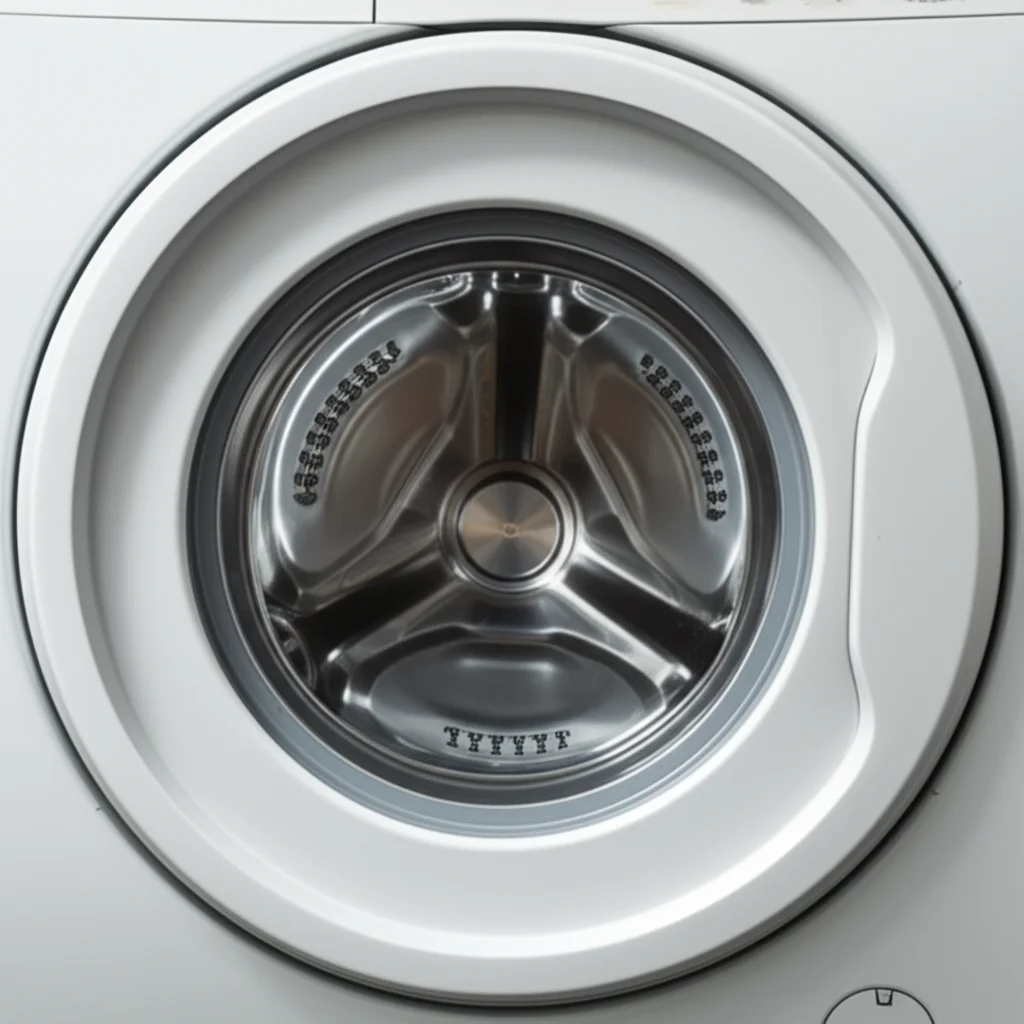
After gaining access, the lid lock assembly becomes visible. It is typically located on the top rim of the washer tub opening, near where the lid closes. It might be on the front right or left side. Take a moment to observe how the old lid lock is mounted. Pay attention to its orientation. Note how the wires connect to it. This visual inspection helps when installing the new part. Take a picture with your phone if it helps you remember. This initial observation simplifies the following removal and installation steps.
Removing the Old GE Washing Machine Lid Lock
With the washer’s top panel open and secured, you can now proceed to remove the faulty lid lock. This step involves disconnecting electrical wires and unscrewing the mounting hardware. Take your time to avoid damaging surrounding components.
First, locate the lid lock assembly. It sits on the top edge of the washer opening. You will see wires connected to it. These wires supply power and carry the signal to the control board. Before disconnecting them, make a note of their positions. Many connectors are color-coded or keyed, making reassembly easier. However, a quick photo with your phone ensures accuracy. Gently pull each electrical connector from the lid lock terminals. Some connectors have a small tab that you must press to release them. Use needle-nose pliers if they are stiff. Avoid pulling on the wires themselves; pull on the plastic connector housing.
Next, address the mounting screws or bolts. The lid lock assembly is typically held in place by two or three screws. These screws might be Phillips head or hex head. Use the appropriate screwdriver or nut driver to remove them. Keep these screws in your designated container so they do not get lost. They will be used to secure the new lid lock.
Once the screws are removed and the wires are disconnected, the old lid lock assembly should lift out. Sometimes, there is a small plastic housing or bracket that holds it in place. You might need to gently wiggle it free. Observe how the lock fits into its slot. Note any tabs or guides. This helps you understand how the new lock will sit.
Carefully pull the old lid lock assembly out of the washer. Be mindful of any remaining wires or clips. If the lock has a plunger or striker that extends, ensure it clears the opening. Compare the old lock with your new replacement part. They should be identical in shape, size, and connector type. If they look different, double-check your part number. An incorrect part will not fit or function. Discard the old, faulty lid lock. You are now ready to install the new one.
Installing Your New GE Washer Lid Lock
Installing the new GE washer lid lock is the reverse of removing the old one. This process requires precision to ensure proper function and safety. I focus on making sure every connection is secure.
Begin by positioning the new lid lock assembly. Place it into the opening where the old one sat. Ensure it aligns correctly with the mounting holes. The lock usually has specific tabs or grooves. These help it sit flush and securely in the washer’s frame. Make sure the lid strike plate on the washer lid properly aligns with the new lock mechanism. Incorrect alignment can prevent the lid from locking. It can also cause premature wear on the new part.
Next, secure the lid lock with the mounting screws. Use the screws you set aside from the old lock. Insert them into the mounting holes on the new lock assembly. Tighten them firmly but do not overtighten. Overtightening can strip the threads or crack the plastic housing of the new lock. A snug fit is sufficient to hold the lock in place. Ensure the lid lock is stable and does not wiggle.
After securing the lock, reconnect the electrical wires. Refer to the photo you took earlier, or rely on the color-coding and keying of the connectors. Each connector should snap firmly into place. Give each connection a gentle tug to confirm it is secure. Loose connections can cause intermittent problems. They can also lead to arcing or other electrical issues. Make sure no wires are pinched or rubbing against moving parts. Route them away from any sharp edges.
Once the lid lock is installed and wired, you can close up the washer. Gently lower the top panel of the washer. Align the front clips and press down until they click into place. If your model has screws at the back of the control panel, reattach them. Make sure the control panel sits flush and is secure. Before you close everything fully, manually test the lid. Open and close it a few times. Ensure it latches smoothly into the new lid lock. If there is resistance, check the alignment. Proper installation of the lid lock ensures your GE washing machine will operate safely and correctly for many more cycles.
Testing Your GE Washing Machine After Repair
After you replace the GE washing machine lid lock, testing the appliance is a crucial final step. This confirms the repair was successful. It also ensures your washer functions safely and correctly. I always recommend a thorough test.
First, reconnect the power supply. Plug the washing machine back into the wall outlet. If you turned off the circuit breaker, switch it back on. Also, remember to turn the hot and cold water supply valves back on. You need water for the test cycle. Check for any leaks immediately after turning on the water.
Next, run a short test cycle. Select a quick wash or rinse and spin cycle. Observe the washer’s behavior. The lid should lock immediately after you press the start button. You should hear a distinct “click” sound as the lock engages. If the lid does not lock, or if an error code appears, the repair might need re-evaluation. Check the wire connections again. Make sure the new lid lock is seated correctly. Sometimes, the new part itself can be faulty, though this is rare.
Pay attention to the washer’s progression through the cycle. The machine should fill with water, agitate, drain, and spin without interruption. If the washer stops mid-cycle with a “lid open” error, it means the lid lock is not sending the correct signal. Or, perhaps the lid is not fully engaging the lock mechanism. You might need to adjust the lid’s alignment.
A successful test cycle means your GE washing machine is ready for normal use. You have fixed the problem yourself. This saves you the cost of a professional repair. Keep an eye on the washer during its first few full loads. Listen for unusual noises. Check for any new error codes. This ensures everything runs smoothly.
Remember that a properly working lid lock is essential for appliance safety. It prevents accidental injury during the spin cycle. It also ensures the washer fills with water and operates as designed. If you encounter issues with water filling, it could be related to other components, even if the lid lock seems fine. For related issues, you might find information on Why Won’t My GE Washing Machine Fill With Water helpful. However, for now, celebrate your successful lid lock replacement!
Tips for Maintaining Your GE Washer’s Lid Lock
Regular maintenance can extend the life of your GE washing machine lid lock. It also prevents future problems. A little care goes a long way. I share these tips to help you keep your washer running smoothly.
First, avoid slamming the washer lid. Forceful closing can stress the lid lock mechanism. It can bend the latch or damage internal components. Always close the lid gently and firmly. This allows the lock to engage properly without unnecessary impact. Teach everyone in your household to do the same.
Periodically inspect the lid and the lid lock area. Look for any foreign objects. Small items like socks, lint, or debris can get trapped in the lock. This prevents it from engaging fully. Use a damp cloth to wipe down the area around the lid lock. Keep it free from detergent residue or fabric softener buildup. A clean environment helps the lock operate smoothly.
Do not overload your washing machine. Overloading creates excess vibration during cycles. This vibration can loosen screws or cause wear on the lid lock over time. Refer to your GE washer’s manual for recommended load capacities. Distribute clothes evenly inside the tub. An unbalanced load causes more stress on components.
If you notice any unusual behavior from your lid lock, address it promptly. Does the lid feel loose when closed? Does it struggle to lock? Early detection of minor issues prevents them from becoming major failures. You might hear strange noises from the lock area. This could indicate parts are wearing out.
Consider using appliance cleaner for your washing machine regularly. While this does not directly clean the lid lock mechanism, a clean washer is a happy washer. It helps prevent buildup that might migrate to the lock area. For general cleaning advice, you might find How To Clean GE Washing Machine a useful resource. By following these simple maintenance tips, you can help ensure your new GE washing machine lid lock lasts for years.
Advanced Troubleshooting for GE Lid Lock Issues
Sometimes, a new lid lock does not immediately resolve the issue. If your GE washing machine still shows problems after replacement, you need to troubleshoot further. This involves checking related components and ensuring correct installation. I have faced these situations myself.
First, recheck all electrical connections. Even a slight misalignment can prevent the lock from getting power or sending a signal. Disconnect and reconnect each wire. Make sure they click firmly into place. Ensure no wires are pinched or frayed. Visually inspect the wire insulation for any signs of damage.
Next, inspect the lid strike plate. This is the small part on the washing machine lid that inserts into the lid lock. Sometimes, it can become bent, damaged, or misaligned. If the strike plate does not properly enter the lock, the lock will not engage. You might need to gently bend it back into position. Or, replace the strike plate if it is severely damaged. This small part often gets overlooked.
Examine the main control board. The lid lock sends its signal to the washer’s control board. If the board itself is faulty, it will not recognize the lid lock’s signal, even if the lock is new and working. This is a less common issue but can happen. Control board replacement is often more complex and costly. You might need a professional for this. However, it is good to rule out the lid lock first.
Check for error codes. Modern GE washers display error codes when issues occur. Consult your owner’s manual for the meaning of specific codes. An error code related to the lid lock (e.g., “dL” or “Lid”) confirms the problem area. If you get a new error code after replacement, it points to a new issue or an incomplete repair. For example, if your machine is not filling, it might be the lid lock, or it could be the water inlet valve. You can learn more about this part at How To Replace GE Washing Machine Water Inlet Valve.
Finally, consider your specific GE model’s nuances. Some GE washer models have unique diagnostic modes. These modes can help pinpoint specific issues. Search online forums or your service manual for information on your model’s diagnostic tests. Running these tests can provide clearer insights into the problem. This level of troubleshooting helps ensure you address the root cause of the lid lock issue.
When to Call a Professional for GE Washer Repair
While replacing a GE washing machine lid lock is a manageable DIY task, there are times when calling a professional is the best course of action. Knowing when to stop and seek expert help can save you time, money, and frustration. I understand the desire to fix things myself, but sometimes it is better to hand it over.
One clear sign to call a professional is if you are uncomfortable with the repair. If you feel unsure about any step, especially those involving electricity, do not proceed. Safety should always be your top priority. An incorrect repair can lead to more damage to your appliance or, worse, personal injury. Appliance repair technicians have specialized training and tools. They ensure the job is done correctly and safely.
Another reason to call a pro is if your troubleshooting efforts fail. You replaced the lid lock, rechecked all connections, and tried advanced troubleshooting. Yet, your GE washing machine still does not work. This indicates a deeper problem. The issue might be with the main control board, wiring harness, or another complex component. Diagnosing these can be difficult without specific diagnostic equipment. Professionals can quickly identify and fix these more complex issues.
If the repair involves parts that are hard to access, consider professional help. Some washer designs make certain components very difficult to reach. You might risk damaging other parts trying to get to the lid lock. A professional has experience with various models. They know the best way to access
- GE washing machine repair
- lid lock replacement
- DIY appliance fix

Todd Martin
Senior Writer
With over 15 years of experience in home renovation and design, I started HEG to share what I’ve learned with homeowners who want to create spaces that are both beautiful and functional. I’ve always believed in a hands-on approach, and over the years, I’ve picked up practical solutions that actually work. Through HEG, I aim to make home improvement more approachable, sharing real tips that help you create a home you truly love.