· Todd Martin · Home Improvement · 21 min read
How To Replace Frigidaire Dishwasher Water Inlet Valve
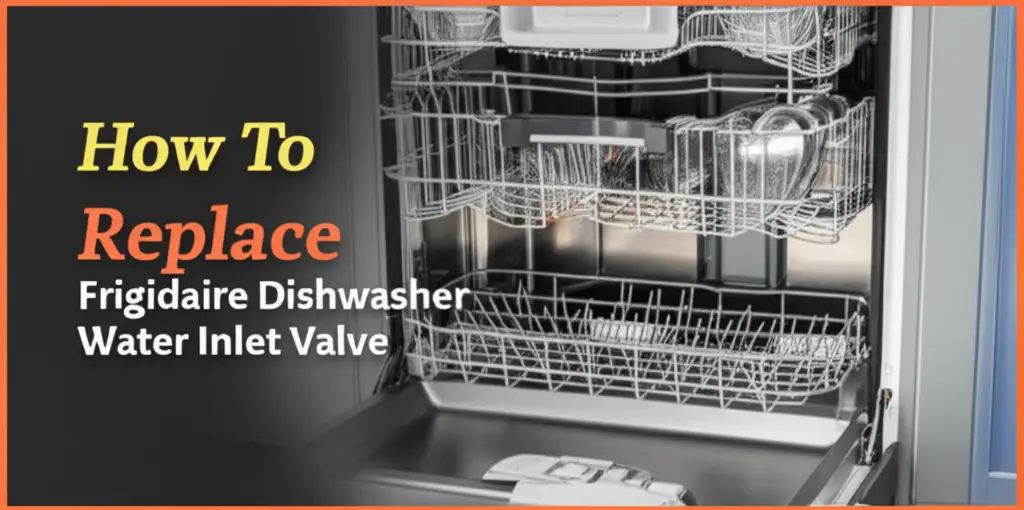
How To Replace Frigidaire Dishwasher Water Inlet Valve
Is your Frigidaire dishwasher refusing to fill with water? Perhaps you notice a small puddle forming near the appliance base. These common issues often point to a faulty water inlet valve. This little component plays a big role in your dishwasher’s operation.
A broken valve can disrupt your daily routine. Replacing it yourself is a smart way to save money on repair costs. You do not need specialized skills to complete this task. This guide walks you through each step. I will show you how to safely replace your Frigidaire dishwasher water inlet valve. Let’s get your dishwasher running smoothly again.
Takeaway
- Safely disconnect power and water before starting work.
- Gather all necessary tools and the correct replacement valve.
- Access the valve by removing the lower access panel.
- Carefully disconnect hoses and wiring, then remove the old valve.
- Install the new valve, re-connect everything, and test the dishwasher.
The Frigidaire dishwasher water inlet valve is found at the bottom front of the appliance. It controls water flow into the tub. Replacing it involves disconnecting power and water, removing the kick plate, detaching hoses and wires from the old valve, installing the new one, and reassembling the unit.
Understanding the Frigidaire Dishwasher Water Inlet Valve
Your Frigidaire dishwasher relies on several key parts to clean dishes effectively. The water inlet valve is one of these vital components. It acts like a gatekeeper. This valve opens to allow hot water into the wash tub and closes to prevent leaks.
What the Water Inlet Valve Does
The water inlet valve is an electrically controlled solenoid valve. When the dishwasher starts a cycle, the control board sends power to the valve. This power opens a small plunger inside the valve. Water then flows from your home’s supply line into the dishwasher. Once enough water fills the tub, the control board cuts power to the valve. The plunger then closes, stopping the water flow. This process repeats as needed during different wash stages.
Common Signs of a Failing Inlet Valve
You might notice several warning signs if your Frigidaire dishwasher’s water inlet valve is failing. One clear sign is the dishwasher not filling with water. If you start a cycle and hear the motor but no water enters, the valve may be stuck closed. Another common issue is continuous filling, even when the dishwasher is off. This indicates the valve is stuck open, leading to potential overflow.
Leaks are also a strong indicator. Water might drip or pool around the front of the dishwasher. This often happens if the valve body cracks or its internal seals fail. You might also hear a humming or buzzing noise if the valve is struggling to open or close. Addressing these signs early prevents bigger problems.
Why Inlet Valves Fail
Over time, water inlet valves can simply wear out. Their internal components, like springs and seals, degrade. Mineral deposits from hard water are a major culprit. These deposits can build up inside the valve. They prevent the plunger from moving freely. This leads to the valve sticking open or closed. Electrical problems can also occur. The solenoid coil might burn out, stopping the valve from receiving signals. Identifying these issues helps you understand the replacement process better. A faulty valve stops your dishwasher from working. Replacing it helps restore proper function and saves your floor from water damage.
Essential Tools and Parts for Frigidaire Water Inlet Valve Replacement
Before you begin any repair work, gathering the right tools and parts is crucial. Having everything ready saves time and frustration. It also ensures the job gets done safely and correctly. I always make a checklist to avoid forgetting anything important.
Required Tools
You do not need many specialized tools for this job. Most items are common household tools. Here is what you will likely need:
- Screwdriver set: You will need both Phillips and flathead screwdrivers. These are for removing various screws, especially on the kick plate and mounting brackets.
- Nut driver or socket set: Some connections might use hex-head screws or nuts. A nut driver or a small socket set, typically 1/4 inch or 5/16 inch, will be helpful.
- Pliers: Adjustable pliers or channel locks are useful for gripping hoses or tightening fittings.
- Bucket and towels: Water will spill during disconnection. A small bucket and several old towels will help contain any mess.
- Flashlight or headlamp: The work area under the dishwasher can be dark. A flashlight provides necessary illumination.
- Wire strippers/crimpers (optional): If your new valve requires cutting and splicing wires, these tools will be needed. However, most modern valves use plug-in connectors.
- Voltmeter (optional but recommended): This tool helps you confirm that power is truly off before you start working. Safety is always important.
Finding the Correct Frigidaire Replacement Part
Getting the exact part for your specific Frigidaire dishwasher model is vital. Dishwasher models vary, and so do their water inlet valves. An incorrect part will not fit or function properly.
- Locate your model number: The model number is usually on a sticker or plate inside the dishwasher door. It can be on the left or right side of the tub opening. Write down the full model number.
- Search for the part: Use your model number to search online appliance parts retailers. They typically have diagrams and specific part numbers. Many sites also offer compatibility checkers.
- Consider OEM vs. aftermarket: Original Equipment Manufacturer (OEM) parts are made by Frigidaire. Aftermarket parts are made by other companies. OEM parts usually cost more but often offer better quality and fit. Aftermarket parts can be a good value if you find a reputable brand. I usually lean towards OEM for critical components like this.
- Check reviews: Read reviews for the specific part and the seller. This helps ensure you get a reliable component.
Having the right part on hand prevents delays. It also prevents potential damage from using an ill-fitting component. Knowing you have the correct water inlet valve makes the repair process smoother. This preparation is a small investment of time. It prevents bigger headaches later on. Remember, you can also learn how to test a Bosch dishwasher water inlet valve if you are unsure if the valve is indeed the problem.
Safety First: Preparing for Your Frigidaire Dishwasher Repair
Working with appliances involves electricity and water. Prioritizing safety is not just good advice; it is essential. Skipping safety steps can lead to serious injury or damage to your home. I always tell people to take these precautions seriously.
Disconnect Power to the Dishwasher
The very first step is to cut off all electrical power to the appliance. This removes the risk of electric shock.
- Locate the circuit breaker: Go to your home’s main electrical panel. Find the breaker labeled for your kitchen or specifically for the dishwasher.
- Flip the breaker: Turn the breaker switch to the “OFF” position. This usually means flipping it down.
- Confirm power is off: To be absolutely sure, try turning on the dishwasher. If it does not light up or respond, the power is off. I also use a voltage tester or multimeter to check the outlet if the dishwasher is plugged in. This provides visual confirmation of no power.
- Unplug (if applicable): Some dishwashers plug into an outlet under the sink. If yours does, unplug it after turning off the breaker. This adds an extra layer of safety.
Shut Off the Water Supply
After disconnecting power, you must stop the water flow to the dishwasher. This prevents flooding your kitchen.
- Find the water shut-off valve: The main water shut-off valve for the dishwasher is usually under the kitchen sink. It will be a small valve on the hot water line leading to the dishwasher.
- Turn the valve clockwise: Twist the valve handle clockwise until it is completely closed. This stops water from reaching the dishwasher.
- Check for drips: Wiggle the water supply line near the dishwasher’s inlet valve. No water should drip out if the valve is fully closed.
Draining Residual Water
Even after shutting off the water supply, some water might remain in the lines or the dishwasher itself.
- Prepare for spills: Place old towels or a shallow pan underneath the front of the dishwasher. This catches any water that might escape during disconnection.
- Disconnect supply line: Have your bucket ready. You will disconnect the main water supply line from the inlet valve later. Some water will drain from this line when it is detached.
Creating a Clear Workspace
A clear and well-lit workspace makes the repair easier and safer.
- Pull out the dishwasher (if necessary): Some Frigidaire models allow valve access from the front without pulling the entire unit out. Other models require pulling it slightly forward. If you need to pull it out, be careful not to kink hoses or scratch the floor.
- Ensure good lighting: Use a flashlight or headlamp. The area under the dishwasher is often dark and cramped.
- Clear clutter: Remove anything that blocks access or could trip you. Keep your tools organized and within reach.
Taking these safety steps ensures you can focus on the repair without worry. It prevents accidents and makes the entire process much smoother. You should always confirm safety measures before touching any component.
Step-by-Step Guide: Removing the Old Frigidaire Inlet Valve
With safety precautions in place, you are ready to begin the hands-on part of the repair. Removing the old valve requires careful disconnection of hoses and electrical wires. I take my time with each step to avoid breaking anything.
Accessing the Water Inlet Valve
The water inlet valve on most Frigidaire dishwashers is located at the lower front of the appliance.
- Remove the lower access panel (kick plate): This is usually held in place by two or more Phillips head screws. Use your screwdriver to remove these screws.
- Gently pull off the panel: The kick plate might also have clips or tabs holding it. Pull it straight off or slightly downwards to detach it. Set it aside where it will not get damaged.
- Locate the valve: Once the panel is off, you will see various components at the bottom of the dishwasher. The water inlet valve is typically a brass or plastic component where the main water supply line connects. It often has electrical wires attached to it.
Disconnecting the Water Supply Line
This is where your bucket and towels come in handy.
- Place bucket: Position your small bucket directly under the inlet valve.
- Loosen the supply line connection: Use your adjustable pliers or wrench to loosen the compression nut that connects your home’s water supply line to the inlet valve. This nut is usually brass or plastic. Turn it counter-clockwise.
- Carefully detach the line: Once loose, gently pull the supply line away from the valve. Be prepared for a small amount of residual water to drain out into your bucket.
- Ensure no kinks: Do not bend the supply line sharply. This can damage it.
Detaching the Dishwasher Tub Hose
Another hose connects the inlet valve to the dishwasher’s wash tub. This hose directs the water into the appliance.
- Identify the hose: Locate the larger rubber hose attached to the other side of the inlet valve. This hose usually connects to a manifold or directly into the bottom of the wash tub.
- Release the clamp: This hose is often secured with a spring clamp or a worm-drive clamp.
- Spring clamp: Use pliers to squeeze the clamp’s tabs together, then slide the clamp down the hose away from the valve.
- Worm-drive clamp: Use a screwdriver to loosen the screw on the clamp, then slide the clamp down.
- Pull off the hose: Once the clamp is moved, carefully twist and pull the hose off the old inlet valve’s nipple. Again, expect a few drops of water.
Disconnecting Electrical Wires
The inlet valve needs electricity to operate. You must disconnect these wires safely.
- Observe wire connections: Take a mental note or even a quick photo of how the wires are connected to the old valve. This helps when connecting the new one. Most valves have two spade connectors.
- Gently pull off connectors: The electrical wires connect via spade connectors that simply pull off the valve terminals. Grip the plastic connector itself, not the wire, and pull firmly but carefully. They might be snug.
- Avoid pulling wires: Never yank on the wires directly. This can damage the wiring or the terminals.
Removing the Old Valve from its Mounting Bracket
The valve is usually secured to the dishwasher frame.
- Locate mounting screws/clips: The valve is typically held by one or two screws or simple mounting clips.
- Remove screws or release clips: Use your screwdriver or pry tool to remove the screws or gently release the clips.
- Slide out the valve: Once unsecured, the old water inlet valve should slide out of its mounting position.
You now have the old, faulty Frigidaire dishwasher water inlet valve in your hand. This is a good time to compare it side-by-side with your new replacement part to ensure they are identical. Proceeding carefully ensures you are ready for the next phase. If you have other appliances you are working on, understanding how to replace a Samsung dishwasher water inlet valve or even a GE dishwasher water inlet valve follows similar principles.
Installing Your New Frigidaire Dishwasher Water Inlet Valve
With the old valve removed, you are ready to put the new one in place. This process is essentially the reverse of removal. Taking your time ensures all connections are secure. A properly installed valve prevents leaks and ensures correct water flow.
Mounting the New Valve
Secure the new water inlet valve firmly to the dishwasher’s frame.
- Align the valve: Position the new valve in the same spot where the old one sat. Make sure it aligns with the mounting holes or clips on the dishwasher frame.
- Secure with screws/clips: If your valve uses screws, insert them and tighten them down. Do not overtighten; just make sure the valve is stable. If it uses clips, push the valve into place until the clips engage. The valve should not wobble.
Connecting Electrical Wires
Reconnecting the electrical wires is straightforward.
- Match the connections: Refer to the photo you took earlier or recall how the wires were connected. Most Frigidaire water inlet valves have two terminals. It usually does not matter which wire goes to which terminal, as long as both are connected.
- Push on the spade connectors: Firmly push the spade connectors onto the terminals of the new valve. Ensure they are fully seated and feel snug. Tug gently on them to confirm they are secure. Loose connections can prevent the valve from operating or cause intermittent issues.
Attaching the Dishwasher Tub Hose
This hose sends water from the valve into the dishwasher tub.
- Slide on the hose: Push the larger rubber hose onto the nipple of the new water inlet valve. Push it on as far as it will go.
- Secure with clamp: Slide the hose clamp back into its original position over the hose connection point. If using a spring clamp, use pliers to squeeze it open and slide it. For a worm-drive clamp, tighten the screw until the hose is securely fastened. The connection must be tight to prevent leaks under pressure.
Reconnecting the Water Supply Line
This is the final water connection. It brings water from your home’s supply to the valve.
- Align the supply line: Carefully guide your home’s water supply line back to the inlet valve. Ensure the threaded end is aligned straight with the valve’s connection point. Avoid cross-threading.
- Hand-tighten first: Start threading the compression nut by hand. This helps prevent cross-threading the plastic threads of the valve.
- Tighten with pliers/wrench: Once hand-tight, use your adjustable pliers or wrench to tighten the nut. Give it about a quarter to half a turn past hand-tight. Do not overtighten, as this can crack the valve body or damage the threads. The connection needs to be snug but not excessively tight.
Replacing the Access Panel
The final step before testing is to put everything back together.
- Position the kick plate: Place the lower access panel back into its original position.
- Secure the panel: Reinsert and tighten the screws that hold the kick plate in place. Ensure it is flush with the dishwasher’s base.
You have now successfully replaced the Frigidaire dishwasher water inlet valve! The hardest part is over. Next, you will perform crucial tests to ensure everything works correctly and no leaks are present. Knowing how to replace the water valve on a Frigidaire refrigerator or even a KitchenAid dishwasher water inlet valve involves similar logical steps.
Testing and Troubleshooting Your Frigidaire Dishwasher After Replacement
After replacing the water inlet valve, testing is a critical step. This ensures the repair was successful and identifies any leaks immediately. Do not skip this part. It helps confirm your hard work paid off. I always monitor the first few minutes very closely.
Initial Leak Check
Before restoring full power, you should perform a visual check.
- Restore water supply: Go back under your kitchen sink. Slowly open the water shut-off valve you closed earlier. Turn it counter-clockwise until it is fully open.
- Inspect the new valve: Immediately check all connections around the new water inlet valve. Look for any drips or signs of water leakage. Pay close attention to the water supply line connection and the hose going to the dishwasher tub.
- Tighten if necessary: If you see any minor drips, gently tighten the connection a little more with your pliers or wrench. Do not overtighten. Wait a few minutes and recheck. If the leak persists after a slight tightening, you might need to re-seat the connection.
- Wipe and observe: Wipe the area completely dry with a towel. Continue to observe for several minutes to ensure no new leaks appear.
Running a Test Cycle
Once you are confident there are no immediate leaks, it is time to test the valve’s operation.
- Restore electrical power: Go back to your home’s circuit breaker panel. Flip the breaker switch for the dishwasher back to the “ON” position.
- Start a short cycle: Choose the shortest wash cycle setting on your Frigidaire dishwasher, such as “Rinse Only” or “Quick Wash.” This allows you to quickly observe if the valve is functioning.
- Listen for water filling: You should hear the sound of water entering the dishwasher within the first minute or two of the cycle starting. The dishwasher should fill to the correct level.
- Observe the wash cycle: Let the cycle run for a few minutes. Check if the spray arms are spinning and water is circulating properly.
- Monitor for leaks during operation: Keep an eye on the area around the new valve. Leaks sometimes only appear when the system is under pressure during operation.
Common Troubleshooting Scenarios
Even after a successful replacement, issues can sometimes arise. Here are a few common ones:
- Dishwasher still not filling:
- Check power connections: Ensure the electrical wires are firmly attached to the new valve terminals.
- Verify water supply: Make sure the shut-off valve under the sink is fully open.
- Valve faulty (rare for new parts): Though unlikely, a new part can sometimes be defective. If all else fails, you might need to test the new valve’s solenoid with a multimeter.
- Dishwasher continuously fills/overflows:
- This indicates the new valve is stuck open. It could be a manufacturing defect in the new valve. You might need to replace the new valve if this happens.
- Float switch issue: Less common, but a faulty float switch can also cause continuous filling. This is a separate issue from the inlet valve itself.
- Leaks persist:
- Loose connections: Re-tighten all connections (water supply line, tub hose) but avoid overtightening.
- Damaged threads/gaskets: Inspect the threads on the water supply line and the valve. Ensure any rubber gaskets or washers are correctly seated. A damaged part or a missing washer can cause leaks.
- Cracked valve body: If the leak is from the plastic body of the new valve, it is defective. You will need a replacement part.
Successfully completing these tests confirms your Frigidaire dishwasher is ready for use. You have not only fixed a problem but also gained valuable experience in appliance repair. This knowledge is empowering for future home maintenance tasks.
Maintaining Your Frigidaire Dishwasher for Longevity
Replacing the water inlet valve fixes a specific problem. Proper maintenance helps prevent future issues and extends the life of your Frigidaire dishwasher. A little effort now can save you big repairs later. I always suggest a proactive approach to appliance care.
Regular Cleaning and Inspection
Keeping your dishwasher clean is more than just about sparkling dishes. It affects the internal components too.
- Clean the filter: Most dishwashers have a removable filter at the bottom. Food particles and debris can accumulate here. Clean it regularly, at least once a month, by rinsing it under running water. A clogged filter can strain the pump and affect overall performance.
- Wipe down the door seal: The rubber gasket around the dishwasher door can collect food residue and mildew. Wipe it clean with a damp cloth. This prevents odors and ensures a tight seal, preventing leaks.
- Inspect spray arms: Check the spray arm nozzles for any clogs. Food bits or mineral deposits can block these tiny holes. Use a toothpick or small wire to clear them. This ensures proper water distribution during cycles.
Addressing Hard Water Issues
Hard water is a common enemy of appliances, including dishwashers. Mineral deposits (limescale) can build up inside hoses, pumps, and especially the water inlet valve.
- Use dishwasher cleaner: Run a dishwasher cleaner specifically designed to remove hard water deposits and grime every few months. These products help break down limescale.
- White vinegar rinse: A simple and effective method is to place a cup of white vinegar in an empty dishwasher. Run a hot cycle. Vinegar helps dissolve mineral buildup. Do not use detergent during this cycle.
- Water softener (if severe): If your home has extremely hard water, consider installing a whole-house water softener. This protects all your water-using appliances. It significantly reduces mineral buildup.
Proper Loading Practices
How you load your dishwasher also impacts its longevity.
- Scrape plates: Scrape off large food particles before loading dishes. You do not need to pre-rinse, but removing large chunks prevents filter clogs and reduces strain on the drain pump.
- Avoid overcrowding: Do not jam too many dishes into the dishwasher. Overloading restricts water circulation. It also prevents proper cleaning. This can make the dishwasher run longer or require multiple cycles. This adds wear and tear to components.
Periodic Professional Check-ups (Optional)
While this guide focuses on DIY repair, sometimes a professional check-up is beneficial.
- Annual maintenance: Consider having an appliance technician inspect your dishwasher annually. They can identify potential issues before they become major problems. They can also perform deep cleaning or adjustments you might miss.
By performing these simple maintenance tasks, you are not just caring for your Frigidaire dishwasher. You are protecting your investment. A well-maintained appliance performs better and lasts longer. This reduces the frequency of replacements like the water inlet valve. Regular care ensures your dishwasher remains a reliable workhorse in your kitchen.
Frequently Asked Questions (FAQ)
How long does a Frigidaire dishwasher water inlet valve typically last?
A Frigidaire dishwasher water inlet valve generally lasts between 5 to 10 years. Its lifespan depends on usage, water quality, and maintenance. Hard water and frequent use can shorten its life. Replacing it is a common repair due to wear and tear over time.
Can I clean a Frigidaire dishwasher water inlet valve instead of replacing it?
Cleaning a Frigidaire dishwasher water inlet valve is rarely effective. Mineral buildup causes most failures. The internal components are delicate and hard to access for cleaning. Attempting to clean it often damages the valve further. Replacement is usually the most reliable solution.
What causes a dishwasher water inlet valve to fail?
Several factors cause a dishwasher water inlet valve to fail. The most common cause is mineral buildup from hard water. This buildup prevents the valve from opening or closing properly. Electrical failures in the solenoid coil can also occur. General wear and tear of internal components like springs and seals also contribute to failure over time.
Is it difficult to replace a dishwasher water inlet valve?
Replacing a dishwasher water inlet valve is a moderately difficult DIY task. It requires basic tools and following safety steps carefully. Accessing the valve and managing water connections can be tricky. However, most homeowners with some mechanical aptitude can complete the repair successfully.
How much does a replacement Frigidaire dishwasher water inlet valve cost?
A replacement Frigidaire dishwasher water inlet valve typically costs between $30 and $70 for the part itself. This price varies based on the specific Frigidaire model and whether you purchase an OEM or aftermarket part. Labor costs for professional installation can add another $100-$200 or more.
What are the signs of a faulty dishwasher water inlet valve?
Common signs of a faulty dishwasher water inlet valve include the dishwasher not filling with water, continuous water filling even when off, or visible leaks around the valve area. You might also hear unusual humming noises from the valve. Addressing these signs quickly prevents further issues.
Conclusion
Replacing your Frigidaire dishwasher water inlet valve is a manageable repair for any homeowner. You have learned the function of the valve, identified signs of failure, and understood the tools needed. We walked through crucial safety steps, from disconnecting power to managing water. You now know how to remove the old part and install the new one with confidence.
Remember to test your repair thoroughly to ensure no leaks and proper function. Regular maintenance further protects your appliance. By taking on this task, you not only save money but also gain valuable DIY experience. Your Frigidaire dishwasher can now return to its full working capacity. Take pride in your accomplishment. Your dishes, and your wallet, will thank you.
- Frigidaire Dishwasher
- Water Inlet Valve Replacement
- Dishwasher Repair
- DIY Appliance Repair
- Home Maintenance
- Frigidaire Parts

Todd Martin
Senior Writer
With over 15 years of experience in home renovation and design, I started HEG to share what I’ve learned with homeowners who want to create spaces that are both beautiful and functional. I’ve always believed in a hands-on approach, and over the years, I’ve picked up practical solutions that actually work. Through HEG, I aim to make home improvement more approachable, sharing real tips that help you create a home you truly love.