· Todd Martin · Home Appliance Repair · 13 min read
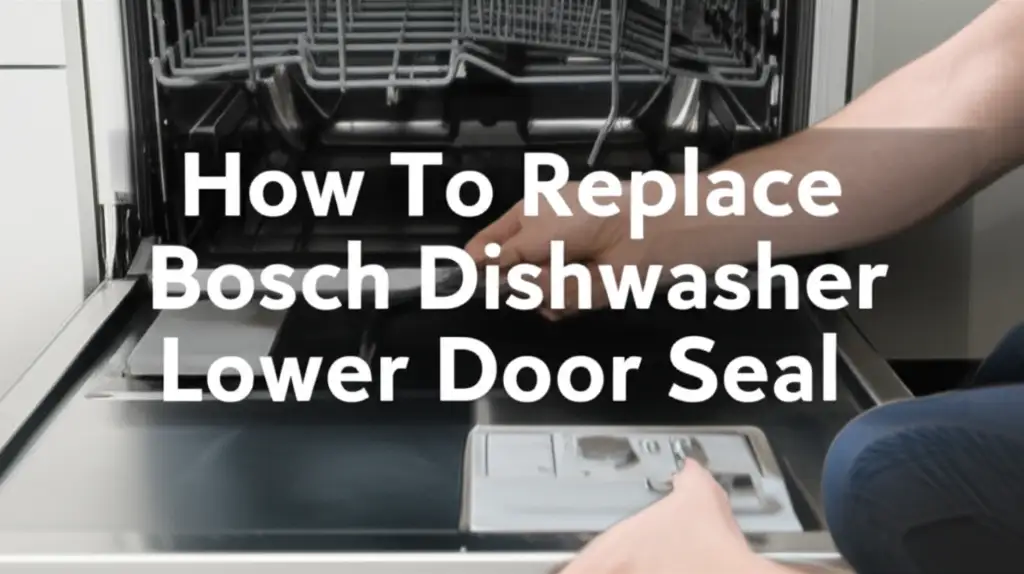
How To Replace Bosch Dishwasher Lower Door Seal

Replace Bosch Dishwasher Lower Door Seal: A Simple Guide
Is your Bosch dishwasher leaving puddles on your kitchen floor? A leaking dishwasher is frustrating. Often, the lower door seal causes these leaks. This rubber gasket keeps water inside during a wash cycle. Over time, this seal can wear out or crack.
Knowing how to replace a Bosch dishwasher lower door seal saves you money. You do not need to call a repair technician. I will show you how to do this simple repair yourself. This guide covers the process completely. We will discuss identifying issues, gathering tools, and doing the replacement. Get ready to fix your dishwasher.
Takeaway
- Spot Leaks Early: Watch for water puddles or reduced cleaning. These signs point to a faulty seal.
- Gather Tools: You need basic tools and a new, correct Bosch lower door seal.
- Prioritize Safety: Always disconnect power and water before starting work.
- Follow Steps: Remove the old seal carefully. Clean the channel. Install the new seal firmly.
- Test Thoroughly: Run a short cycle to check for leaks after replacement.
Replacing a Bosch dishwasher lower door seal involves opening the door, carefully removing the old seal from its channel, cleaning the groove, and pressing the new seal firmly into place. Ensure a snug fit for proper sealing. This DIY repair fixes leaks and extends appliance life.
Identifying a Failing Bosch Dishwasher Lower Door Seal
Your dishwasher works hard. It runs many cycles each week. Over time, parts wear out. The lower door seal is one such part. This seal is a long, thin rubber strip. It sits at the bottom edge of your dishwasher door opening. Its job is to prevent water from escaping.
You will see clear signs if your Bosch dishwasher lower door seal is failing. The most obvious sign is water. You might find puddles on the floor in front of your dishwasher. These puddles appear during or after a wash cycle. Do not ignore these small leaks. They can cause damage to your floor or cabinets.
Another sign is reduced cleaning performance. Sometimes, a bad seal lets water escape. This lowers water pressure inside the tub. Your dishes might not get as clean as they used to. You might also notice unusual noises. A loose seal can sometimes flap or rub, creating odd sounds.
You can also check the seal itself. Open your dishwasher door fully. Look at the rubber seal along the bottom edge. Does it look cracked? Is it brittle? Does it have tears or cuts? A healthy seal feels soft and pliable. If it feels stiff or has visible damage, it is time for a replacement. Early detection saves you from bigger problems. For more insights on water issues, you might find this article useful: Why Does My Bosch Dishwasher Have Water in the Bottom.
Tools and Parts Needed for Seal Replacement
Before you start any repair, gather all your supplies. Having everything ready makes the job smoother. You do not want to stop in the middle to find a tool. This repair needs only a few common items. You can probably find most of them in your home toolkit.
First, you need the new Bosch dishwasher lower door seal. This is the most important part. Do not try to reuse an old or damaged seal. Each dishwasher model might use a specific seal. Make sure you get the correct one for your Bosch appliance. You can find the model number on a sticker inside the dishwasher door. Look up the part online or at an appliance parts store. Using an original equipment manufacturer (OEM) part is often best. These parts fit perfectly and last longer.
You will also need some basic hand tools. A flathead screwdriver is useful. You might use it to gently pry the old seal out. Pliers can also help. They can give you a better grip on a stubborn seal. Have a clean cloth or sponge ready. You will use it to clean the seal channel. A mild household cleaner is also helpful for cleaning. Dish soap mixed with water works well.
Safety gear is important too. Wear a pair of work gloves to protect your hands. The edges of the dishwasher can be sharp. Eye protection is also a good idea. This prevents any debris from entering your eyes. Preparing your workspace means you are ready for a smooth repair.
Safety First: Preparing Your Bosch Dishwasher for Repair
Safety is always the first step for any appliance repair. Working with electrical appliances can be dangerous. Water and electricity do not mix well. So, before you touch anything inside your Bosch dishwasher, you must prepare it. This takes only a few minutes. It keeps you safe during the whole process.
First, disconnect the power to your dishwasher. This is critical. You can do this in two ways. The easiest way is to unplug the dishwasher from the wall outlet. If your dishwasher is hardwired, you must turn off the power at your home’s circuit breaker. Go to your electrical panel. Find the breaker labeled for your kitchen or dishwasher. Flip it to the “off” position. If you are unsure, turn off the main breaker for your entire house. It is better to be overly cautious.
Next, turn off the water supply to the dishwasher. There is usually a shut-off valve under your kitchen sink. This valve connects to the dishwasher’s water line. Turn the handle clockwise until it is completely off. If you cannot find a dedicated valve, you might need to turn off the main water supply to your house. This prevents any accidental water flow during the repair.
After disconnecting power and water, clear your work area. Remove any dishes or racks from inside the dishwasher. Make sure the area around the dishwasher is dry and clear of obstacles. This gives you room to work comfortably. Taking these safety steps means you can focus on the repair without worry.
Step-by-Step: Removing the Old Bosch Dishwasher Door Seal
Now that your dishwasher is safe, we can start the actual repair. Removing the old seal is straightforward. It does not require special skills. Take your time with this step. Being gentle prevents damage to your dishwasher.
Open the dishwasher door completely. It should lay flat. This gives you full access to the lower edge of the door opening. You will see the existing rubber seal running along this bottom edge. This seal sits in a groove or channel. Take a moment to observe how it is seated. It will help you understand how to install the new one.
Start at one end of the seal. You can often just grab the end of the seal with your fingers. Pull it gently but firmly. The seal is usually held in place by friction. It is pushed into a channel. Some seals might have small tabs or clips, but Bosch lower door seals typically pull out from the groove. If it is stubborn, you can use a flathead screwdriver. Carefully insert the screwdriver under the edge of the seal. Gently pry it up. Work your way along the seal. Pull it out of the channel bit by bit.
Once you remove the old seal, you will see the empty channel. This channel might have dirt, food debris, or soap residue. Use your clean cloth and mild cleaner to clean this channel thoroughly. Make sure it is completely clean and dry before you install the new seal. Any debris left behind can prevent the new seal from sitting properly. A clean channel ensures a good seal and prevents future leaks. When replacing seals, other brands have similar processes. For instance, learn how to replace a Samsung dishwasher bottom door seal or a GE dishwasher lower door gasket.
Installing Your New Bosch Dishwasher Lower Door Seal
With the old seal removed and the channel clean, it is time for the new seal. This is the most important part of the repair. Proper installation ensures no more leaks. Take your time and be precise. The new seal needs to sit perfectly in its groove.
First, unbox your new Bosch dishwasher lower door seal. Lay it out to remove any kinks from packaging. Inspect the seal. Make sure it looks correct and has no damage. Notice its shape. Some seals have a specific orientation. One side might be thicker or have a lip designed to fit into the channel a certain way. Match the new seal’s shape to the channel.
Begin installation at one end of the channel. Align the new seal. Gently press it into the groove. You might hear a slight click or feel it snap into place. Work your way along the entire length of the channel. Push the seal firmly into the groove. Use your thumbs or fingers to apply even pressure. Make sure the entire seal is seated deeply and snugly.
Pay special attention to the corners. Ensure the seal bends smoothly around any curves. Do not stretch the seal too much. Stretching can cause it to retract later. This can create gaps. Ensure there are no twists or kinks in the seal. A twisted seal will not provide a watertight barrier. Once you press the seal into place, run your fingers along its entire length. Check for any loose spots. The seal should feel firm and flush with the dishwasher opening. A well-seated seal means your dishwasher will be ready for leak-free operation.
Testing Your Bosch Dishwasher After Seal Replacement
You have installed the new lower door seal. Now you need to check your work. Testing your dishwasher is vital. This step confirms that the new seal works correctly. It also lets you catch any issues before a full wash cycle.
First, reconnect the power to your dishwasher. Flip the circuit breaker back to the “on” position. If you unplugged it, plug it back in. Next, turn the water supply back on. Open the valve under your sink. Make sure it is fully open. You should hear the dishwasher fill with a small amount of water if it has a holding tank or pre-rinse function.
Now, run a short wash cycle. A “rinse only” cycle is perfect for this test. These cycles are short and use water. They allow you to observe for leaks without committing to a full wash. Start the cycle. Close the dishwasher door.
During the cycle, watch carefully. Look for any water dripping or pooling on the floor. Pay close attention to the bottom edge of the dishwasher door. This is where the new seal is. If you see any leaks, stop the cycle immediately. A small drip indicates the seal might not be perfectly seated. You might need to adjust it. Turn off power and water again. Then, re-examine the seal. Press it more firmly into the channel. Check for any twisted sections. Re-run the test. If no leaks appear during the short cycle, your repair is successful. Your Bosch dishwasher is ready for regular use.
Maintaining Your Dishwasher Seal for Longevity
Replacing your Bosch dishwasher lower door seal is a great fix. But the work does not end there. Regular maintenance helps your new seal last longer. It also prevents future leaks. Taking care of your dishwasher seal is simple. It protects your investment.
First, keep your dishwasher clean. Food particles and grease can build up on the seal. This build-up can make the seal stiff. It can also cause it to degrade faster. After each wash cycle, quickly wipe down the seal. Use a damp cloth to remove any food debris. A mild soap solution can remove tougher grime. Do this regularly, perhaps once a week.
Avoid using harsh chemicals on your dishwasher seal. Bleach or abrasive cleaners can damage the rubber. They can make it brittle. Stick to mild soap and water for cleaning. Dishwasher cleaning tablets are good for the interior. But they might not directly clean the seal.
Proper loading of your dishwasher also helps. Do not let large plates or utensils stick out past the bottom rack. These items can hit the lower door seal when you close the door. Repeated impacts can damage the seal. Make sure all items are fully inside the dishwasher. This prevents wear and tear on the seal.
Finally, be gentle when closing the dishwasher door. Slamming the door can stress the seal. It can cause it to shift or warp over time. Close the door smoothly and firmly. These small actions extend the life of your Bosch dishwasher lower door seal. They keep your kitchen dry.
FAQ Section
How often should a Bosch dishwasher seal be replaced?
A Bosch dishwasher seal does not have a fixed replacement schedule. It typically lasts many years. Replace it when you notice signs of wear. Look for cracks, stiffness, or leaks on the floor. Regular cleaning can extend its life.
Can I use a universal seal for my Bosch dishwasher?
No, you should not use a universal seal for your Bosch dishwasher. Bosch dishwashers need specific parts. A universal seal may not fit correctly. An ill-fitting seal will not prevent leaks effectively. Always use the exact part number for your model.
What happens if I do not replace a leaky seal?
If you do not replace a leaky seal, water will escape your dishwasher. This can damage your kitchen floor and cabinets. Mold and mildew can grow in damp areas. Water damage can be costly to repair. A bad seal also reduces cleaning efficiency.
Is replacing a Bosch dishwasher seal a difficult DIY task?
Replacing a Bosch dishwasher lower door seal is a simple DIY task. It does not require special tools or skills. Most people can complete it in under an hour. Follow the instructions carefully. Make sure to turn off power and water first.
How do I find the correct seal part number for my Bosch?
To find the correct seal part number, look for the model number of your Bosch dishwasher. It is usually on a sticker inside the door or on the side of the tub. Use this model number to search for parts online. Appliance parts websites or Bosch’s official site can help.
Conclusion
Fixing a leaking Bosch dishwasher is a rewarding DIY project. You have learned that replacing the lower door seal is a straightforward process. This guide walked you through each step. From identifying the problem to testing your repair, you now have the knowledge. You no longer need to fear those annoying puddles on your kitchen floor.
Taking on this task yourself saves you money on repair services. It also helps you understand your home appliances better. Remember to always prioritize safety. Disconnect power and water before you begin. A new, correctly installed Bosch dishwasher lower door seal means your appliance works efficiently. It keeps your kitchen dry. Now, you can confidently tackle this repair. Enjoy your quiet, leak-free Bosch dishwasher.
- Bosch dishwasher
- door seal replacement
- dishwasher repair
- appliance maintenance
- leak repair
- DIY home repair


