· Todd Martin · Home Improvement · 14 min read
How To Remove Built In Microwave With Vent Under Cabinet
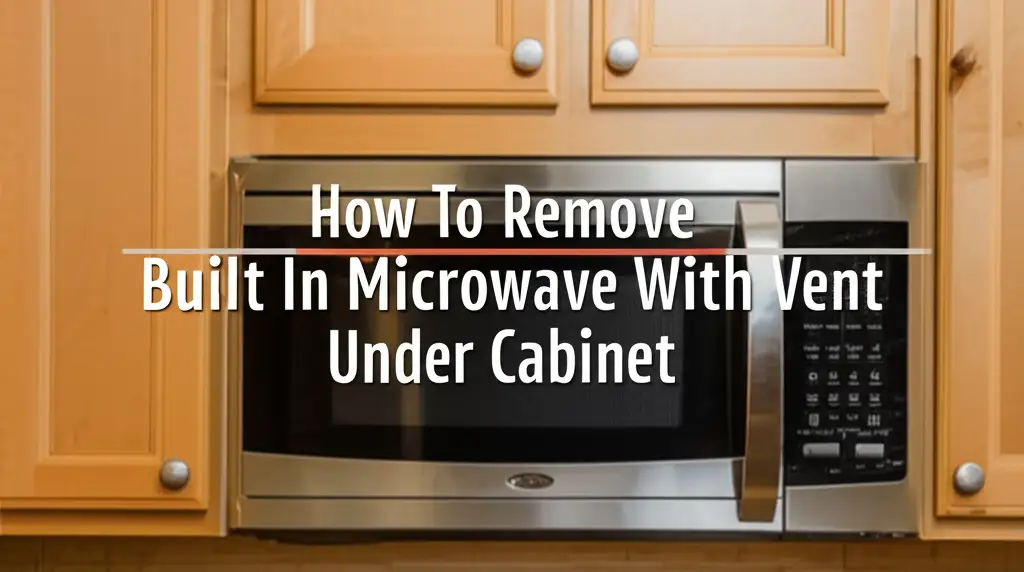
Safely Remove Your Built-In Microwave with Under-Cabinet Vent
Removing a built-in microwave with a vent under the cabinet might seem like a big job. Many people choose to replace old appliances or update their kitchens. This type of microwave is often heavy and connected to an exhaust system. Knowing the right steps makes the process safe and simple. I will guide you through each part of uninstalling your microwave. We will cover safety, tools, and disconnections.
This article shows you how to remove your built-in microwave with a vent under the cabinet. You will learn about disconnecting power and ventilation. We will then discuss how to unfasten the unit from its mounts. This guide helps you prepare your kitchen for a new appliance or a remodel.
Takeaway
- Prioritize Safety: Always turn off power to the microwave circuit breaker first.
- Gather Tools: Collect screwdrivers, wrenches, a ladder, and gloves before you begin.
- Disconnect Power and Vent: Unplug the microwave and detach all ductwork components.
- Unfasten Securely: Locate and remove mounting bolts and screws holding the unit in place.
- Lift with Help: Have a helper ready to support the microwave’s weight during removal.
- Clean Up: Prepare the space for your next steps, whether it is a new appliance or repairs.
To remove a built-in microwave with an under-cabinet vent, first disconnect power at the circuit breaker. Then, detach the ventilation ductwork and filter components. Next, unfasten the securing screws from the upper cabinet and wall mounting plate. Finally, carefully lower the microwave unit with assistance.
Preparing for Safe Microwave Removal
Before you touch any part of your microwave, proper preparation is key. This step protects you and your home. Ignoring safety can cause serious injury or electrical damage. I always make sure the area is clear and I have the right tools ready.
Electrical Safety First
Power is the main concern when removing any appliance. Built-in microwaves connect directly to your home’s electrical system. You must turn off the power at the source.
- Locate Your Breaker Box: Find your home’s electrical service panel. It is usually in a basement, garage, or utility closet.
- Identify the Circuit: Look for the breaker labeled “Microwave,” “Kitchen,” or “Appliance.” If unsure, turn off the main breaker for your entire home.
- Test the Microwave: After flipping the breaker, try to turn on the microwave. If it does not power on, the circuit is off. You are now safe to proceed.
Do not skip this step. This ensures no electricity flows to the unit.
Gathering Essential Tools
Having the right tools ready saves time and frustration. You do not want to stop in the middle of the job to find a wrench. I recommend organizing everything on a clean workspace.
- Screwdrivers: You will need Phillips and flathead screwdrivers. Many microwave screws are Phillips head.
- Adjustable Wrench or Nut Drivers: These are for the bolts that secure the microwave. They might be hex bolts.
- Drill with Bits: A drill can speed up screw removal, but be careful not to strip screws.
- Gloves: Protect your hands from sharp edges or grime.
- Safety Glasses: Dust or debris can fall from the cabinet area.
- Step Ladder or Stool: The microwave is usually mounted high above the range.
- Helper: The microwave unit is heavy. Plan to have someone assist you with lifting it down.
- Cardboard or Blanket: Place this on your countertop to protect it when you lower the microwave.
Having these items makes the removal process much smoother. It helps you work efficiently and safely.
Disconnecting the Ventilation System and Power
Once safety preparations are complete, you can begin disconnecting the microwave. This involves both the electrical connection and the ventilation ductwork. These steps are crucial for releasing the unit from its secured position. I find it helpful to take pictures before I start. This helps me remember how everything was connected.
Unplugging the Microwave Unit
Even with the breaker off, locating and unplugging the microwave is an important step. Some built-in microwaves have a visible power cord. Others might have the cord hidden inside the upper cabinet.
- Open the Upper Cabinet: Look into the cabinet directly above the microwave. Often, the power cord plugs into an outlet inside this cabinet.
- Locate the Outlet: Find the three-pronged plug. It will connect the microwave to the electrical supply.
- Unplug the Cord: Firmly grasp the plug and pull it from the outlet. Ensure no part of the cord is still connected to power.
- Check for Hardwiring: In some older installations, the microwave might be hardwired directly. If you see wires going into a junction box instead of a plug, you might need an electrician. Do not attempt to disconnect hardwired units without proper knowledge.
Disconnecting the power cord ensures complete isolation from the electrical system. This provides an extra layer of safety.
Detaching the Vent Ductwork
Built-in microwaves with under-cabinet vents connect to a duct system. This duct carries smoke and odors outside. You must disconnect this ductwork before removing the microwave.
- Locate the Vent Grille: Look on the top or back of the microwave. You will see a vent grille or exhaust opening.
- Access the Ductwork: The duct might be accessible from the top cabinet or behind the microwave. Some units have a removable panel at the top.
- Remove Filters: Pull out the grease filters from the bottom of the microwave. Some microwaves have filters that block access to vent screws. For information on cleaning, you can refer to how to clean hood vent filter.
- Disconnect the Duct Connection: The vent usually connects with screws or tape to the house duct. Use a screwdriver or utility knife to detach it.
- Remove the Damper: Many vent systems have a damper flap that prevents backdraft. This flap might be part of the microwave unit or the ductwork. Ensure it is free from the duct. If your microwave vent is dirty, you can find tips on how to clean microwave vent.
Carefully separate the microwave’s vent from the wall or cabinet ducting. This prepares the unit for physical removal.
Unfastening the Microwave Unit
With the power and vent disconnected, the next step is to unfasten the microwave from its mounts. Built-in microwaves are typically secured in two main places. They have screws from the upper cabinet and a mounting plate on the wall. This part requires careful attention to detail.
Removing Top Cabinet Mounting Screws
Most over-the-range microwaves are secured to the upper cabinet. These screws support the front and top of the unit. You will usually find them inside the cabinet directly above the microwave.
- Open the Upper Cabinet Doors: Gain full access to the cabinet floor.
- Locate the Mounting Screws: Look for large screws or bolts. There are usually two or three of these. They pass down through the cabinet floor and into the top of the microwave frame.
- Use the Right Tool: Use a Phillips head screwdriver or a nut driver. Unscrew these bolts slowly.
- Support the Microwave: As you remove the last screw, the microwave may tilt forward slightly. Have your helper ready to support the unit from below. This prevents it from falling.
These screws are critical for holding the microwave in place. Removing them is the first step in freeing the appliance.
Detaching from the Wall Mounting Plate
The wall mounting plate provides the main structural support for the microwave’s weight. This plate is typically installed directly onto the wall studs. The back of the microwave hooks onto this plate.
- Locate the Mounting Plate: It is usually a metal strip running across the wall behind the microwave.
- Identify Securing Points: Some microwaves have additional screws on the bottom or sides that secure them to the wall. Check the bottom edge of the microwave for any small screws. These might be hidden behind grease filters or decorative panels.
- Lift and Tilt: Once the top cabinet screws are out, the microwave should be able to lift slightly. You need to lift the front of the microwave. Then, tilt it outward. This movement unhooks the microwave from the mounting plate.
- Get Help: This is where your helper is essential. One person lifts and tilts. The other person supports the bottom of the microwave. This ensures a controlled and safe removal.
Taking off these fasteners frees the microwave completely from its installed position.
Carefully Lowering and Removing the Appliance
Once the microwave is unfastened from the cabinet and wall plate, the final physical step is to lower it. This stage requires coordination, especially if the microwave is heavy. Do not try to lift it alone. I have seen people hurt themselves by underestimating the weight.
Coordinating the Lift
Teamwork is vital when lowering the microwave. You and your helper need to work together. Clear communication prevents accidents.
- Position Yourselves: Stand on either side of the microwave. Make sure you have a firm grip.
- Lift Up and Out: One person should hold the bottom. The other person can guide the top. Lift the microwave unit up and away from the wall mounting plate. The goal is to clear the hooks on the plate.
- Tilt Downward: Once the back hooks are free, tilt the top of the microwave unit downward. This allows the unit to swing away from the wall.
- Lower Evenly: Both individuals should lower the microwave slowly and steadily. Bring it down onto a prepared surface. Use the cardboard or blanket you placed on the countertop.
Taking your time and working together makes this a safe process. Rushing can cause damage to the microwave or injury.
Moving the Microwave from the Area
After the microwave is on the counter, you need to move it away. Plan your path to avoid obstacles. This prevents tripping or bumping into things.
- Clear the Path: Remove any chairs, kitchen items, or rugs. Create a clear path from the counter to your disposal area.
- Carry Safely: If possible, carry the microwave out of the kitchen immediately. If it is too heavy for two people, use a hand truck or furniture dolly.
- Protect Surfaces: Be careful not to scratch floors or doorways. Microwave edges can be sharp.
Removing the microwave unit completes the main task. Now, you can focus on what is left behind.
Cleaning Up and Next Steps
With the microwave removed, you will likely find a messy area. Grease, dust, and old mounting hardware can be present. Cleaning this space is important. It prepares the area for a new appliance or for renovation work. I always take time to clean thoroughly.
Cleaning the Exposed Area
The area where the microwave was installed needs a good cleaning. This includes the wall, the cabinet interior, and possibly the backsplash.
- Remove Debris: Sweep or vacuum any dust, crumbs, or small pieces of insulation.
- Degrease Surfaces: Over time, grease and cooking residue build up. Use a strong kitchen degreaser to clean the wall and cabinet surfaces. Pay special attention to the area around the old vent opening. For general cabinet cleaning, you might find tips on how to clean cabinet.
- Wipe Down: Use clean cloths or sponges to wipe surfaces. Rinse with clean water if needed.
- Clean the Duct Opening: The vent opening might have built-up grime. Clean around it to ensure good airflow for a new system. Cleaning different types of vents is covered in how to clean vent.
A clean surface is crucial for a fresh start. It also helps if you plan to paint or install a new appliance.
Dealing with the Mounting Plate and Damage
The wall mounting plate is likely still attached. You need to decide whether to remove it. You also need to address any wall or cabinet damage.
- Mounting Plate Decision:
- Keep It: If installing a similar new microwave, the existing plate might work. Check the new microwave’s manual for compatibility.
- Remove It: If installing a different microwave or a range hood, you will need to remove the plate. Use a drill or screwdriver to unscrew it from the wall studs.
- Repairing Wall Damage:
- Small Holes: Use spackle or wall joint compound to fill small screw holes.
- Larger Damage: If there are larger holes from anchors or previous repairs, you might need drywall patches.
- Sanding and Painting: Sand the repaired areas smooth. Then, paint to match your kitchen walls.
- Cabinet Damage: Check the underside of the upper cabinet. Fill any screw holes or patch wood if needed.
Addressing these details creates a clean slate for your kitchen project.
Disposing of the Old Microwave
Microwaves contain electronic components and metal parts. They should not go into regular household trash. Proper disposal is important for the environment.
- Check Local Regulations: Research your local waste management rules. Many communities have specific drop-off locations for electronics or appliances.
- Recycling Centers: Look for recycling centers that accept electronic waste. Some may charge a small fee.
- Appliance Retailers: If you are buying a new microwave, some retailers offer old appliance removal and recycling services. Ask about this option when you purchase your replacement.
- Donation: If the microwave is still in working condition, consider donating it to a charity. They often pick up appliances.
Responsible disposal helps protect the environment. It also prevents valuable materials from ending up in landfills.
Planning for Your Next Kitchen Appliance
After successfully removing your built-in microwave, you have an open space. Now is the time to decide what comes next. You might replace it with another microwave or change your kitchen layout. Think about your cooking needs and kitchen design.
Choosing a Replacement Microwave
If you plan to install a new built-in microwave with an under-cabinet vent, consider a few factors.
- Size and Fit: Measure the exact dimensions of the old microwave’s space. Ensure the new unit fits perfectly. Check the height, width, and depth.
- Mounting System: Different brands use different mounting plates. Be ready to install a new mounting plate if your old one is not compatible.
- Ventilation Type: Confirm the new microwave’s vent type matches your existing ductwork. Some can vent outside, recirculate, or vent through the top. If you need to build a new vent system, you might explore how to build a vent hood.
- Features: Look at wattage, sensor cooking, and fan speeds. Choose features that suit your cooking style.
Installing a new microwave typically follows the reverse steps of removal. Always refer to the new appliance’s installation manual.
Considering Alternatives or Renovations
Removing the microwave opens up design possibilities. You might decide not to put another microwave in the same spot.
- Range Hood Installation: Many homeowners replace built-in microwaves with dedicated range hoods. These often offer better ventilation performance. This means removing the old microwave entirely.
- Open Shelving: You could install open shelves above your range for a different look. This requires patching and painting the wall thoroughly.
- Cabinetry Extension: You might extend your existing cabinetry to fill the space. This could involve custom work or modifying existing cabinets.
- Microwave Drawer: A microwave drawer is an alternative that frees up counter space. It also clears the area above your range. This requires cabinet modifications below the counter.
Take this opportunity to rethink your kitchen space. Choose an option that best fits your lifestyle and design goals.
Frequently Asked Questions
Q1: How long does it typically take to remove a built-in microwave? A1: Removing a built-in microwave usually takes about 1 to 2 hours. This time includes gathering tools and cleaning up. The process goes faster with two people. It might take longer if you encounter unexpected issues. This includes stubborn screws or hidden connections.
Q2: Can I remove a built-in microwave by myself? A2: It is highly recommended to have a helper. Built-in microwaves are heavy. They can weigh 50 to 100 pounds. Trying to lift it alone can cause injury or damage to your kitchen. A second person helps support the weight and guides the unit.
Q3: What do I do if the microwave is hardwired instead of plugged in? A3: If your microwave is hardwired, the power cables connect directly to a junction box. You should not disconnect these wires yourself unless you are a qualified electrician. Hire a professional electrician to safely disconnect and cap the wires. This avoids electrical hazards.
Q4: Will I need to repair my walls or cabinets after removal? A4: Yes, most likely. You will have screw holes in the upper cabinet and wall. There might be larger holes from the mounting plate anchors. You will need to patch these holes with spackle or drywall compound. Then, you can sand and paint the area.
Q5: How do I dispose of the old microwave safely? A5: Do not put the microwave in regular trash. Microwaves contain electronics and metals that require special disposal. Check with your local waste management services for electronic waste drop-off locations or recycling programs. Some appliance retailers also offer recycling services when you buy a new unit.
Conclusion
Removing a built-in microwave with a vent under the cabinet is a manageable home improvement project. It requires careful planning and execution. We covered everything from ensuring electrical safety to properly disconnecting the ventilation system. You also learned how to unfasten the unit from its mounts and safely lower it. By following these steps, you can successfully remove your old appliance.
Remember to prioritize safety by turning off power and having a helper. Take your time with each step. A smooth removal paves the way for your next kitchen update. Whether you are installing a new microwave or transforming your kitchen with different appliances, you have completed the first step. You can confidently tackle this project yourself, saving money and gaining a sense of accomplishment.
- microwave removal
- appliance uninstall
- kitchen DIY
- over-the-range microwave
- kitchen renovation
- vent system
- cabinet mounted

Todd Martin
Senior Writer
With over 15 years of experience in home renovation and design, I started HEG to share what I’ve learned with homeowners who want to create spaces that are both beautiful and functional. I’ve always believed in a hands-on approach, and over the years, I’ve picked up practical solutions that actually work. Through HEG, I aim to make home improvement more approachable, sharing real tips that help you create a home you truly love.