· Katria Melrose · Cookware Guide · 20 min read
How To Know When Ceramic Pan Is Hot Enough
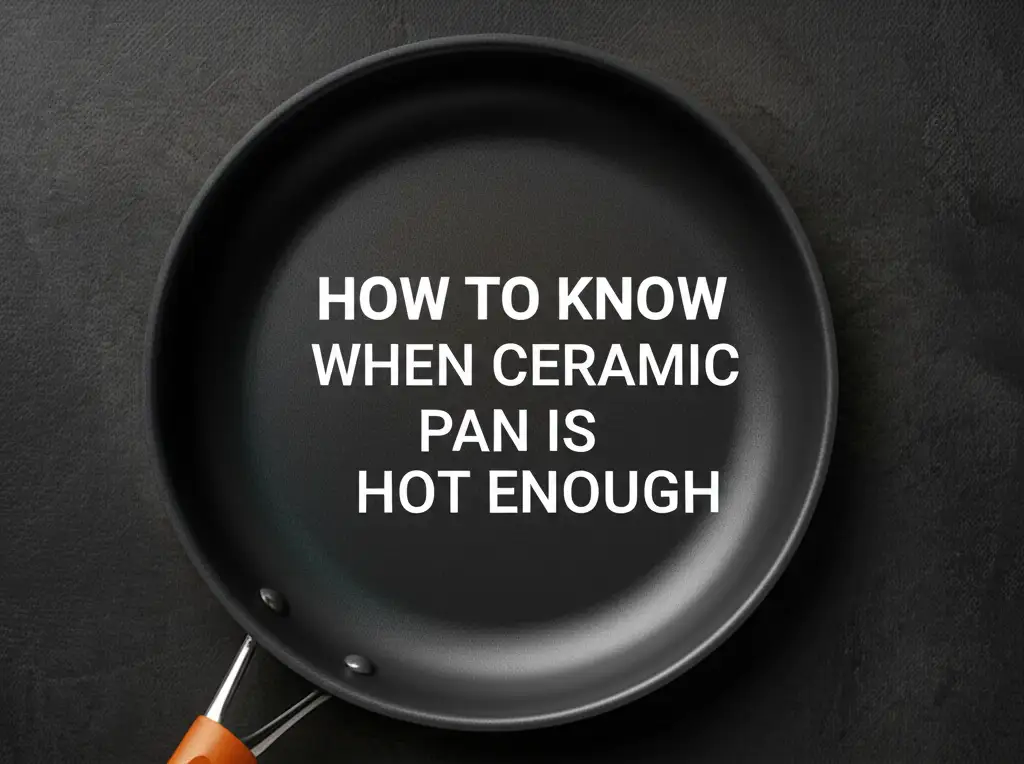
Mastering Heat: How to Know When Your Ceramic Pan Is Ready
Have you ever started cooking, only to have your food stick to the pan or cook unevenly? This is a common kitchen frustration. Often, the problem is simple: your pan was not hot enough. Knowing how to know when ceramic pan is hot enough is crucial. It ensures your food cooks properly and maintains the non-stick properties of your valuable ceramic cookware.
Getting the temperature right is especially important for ceramic pans. These pans perform best when preheated correctly. Too little heat, and food sticks; too much, and you risk damaging the pan’s surface. This guide will walk you through easy methods to determine the perfect temperature. We will cover visual cues, simple tests, and practical tips. By the end, you will confidently master your ceramic pan’s heat, leading to better meals every time.
Takeaway
- Achieve Optimal Cooking: Proper preheating prevents sticking and ensures even cooking results.
- Protect Your Cookware: Overheating can damage the non-stick surface of ceramic pans.
- Use Simple Tests: The water drop test is the most reliable method.
- Observe Visual Cues: Look for subtle changes in the pan’s appearance or oil behavior.
- Practice Patience: Ceramic pans need time to heat slowly and evenly.
Knowing when your ceramic pan is hot enough means performing the water drop test: a small drop of water should skitter across the surface without evaporating immediately. The pan should feel warm to the touch, and if using oil, it should shimmer gently. This indicates even heat distribution for optimal cooking.
Understanding Ceramic Cookware Heat Dynamics
Ceramic cookware has become a favorite in many kitchens. It offers a non-stick surface without traditional chemical coatings. This makes it a popular alternative to pans made with PTFE. However, ceramic pans require a specific approach to heating. Knowing how ceramic pans heat is key to their performance and longevity.
Ceramic pans are designed to heat evenly across their surface. Unlike some metals, they do not create “hot spots” easily. This even heat distribution helps food cook uniformly. It also prevents burning in one area while another remains undercooked. To achieve this, preheating your ceramic pan is essential.
Why Even Heat Matters for Ceramic Pans
Proper preheating allows the entire cooking surface to reach the target temperature. This creates a consistent cooking environment for your food. When a ceramic pan is not preheated enough, food tends to stick. The non-stick properties activate best at the correct temperature. This ensures your ingredients release easily from the surface.
Conversely, overheating a ceramic pan can cause damage. High, sustained heat can degrade the non-stick coating over time. It can lead to flaking or a loss of non-stick ability. This is why cooking on medium to medium-low heat is often recommended for ceramic. This gentle heat preserves the pan’s life and performance. Mastering the heat ensures your ceramic pan stays in top condition for years. This also helps you how to keep eggs from sticking to ceramic pan.
The Water Drop Test: Your Go-To Method
The water drop test is the most reliable method to determine if your ceramic pan is hot enough. This technique is simple, effective, and provides a clear indicator. It is based on the Leidenfrost effect, a scientific phenomenon. This effect occurs when a liquid comes into contact with a surface significantly hotter than its boiling point. The water forms small, spherical droplets that dance across the pan.
To perform the water drop test, place your ceramic pan on the stove over medium heat. Allow it to heat for a few minutes. Then, flick a few drops of water onto the pan’s surface. You can use your fingers or a small spoon. Observe how the water behaves. The reaction will tell you if your pan is ready.
How to Interpret the Water Drop Test Results
- Pan is Too Cold: If the water sizzles immediately and evaporates without forming beads, the pan is not hot enough. It needs more time to preheat. Continue heating and repeat the test in another minute or two.
- Pan is Just Right: If the water forms distinct, mercury-like beads that skitter and dance across the pan’s surface, your pan is perfectly preheated. This means the temperature is ideal for adding oil or food. The water droplets create a cushion of steam, preventing immediate evaporation.
- Pan is Too Hot: If the water evaporates instantly on contact, without forming any beads, the pan is too hot. Remove the pan from the heat source immediately. Let it cool down for a minute. Then, return it to the heat and repeat the test. Starting over helps you find the correct temperature.
This test provides a precise signal for ceramic pans. It helps you avoid sticking and ensures proper cooking. It also protects your pan’s non-stick coating from excessive heat. Use this method every time you cook.
Visual Cues: What to Look For
While the water drop test is highly accurate, visual cues also offer hints about your ceramic pan’s temperature. These cues are more subtle than with stainless steel pans. You need to pay close attention. They can help you gauge the pan’s heat before resorting to the water test.
First, observe the pan itself. As a ceramic pan heats, its surface may develop a very slight sheen. This is not as obvious as with cast iron, but it’s there. The pan’s color might appear a little different. It could seem a touch lighter or brighter as heat builds. This change is often more noticeable on darker ceramic coatings.
Second, if you add a tiny amount of oil early on, watch its behavior. The oil will react to the pan’s increasing temperature. We will discuss the oil test in more detail. However, simply seeing the oil spread smoothly and begin to shimmer indicates rising heat.
Observing Steam and Shimmer
Another visual cue is the appearance of faint steam. This can happen, especially if there is any residual moisture on the pan from washing. As the pan heats, this moisture will evaporate. You might see a very light wisp of steam. This indicates the pan is getting warm, but likely not yet hot enough for cooking.
Finally, the most reliable visual cue for many cooks is the shimmering of oil. When oil, like olive oil or vegetable oil, starts to shimmer and gently wave, the pan is usually close to its ideal cooking temperature. Do not wait for the oil to smoke. Smoking oil means the pan is too hot. It can also break down the oil, creating off-flavors and unhealthy compounds. Learning to recognize this gentle shimmer helps you achieve the perfect cooking temperature for your ceramic pan. For general guidance on pan heat, you might also find it useful to know how to tell if stainless steel pan is hot enough.
Oil Test: A Simple Indicator
The oil test is another practical way to gauge the temperature of your ceramic pan. It is less precise than the water drop test but still very useful. This test relies on observing how a small amount of cooking oil reacts to the pan’s heat. Different oils have different smoke points. This means they will start to smoke at different temperatures. For this reason, it is important to know your oil.
To perform the oil test, add about half a teaspoon of your chosen cooking oil to the pan after it has preheated for a few minutes on medium heat. Tilt the pan gently to spread the oil. Then, watch its behavior. The way the oil moves and changes will tell you about the pan’s temperature.
Interpreting Oil Behavior
- Oil Sits Still and Thick: If the oil just sits in the pan, looking thick and motionless, the pan is still too cold. It needs more time to warm up. The oil has not yet reached a temperature where its viscosity changes significantly.
- Oil Spreads and Shimmers: When the pan is reaching the right temperature, the oil will begin to thin out. It will spread more easily across the pan’s surface. You will notice a gentle shimmer or wave-like appearance. This indicates the oil is hot but not yet smoking. This is the ideal stage for adding food. It means your ceramic pan is ready.
- Oil Starts to Smoke: If the oil begins to smoke, the pan is too hot. Smoking oil indicates it has surpassed its smoke point. This can lead to burnt flavors in your food. It can also degrade the oil and create unpleasant odors. If your oil is smoking, remove the pan from the heat. Let it cool down for a minute or two. Then, wipe out the smoking oil and add fresh oil before attempting to cook. This prevents off-flavors.
The oil test is a good everyday method for many dishes. Remember, ceramic pans perform best on medium to medium-low heat. Avoid high heat settings, as they can damage the non-stick coating over time and cause the oil to smoke too quickly. It is also good to remember how to know if your non-stick pan is bad for overall pan health.
Beyond the Basics: Temperature Tools and Best Practices
While visual cues and simple tests are effective, you can also use specialized tools for more precise temperature control. An infrared thermometer, often called a laser thermometer, offers the most accurate way to measure your pan’s surface temperature. This tool reads the surface temperature from a distance. It gives you an exact number. This is especially useful for recipes that require specific heat levels, like searing meats.
To use an infrared thermometer, point it at the center of your preheating ceramic pan. The digital display will show the current temperature. For most general cooking with ceramic pans, a temperature range of 300°F to 400°F (150°C to 200°C) is ideal. Always consult your recipe for specific temperature needs. Using a thermometer removes guesswork, ensuring consistent results.
Best Practices for Heating Your Ceramic Pan
- Start Low and Go Slow: Always begin heating your ceramic pan on medium-low to medium heat. Ceramic pans heat evenly but slowly. Rushing the preheating process by using high heat can cause uneven spots or even damage the non-stick surface. Patience is key to success.
- Avoid Empty Overheating: Do not leave an empty ceramic pan on high heat for extended periods. This can lead to thermal shock or damage the non-stick coating. Always add oil or food shortly after the pan reaches the desired temperature.
- Preheat Uniformly: Ensure the pan sits flat on the burner. This promotes even heat distribution across the entire cooking surface. An uneven pan will have hot and cold spots.
- Match Pan Size to Burner: Use a burner that matches the size of your ceramic pan. A burner too small will only heat the center, leaving the edges cold. A burner too large wastes energy and can cause excessive heat around the pan’s edges.
- Listen to Your Pan: Beyond visual cues, sometimes a very subtle crackle or sizzle, especially if adding a tiny bit of water or fat, can indicate the pan is warming up. This combines with visual cues for a full understanding.
Adopting these best practices extends the life of your ceramic cookware. It also improves your cooking results. Precision in heating makes a significant difference in the kitchen.
Common Mistakes to Avoid When Heating Ceramic Pans
Cooking with ceramic pans is rewarding, but some common mistakes can hinder performance and shorten their lifespan. Avoiding these pitfalls ensures your pans remain non-stick and effective for a long time. Knowing these errors helps you cook better and protect your investment.
One major mistake is using excessively high heat. Ceramic pans are excellent at retaining and distributing heat. They rarely need to be on high settings. High heat can degrade the non-stick coating. It causes food to stick and can lead to discoloration of the pan. Always stick to medium or medium-low heat settings for most cooking tasks. Save high heat for specific tasks on other cookware, not ceramic.
Another error is rapid temperature changes. For example, placing a very hot pan directly under cold water can cause thermal shock. This can lead to warping or cracking of the ceramic coating. Always allow your pan to cool down naturally before washing. This preserves its structural integrity.
Other Heating Missteps
- Not Preheating Enough: As discussed, insufficient preheating is a primary cause of food sticking. Many people rush the process. They add food before the pan reaches optimal temperature. Always allow 3-5 minutes for proper preheating, or until your chosen test indicates readiness.
- Using Metal Utensils: While not directly related to heating, using metal utensils can scratch the delicate ceramic surface. These scratches compromise the non-stick properties. Always use wooden, silicone, or plastic utensils with ceramic pans to protect the coating.
- Overcrowding the Pan: Adding too much cold food at once can drastically drop the pan’s temperature. This leads to steaming instead of searing. It also makes food stick. Cook in batches if necessary to maintain consistent pan temperature. This ensures proper cooking and prevents sticking.
- Washing Before Cooling: Washing a hot ceramic pan with cold water is detrimental. The sudden temperature change can crack the non-stick layer. Always let your pan cool completely to room temperature before cleaning. This simple step extends the life of your ceramic pan.
- Using Abrasive Cleaners or Scouring Pads: After cooling, avoid harsh cleaners or abrasive pads. These can scratch or wear down the ceramic coating. A soft sponge and mild dish soap are sufficient for cleaning ceramic. Proper cleaning helps maintain the non-stick surface. This also links to how to clean ceramic cookware.
By being mindful of these common errors, you can maximize the performance and durability of your ceramic cookware. Good habits lead to great results.
Maintaining Your Ceramic Pan for Optimal Heat Performance
Proper maintenance is crucial for your ceramic pan’s longevity and its ability to heat effectively. A well-cared-for pan will distribute heat evenly and retain its non-stick properties. Neglecting care can lead to sticking, uneven cooking, and a shortened lifespan. Taking simple steps helps your ceramic pan perform its best for years.
First, always hand wash your ceramic pan. While some manufacturers claim dishwasher safety, the harsh detergents and high heat cycles of a dishwasher can degrade the non-stick coating over time. A gentle hand wash with warm, soapy water and a soft sponge is sufficient for most ceramic pans. This preserves the surface integrity. Rinse thoroughly and dry immediately to prevent water spots.
Second, ensure proper storage. Stacking ceramic pans without protection can lead to scratches. The ceramic coating is durable but not impervious to metal-on-metal contact. Use pan protectors, felt pads, or a kitchen towel between pans when stacking them. This simple barrier prevents scratches and keeps the non-stick surface intact.
Tips for Longevity and Heat Distribution
- Low to Medium Heat Cooking: Reinforcing this point is vital. Consistently cooking on low to medium heat settings prevents overheating. This protects the ceramic coating from breaking down. It ensures the pan heats evenly and maintains its non-stick properties. High heat is the enemy of ceramic pans.
- Avoid Cooking Sprays: Many cooking sprays contain propellants and additives that can leave a sticky residue on your ceramic pan over time. This residue can be difficult to remove and may cause food to stick. Instead, use a small amount of oil, like olive, coconut, or vegetable oil, applied directly to the pan or food. This helps keep the surface clean and non-stick.
- Conditioning (If Recommended): Some ceramic pan brands suggest occasional “conditioning.” This involves rubbing a small amount of cooking oil onto the clean, dry surface. Then, heat the pan gently for a minute before wiping it clean. This can help maintain the pan’s non-stick properties. Always check your pan’s specific care instructions.
- Address Sticky Residue Promptly: If food residue starts to stick, clean it off gently. Soak the pan in warm, soapy water for a few minutes. Then, use a soft sponge or nylon brush to remove the residue. Do not use metal scrapers or harsh scrubbing pads. Persistent residue can affect heat distribution and non-stick performance. Also, knowing if you can you wash ceramic pans in the dishwasher is crucial for their care.
By following these maintenance tips, you ensure your ceramic pan continues to heat properly and delivers excellent non-stick cooking results. A well-maintained pan is a joy to cook with.
Troubleshooting Common Ceramic Pan Issues
Even with the best care, you might encounter issues with your ceramic pan. These problems often relate to heat management or cleaning. Understanding how to troubleshoot common issues can save your cooking and extend your pan’s life. Don’t throw out a pan at the first sign of trouble. Many problems have simple solutions.
One common issue is food sticking despite proper preheating. This might happen if the pan has developed a layer of burnt-on residue. This residue is often invisible but can compromise the non-stick surface. It acts as a barrier, preventing food from releasing cleanly. Another cause could be minor scratches that have accumulated over time, especially if metal utensils were used.
Another problem might be uneven heating. If food cooks faster in one spot than another, the pan might be warped. Warping can occur from severe thermal shock or manufacturing defects. An uneven pan will not sit flat on the burner, causing hot and cold zones.
Solutions for Sticking and Uneven Heat
- For Sticking Due to Residue: If food starts sticking, try a deeper clean. Fill the pan with water and add a tablespoon of baking soda. Bring it to a gentle simmer for 10-15 minutes. Let it cool, then gently scrub with a soft brush or sponge. This can help lift stubborn, unseen residue. Rinse thoroughly. This method is often effective at restoring non-stick properties.
- For Minor Sticking/Loss of Non-Stick: Ensure you are using enough fat. While ceramic is non-stick, a small amount of oil or butter still helps. This also adds flavor and promotes browning. Re-seasoning, if recommended by the manufacturer, can also help. Some brands suggest gently heating a thin layer of oil in the pan after cleaning to refresh the surface.
- For Uneven Heating/Warping: Unfortunately, a warped pan cannot usually be fixed. If the pan does not sit flat, it will not heat evenly. You may need to replace it. To prevent warping, always avoid sudden temperature changes. Do not place a hot pan under cold water. Let it cool naturally on the stovetop or a heat-safe surface.
- Addressing Discoloration: Ceramic pans can sometimes develop brown or yellow stains over time, especially from cooking at higher temperatures or with certain foods. This is usually cosmetic and does not affect performance. Gentle cleaning with baking soda paste can sometimes lighten these stains. Always test on a small, inconspicuous area first.
By addressing these common issues, you can keep your ceramic pan performing optimally. Regular maintenance and careful use are the best defenses against problems.
The Science Behind Ceramic Pan Performance
Understanding the science behind ceramic pans helps explain why correct heating is so important. Ceramic cookware features a non-stick layer made from a silica-based gel. This gel is applied to the pan’s metal base and then baked onto the surface. This creates a smooth, durable, and non-porous finish. This unique construction influences how it interacts with heat.
When you heat a ceramic pan, the heat energy transfers through the metal core to the ceramic surface. The ceramic coating itself is an excellent heat conductor. It distributes this heat very evenly across the entire cooking area. This evenness is a key benefit. It helps food cook uniformly and prevents localized burning. The non-stick properties of the ceramic surface become most effective at specific temperatures.
This is why preheating is vital. At the correct temperature, the ceramic surface provides an ideal environment. Food particles are less likely to adhere to the smooth, heated surface. If the pan is too cold, the food’s moisture can create micro-suction, causing sticking. If it’s too hot, the coating can degrade, losing its non-stick quality over time.
Why Temperature Control Protects Your Pan
The silica-based coating on ceramic pans is designed to withstand typical cooking temperatures. However, extreme heat or rapid temperature fluctuations can stress the material. Overheating can cause the coating to break down at a molecular level. This leads to cracking, blistering, or flaking. This damage compromises the non-stick performance. It also shortens the pan’s useful life.
Thermal shock is another scientific consideration. When a very hot ceramic pan encounters cold water, the sudden temperature difference causes rapid expansion and contraction. This stress can lead to cracks in the ceramic layer. It can also warp the underlying metal. This is why cooling the pan naturally before cleaning is a critical step in its care.
In essence, gentle, controlled heating allows the ceramic coating to expand and contract smoothly. It maintains its integrity and non-stick properties. Understanding this science reinforces the importance of patience and proper technique. You get perfect cooking results while preserving your cookware.
FAQs About Heating Ceramic Pans
Can I preheat ceramic pans on high heat?
No, you should not preheat ceramic pans on high heat. High heat can damage the non-stick coating over time. It can cause it to break down and lose effectiveness. Always use medium-low to medium heat settings. Ceramic pans heat evenly at these lower temperatures. This gentle approach preserves your pan.
Why is proper preheating important for ceramic pans?
Proper preheating is crucial for ceramic pans to activate their non-stick properties. It ensures the entire cooking surface reaches an even temperature. This prevents food from sticking. It also allows for consistent cooking results, browning food beautifully without burning. Preheating protects the pan’s coating from thermal shock when food is added.
How long does it take for a ceramic pan to heat up?
It typically takes 3 to 5 minutes for a ceramic pan to heat up on medium-low to medium heat. The exact time depends on your stove’s power and the pan’s size. Use the water drop test or oil shimmer test to confirm readiness. Patience during preheating leads to better cooking outcomes.
What happens if a ceramic pan is too hot?
If a ceramic pan gets too hot, its non-stick coating can degrade. This leads to food sticking and reduces the pan’s lifespan. Overheated oil can also smoke and break down, affecting flavor and creating unhealthy compounds. It can also cause discoloration or warping of the pan.
Is it safe to use a ceramic pan that is scratched?
Using a ceramic pan with minor scratches is generally safe. However, the non-stick properties may be compromised in the scratched areas. Food might stick more easily. Deep or widespread scratches indicate the coating is failing. It might be time to replace the pan for optimal performance and non-stick cooking.
How do I clean a ceramic pan after use?
Let your ceramic pan cool completely after use. Then, wash it by hand with warm water, mild dish soap, and a soft sponge. Avoid abrasive scrubbers or harsh detergents. Rinse well and dry immediately. This gentle cleaning method preserves the non-stick coating and extends the pan’s life.
Conclusion
Knowing how to know when ceramic pan is hot enough is a foundational skill. It transforms your cooking and extends the life of your cookware. We have explored simple yet effective methods to achieve the perfect temperature. The water drop test provides a clear scientific indicator. Visual cues and the oil shimmer test offer practical daily guidance.
Remember, patience is key when preheating ceramic pans. Avoid high heat and sudden temperature changes. Consistent medium to medium-low heat settings protect the delicate non-stick surface. This ensures your food cooks evenly and releases effortlessly. By applying these techniques, you will minimize sticking and maximize flavor. Embrace these simple habits to unlock your ceramic pan’s full potential. Your meals will taste better, and your pans will last longer. Go forth and cook with confidence!
- ceramic cookware
- cooking tips
- pan preheating

Katria Melrose
Cleaning Specialist
With over 12 years of experience in commercial cleaning and a certification in workplace ergonomics, I’ve developed a deep understanding of what makes a workspace truly productive. At HEG, I specialize in helping people transform their home offices into clean, efficient, and comfortable environments. Through smart cleaning routines and strategic organization solutions, I empower readers to create spaces that support focus, comfort, and success—one well-organized desk at a time.